 Windows 8 has gotten lots of buzz, and plenty of criticism, for its attempt to shake up your PC’s operating system. With so many big changes, you may want to keep your old Windows 7 OS on your machine, just so you have something familiar to ease the transition. Fortunately, you can work a little hard drive wizardry to make space for both the old and the new. Here’s how you can dual boot Windows 8 on a computer that already runs Windows 7.
Step 1: Back up your current system
This is always a good practice when you are tweaking an operating system. The risk of losing data is usually pretty low, but you don’t want files to disappear the one and only time you didn’t back up. Make sure you save a copy of your entire hard drive in addition to your regular backups. (You are backing up your files, right?)
Step 2: Create a new partition on your hard drive
You’ll need to set aside a separate chunk of your hard drive to house the new OS and everything you’ll run on it. Windows 8 on its own will take about 20GB of space, but you’ll also need room for all your programs and files, so you may want to allot as much space as you can take from your existing hard drive.
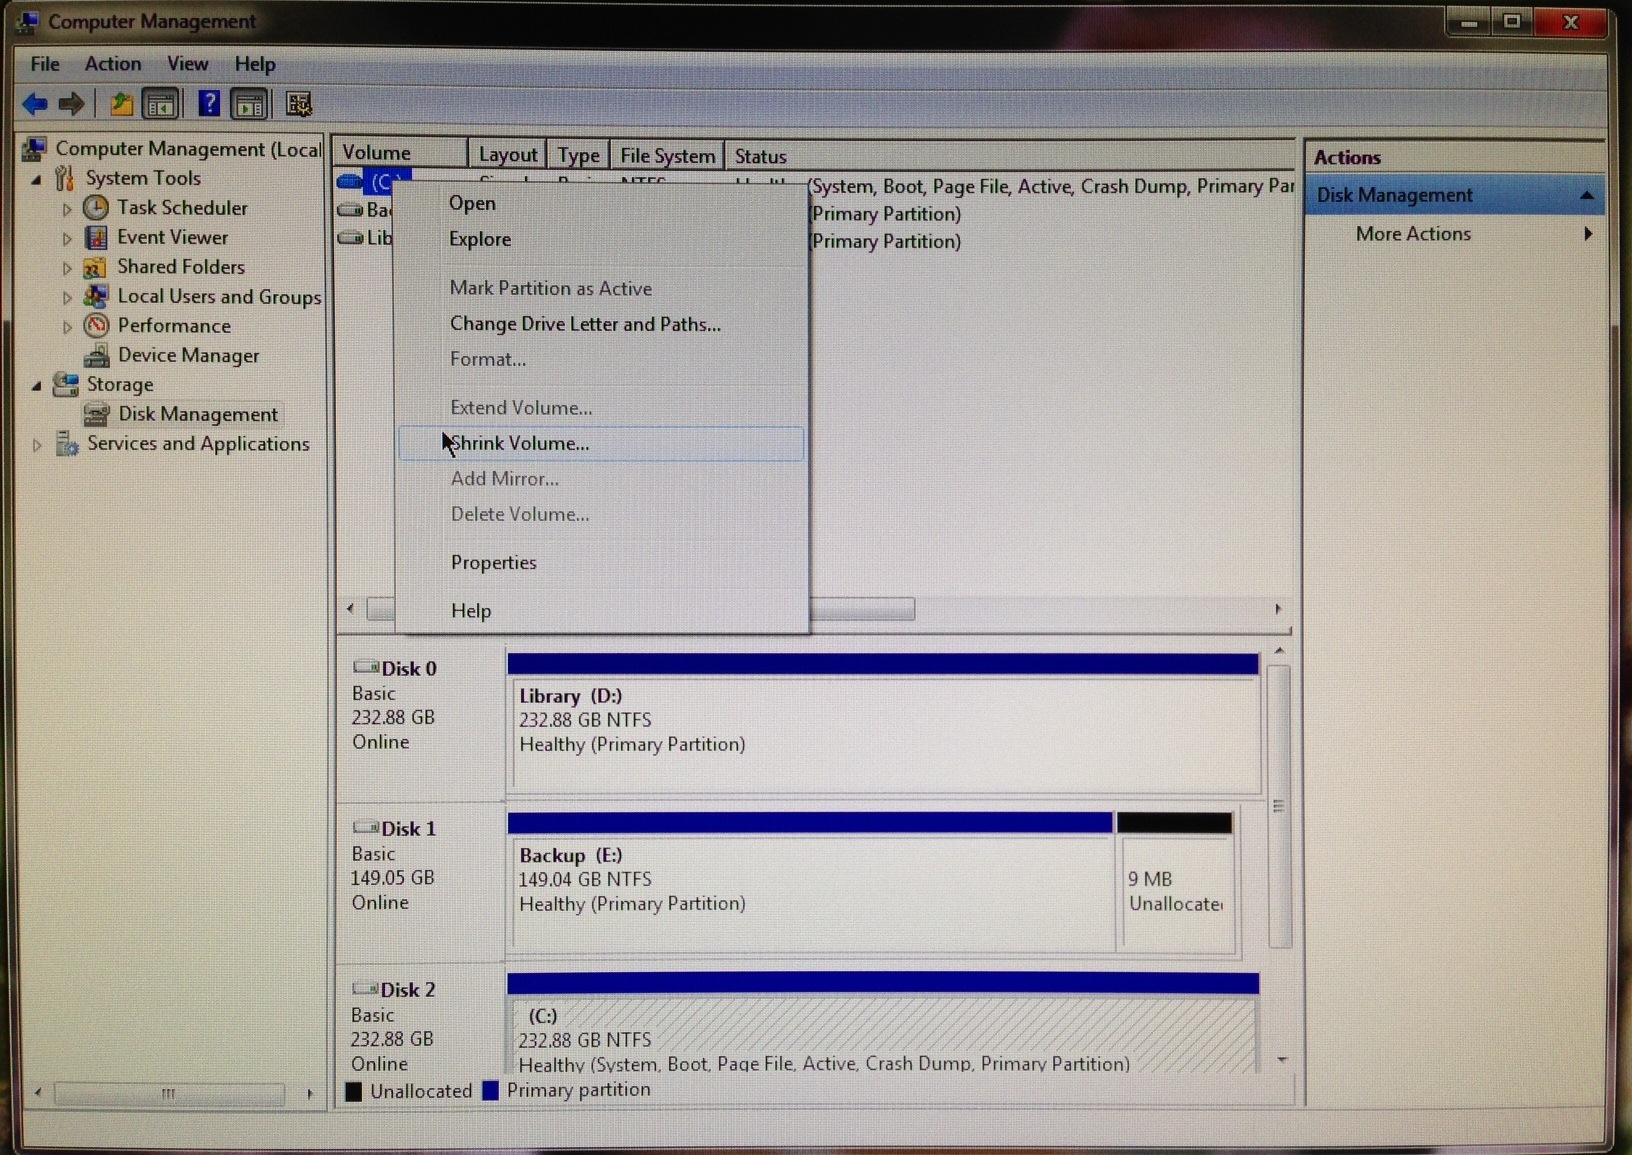
From the Start menu, right-click on the “Computer” option. Select “Manage” from the drop-down menu, then double-click on “Disk Management.”
The top of the Disk Management window displays a list of any existing partitions in your hard drive. Right-click on the entry for your main hard drive, which is C: for most machines, and select “Shrink volume.” Minimize the hard drive until you have the desired amount of free space. Once you have made the room for Windows 8, click the empty block and select “New Simple Volume.” This will launch a wizard to walk you through the final steps.
You won’t have to change anything until you reach the “Format Partition” window. The settings you will need for formatting are NTFS for File System and the default for Allocation Unit Size. Be sure to give the new partition a name under “Volume label.” Titling it “Windows 8” will ensure that you can find it in the next step. After you’ve named the new space in the hard drive, click “Next” and your computer will complete the formatting.
Step 3: Obtain your copy of Windows 8
Depending on how you want to purchase the new OS, you can install it either by DVD or by USB drive. If you purchase a copy in your friendly local computer store, you’ll be using the DVD and DVD drive approach in the next step. If you prefer to download it directly from Microsoft, put the files on a large thumb drive and use the USB approach in the next step.
Step 4: Install Windows 8 in the new partition
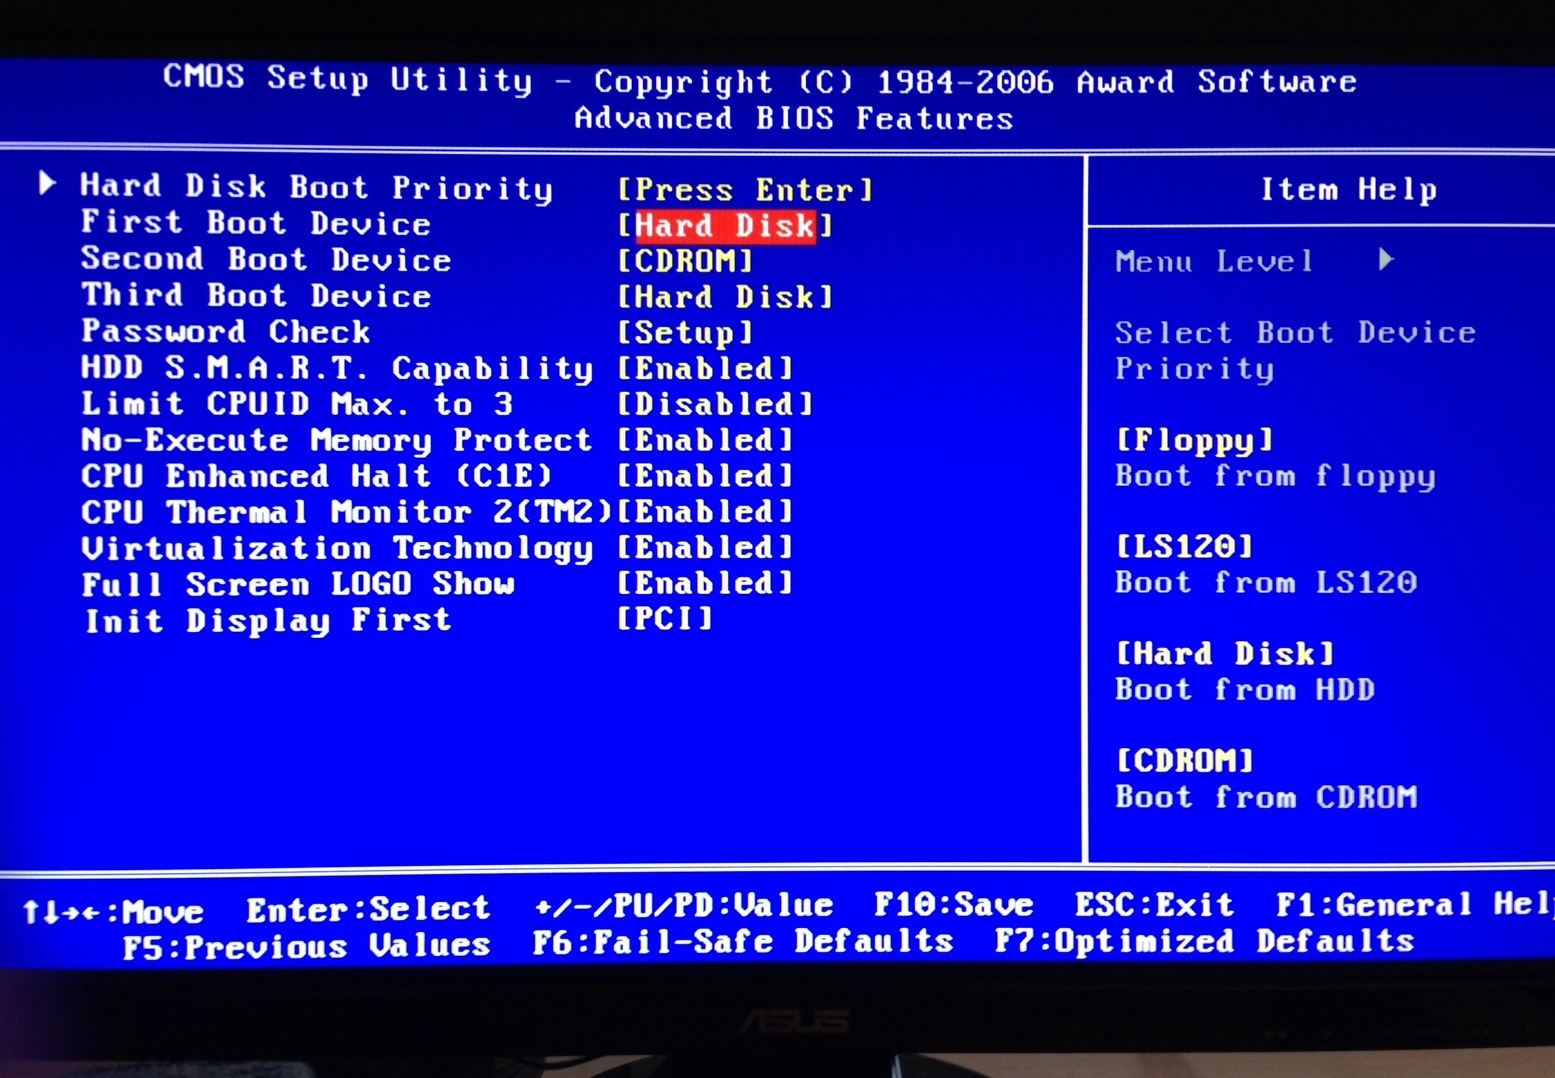
This is the most complicated step. Depending on your computer’s settings, you may need to change your computer’s BIOS settings so that it will boot from the drive with Windows 8 installation files on it. To do that, restart your computer and mash a hot key as the machine wakes up; the “Delete” key will accomplish this on most PCs. Go to the boot menu and switch the settings so that the first choice for booting up is the DVD or USB drive, depending on where you’ve stored your Windows 8 files, instead of the hard drive. Then go ahead and start up your computer.
You’ll first have to accept the installer’s software license, and the next screen will ask which type of installation you want. Choose the Custom option, then select your newly created hard drive partition, the one you probably named “Windows 8,” for its location. The installer will probably take about 20 minutes to complete the task.
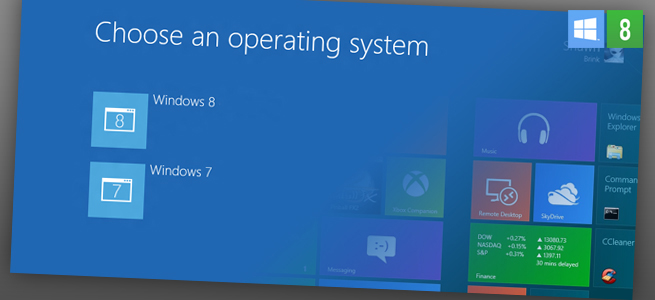
Step 5: Enjoy playing with your new OS
You’ll now see a screen asking which operating system you want to use when you boot up your computer. It will default to launching Windows 8 if you don’t make a selection within 30 seconds, but you can change that setting under the “Change defaults” link on the launch page.
Dual booting on a Mac
If you have a Mac computer that also runs Windows 7, the process for adding Windows 8 is the same as for its predecessor. Apple’s Boot Camp can help you perform similar hard drive partitioning to make space for the new Microsoft OS. Parallels Desktop 8 and VMware Fusion 5 are other popular virtualization programs that allow you to switch between Mac and Windows without needing to reboot your computer. Both products should support the new Microsoft offering as well as Apple’s latest OS, Mountain Lion.
For those of you who still aren’t sure if you want to make the leap to the new OS, check out our guide to Microsoft’s Windows 8 for more insights about whether the OS is a good fit for you.
Editors' Recommendations
- How to disable VBS in Windows 11 to improve gaming
- How to convert FLAC to MP3 on Mac, Windows, and web
- How to convert a PDF to JPG on Mac, Windows, and web
- How to find your Windows 11 product key
- How to remove a login password on Windows 11