Laptops are difficult to upgrade in a meaningful way. In many cases, the processor, motherboard, and video card are installed as a one-package setup. If one component fails, you can’t simply swap it out — you’ll need to replace the whole trio, which can be timely and expensive. Typically, the only components you can manually upgrade are RAM and storage.
A good way to improve your laptop’s performance is to swap out its mechanical hard disk drive (HDD) for a solid-state drive (SSD). It doesn’t change how quickly software runs — that’s all on the CPU. Instead, it improves the speed at which software loads and the speed at which software juggles data. That makes a PC feel much faster.
Better still, an SSD isn’t difficult to install. You can upgrade most laptops on a kitchen table using just a screwdriver. If you have both items ready to roll, you can get started.

How to pick the right SSD
Since this is not a buying guide, we won’t recommend specific SSDs here. Instead, you can find more information about purchasing an SSD in our buying guide and our comparison between SSDs and traditional hard disks. Just be sure you buy an SSD that actually fits in your laptop.
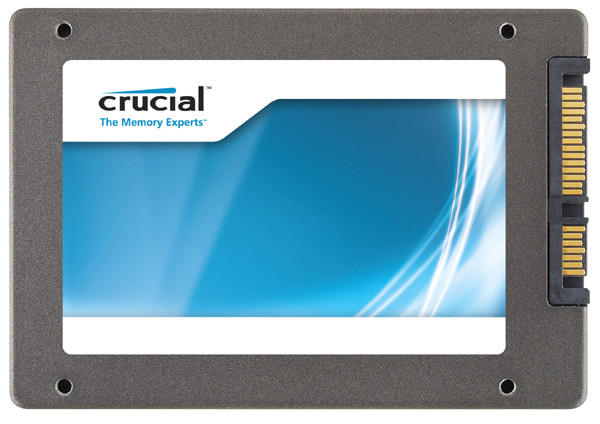
There are two standard formats for laptop SSDs: 2.5-inch and 1.8-inch.
Of the pair, the 2.5-inch drive is by far the most common. Smaller 1.8-inch drives are found in some new laptops that offer an SSD as standard equipment, but they can be modified to fit 2.5-inch bays if desired. Given that this is an upgrade guide, that’s presumably not what you have, so a 2.5-inch drive is what you’ll need in most cases.
Some Ultrabooks have extremely thin drive bays that won’t fit a standard 2.5-inch drive. In those cases, you’ll need an SSD that’s 7mm thick or less. Be prepared to hunt for these slimmer drives because retailers do a poor job of advertising these products. You may need to call the retailer or look up the specifications on the manufacturer’s website.
How to prepare for installation
There are two ways to handle the data on your existing hard drive.
First, you can back up important files and start over with a new operating system install, but ensure you have an install disc or an external hard drive. These methods are simple solutions, but they can be time-consuming. That said, once you install the new drive, you’ll need to reinstall the OS and then restore your backed-up files.
The second option is to clone your drive and copy all data from your existing drive to the new one, OS included. It’s quick but requires more technical knowledge and will only work if the new drive has equal or greater capacity than the old one. In this case, you install the cloned drive in your laptop and boot as normal.
However, to clone your current drive, you’ll need a SATA-to-USB adapter. Connect your new SSD to the SATA/USB adapter, then plug the adapter into a USB port on your laptop. Your laptop should detect your new SSD as an external hard drive.

Cloning is not as simple as dragging and dropping files. Everything must be copied, including portions of the drive that allow Windows to use it as a boot device. A growing number of SSD manufacturers bundle cloning software with their devices, but if you’re on your own, check out Norton Ghost, Acronis True Image, or Paragon Drive Copy.
If you don’t want to pay, try MiniTool, Clonezilla, or Acronis. Just remember that free software may not offer customer support if you are confused about the software or how it works.
If you clone your drive, make sure to back up essential data anyway, as cloning is not 100% reliable.
How to perform the installation
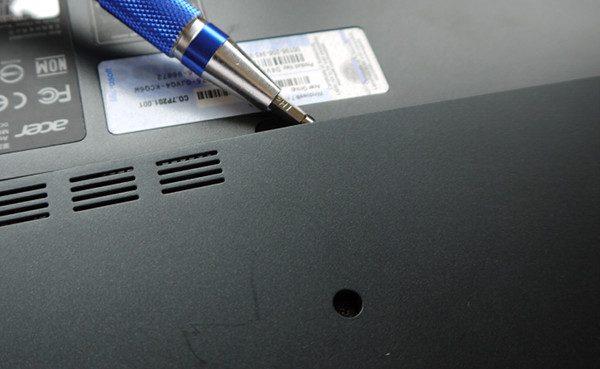
Find a level surface with good lighting where you can work without distractions. Place your laptop upside-down with the power unplugged and battery out, if possible.
You should see a plastic cut-out panel in the bottom, which is covered by multiple screws. Some laptops will have two panels, in which case you should remove the one marked by the hard drive symbol, an engraving that looks like three stacked discs.

A few laptops have no cut-out, which means you’ll have to take the entire bottom off, and it involves far more screws. Make sure you keep track of them, too — a Ziploc bag works best because it keeps the screws together so they don’t roll off the table.
Once you remove the screws, gently pry the cut-out panel off with a sharp object. You’re up a creek without a paddle if that panel breaks, so don’t be forceful — lift it gently. If one section seems stubborn, try loosening another side instead.
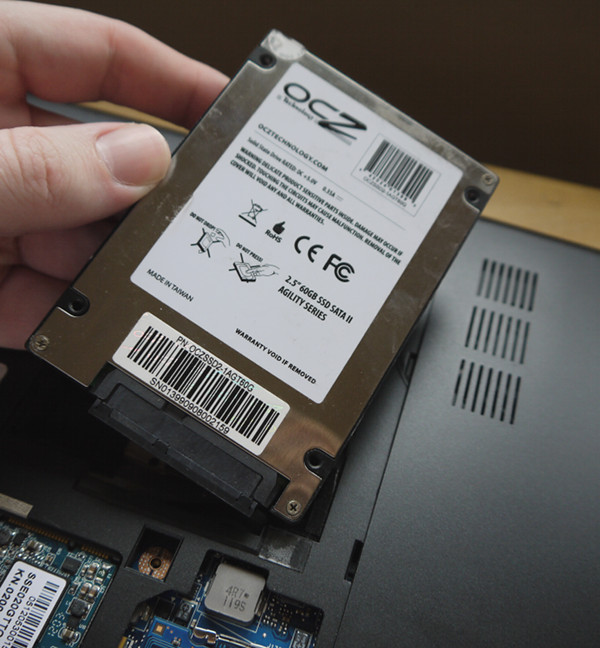
With the panel off, the hard drive is exposed. In a modern laptop, hard drives are typically covered by metal brackets or metallic wrap with a tab attached. Pull the tab gently out and up to remove the drive. Some laptops will have a loose connector, in which case the cable and SATA connector will begin to go with the drive. Detach it.
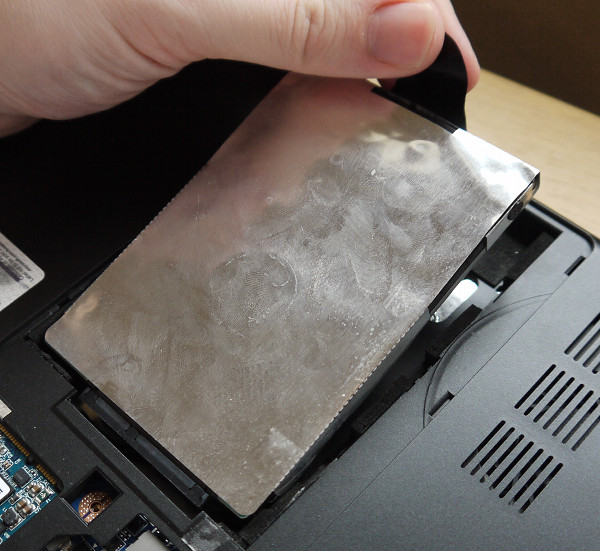
If your laptop uses a bracket, you’ll notice the drive is secured to the bracket by screws (usually four). Remove them to detach the drive, then place your new SSD into the bracket and use the same screws you removed to secure it. If your laptop doesn’t use a bracket, discard any wrap used by the previous drive.
Now slide the drive back into the bay and plug it in the SATA connector used by the old drive. Remember, SATA connectors have a straight or L-shaped plug, making it very difficult to install incorrectly. You shouldn’t need to use much force if you’re installing the new drive correctly.
Replace the panel, replace the screws, and you’re done.
How to use your new drive
If you opted for reinstalling your OS, the next step is simple: Pop in your installation disk or recovery disk and reinstall. There’s nothing special to do. Just follow the steps suggested by the installation wizard.
What if you don’t have an optical drive? You can usually reinstall the OS from a thumb drive, external hard drive, or other storage methods. For Windows, you’ll need another PC to download the OS from Microsoft. Once you begin the installation, Windows will refer to the license key embedded in your laptop’s motherboard.
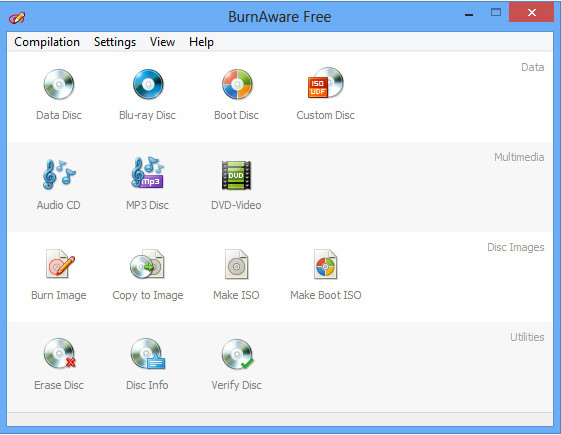
If you have a different Windows version, you can use BurnAware Free to make a boot disc from your existing Windows disk. You can use the same software to turn a drive cloning software disc into a bootable thumb drive file.
Those who cloned their drive don’t need to do anything extra. The final step is to boot and go. However, you may see an interface to finalize the clone. This step makes it bootable for your PC.
Finally, we’ll consider the drivers. Even though your new hard drive shouldn’t need an extra installation, it might come with a software disc to simplify drive management. If you bought a bare drive model, you’re less likely to receive a software disk, but it isn’t a problem to download management software yourself. The hardware manufacturer should provide you with instructions on how to do this on their support resources.
You should also consider upgrading your laptop to an SSD if you want maximum speed and data protection. HDDs are more widely known, but they’re also faultier. One of the main drawbacks to a laptop’s transportability is its susceptibility to HDD damage during transport. Since SSDs run on flash memory instead of mechanical parts, you won’t need to worry about damaging tiny moving pieces, magnets, or disks.
Hardware updates can be a pain, but an SSD installation isn’t too tricky. By taking the time to swap your HDD for an SSD will pay off big time with a vast improvement to your PC’s performance. Additionally, you don’t need a ton of knowledge or expensive tools, so you don’t have much of an excuse to pass on the upgrade. After using these directions, you’ll have super-fast software load times and even more gratification.
Editors' Recommendations
- Best external hard drive deals: Portable SSDs, game drives & more
- Get ready — SSD prices are about to skyrocket
- Western Digital responds to claims that SanDisk SSD failures have design flaw
- Amazon shoppers warned of portable SSD drive scam
- There’s a new reason HDDs could be better than SSDs