
You could back up your data on an external hard drive, but what if you need to access important files or information that’s located on a computer other than your own? Mapping networked drives grants users remote access to content stored on a server or network-attached storage device.
However, granting access to networked drives can be tedious. Fortunately, both Windows and Mac OS X make it easy to map a network drive, and neither method requires more than five minutes of your time.
Here’s our guide on how to map a network drive. Additionally, check out our top picks for the best external hard drives and our basic guide on how to buy an external hard drive.
Skip ahead to how to map a network drive in Mac OS X.
Mapping a network drive in Windows 7
Step 1: Click the Start menu and select Windows Explorer from the resulting drop-down menu.

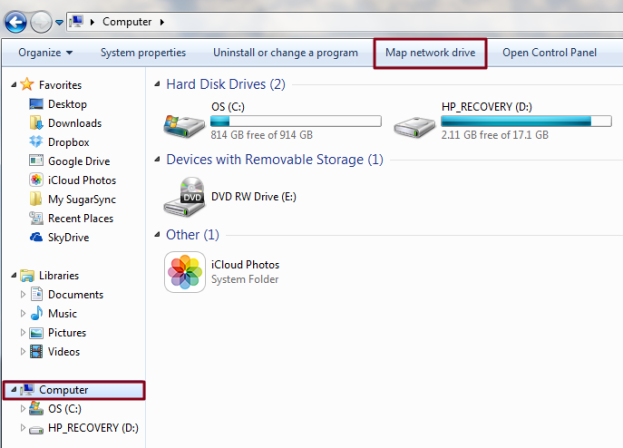
Step 2: Once open, select the Computer section located on the left-hand side of the window and click the Map network drive button near the top.
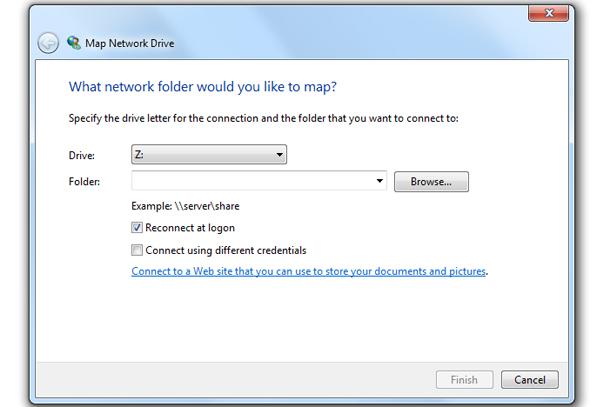
Step 3: The resulting setup wizard provides options for both manually specifying the network address, or browsing for it among systems on your network. Click the check box directly to the left of “Reconnect at login” if you wish to automatically re-establish the connection every time you start your computer. If the networked drive requires log-in credentials other than those used for your computer, check the “Connect using different credentials” box below and enter your credentials when prompted. Click Finished in the bottom-right corner when done.
Mapping a network drive in Windows 8
Step 1: Enter the Modern/Metro UI, type “File Explorer” and select it from the list of results that appear on the right side of the screen.

Step 2: Once open, select the “Computer” section located on the left-hand side of the window, click the “Computer” tab at the top, and select the “Map network drive” option.

Step 3: The resulting setup wizard provides options for both manually specifying the network address, or browsing for it among systems on your network. Click the check box directly to the left of “Reconnect at login” if you wish to automatically re-establish the connection every time you start your computer. If the networked drive requires log-in credentials other than those used for your computer, check the “Connect using different credentials” box below and enter your credentials when prompted. Click Finished in the bottom-right corner when done.

Mapping a network drive in Mac OS X
In Mac OS X, there is a shortcut that makes it easy to map and access network drives without any extra software.
Step 1: Make the Finder utility active, hold the Command key and press the “K” button to bring up the appropriate server connections. If Finder is not active, click the blue face icon within the Mac OS X Dock before entering the keyboard command.

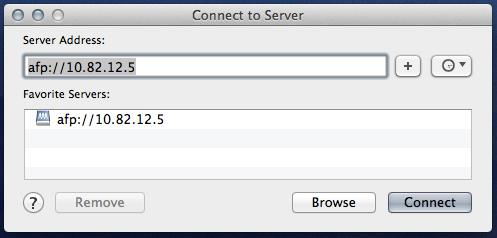
Step 2: The resulting window provides options for both manually specifying the network address, or browsing for it among systems on your network. Select the appropriate server and click the “Connect” button in the bottom-right corner of the window when finished.
What do you think of our guide on how to map a network drive? What do you frequently use networked storage for? Let us know in the comments below.
Editors' Recommendations
- How to choose an external hard drive
- Google Drive vs. Dropbox: which is best in 2024?
- How to create folders and move files in Google Drive
- This monstrous 22TB external hard drive just got a $215 price cut
- What is packet loss, and how do you fix it?