
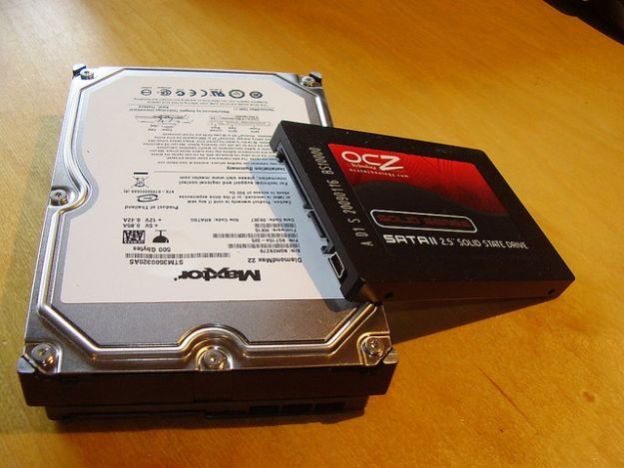
If you crave high performance storage, solid-state drives (SSDs) offer the best performance for fast boot times and speedy application loading. But if you look at prices per gigabyte, they often cost ten times as much as a conventional drive – or more. What if you still need affordable space for all those photos, music, and (totally legal) movie files? Don’t force yourself to choose, go for both.
Windows 7 and Windows 8 allow you to easily run an SSD as your primary drive for speed, and a conventional drive as a secondary drive for storage. So you can have fast boot times, fast application load times and huge amounts of space for data.
We’ll walk through the process of setting up your drives properly, so you have maximum space on the SSD for applications, without slowing down your system by relying too much on the old-school drive.
Configuring a secondary drive: Partitions
Let’s say you’ve been rocking a 256GB SSD in your PC, but want to add a more capacious hard drive for data. You’ve bought the drive and physically installed it in your system. Now it’s time to configure it. I recently added a 2TB hard drive to a desktop PC with an SSD, so I’ll walk you through the steps I took to configure the data drive.
First, we need to partition and format the drive. After you install a drive, Windows sometimes requires a reboot as it installs a driver for the drive. After that, you may see a small window asking you if you want to configure a new drive. Click “yes” and let the disk management utility run.
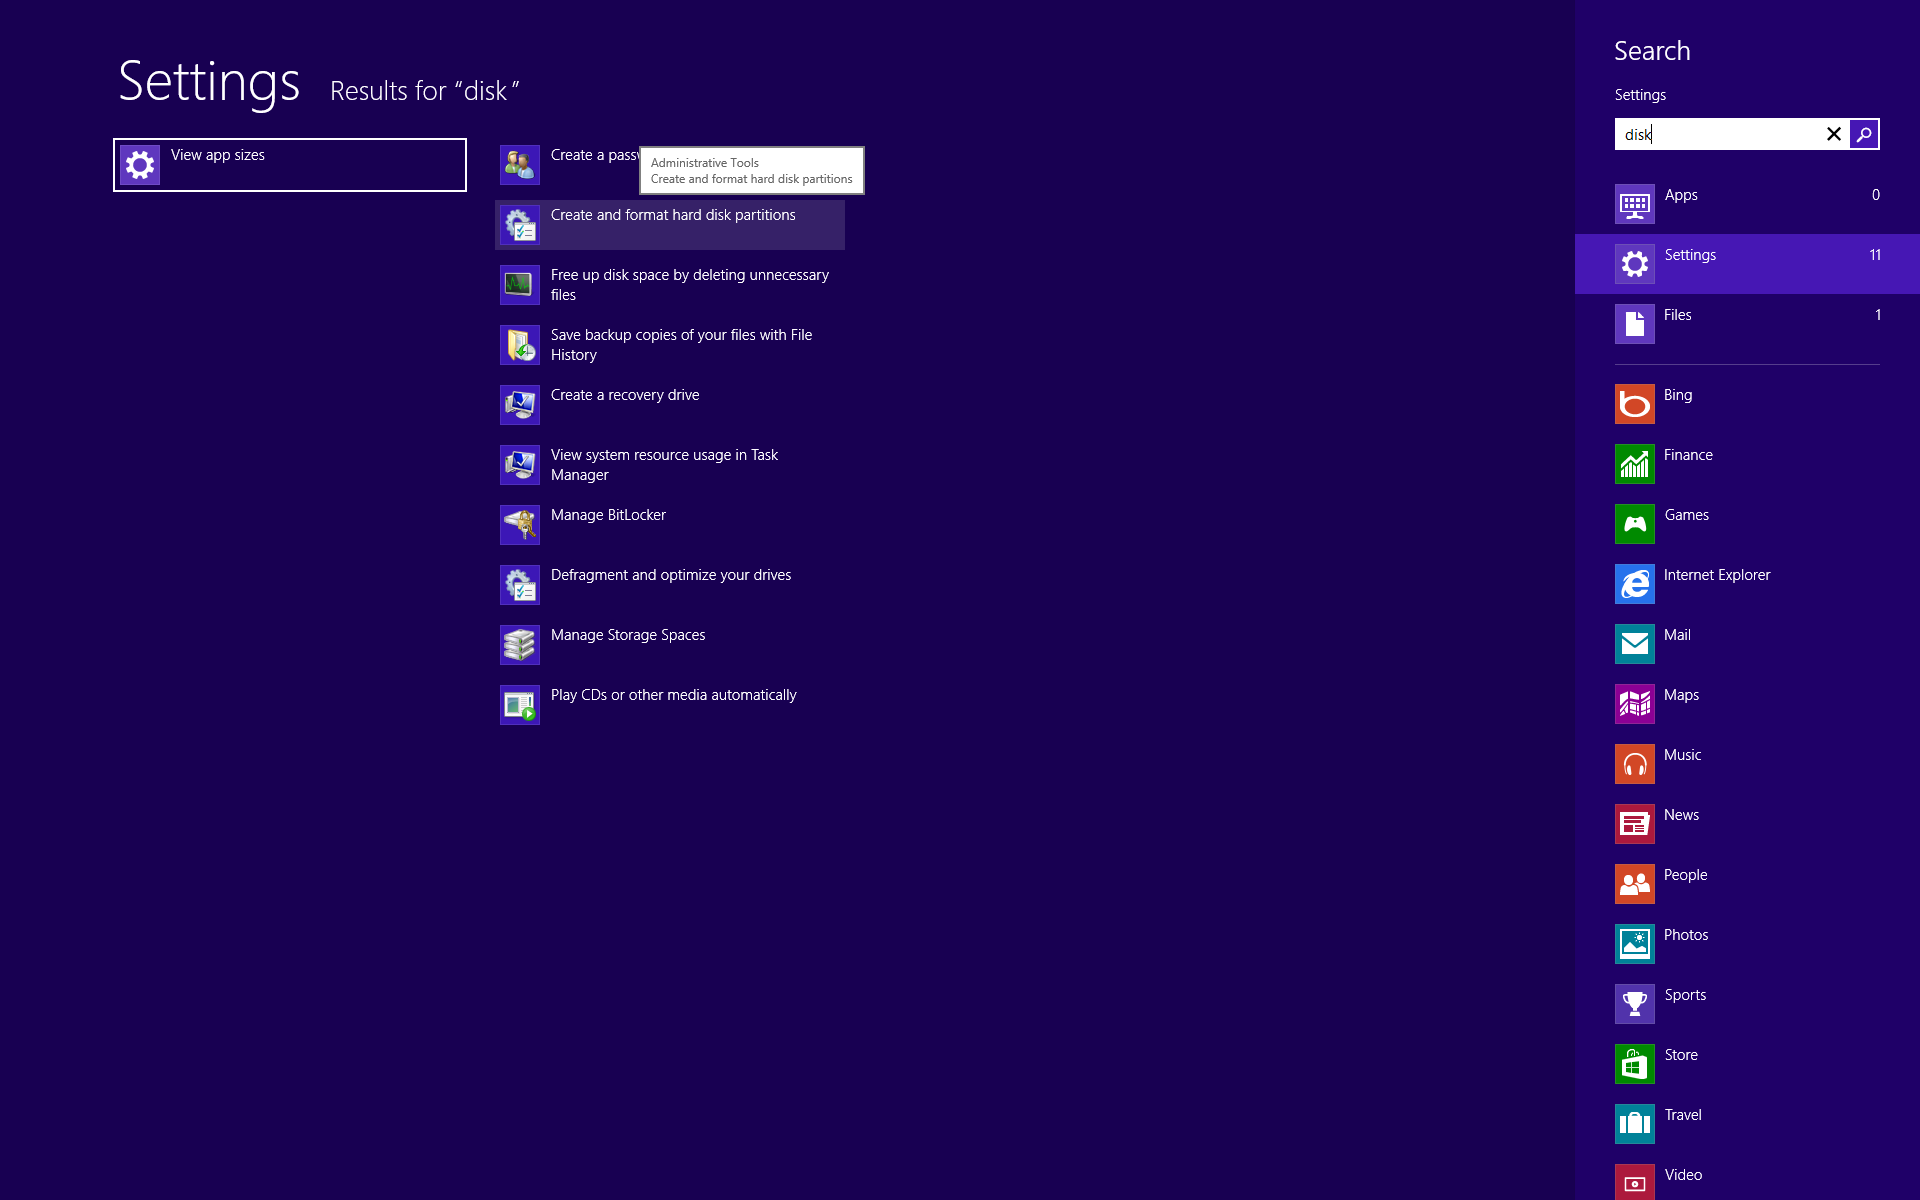
If you don’t get prompted to set up a new drive, you’ll need to run disk management yourself. In Windows 8, just type “disk” and then click on Settings on the right side. Then click on “Create and format hard disk partitions.”
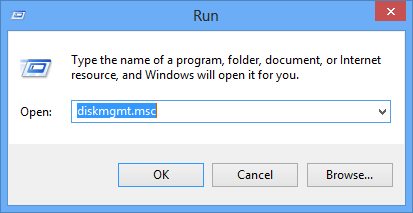
If you’re running Windows 7, bring up the “Run” dialog from the Start menu and type “diskmgmt.msc.” This also works if you’re in the Windows 8 desktop. (You can bring up the Run dialog in the Windows 8 desktop by hovering your mouse pointer over the lower left and right-clicking when you see the small icon of the Start screen.
That will bring up the Windows 8 system management menu. You can also activate it by pressing the Win + X key combination.
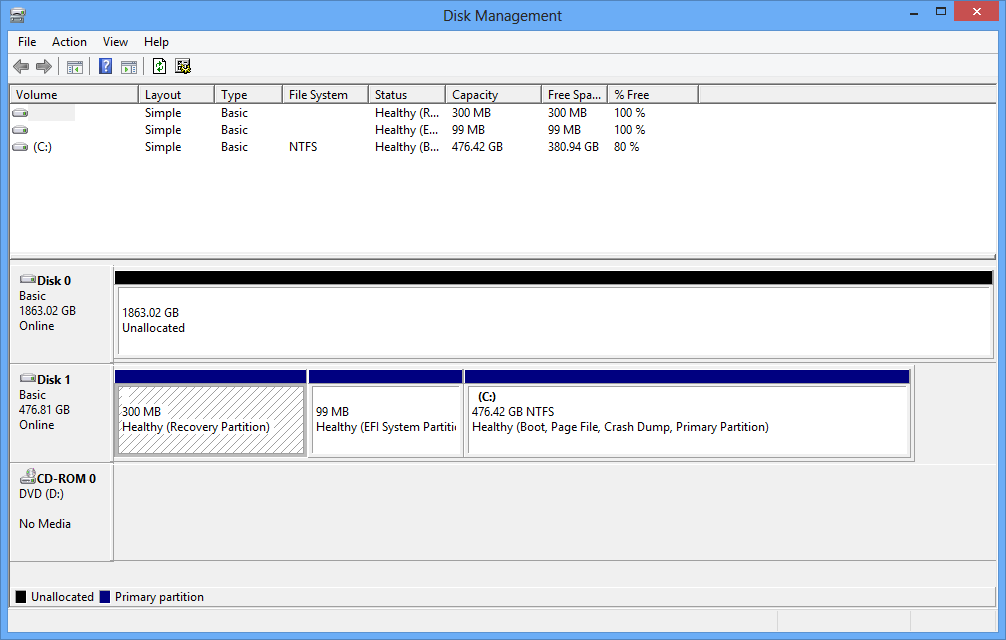
The Disk Manager window lists all the drives in your system, including USB flash memory drives, if they’re attached, and optical drives, if installed. The new 2TB drive shows up at the top of the list as 1863GB of unallocated space. (Note: disk makers treat 1 kilobyte as 1,000 byes. Windows reports 1 kilobyte as 1,024 bytes. That’s why a 2TB drive is shown as having 1.86TB instead of 2TB.)
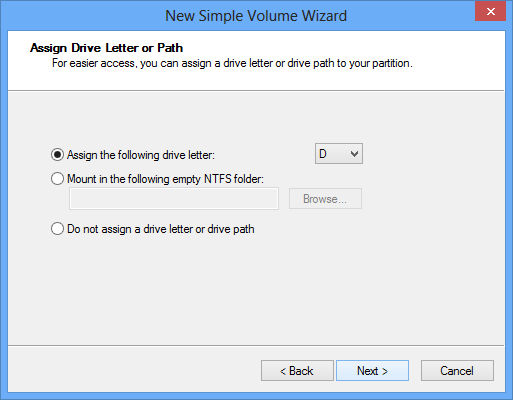
The boot drive is C:. The optical drive in the system was installed prior to the second hard drive, which means its drive letter is D:. For convenience’s sake, I wanted the hard drive to be the D: drive. First, I had to rename the optical drive.

Right-click on the drive name box and select “Change Drive Letter and Paths…” A dialog box pops up and lets you select a new drive letter. After changing the optical drive letter to E:, I assigned D: to the new data drive.
Now it’s time to partition the drive. What you need to do is right-click on the part of the window labeled “Unallocated.” We’re not creating a RAID volume so just select “New Simple Volume.” Alternatively, you can pull down the Action menu, click on “All tasks,” and then select “New Simple Volume.”
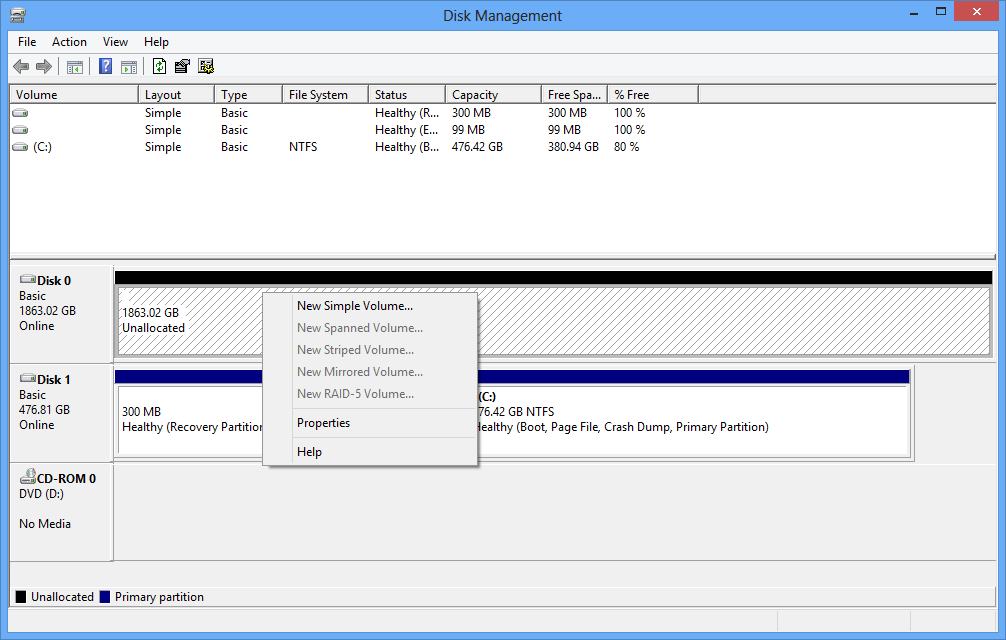
I’ve never been fond of multiple drive partitions; I tend to create single volumes on hard drives, even massive ones. So I partition the 2TB drive as a single, new simple volume that uses up almost all the space. That tiny, 8MB of space left over is too small to be addressed. But it’s only 8MB out of 1.86GB, so just ignore it.
Format the drive
The next step is to format your secondary drive. You can easily do that in Disk Manager, as it’s the next logical step after you partition the drive. All you need to do is click “Next.”
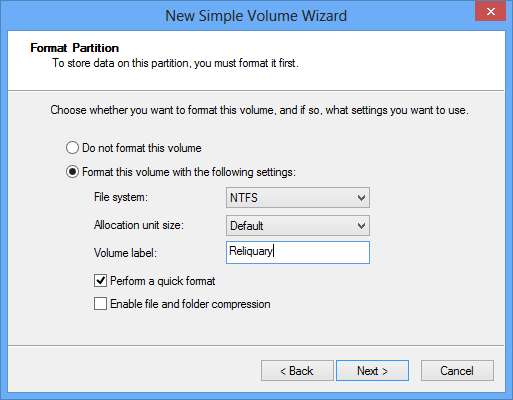
Most new drives are reliable, so a quick format is fine. If you’re formatting a used drive, you may want to avoid a quick format, as a full format will check the drive as the format process occurs. However, this could take several hours on a very large drive.
If, for some reason, you exited the simple volume wizard before the format step, you can format the drive later. Just open file manager, and open your computer system (My Computer) window. The partitioned, but unformatted drive will show up here. Right click on the drive in question and select “format.”
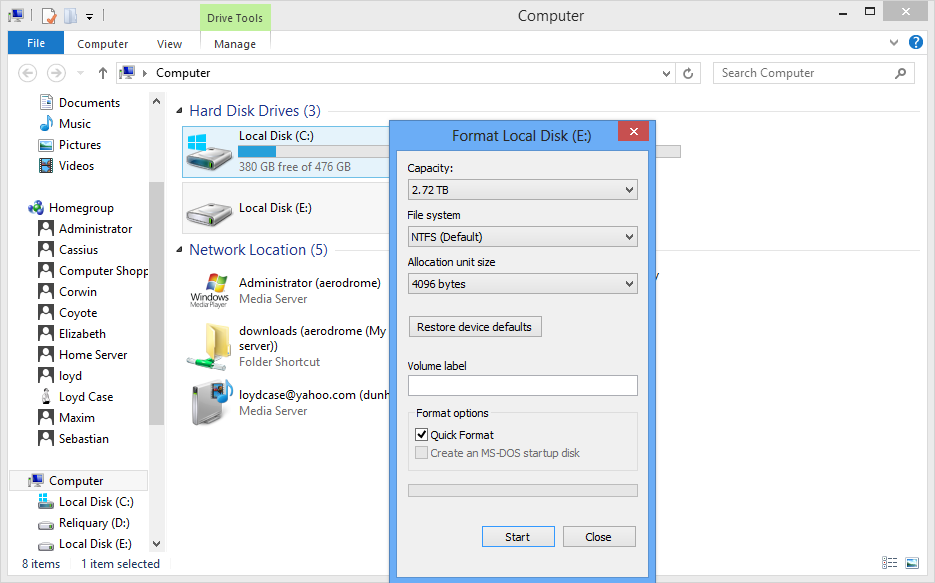
Once your drive is formatted, you can configure Windows so your data folders appear here.
Drives larger than 2TB
Before we talk about configuring Windows to move your data folders to the new drive, it’s worth briefly discussing hard drives larger than 2TB.
We now live in an era where you can buy 3TB and 4TB hard drives. However, if you’re running an older system that lacks a modern UEFI BIOS, you may be unable to create a simple volume that’s bigger than 2TB. The firmware built into older PCs simply can’t recognize large hard drives. Also, a 32-bit version of Windows can’t use a volume that’s larger than 2TB. If that’s the case, you have three solutions, in order of preference:
- Use a GPT (GUID partition table) style partition. You can do this in Windows 7 or later, but it allows you to allocate all the data into a single volume.
- Use simple partitions, and create more than one partition.
- Use third-party partitioning software, which is sometimes included when you buy larger drives.
Note that older systems may not be able to boot from a hard drive formatted to greater than 2TB, so if you plan on booting from a large drive with an older OS, then your only solution is to partition to smaller volumes. Since we’re talking about secondary hard drives here, this shouldn’t be a problem.
If you’re running a 64-bit version of Windows 7 or Windows 8 and your motherboard has a modern UEFI BIOS, then there’s no issue with creating volumes larger than 2TB.
Moving Windows data folders
If you navigate to C:users<YOUR USER NAME>, you’ll see a bunch of default Windows data folders.

You can move most of these folders to the secondary hard drive. I’ll show you how to move the My Documents folder, but this method also applies to My Videos, My Music, My Pictures, etc. Even the Desktop folder can be moved.
If this is not a new system – that is, if you have a lot of valuable data stored in My Documents – take a few minutes to back up your data. After all, we’re moving files, which means files will be deleted from the original location. If you encounter problems, you’ll want to have a backup of any valuable data. Okay, data files backed up? Let’s proceed.
First, right click on My Documents and select properties. One of the tabs on the property sheet is “Location.” Click on that tab.
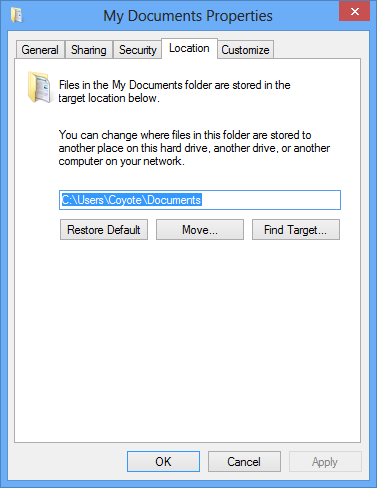
See how the location dialog reads “C:UsersCoyoteDocuments”? (The user name on this system is Coyote. Your folder will have your user name in place of “Coyote.”) I just delete the “C” and replace it with “D,” so it reads, “D:UsersCoyoteDocuments.” Then I click on “Apply.”
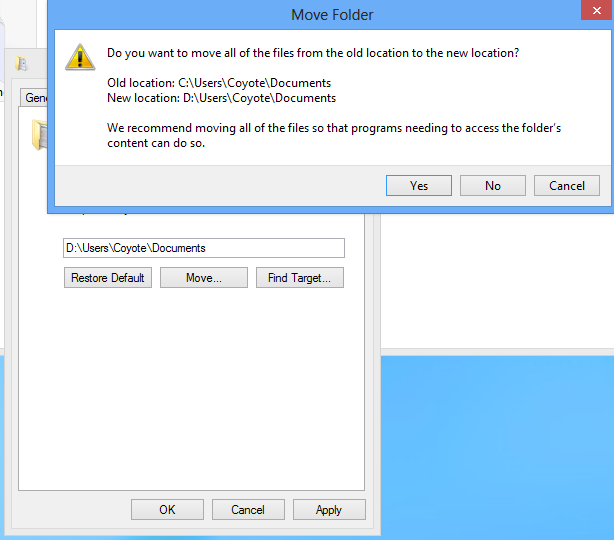
After you do this, Windows will ask you if you want to move all your files from the old location to the new one. If you click “Yes,” the files will be copied to the new location, and then deleted from the old. If this makes you nervous, you can manually copy them over later, then delete them from the old location yourself. Whether you delete the files or not, Windows will treat the new location as the default My Documents folder.
That’s it! You’re done. You can, if you wish, verify the new location. Just open up File Explorer and right-click on the Documents library in the left pane. A property sheet will appear, which shows you that the default My Documents folder is now on the D: drive.
Final thoughts
Now your SSD has more room, allowing you to install more applications. However, data files are now on the secondary drive. If those data files are very large, that may mean slow load times. In my experience, even large video files stored on the secondary drive load pretty quickly. If you’re running applications that use scratch files, like Photoshop, you want to keep those scratch files on the SSD if possible. That has a greater impact than load times for an individual data file.
You have the best of both worlds: fast Windows boot times, speedy application loading, and a large volume for storing lots of data. But don’t forget to regularly back it all up!
Editors' Recommendations
- How to choose an external hard drive
- How to create folders and move files in Google Drive
- How to download Windows 10 for free
- How to share an external hard drive between Mac and Windows
- How to take a screenshot on a Windows PC or laptop


