

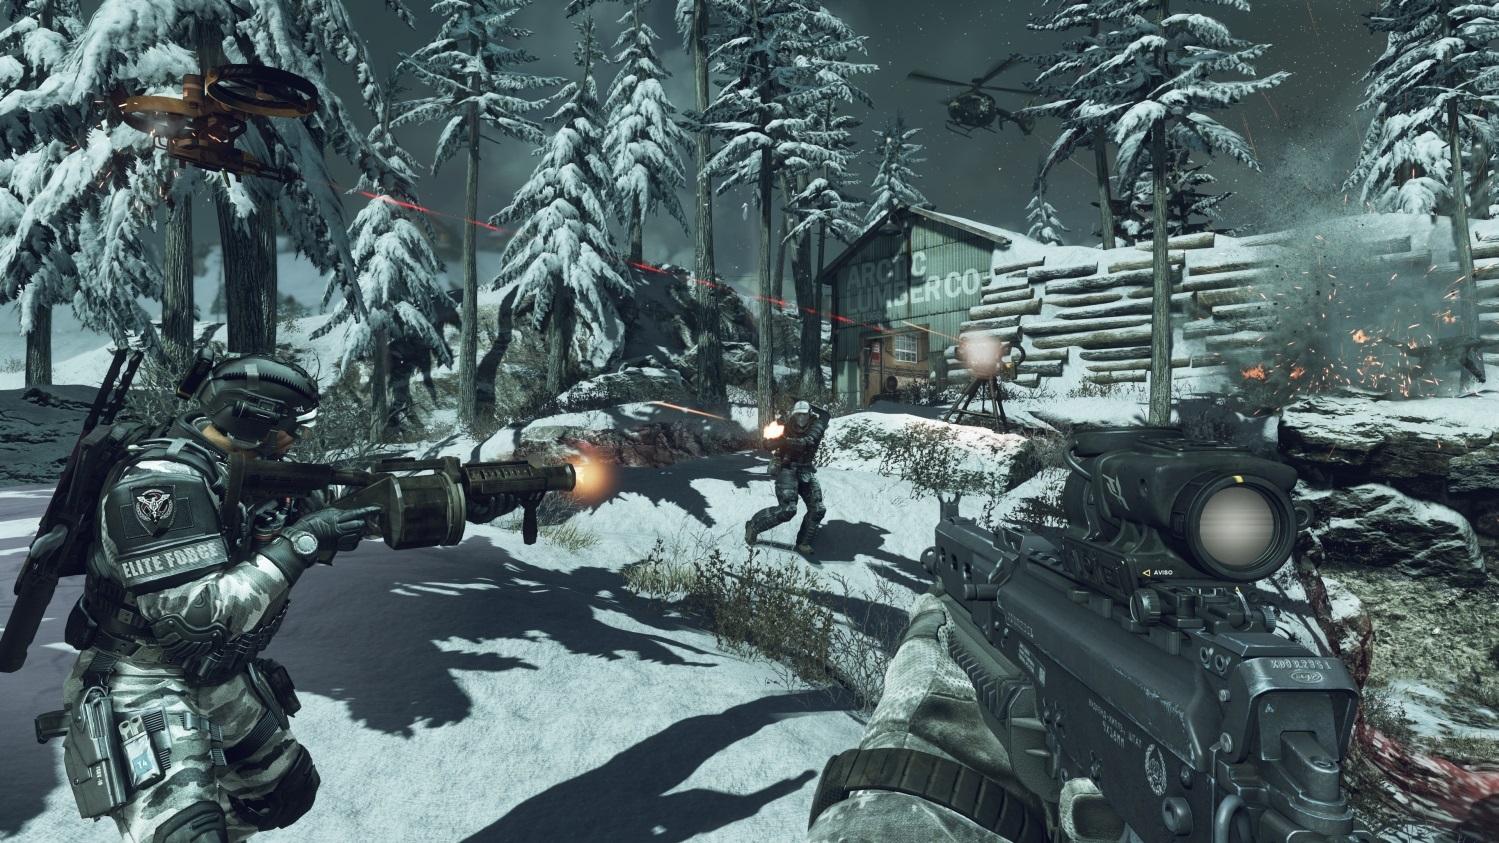
Call it what you will: Survival, Horde, Guerilla mode; play enough online shooters and odds are you’ve encountered a mode like Call of Duty: Ghosts‘ Safeguard. It features up to four players facing waves of increasingly demanding enemies, and builds upon the 2-player survival mode in Modern Warfare 3. It may feel familiar, but that doesn’t mean it isn’t without its own unique flair.
There are three Safeguard modes to choose from. The first pits you against 20 waves of enemies, the second features 40 waves, and the third offers infinite waves. Throughout it all, you earn experience that transfers to your multiplayer character, and you can earn thousands of points for reaching higher levels. Whatever your end goal, Safeguard is brutal. With that in mind we have some tips on how to survive the onslaught.
We will update this post with additional tips, and if you have any questions or suggestions please sound off in the comments below.
Coordinate
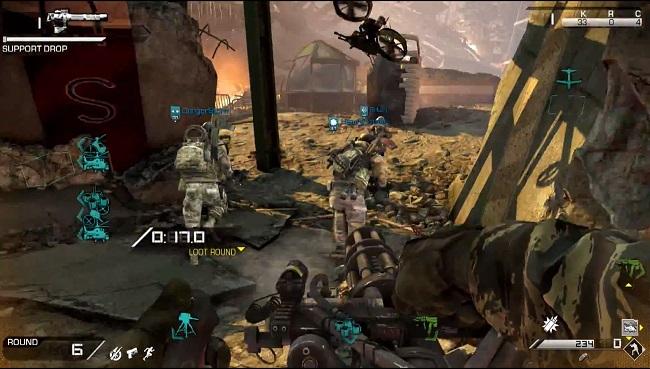
 Safeguard regularly drops random weapons, killstreaks, and perks throughout each match. Before the first wave begins, you have a 30-second loot round during which you have the opportunity to grab random killstreaks as they’re air dropped throughout the map before they disappear. Sometimes you will get lucky and a sentry gun or attack chopper will land right in front of you, other times they may land on the far side of the map. Depending on the map and your team’s spawn, you could end up with some very good killstreaks – but talk to your teammates. Two people running for the same killstreak is a waste of the limited time you have before the match begins. You can only carry three killstreaks max, so don’t get greedy.
If you get lucky with your drops, and you can coordinate with your team, it’s possible to collect an arsenal that could make your life much easier. Use the killstreaks sparingly, but don’t horde them. More loot drops are coming in future waves, and killstreak support could mean the difference between life and death if you are threatened with being overrun.
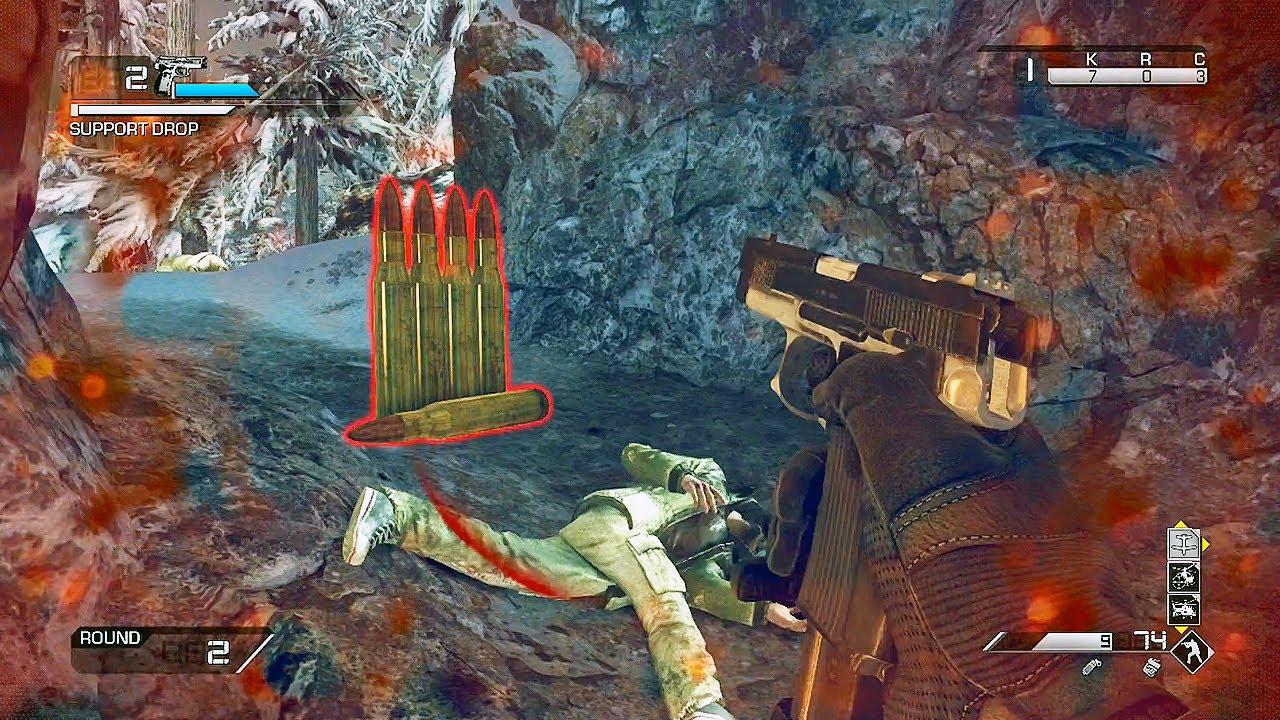
Enemies will also randomly drop ammo icons when they die. Grabbing these icons replenishes the primary ammo, secondary ammo, and all equipment for your entire team. If you have the time and can wait a few moments before picking it up (it will disappear, but you have time), use every piece of equipment and unload your clips before collecting the ammo icon. Consider it a brief, glorious moment of overkill.
Use your all tools
 Each player has a special attack of sorts in the form of a Ghost squad member. This AI-controlled character is activated like a killstreak with a press on the right D-pad, and joins in the fight under AI control for a limited time. Although it may be tempting to call them into the fight anytime it gets rough – he/she usually spawns next to you within a few seconds – these AI controlled squad mates can save your life, and the lives of teammates.
The AI controlled squad mate is one of the few things you can activate while you are bleeding out. They can heal you and any teammates nearby, so if you are stuck far from your team, calling them in is a good last resort. You only have one per life, but when you die and are forced to respawn with nothing, you receive a new Ghost squad member to call.
Taking the bar
 There are two bars in the upper left side of the screen, and you should pay close attention to them both. The first is your weapon damage bar. It begins at level 1 and fills with every shot you land on an enemy (the amount varies depending on the enemy, and you earn more for headshots). Once you max it out, you gain a damage bonus and start over. Enemies also drop star-shaped icons that provide you with an instant weapon damage level up. Earning these damage bonuses can turns most weapons into a powerful enough force to take out an armored enforcer with a only a modicum of ammo. Damage bonuses carry over from wave to wave.
If you do end up dying and respawning with nothing, you still have a chance to save your leveled up weapons. When you respawn make a beeline for the spot you fell. You’ll see a red box that you can grab to reclaim your weapons (but not perks or killstreaks.) Your teammates won’t see the red box and can’t accidentally grab it either, but you need to hurry – the box disappears quickly.
Your best bet is to keep one weapon slot flexible, picking up more powerful weapons as they appear via air drop, but find a weapon you like early on and work on leveling it up. When you get a weapon like the powerful Chain SAW LMG that burns through ammo (it tends to be dropped in later rounds), having a powerful secondary weapon can make life much easier when you don’t have time to reload your primary.
The second bar determines when your team receives supply drops. When the team accumulates enough kills to fill the bar, it triggers an air drop drop of care packages, dropping weapons, perks, or killstreaks; sometimes a combination of all three. The perks you collect stack up, and as long as you don’t die and respawn you keep them throughout the game. If you find a perk or weapon you don’t like, you can double tap a button to change it. Be careful though, it’s random. You may end up with something worse, and you can only change it twice before you are stuck with what is left.
Following orders
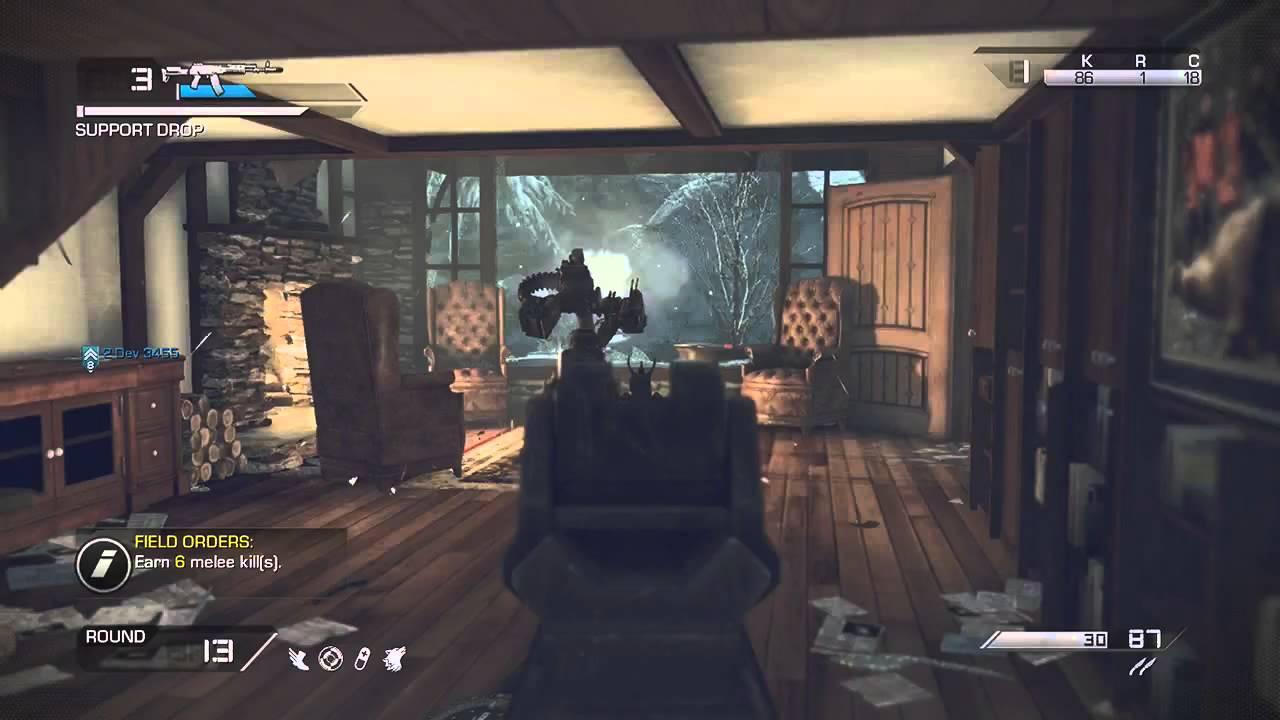
 Throughout each match you receive Field Orders, just like in the multiplayer. These challenges can range from recording two kills with equipment to 10 headshots, and the entire team contributes to the totals. These assignments carry over through multiple waves until they’re completed, and your reward is a Death Machine mini-gun for each member of the team. You only have it for a limited time with it, but funnel a large group of enemies towards four mini-gun toting players, and let slip the dogs of war.
There is no “jackass” in team
 Call of Duty is a game that typically allows lone wolf players to thrive. You can jump online, play a few rounds, then jump off and no one is the worse for it. With Safeguard though, the lone wolf player is a liability. All it takes is one person to foolishly go chasing a new weapon or killstreak to bring a round crashing to an end. That player’s teammates are then put in the awkward position of having to decide if it’s better to risk running an enemy gauntlet to save their downed squad mate in a short window of time, or wait for the next round when they will have a weakened teammate following their respawn.
The only way to reach level 20 and beyond is to talk to each other. Find a defensible location and make sure all your entry points are covered. Don’t run off on your own unless it is absolutely necessary. You can also try constantly moving, but that requires you to move as a group. Don’t be that guy, work with your team.
Do you have any other questions or suggestions for Safeguard? Let us know in the comments below.
Editors' Recommendations
- Is Call of Duty: Modern Warfare 3 cross-platform?
- All Call of Duty games in order, by release date and chronologically
- Hogwarts Legacy beats out Call of Duty to become 2023’s bestselling game
- Call of Duty: Modern Warfare 3 Zombies: how to complete Bad Signal
- The best weapons in Call of Duty: Modern Warfare 3


