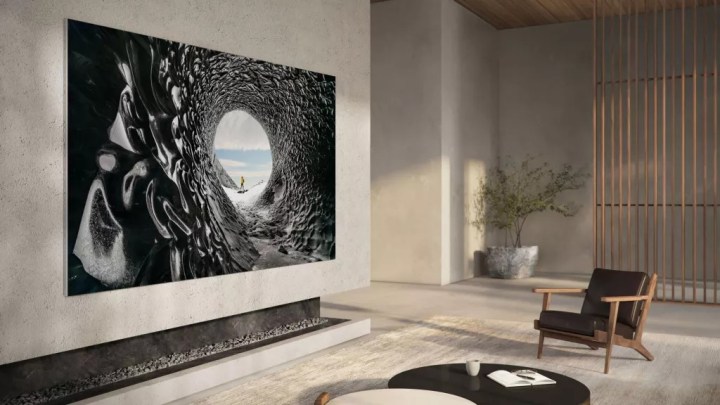
A properly wall-mounted TV can make all the difference for your living space. If you're dealing with a space-starved room to begin with, going airborne with your Samsung or Sony can free up much-needed space for furniture. That's not to mention the finished aesthetic, which is becoming all the more common in modern homes. It's also quite the thrill to display artwork and personal photos on a wall-mounted TV, turning that awesome new OLED into a pivotal piece of decor. And here's the best part: If you've got the time and positive attitude, pretty much anyone can mount a TV. We're serious!
- What height should my TV be on the wall?
- What about viewing distance?
- Picking a TV wall mount
- What color should I paint the wall behind the TV?
- How to use a stud finder the right way
- Help! The studs are in the wrong spot — or there aren’t any
- Please, hide all of the cords in the wall
- Choosing the right cable length
- Leveling your TV correctly
Wall mounting isn’t rocket science, but it does require a fair bit of precision, care, and patience. After all, the last thing you want to experience is your new set lying cracked on your hardwood floor in a pile of crumbled drywall. Take a few minutes to read and absorb our tips, tricks, and expertise.
What height should my TV be on the wall?
You’re going to be clocking a lot of hours with your eyes glued to this TV, so the height at which you mount it might be the most important decision you make. While there is some debate around whether higher is better, the best position for most people is right at eye level when sitting down. Think about it: No one likes to sit in the front row of a movie theater because looking up at the screen is a strain on the neck. But it’s also wise to determine what “seated” means in the particular room your TV is in and how you’ll be watching it.
For example: If you’re going to be watching the game sitting on bar stools or while playing darts or pool, you’re going to want to mount the TV higher than you would if you’re slouched on the couch binging your latest obsession.
To mount your TV at eye level, take a seat as you normally would on your preferred chair, stool, or couch, and have a friend or family member measure from the floor up to your eye level, keeping in mind others that might be watching the TV, too (a couple of inches in height isn’t going to make a huge difference).
This height is going to be where the center of your TV should be, not the top or bottom edges. Alternately, a good general height, according to Samsung, is 42-inches from the floor, which is roughly eye level for someone who is 5-foot 6-inches tall. Whatever height you decide on, though, take a piece of painter’s tape and stick it to the wall in the spot where the center will be. Then, have a seat and stare for a minute. If it feels comfortable, then you’re good.
The size of your TV also is going to play a big factor, as the height of the TV (measured from the top edge to the bottom) divided in half is going to be the center. If you’re mounting on the wall above a piece of furniture, like an A/V cabinet, you just have to make sure that you set the center to give yourself enough clearance above the furniture. If your ideal eye-level height is 40 inches and you have a cabinet that stands 20 inches, subtract the cabinet height from your eye-level height, which will give you 20 inches. Then, take the height of your TV, say 32 inches, and divide that in half (16 inches) to get the distance between the center and the bottom edge of your TV. Since it’s under the 20-inch space, you’re good to go.
What about viewing distance?
If you haven’t already done your due diligence in determining what size TV you should buy, some of that decision will come down to how big your room is and whether it provides enough space for you to sit a comfortable distance from the screen, which will also play a role in determining how you arrange your furniture.
To help you decide what is right for you, you can check out our handy interactive guide, but a general rule of thumb is to measure the distance from your seat to your television in inches and multiply by 0.84 (for example, 78 inches x 0.84 = 65.2-inch screen). This should give you the best screen-size range.
If you have your heart set on a screen size already, however, there are several viewing distance calculators that show you the ideal sitting distance you need based on the TV size.

Picking a TV wall mount
If your TV didn't come with a wall mount or you no longer have it, you may be wondering where to get a mount from, and if the type you get even matters. There are a variety of options depending on how you want your mount to function.
You can get a low-profile model with a basic tilt design if you don't have much space to work with or want the TV to sit as close to the wall as it can. Or, if the TV is going to be moved around to different angles (more common in a classroom or meeting room), you may want a full motion wall bracket. The good news is that most third-party mounts are affordable, generally around $20 to $50, and designed to fit a wide variety of TV sizes and weights, so you should be able to find a compatible model.
Do keep in mind that some TVs will require you to use the wall mount that comes with the set. In most cases, you'll actually have to buy a separate mount, but ultrathin sets like the LG G3 OLED include a proprietary mount right in the box.

What color should I paint the wall behind the TV?
TVs, especially 65-inch models or larger, tend to be the focal point of any room you put them in. When choosing a wall color to go behind your TV, just as you would when painting otherwise, take into consideration the hues that will work best with the room.
Painting with lighter, natural colors (beige, ivory, cream), for example, will not only make your room look bigger but will also make the TV stand out on the wall.
With charcoals, midnight blues, and darker colors, however, the TV is going to blend in more when it’s turned off, while also making it seem brighter and more vivid when it’s on; which many consider a more theatrical and immersive experience. If you don’t want to commit to a completely dark room, a good compromise is to just do an accent wall behind the TV.

How to use a stud finder the right way
Electronic stud finders are tricky little tools. They can be one of the most helpful gadgets in the box or the reason you put a dozen extra holes in the wall. Here are four tips to help ensure they won't trick you.
Step 1: To be effective, stud finders need to be properly calibrated. First, place the stud finder on the wall and turn it on. You usually do this by pressing and holding in the device's main button. Let the stud finder read the density of the material (this will only take a second or two), then slowly move it from side to side. Go back and forth over the wall a few times, starting from a different spot with each pass.
Mark each stud you discover with a piece of painter’s tape. We recommend finding three and using a tape measure to make sure they are the same distance apart. For most modern homes, this measurement should be 16 inches from the center of one stud to the next.
Step 2: Have you ever tried to run a stud finder across a ceiling with popcorn texturing? Not only do you ruin the texture, but the stud finder also doesn’t work well. An easy way to overcome this problem is to place a piece of cardboard over the area you want to scan. The cardboard gives the stud finder a smooth surface to slide across and will allow you to easily find the joists.
Step 3: Before you drill holes, run your stud finder vertically up and down the wall to ensure no fire blocks are running horizontally between stud bays. Fire blocks can make fishing wires down the wall very difficult, even for experienced installers.
Step 4: Stud finders can be fooled fairly easily. They’ll often read a seam in the drywall as a stud. After you have marked your studs and where you want to drill your holes, you should use something to poke into the wall to ensure you actually marked a stud.
We normally use a small precision screwdriver, but a coat hanger or piano wire will work fine. We would recommend doing this by hand, rather than using a power tool, as you will have a better feel for what’s inside the wall. You can also tap a small nail into the wall, and if you get past the drywall without the nail “falling in,” you’ve found a stud.
The final step you should take before drilling is to poke a little hole to the left and right of where you want to drill and make sure you are still on the stud. This will ensure you are centered on a stud and not just clipping its side (and possibly hitting electrical wiring).

Help! The studs are in the wrong spot — or there aren’t any
You found the perfect spot to mount a TV in your home. You’ve read all of our tips on using a stud finder, and are ready to go. But after 20 minutes of scanning for studs, you can’t find any, the results are inconsistent, or they don’t line up with the templating on your wall mount. There are several solutions that don’t require much, if any, extra work to fix this little problem.
Step 1: If you can’t locate the studs with a stud finder, locate an outlet on the wall (or any other fixture, like a cold air return). All outlets are attached to studs unless they were added after the wall was up (not common).
By taking off the wall plate, you can stick a thin tool into the gap between the side of the electrical box and the drywall, and then feel which side the stud is on. From there, measure over 16 inches and you should find another stud. Keep going 16 inches at a time until you are in the area where you want to mount the TV. Then use a small tool to poke a hole in the wall to see if a stud is really there.
Step 2: What if you find studs, but they don’t line up with the holes on your wall mounting bracket? Easy: Make holes in the wall bracket. The best way to do this is to use a step drill bit (like an Irwin Unibit) and a powerful drill. A good step drill bit will quickly cut through a steel wall mount.
Step 3: If there simply aren’t any studs where you want to mount the TV, then you need to use some sort of hollow wall anchor. These can be extremely strong, but as a general rule, they should not be used with full-motion or articulating mounts. This is because the force exerted on the bracket-arm when you pull the TV in and out can effectively rip the wall bracket straight off the anchors. The quarter-inch Snaptoggle is one of the best around, and a few of them can comfortably hold new 55-inch TVs on a single sheet of drywall.
Mounting a TV on drywall or plaster without attaching it to a stud can be a very safe and reliable solution if you know the limits of the wall and the toggles. Professional home theater installers use these regularly. We know of other installers who overestimated the strength of the wall and ended up with a TV on the ground. In the end, if you aren’t comfortable performing the install, consider hiring a professional.

Please, hide all of the cords in the wall
Nothing ruins the look of a nice television mounted on the wall quicker than a tangle of exposed wires. Luckily, hiding cables inside the wall is fairly cheap and easy. The simplest way to achieve this is with an IWPE (in-wall power extension) or a power relocation kit. These kits come with everything you need to run power up to your TV while hiding all of your signal wires (some even come with a cutting tool). You might be thinking: “Why not just drop an extension cord in the wall instead of installing an outlet?” Well, it’s actually against National Electric Code (NEC) to drop a power cord or extension cord inside the wall. It’s also not legal to put low-voltage cables like HDMI inside the wall unless they’re CL3-rated for in-wall use, which is one reason expensive HDMI cables are worth buying.
You may not need the extra HDMI ports on your TV now, but you may want to add components to your home theater system in the future. Put in extra HDMI cables and run them through the wall now so that you have them when you need them.
An IWPE is exactly what it sounds like — an extension cord rated to go inside the wall. In the end, you will have an outlet behind your TV, and what’s called an inlet down by the floor (at the same height as your other outlets). To provide power to the kit, you connect an extension cord from an existing outlet to the inlet. Confused? The pictures on this kit explain it clearly.
Before you begin the installation, ensure your low-voltage cables are rated for in-wall use. The next thing to know about IWPE kits is that they come with a predetermined length of electrical wire, typically 6 to 8 feet. Also note that they should be used only in a single stud bay, and they are not designed for use above a fireplace.
If you want to mount a TV above a fireplace (which we normally advise against), and there’s no electrical outlet above the mantle, we recommend hiring a licensed electrician for the job. If there’s a nearby outlet (floor level), they may be able to tap off the existing outlet to get power up to your fireplace. We also advise you to have the electrician run additional A/V cables for you. HDMI, coaxial, and speaker wire are never fun to run after a completed wall mounting job, especially when it’s above a fireplace.
If you can’t hide cables inside the wall, then try installing a paintable wire channel. Most of these simply stick to the wall and allow you to hide all of your cables inside, providing for a clean look. Just know that when you remove the wire channel, you will likely also remove the paint.

Choosing the right cable length
It doesn’t matter if your TV is going on a wall or sitting on a stand — buy longer cables than you think you need. This is the most ignored piece of advice we give people. Extra wire can be wrapped up, stuffed in a wall, or otherwise hidden. If the cables are too short, you risk them falling out, simply not reaching, breaking, or worse yet, damaging your equipment.
For a typical flat-panel installation, with a tilting wall mount and equipment located directly below the TV, 8-foot cables will work nicely. Twelve-foot cables will allow you to make connections before the TV is on the wall, or pull out the equipment once it is hooked up. If you’re mounting a TV higher than normal (the bottom of the average TV is between 36 inches and 46 inches from the floor) or using a full-motion mount, you’ll need 12-foot cabling. If that seems excessive, consider this: On a typical full-motion mount with a 20-inch arm, you will use 3 to 4 feet of cable before even reaching the wall — that is, if it’s properly routed to allow safe movement of the TV on the arm.
A final note on cables: Try to avoid the kind with bulky connectors. These types of cables might not fit properly behind a slim television, or even plug in for that matter.
Leveling your TV correctly
Everything is cut, drilled, assembled, tightened, and otherwise wrapped up. You step back to take a look at your newly wall mounted TV, but something isn’t right. The TV isn’t level.
What do you do? Do you need to pull it down? Drill new holes in the wall? Cry? Cry really hard? Probably none of the above. There is almost always a way to level a crooked TV. Just know that sometimes a TV will never look level if the ceiling, floor, or mantle isn’t level (so be sure that your viewing angle isn’t deceiving you). Check these other areas before you go mad trying to level the flat-screen TV.
Step 1: Walk up to the TV as it hangs on the wall, grab onto the sides, and then try to force it into being level. No, really. Your success here depends on how snug the bolts are that hold the wall mount arms on the back of the TV. If they aren’t overtightened, you should have a little wiggle room to help level the TV.
Step 2: Take the TV off the wall, loosen the bolts holding the arms on the back of the TV, then push up/down on the arms as you tighten them back down. Put the TV back on the wall and see if it’s level. If it isn’t, then do the same thing with the wall plate.
Step 3: If you used up all of the wiggle room available and it still isn’t level, make more wiggle room. You can use the step drill bit we talked about earlier to round out the holes in the arms or wall plate. This may give you the little extra space needed, just don’t go too crazy and make the holes unusable. If you accidentally make the holes so big that bolts slip through, you can always buy larger washers.
All of the tips listed come from years of firsthand experience mounting TVs on wood studs, steel studs, plaster, brick, from the ceiling, you name it. Some of these tips are common sense, but almost none will be found in an instruction manual. If you have the right tools, a few hours, and patience, then you can mount your own TV. Do be sure to budget your time appropriately, though. A simple wall mounting job (tilting mount, drywall, exposed wiring) might take a professional only 20 minutes from unboxing to finished install. A novice should plan to read the instructions, proceed cautiously, and free up an afternoon because, let’s face it: breaking a TV is never fun.
Editors' Recommendations
- ESPN+ Free Trial: Can you sign up for free in 2024?
- How to mirror your smartphone or tablet on your TV
- How to replace lost or broken AirPods, AirPods Pro, or cases
- How to download music from SoundCloud on desktop and mobile
- How to convert your VHS tapes to DVD, Blu-ray, or digital