
HTC addressed some of its camera shortcomings with the One A9, a not-quite-flagship handset the company released in the fall, but it went further with the 10. While it would seem like a step back to go to a 12-megapixel image sensor, this one is actually a major improvement over the previous one. It’s an UltraPixel 2 sensor with 1.55 micron pixels, an f/1.8 aperture, and optical image stabilization (OIS). The immediate benefit is vastly improved low-light and night photos.
Rather than line the camera interface with gimmicky features and other distractions, HTC wisely focused on improving the photography basics, with particular emphasis on the Photo and Pro modes. It’s the latter of the two that truly shows what this camera is capable of. Here’s a look at some of the ways you can use the HTC 10’s camera to make the most of your photography skills.
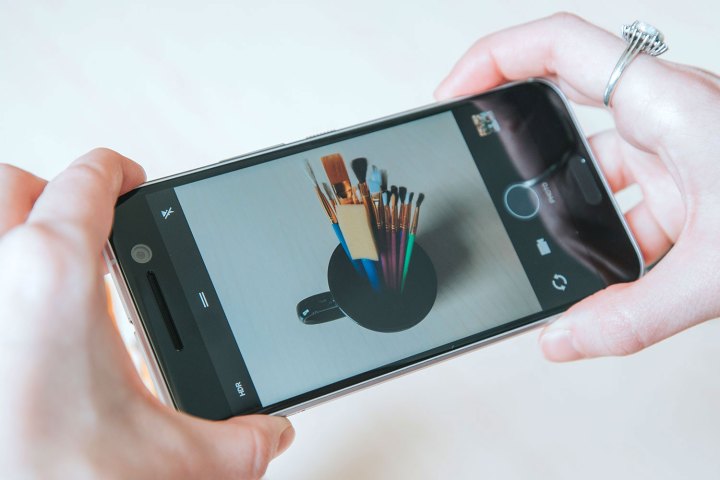
The basics of Photo (auto) mode


On the HTC 10, the automatic mode is known as Photo, which is a little unusual, but it’s the default mode the camera works with out of the box. With auto on, you can basically point and shoot to capture great images, thanks to fast focusing and HDR (High Dynamic Range) mode, which is enabled by default.
The thing is, because this phone has an UltraPixel image sensor in the rear, it’s more sensitive to incoming light, and that can wreak havoc for shots that are very bright or facing a strong source of light, like the sun or a bright bulb. As with any automatic mode, Photo mode is supposed to compensate for that by adjusting settings like white balance, ISO, shutter speed, and exposure to produce more balanced images. When set to Auto, HDR will kick in when necessary to balance the highlights and shadows.
By default, Photo mode shoots in a 4:3 aspect ratio at the full 12-megapixels. If you prefer a wider image, you can tap the settings drawer on the left, tap 4:3 12MP until you see 16:9 9MP. Though images will be at a slightly smaller resolution, you will be able to get a little closer to your subject with a slightly wider angle.
When pointing the camera at a subject, tap the screen to focus where you want. A sun icon will appear with a vertical slider. This is exposure control for adjusting how much exposure to light the sensor will have. Slide it down for less light, which will make the image darker, or slide it up for more light to make it brighter. You will see the resulting change in real-time. The slider isn’t overly sensitive to touch, though, so it will require a few swipes to move it in either direction.
Once you’re satisfied with what you have, tap the shutter button on the screen to get the shot. Pressing the volume button will bring up a screen asking if you want the button to act as a hard shutter button or as a way to zoom in or out. Make your selection and it will stick to that unless you change it.
Learning the Pro mode

The Pro mode on the HTC 10 is a revamped take on going manual, and the level of control can reap major rewards in the quality of images you can capture. To take your smartphone photography skill set to another level, you’ll want to learn how to use Pro mode.
Thankfully, it’s not as daunting as it may seem. Switching to Pro is as easy as sliding out the drawer from the left side and tapping Pro. The interface will change and you’ll see options for adjusting the white balance, exposure, ISO, shutter speed, and manual focus along the bottom of the app. Tap any one of them, and a vertical slider will pop up with different numerical levels, allowing you to adjust on the fly and see the changes reflected in real-time. You can also try automatic settings for each one by tapping the A at the top of the slider.
We noted what exposure does earlier, which is adjust brightness and contrast. White balance adjusts the overall tone and color to look more natural. ISO determines how sensitive the camera is to available light. Shutter speed controls how fast or how long the sensor is exposed to light. Manual focus lets you control focus for anything you’re shooting and is best used for shooting nearby objects.
Not all of these settings need to be tinkered with in order to shoot stellar photos, however. By default, the exposure setting is grayed out because it is set automatically. That is fine, as adjusting the other settings will be good enough for a vast majority of shooting scenarios. In most instances, the key ones are shutter speed and ISO, because they directly affect how much light the sensitive UltraPixel sensor is exposed to.

Adjusting these features can be beneficial in both bright light or low-light scenarios. For example, shooting a tall building in bright sunlight — especially if the structure is backlit — will lead to an overexposed image, even with HDR turned on. Raising the shutter speed will help offset that. The building will look darker, as a result, but at least you have a usable image that is easier to edit afterward.
Low-light photos can benefit from Pro mode even more and lowering the shutter speed will help. Smartphones have traditionally been poor at capturing ambient and natural light — while staying in focus — in darker settings. Photo mode does what it can, but otherwise struggles to get consistent results. Pro mode is a significant upgrade, and all it takes is playing around with the settings to achieve more natural composition. Make sure to keep a steady hand when shooting at night or in low-light settings, as cameras are sensitive to movement at lower shutter speeds.
Getting great shots in Pro mode


The HTC 10 doesn’t focus quite as fast as the Samsung Galaxy S7 or S7 Edge, but it is certainly faster than its predecessor. This is also true of Pro mode, so you may need to tap to properly focus on the subject you’re looking to shoot. If shooting a moving object or subject, tap it on your display and the HTC 10 will automatically lock on to it. This is perfect for shooting action of all kinds.
Shooting in Pro mode also means you can capture images in RAW format, along with the regular JPEG format. RAW is an identical file, except it retains about 10 times as much data, meaning that the image is untouched by any digital processing. Open RAW images in an advanced photo-editing app like Adobe Lightroom on a computer or phone, and you can better control how they look.
By default, Pro mode is set to JPEG only, but you can change that by sliding out the drawer from the left and tapping the JPG icon in the sub-menu until it says RAW. You don’t have to shoot in RAW, but it’s a good idea for those picturesque shots you really care about. Note that you can also change the ratio for photos from 4:3 12MP to 16:9 9MP, as previously mentioned. If quality does matter, however, then stick to 4:3.
Getting great shots while in Pro mode, regardless of the settings you prefer, is easier than it looks. Adjusting ISO and shutter speed should be your first go-to’s, though you may also need to adjust the white balance if there’s too much of a yellow or blue tone to the shot. Setting the white balance to Auto can help, but don’t rely on it too much.
There isn’t much else to getting better composition in Pro mode. The built-in tools make it easy to figure out what the tangible effect is, and it doesn’t very take long to make adjustments on the fly.
Shooting with Zoe

Zoe is a special photography mode that was first introduced on the One M7 back in 2013. It has since been rolled out as a free app on Google Play for any Android users. Its purpose is to mix together still shots with short clips and bursts. As neat as it is, it won’t work with Pro mode in any way. Everything you shoot in Zoe must be shot in Auto.
In fact, this version of Zoe has fewer features than previous ones, but that’s not a loss. Pressing the shutter button while in Zoe mode will take a single image and three-second video clip. The idea is that you can mix together various images and clips to create a montage video with background music and artistic filters for a more dramatic effect. It’s pretty neat, and the Zoe Photo Editor — which comes pre-installed on the HTC 10 — can access all your photos and videos (including the Pro ones). There’s no right or wrong way to use this mode given the level of creativity it affords.
The only caveat is that Zoe is more sensitive to movement, both from your hands and from subjects moving in the frame. Keep a steady hand and you probably won’t be disappointed.
Editors' Recommendations
- The 10 best photo editing apps for Android and iOS in 2024
- How to root Android phones and tablets (and unroot them)
- How to pre-order the OnePlus 10T
- 150-degree wide-angle lens tops OnePlus 10 Pro’s camera specs
- OnePlus CEO takes on 10 Pro critics by releasing official photos


