Click a page to jump to it:
- Quick camera, Smart lock, Now on Tap, customize status bar, and find files
- Fingerprint sensor, app permissions, notification LED, Wi-Fi calling, and Do not disturb
How to quickly launch the camera
It can be tricky to capture those perfect, spontaneous shots. There’s always a danger that you’ll miss the magic, as you fumble to launch your camera app. That’s why the Nexus 5X has a camera shortcut. Just double tap the Power button, even when the phone is locked, and you’ll automatically bring up the camera app. You can also take a photo, when the camera app is open, by tapping Volume down.
If you prefer to use a different camera app, Google doesn’t discriminate, you can head into Settings > Apps > Camera > Open by default and tap Clear defaults. Now, the next time you double tap that Power button, you’ll be asked to select your default camera app.
How to set up Smart lock
It’s always a good idea to have some security on your smartphone. You don’t want just anyone to be able to pick it up and gain access to your life. However, you can also waste a lot of time tapping in a PIN, which is especially annoying when you’re somewhere safe, like your own home. With Smart lock, you don’t have to bother with unlocking anymore. Go to Settings > Security and tap Smart lock > Trusted places > Add a trusted place. Add your home, or another location where you don’t want your phone to be locked, and you’ll no longer have to enter your PIN when you’re there.
How to use Now on Tap
As a stock Android device, the Nexus 5X allows you to enjoy the latest features in Google’s Android platform before the rest of the crowd. The headline feature in
There are lots of possibilities with Now on Tap. You might use it to get contact info for a restaurant that’s mentioned in an article you’re reading, or maybe you want details on a song you’re currently listening to. In any case, you turn it on by touching and holding the Home button and then tapping Get started. Follow the instructions, and you’ll be using it in no time.
How to customize status bar and Quick Settings
This is an experimental feature that may change in the future, but right now you can tweak what appears in the status bar and change your Quick Settings icons. Swipe down from the status bar with two fingers and tap and hold on Settings for a couple of seconds. You should see a wee pop-up message about System UI Tuner, and you’ll find it at the bottom of the Settings menu under System.
You can tap on Quick Settings to change the icon tiles that appear for things like Wi-Fi, Bluetooth, and location. With Status bar, you can remove any of the icons that appear in the status bar. There’s also a toggle that allows you to Show embedded battery percentage, which puts a tiny number in the battery icon indicate the remaining power.
How to find files
Google has built a file explorer into Android 6.0 Marshmallow, so there’s no longer any need to install one. Go to Settings > Storage & USB and tap Explore at the bottom. If you know the name of the file you want, then tap the magnifying glass to search. You can then tap the three lines in the upper-right corner to choose and organize the files by date or size — it defaults to alphabetical by name. Tap the three dots again to switch to a grid view.
Next page: Five more handy Nexus 5X tips…
Click a page to jump to it:
- Quick camera, Smart lock, Now on Tap, customize status bar, and find files
- Fingerprint sensor, app permissions, notification LED, Wi-Fi calling, and Do not disturb
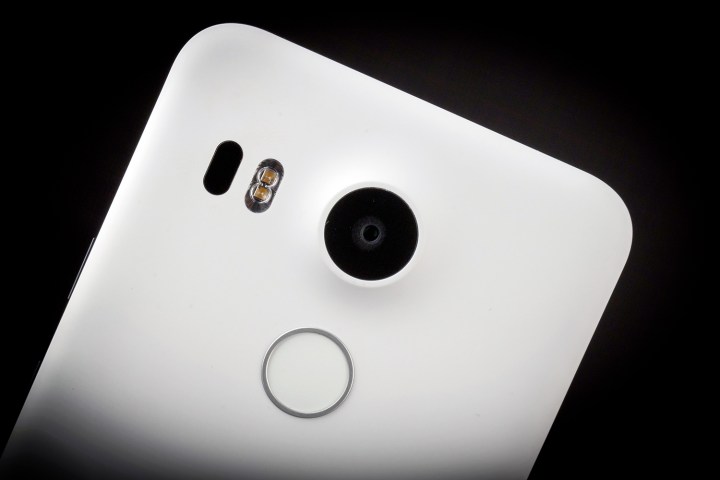
How to use the fingerprint sensor
It’s easy to set up your fingerprints for unlocking your Nexus 5X. Go to Settings > Security > Nexus Imprint > Add fingerprint and work through the process. It’s best to use whatever finger is most comfortable and make sure that you change the angle between each press on the sensor. You should also make sure that you record at least one finger from each hand, so you can unlock your phone regardless of which hand your using.
Once your fingerprint is recorded, you can also use it to authenticate Google Play purchases. Open up the Play Store and tap on the menu in the top-left corner, then Settings > Fingerprint Authentication. Now you can use your fingerprint to buy apps.
How to set app permissions
Google has opened up granular control over app permissions, which means you can specify exactly what each app on your Nexus 5X can and can’t do. Go to Settings > Apps and tap the Gear icon in the upper-right corner, then App permissions. You’ll see a list of which apps have which permissions and you can toggle them on and off as you see fit.
How to activate the notification LED
Google wants you to use the Ambient Display feature, which is on by default in the Nexus 5X, but there actually is a traditional LED notification light. Unusually, it’s in the speaker grille at the bottom of the phone’s screen. To turn it on, go to Settings > Sound & notification and turn Pulse notification light on. It’s an RGB light so it can display lots of different colors. If you want to customize it further, try using an app like Light Flow.
How to use Wi-Fi calling
The ability to use Wi-Fi for calls can be really handy, particularly when you’re indoors and not getting a good signal. Unfortunately, some carriers do not want to support it, but you can check if it’s a possibility for you by going to Settings > More > Wi-Fi Calling. If your carrier supports it, then the option will be there. You can make calls, send text messages, and even send MMS using Wi-Fi.
How to schedule Do not disturb
You can fine tune the Do not disturb feature to ensure that you only get the notifications you want, when you want. Go to Settings > Sound & notification > Do not disturb. By default Do not disturb will silence everything except alarms. In Priority only allows, you can set exceptions to that rule, so that you’ll get calls or messages from specific people. You can even toggle Repeat callers to dictate that an incoming call should be put through if the caller tries again within 15 minutes.
If you take a look in Settings > Sound & notification > Do not disturb > Automatic rules, then you can set up regular rules. It’s a great idea to schedule Do not disturb for your sleeping hours, and you can even have it turn on automatically when you have calendar events.
Editors' Recommendations
- 10 helpful Gmail tips and tricks everyone should know
- SpaceX claims 5G plan could ‘render Starlink unusable for most Americans’
- Camera fans, get ready for the Oppo Find X5 on February 24
- The best Galaxy Note 10 and 10 Plus tips and tricks
- Google Pixel 3 and Pixel 3a: 10 amazing tips and tricks