The real strength of OneNote is its ability to sync across platforms: in addition to desktop and phone apps, OneNote is available as a browser extension or even a website accessible from ANY browser. Microsoft isn’t stingy with the tool, either – OneNote apps are available for OS X, Android, iPhones and iPads, Chromebooks, and even wearable devices like Android Wear or the Apple Watch. All the information in OneNote is connected to your Microsoft account, and syncs almost instantly across devices wherever you have an Internet connection.
Save $20 on Ultimate Help Desk service for Win10 transitions. MSRP $99.99
That said, OneNote is most deeply integrated with Microsoft products like Windows 10 and Windows Phone. One the desktop, OneNote is part of the Office 365 system, a series of applications and services available for a monthly subscription. Without Office 365, you can access your OneNote information in Windows, but cannot modify it. An alternative is using the web interface.
Download OneNote
The following guide assumes that you want to use OneNote in Windows 8 or Windows 10. The general structure of OneNote (and any information you’ve put into it) remains largely the same on all supported platforms, though user interface differences are present from one device to the next.

If your computer came with Windows 8 or Windows 10, OneNote is already installed. Just press the Windows button on your computer’s keyboard (or the Start button on your tablet) and start typing “OneNote” to see it in the list of programs. If you don’t see it, open the Windows Store instead, and search for “OneNote.” Click “Install” and wait for OneNote to download.
Note that there’s really two versions of OneNote available. This guide covers the free app, but you can also access the service through a desktop app that comes bundled with Office365. The instructions here should broadly extend to that but details may differ.
Creating Notebooks
The “top” unit in OneNote is the Notebook. These are sort of like file folders in Windows, but each individual Page will appear as a separate listed item rather than a file. To open the Notebook view, click the Menu button – it’s the three horizontal bars next to the “Home” tab at the top of the window.
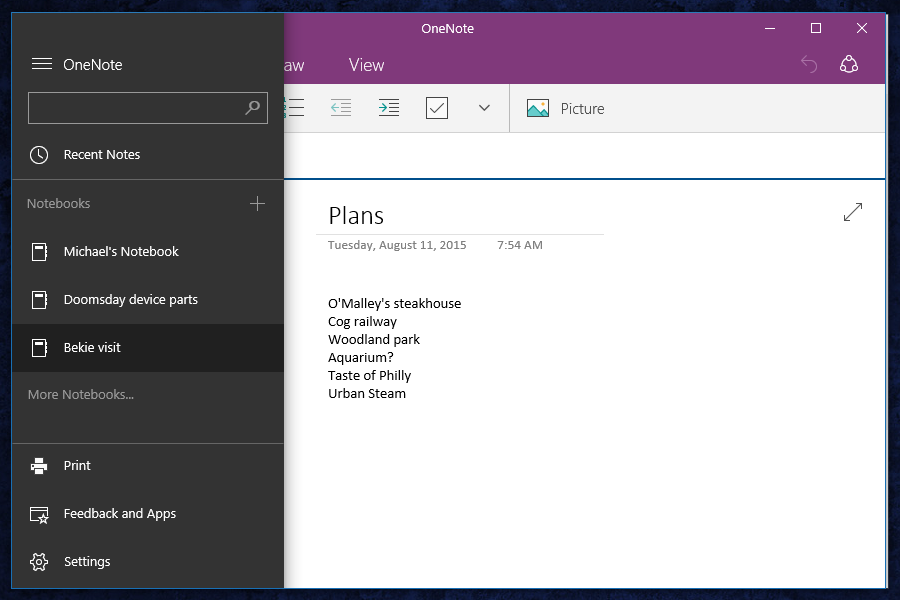
Your default Notebook is labelled with your username. If you only intend to use a few notes at a time, it’s fine to click on your Notebook and return to the default Home view. If you’d like to create new Notebooks for organization, click the Menu button again, then click the “+” button next to “Notebooks.” Type a name for the notebook, then press Enter. Click the new entry to return to the Home view.
Home view
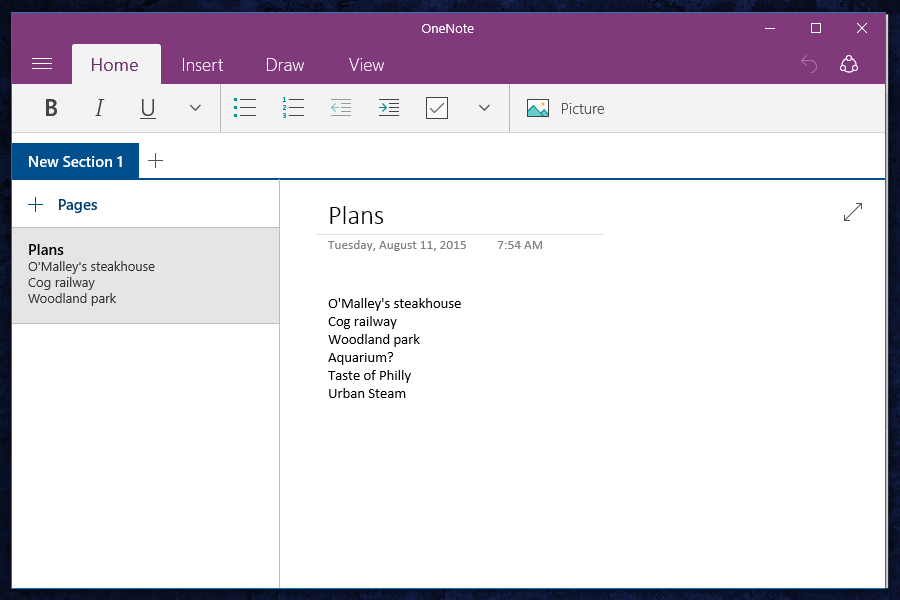
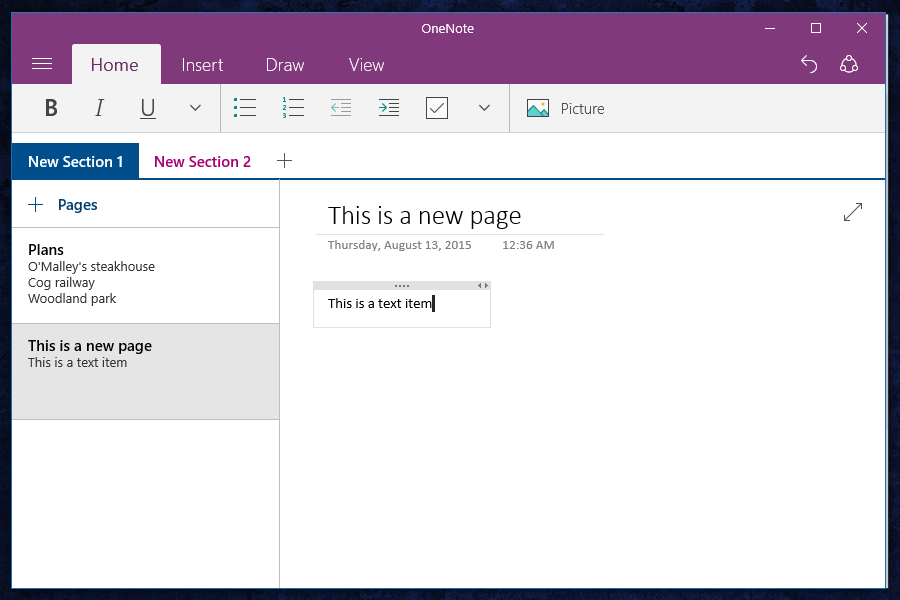
The Home view is further divided into Sections, which appear as tabs beneath the editing tools, and Pages, the final and smallest part of One Note. You can create new Sections in the same way as you created a new Notebook: click the “+” button in the tab area. To rename them, right-click or long-press the tab, then click “Rename Section.” You can also change the text color or pin the individual section to the Start menu.
Pages
Pages are the last item in OneNote, and they’re where most of your actual information will go. Each section begins with a blank untitled note. Click above the auto-generate date and time to create a title for this specific note, then click below it to start typing. That’s it – once you insert text into a Page, it will automatically appear across every computer, phone, and tablet that you’ve installed OneNote on. To create a new Page, click the “+” symbol next to Pages in the left column.
Editing pages is more or less the same as it is in any word processor. The editing ribbon beneath the “Home” tab allows you to alter text with bold, italic, or underline modifiers. Click the “down” button to change font size or color. Bullets, numbers, and tab spacing is handled in the next section, with justification and tags available by clicking the “down” button. Adding tags to pieces of text can make them easier to search for in the side menu.
Insert, Draw, and View
Like a word processor, certain text can be augmented with the Insert tool. Click the “Insert” tab. Here you can create a new table, attach files to your Pages, insert photos from your computer or the web, or hyperlinks to webpages.
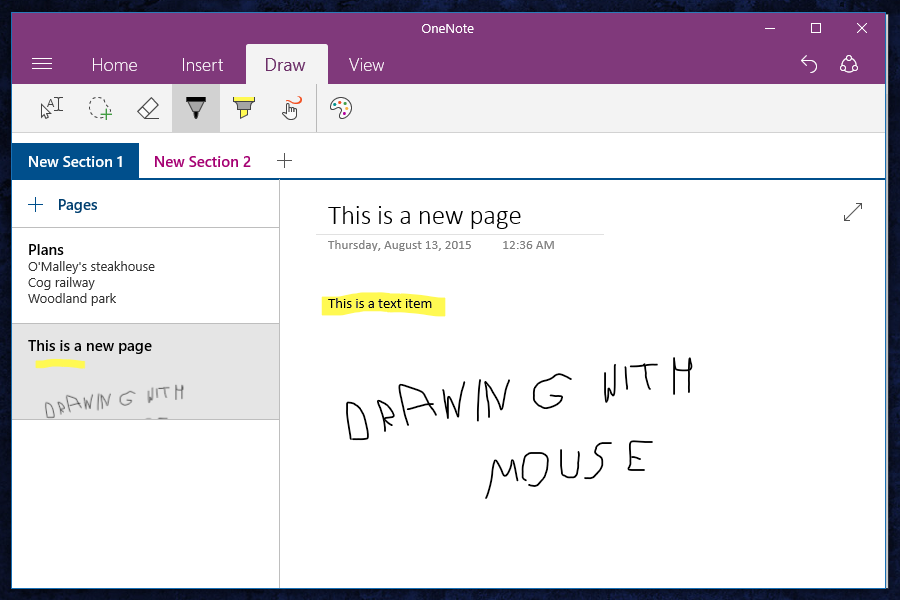
Click the “Draw” tab. Here you can use basic drawing and selection tools to write directly onto Pages. This is particularly useful for tablets, but you can use a mouse cursor for drawing if you have a laptop or desktop without a touchscreen. Click the “back” button to undo an action, or the palette button to change colors.
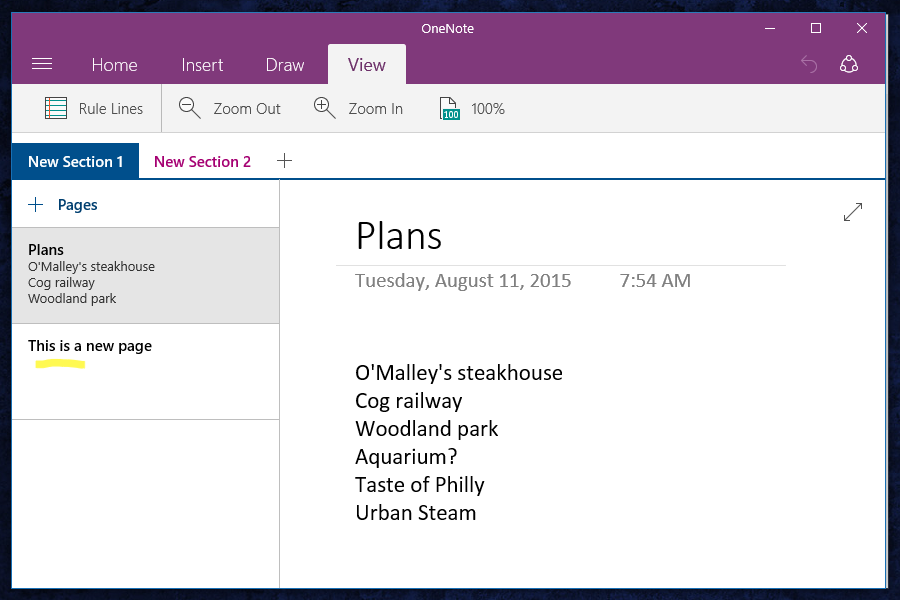
Click the “View” tab. You can use the menu on this screen to add ruled lines to your notes like notebook paper, or zoom in or out of your note.
Syncing
As long as the computer or device you’re using has an active Internet connection, your Pages, Sections, and Notebooks will be uploaded to Microsoft’s servers almost instantly. When you open OneNote again (or on another device), you’ll see everything you’ve written in the same structure.
To sync all OneNote items, simply log in with your Microsoft account when the OneNote app on your computer or device starts. Here’s the full list of all the apps and tools for OneNote on various platforms. Additional apps, and accessing them with your Microsoft account, doesn’t cost anything extra.
- Windows (Windows store app)
- Windows (Microsoft Office app)
- Windows Phone
- Android
- iPhone/iPad
- Mac OS X
- Chrome browser/Chromebook
- Amazon Fire/Kindle Fire
- Web
Editors' Recommendations
- Is now a good time to buy a MacBook Pro? We’ll help you decide
- How to use Windows 10: Useful tips and tricks you need to know