Like any complex piece of software, Windows 10 and its installation process is vulnerable to mistakes, glitches, and hardware errors. That being the case, here are some of the most commonly-encountered problems that arise when installing or upgrading to the new version of Windows. If you have Windows 10 installation problems, you’ve come to the right place.
Side note: If the latest version of Windows 10 is experiencing widespread problems, you may also want to wait before updating. The April 2018 update alone had the potential to wipe all the data from your desktop or break Chrome, and the October 2018 update had its share of problems, leading to recalls and delays.
Now, people are struggling with the latest 2020 updates and some severe problems the new versions of Windows are causing. Not an ideal outcome! Here’s how to make it better.
Run the Windows Update troubleshooter
Windows 10 includes a troubleshooter that can automatically detect and try to fix problems with updates and patches. If the problem isn’t apparent and you aren’t sure what to do next, try running this troubleshooter. It doesn’t always find a solution, but it’s an excellent place to start.
Step 1: Head to your search box and type in Troubleshoot. Select the Troubleshoot Settings option that awaits in System Settings.
Step 2: A new troubleshooting window will open. In the first section, called Get Up and Running, you should see an option for Windows Update. Select it.

Step 3: A new button should now appear that says Run the Troubleshooter. Select it to start the troubleshooter and see how it can help automatically.
Step 4: A new troubleshooter window will now open as Windows 10 scans for any problems. If it finds any issues — and it will look for everything from missing updates to corrupted files — then it will notify you and ask if you want to Apply This Fix or Skip This Fix. Since you are trying to fix your update, it’s a good idea always to choose the Apply option here.
When finished, the troubleshooter will give you a list of any problems found and fixed, at which point you can select Close to end the process. If the troubleshooter did find and fix important issues, you should now try your update process again.
Low disk space

Windows 10 requires quite a bit of free disk space on your hard or solid-state drive to install. The 32-bit version of the operating system — used mostly on tablets and less expensive laptops at this point — needs 16GB of free space; the 64-bit version needs 20 GB. If you’re installing from a file stored on your PC with the Microsoft upgrade tool, you’ll need an additional 2GB to 4 GB just for the installation files. Windows 10 will also reserve 7 GB of space to help make sure there’s enough for most installs.
If you have a full storage drive or not much room to begin with, you’ll need to make some room. The quickest way to do this is to uninstall space-hogging programs. Robust 3D games and complex packages like Adobe Creative Suite take up gigabytes of space. Uninstall them, and be sure to back up any save files or settings. Don’t worry; you can reinstall them from the installation discs or with a download once Windows 10 installs.
Should you still need more space, it’s recommended you remove files in the following order: Video files, audio files, and images of all kinds, then documents and other files. Check out our guide on how to clean your hard drive for more information. An external USB hard drive is the quickest and easiest way to accomplish this — simply save any files you can’t delete to the external media, and they’ll be easy to restore once you’ve installed Windows 10.
Afterward, empty the recycle bin to clear the deleted files, or run a program like CCleaner to clear out your browser caches, logs, and other things that take up storage space. You also can try the built-in disk cleanup tool in Windows 10 as an alternative.
To check your progress, click the Start button, type, “This PC,” and click the result. The drive labeled Windows is what Windows 10 will install — make sure you’ve got at least 20 GB free just to be safe.
ISO image issues

If you’ve used the Microsoft Media Creation tool to burn a disc or create a bootable USB drive to install Windows 10, the media itself may be damaged or corrupt. This corruption will result in a failed or damaged installation. Sadly, it’s extremely difficult or impossible to modify the files once written to the disc or drive. You’ll need to rerun the tool to install Windows 10, which may necessitate access to another laptop or installing your older version of Windows again.
If you continue to experience problems after creating multiple installation media and trying to install Windows 10 more than once, you may have a persistent hardware problem. The CD/DVD burner or the USB drive you’re using may be faulty. If possible, try using a different USB drive or an external disc burner.
Thankfully, you might be able to just install Windows 10 from an ISO image, which you can grab here for free. Fire it up, follow the prompts, and it’ll tell you if you’ll be able to install your new OS without the use of external media like flash drives and discs.
Error codes
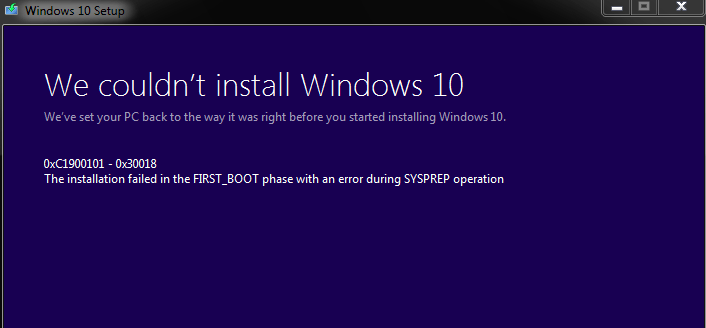
Sometimes during the Windows installation process, the program will stop and display an error code. There are hundreds of possible error codes and at least as many potential problems. The best thing to do in this situation is to write down the code — you may not be able to copy it from the display screen — and search the internet for the core problem and, hopefully, a solution.
Here are some of the steps you can take if there’s no reliable information for your specific code:
- Unplug any unnecessary devices from your computer, like flash drives and dongles. Laptops should have nothing plugged in at all (except a power cord), and desktops should only have a monitor, mouse, and keyboard attached.
- For desktops, remove or disconnect any unnecessary internal hardware. If your PC includes an integrated graphics card or sound card on the motherboard, remove any standalone cards. Unplug any secondary storage drives (but not the primary OS drive), disc drives, card readers, and extra hardware such as a fan controller or USB extension connected to a PCI port.
- If you’re upgrading your PC and you’ve selected a standard upgrade that preserves your programs, delete unnecessary programs before beginning the installation process. Anti-virus programs and drivers for devices like game controllers seem to have the most trouble during the upgrade process.
- If your Windows install or upgrade doesn’t complete or if you have issues with the startup, you might want to disable hibernation, which you can do by typing “powercfg /h off” into a command prompt window.
- Alternately, simply install the OS cleanly, preserving your files but not the programs. To do so, select Custom: Install Windows instead of Upgrade during the setup process. You can reinstall your programs later.
Microsoft also offers a list of potential Windows 10 installation error codes and what they mean.
Incompatible hardware

Windows 10 runs on a variety of hardware, including Atom-based tablets and other low-power systems, but it does have minimum requirements. If your computer has a processor with a speed of less than 1 GHz — or RAM totaling less than 1 GB for the 32-bit version or 2 GB for the 64-bit version — the setup wizard will not allow you to complete the installation. Desktop users can often upgrade their RAM or processor, but laptop users who don’t meet the minimum requirements are probably out of luck.
We provide you with our guide to all things memory, which you can consult to get an idea of the necessary amount of RAM you require.
Rolling back an update

PC updates are supposed to keep your PC functioning as well as possible, but this isn’t always the case. Sometimes certain updates impede functioning instead of improving it, in which case you’ll want to undo the update by wiping it from your system. Unfortunately, your only option might be using an older version of Windows until an update delivers improved functionality. A good example of this is the March 2020 Windows 10 update, which caused problems from blue screens to login and audio loss issues. Here’s how to do it.
Step 1: Enter “Settings” in the search box, and select the Settings option that appears in the results. Then, select Update & Security.
Step 2: From the left menu, select Windows Update, then View Update History. You will then see a display of all the recent updates to your system. You will also see that you have a choice to uninstall updates. Simply click on the Uninstall option.
Step 3: Select the most recent update from the options that appear, and click Uninstall to begin the process. Before clicking on the first update you see, we recommend investigating your updates to see which one is the source of the issues you’re experiencing.
Updates could be the root of your problems. However, sometimes you may find that uninstalling the problematic update doesn’t eliminate the issues. Some Windows 10 2020 update errors, such as loss of audio, persisted even after uninstalling the update. When you cannot resolve your update errors by simply uninstalling those updates, you will have to troubleshoot more deeply.
Editors' Recommendations
- The most common Skype problems and how to fix them
- The most common Microsoft Teams problems and how to fix them
- Windows 11 tips and tricks: 8 hidden settings you need to try
- How to adjust screen resolution in Windows 11 and older
- Windows 11 vs. Windows 10: finally time to upgrade?