Windows 11 is great — it’s worth upgrading to from Windows 10. But as with every version of Windows, it’s at its best when you make some tweaks to it. Beyond making Windows 11 look like Windows 10, or customizing the Windows 11 taskbar, there are a few changes anyone can make to Windows 11, and they’re changes that everyone should make. In my humble opinion, at least.
So, if you’re looking for an upgraded, augmented, and altogether better Windows 11 experience, here are the top five changes you should make to it right now.
Disable tracking and personalization
If, like me, you aren’t a fan of deep personalization or data collection on you in general, then like me, you’ll be looking for the least-tracked version of Windows you can find. While Windows 11 does collect more data on you than previous versions, you can disable some of it, and restrict the way the operating system automatically personalizes your experience.
Step 1: Search for Privacy Settings in the Windows search bar, and select the appropriate result.
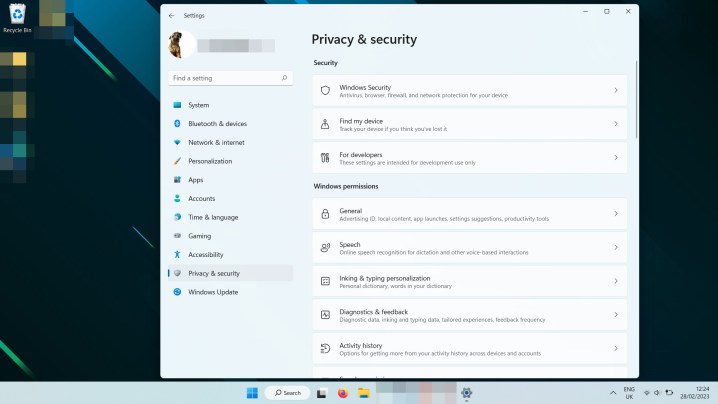
Step 2: Select General.
Step 3: Toggle off whichever tracking and personalization features you don’t want. Personally, I turned them all off, but your interests may differ. This will also turn off Windows 11’s ads, which feel particularly invasive.

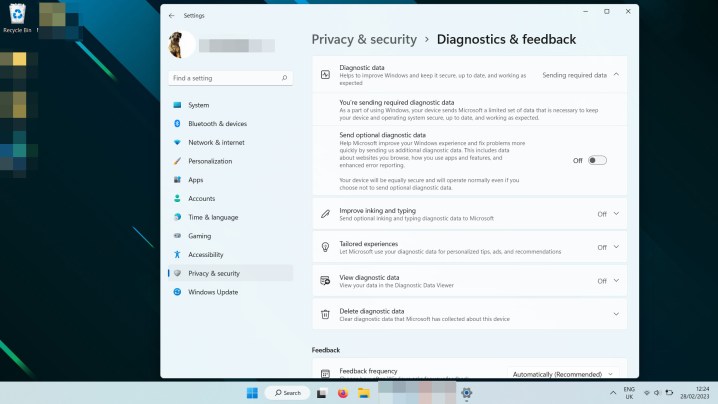
Step 4: Back out to the Privacy Settings menu, then select Diagnostics and feedback.
Step 5: Select each of the options in turn and toggle them off, especially the Send optional diagnostic data option. When you’re done, it should say next to Diagnostic data that you are only Sending required data.
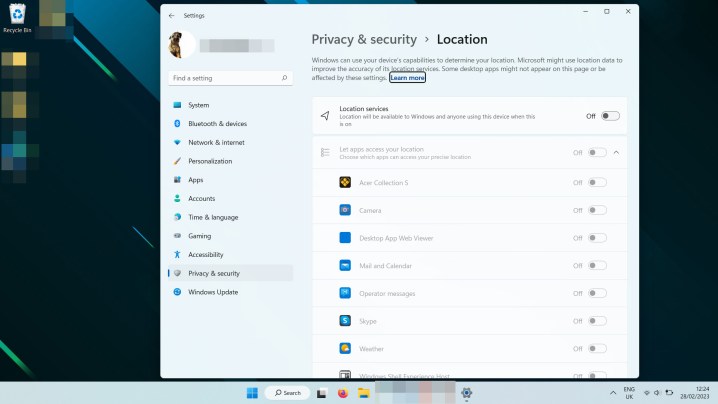
Step 6: Back out to the Privacy Settings menu again. Scroll down until you find Location settings. Select it.
Step 7: Toggle Location services to Off. Alternatively, select the individual apps that you do and don’t want to use your location information.
Step 8: Back out to Privacy Settings again, and select Account Info. Select which apps you want to use your account information, and toggle the others to off, or turn off Account info entirely.
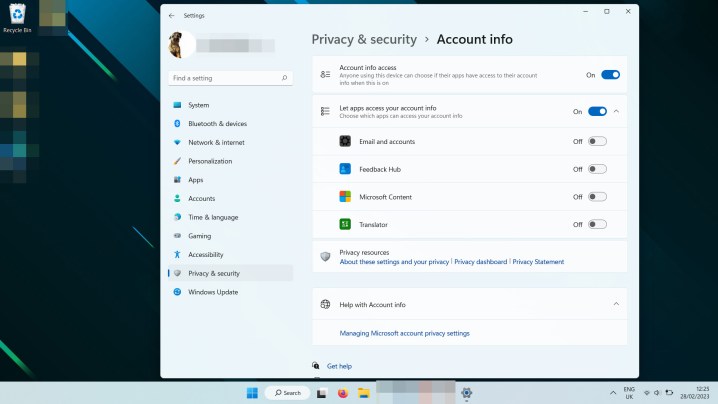
There are a few other settings you might want to change, so have a look around the Privacy and security menu to see whether you want to disable any other data collection, but those are the main ones that I’ve turned off.
Turn on Dark mode
Some people are fine with their websites and operating system blinding them with stark white pages. I am not. I dark mode everything I can as it’s more comfortable to read throughout the near-entire-days I spend working and gaming on my PC, and I find everything far more legible with light text on a dark background than the other way around.
Fortunately, Windows 11 has a robust and versatile Dark mode you can enable with just a few clicks.
Step 1: Open Windows Settings by pressing Windows Key + I.
Step 2: Select Personalization from the left-hand menu.
Step 3: Select Colors.
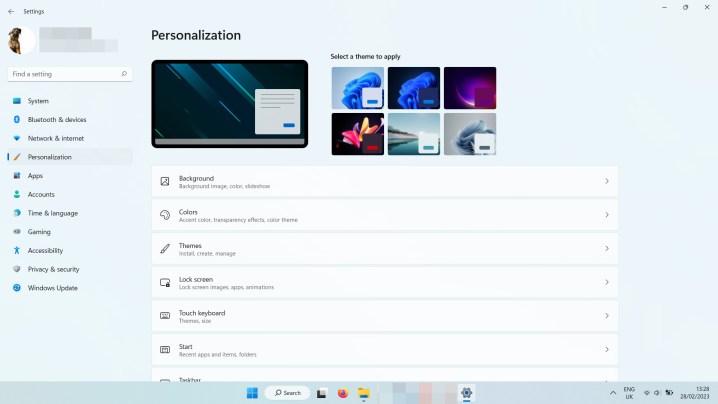
Step 4: Next to the Choose your mode option, use the drop-down menu to select Dark.

Windows 11 will then convert all of its own windows to a darker theme, as well as any compatible apps you have installed. If you would rather apps didn’t ape Windows in this respect, you can switch the toggle to Custom instead. That gives you the option to tell Windows itself to remain dark, while your apps use their default coloring.
Show hidden files
Hidden files aren’t ones that you’ll typically need to use, but if you’ve ever brought a save game over from an older Windows install, or modified an application in some way, then you’ll know you need access to the hidden files that Microsoft keeps tucked away in a default installation. Fortunately, Windows 11 makes it as easy as Windows 10 to show hidden files.
Step 1: Open File Explorer and select View from the top menu.
Step 2: Select Show, then toggle Hidden items.

You should now be able to see hidden folders, like Appdata, in their respective directories.
Disable all the (annoying) notifications
I hate notifications. If it’s important, I’ll remember it. Or probably not. But either way, I don’t need Windows or anything else interrupting what I’m going to tell me to do something else. Windows 11 is rather annoying for this, so I turn them all off, but you can be a little more nuanced if you want to.
Step 1: Open Windows Settings by pressing the Windows key + I.
Step 2: Select Notifications.

Step 3: Toggle Notifications to Off, if you want to turn off all notifications. Alternatively, use the list below to toggle the specific apps and system settings that you are happy to receive notifications for. Toggle everything else to Off.
Step 4: Scroll down to the bottom of the page, and you’ll find three additional toggle options. These relate to the Windows setup process, as well as Windows tips. You can turn these off too, by unticking the boxes.
Turn on file name extensions
This one might not be for everyone, but not being able to see filename extensions is an extreme frustration of mine. Some apps I use don’t apply them properly to saved images, whilst adding mods to games can sometimes mean tweaking file types to get them working right. Considering malware can hide as different file types, checking the extension of a file before launching it is a good security measure too.
Whatever the reason, though, I just like to know what files I’m working with, and without filename extensions, that’s not always obvious. Enabling them in Windows 11 was one of the first customizations I made.
Step 1: Open File Explorer and select View from the top menu.
Step 2: Select Show, then toggle File name extensions.
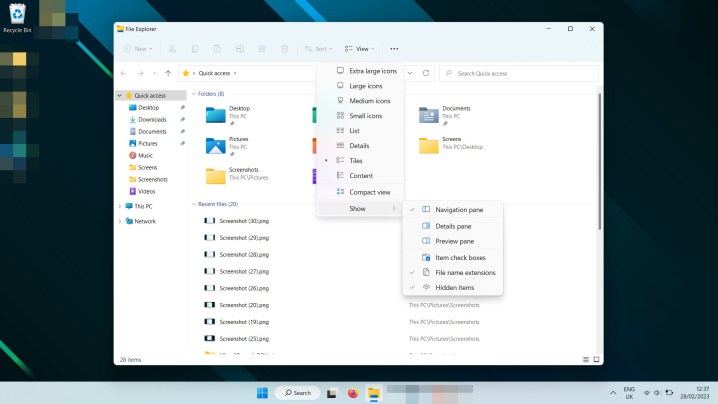
You should now be able to see the file extension of every file in File Explorer.
What else?
Now that you’ve customized Windows 11 to be much more how you and I both like it, have you tried installing Android apps on Windows 11? There are some cool ones worth trying out. Alternatively, if you need any help taking screenshots on Windows 11, there are a few ways to do it.
Editors' Recommendations
- The next big Windows 11 update has a new hardware requirement
- My most anticipated laptop of the year just got leaked
- Microsoft announces a new threat to push people to Windows 11
- Here’s proof that Snapdragon X Elite laptops can play hit games without issue
- The Windows 11 Android app dream is dead


