One of Apple’s greatest services is iCloud, the company’s cloud-based storage. It offers an assortment of advantages, like the ability to automatically sync calendars, reminders, notes, contacts, and other important content across devices. Photo Stream is one of two photo-related services baked into iCloud.
Here’s how to access your iCloud Photo Stream from your Mac.
What is Photo Stream?
Introduced in 2011 alongside iOS 5, Photo Stream is part of Apple’s basic, free plan. It’s different from iCloud Photos in that it doesn’t store your photos in the cloud indefinitely. Instead, up to 1,000 recent photos are uploaded and stored on Apple’s servers for 30 days. That gives you time to download and store your photos on a Mac. Photo Stream storage does not count against your free iCloud Photos 5GB cap.
Here are the highlights:
- Does not support Live Photos
- Does not support video
- Stores up to 1,000 most recent photos.
- Deletes photos stored in the cloud after 30 days.
- Supports JPEG, PNG, RAW, and TIFF formats.
- Photos download in full resolution on Mac, device-optimized resolution on iOS devices and Apple TV.
- Does not count against iCloud storage.
According to Apple, you can use both iCloud Photos and Photo Stream. However, if you opt for a paid subscription, Photo Stream is not available. Moreover, if you created an Apple ID in 2018 or later, the feature is not available. This guide essentially addresses everyone who doesn’t fall into those two groups.
With Photo Stream turned on, your iOS device will automatically upload a copy of every photo you capture via any available Wi-Fi or Ethernet connection, essentially allowing you to share communal albums with whoever you choose and ditch manual uploads altogether.
Turn on My Photo Stream in iOS
Before you can access Photo Stream on your Mac, you’ll need to turn it on through your iOS device. Once you do, each photo automatically uploads to your Photo Stream and remains there for 30 days — or until you reach the 1,000-picture limit, at which point the oldest ones are replaced with newer photos.
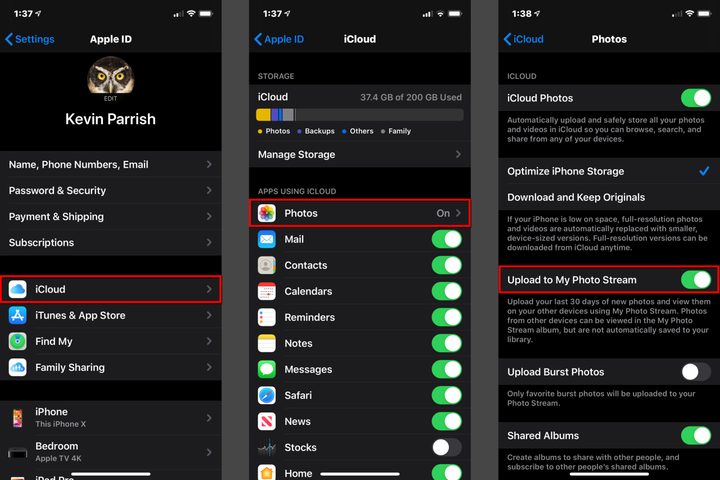
Step 1: Tap the Settings app on your iPhone.
Step 2: Tap your name on the following screen.
Step 3: Tap iCloud.
Step 4: Tap Photos.
Step 5: Toggle on the Upload to My Photo Stream setting.
Access My Photo Stream using Photos for Mac
The absolute simplest way to access your Photo Stream is through the Photos app. The exact process may vary depending on which version of Photos you’re currently running, but the directions below should still work with most incarnations of the native software.
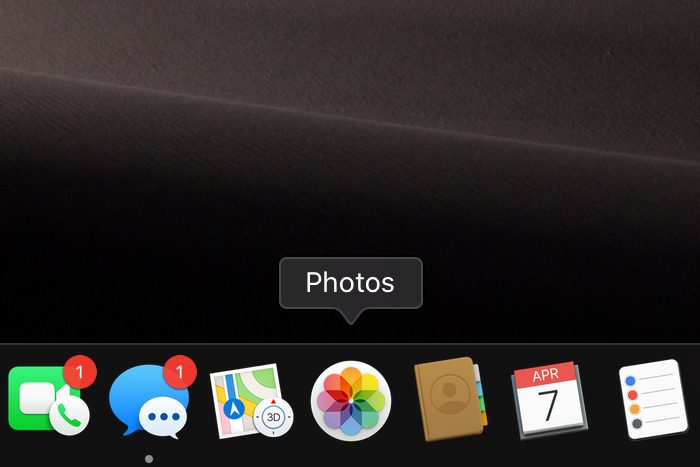
Step 1: Click on the Photos app listed on the Dock.
Step 2: With the app open, select Preferences on the drop-down menu.
Step 3: A pop-up window appears on your screen with the General tab open by default. Select iCloud instead.
Step 4: Click the box next to My Photo Stream.
Step 5: With the Photos app still open, select My Albums listed on the left.
Step 6: Select My Photo Stream to access your photos.
Access My Photo Stream using a saved Smart Folder
There is another, slightly more complicated (but still totally fun) way to access your Photo Stream on your Mac. It involves manually accessing a folder created by the Photo Stream service. As BenWard describes:
Step 1: Open Finder.
Step 2: Press the Command + Shift + G keys simultaneously (⌘+⇧G). This opens the Go to Folder option in Finder.
Step 3: Paste the following text into the Go to Folder field and then press Enter:
~/Library/Application Support/iLifeAssetManagement/assets/sub
Step 4: With the Sub folder open, press the Command + F keys simultaneously (⌘+F) to open a new search interface.
Step 5: Click to highlight Sub listed on the same line as Search and This Mac.
Step 6: The Kind drop-down menu appears under that line — leave it alone. You want to change the second drop-down menu from Any to Image.
Step 7: A third drop-down menu appears. Change it from All to JPEG.
All synchronized Photo Stream images appear in this window. You may see other pictures as well, though Photo Stream images are designated with a green checkmark on their thumbnails.
Step 8: Click the small Save button located on the right and name the Smart Folder as “Photo Stream” or something similar you’ll easily remember. Leave the Add to Sidebar box checked for easy access in the Finder window.