Using bullets for your list items keeps your document nice and neat. Whether you use dots, dashes, or even images, we’ll show you how to add bullets in Apple Pages and customize them, too.
Add bullets in Pages on Mac
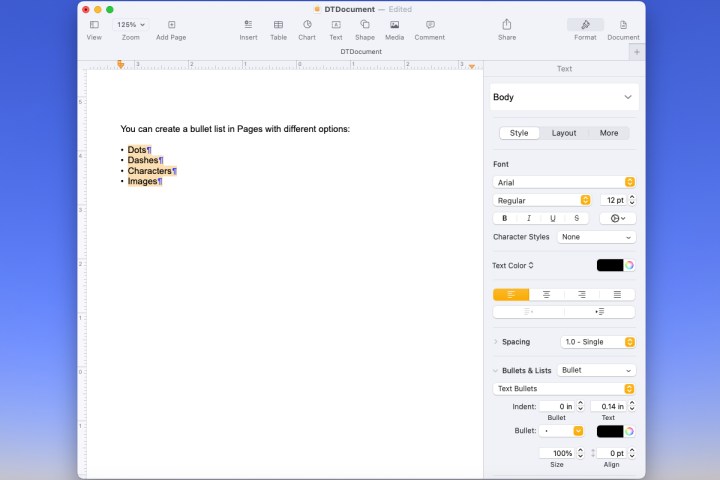
You can add bullets as you create your list or after you insert your list items. Let’s start with adding bullets as you go.
Step 1: Place your cursor in the document where you want your first list item.
Step 2: Select the Format button on the top right to open the sidebar.
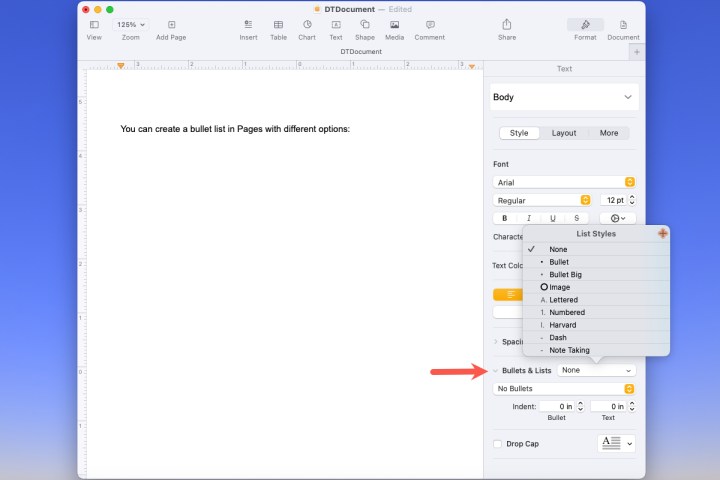
Step 3: Expand the Bullets & lists section using the arrow on the left.
Step 4: Use the drop-down list immediately to the right to pick your list style. You can choose from options like simple bullets, dashes, or even images.
Step 5: After you choose the style, you’ll see the first bullet appear in your document. You can use the bullet as-is and enter your first list item.
To add another item, press Return and enter it beside the next bullet that appears.
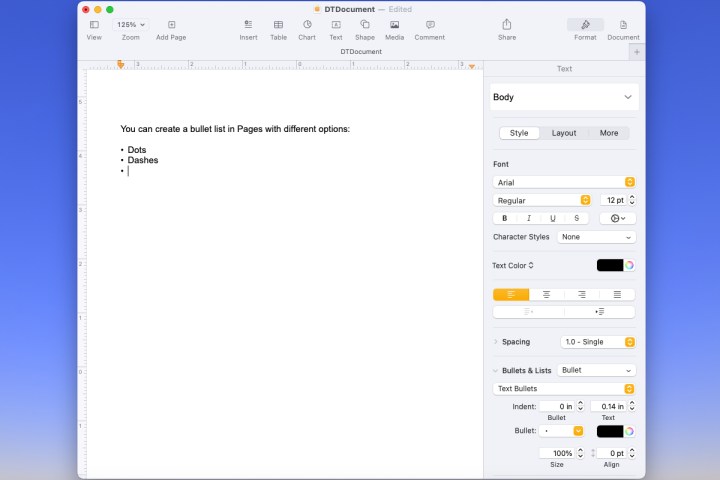
Step 6: When you finish with the list and want to continue with other content, press Return twice. This ends the list and lets you start a new paragraph, insert an image, or do whatever you like.
Step 7: If you have a list of items in your document that you want to turn into a bulleted list, this is just as easy.
Select all of the list items, open the Format sidebar, and use the drop-down menu to pick the list style. You’ll then see your list update to include the bullets.
Customize the bullets in Pages on Mac
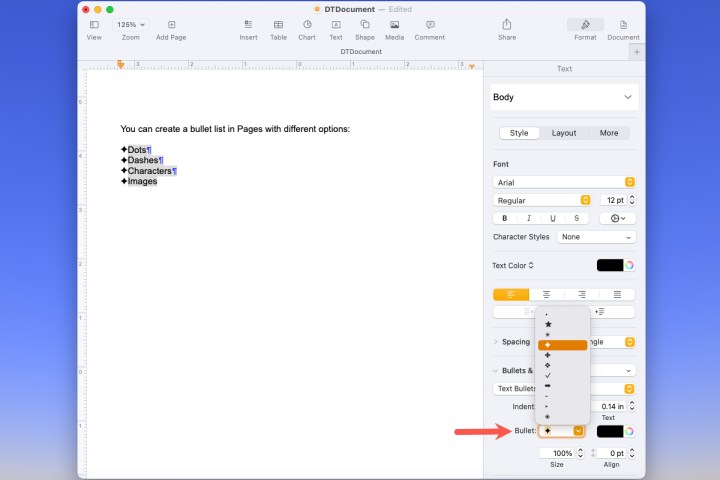
Maybe you want to add a little pizzazz to your bullet list. You can select different bullets like stars, checkmarks, arrows, and plus signs. You can also use images for your bullets and choose from pre-made options or upload your own picture.
Step 1: If you already have a bulleted list, select all of the items. If you’re going to create the list as you add items, place your cursor where you want the first item.
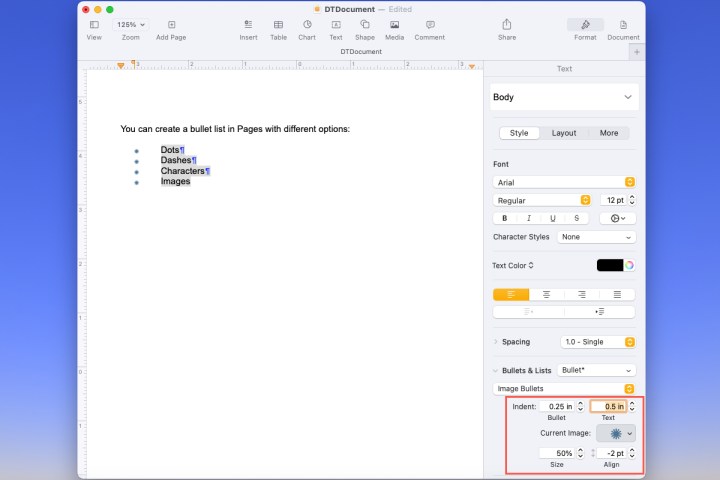
Step 2: Select the Format button and then expand Bullets & lists in the sidebar.
Step 3: Below the list style drop-down box, select the next drop-down box. This may display with Text bullets or Image bullets depending on what you pick in the list style menu.
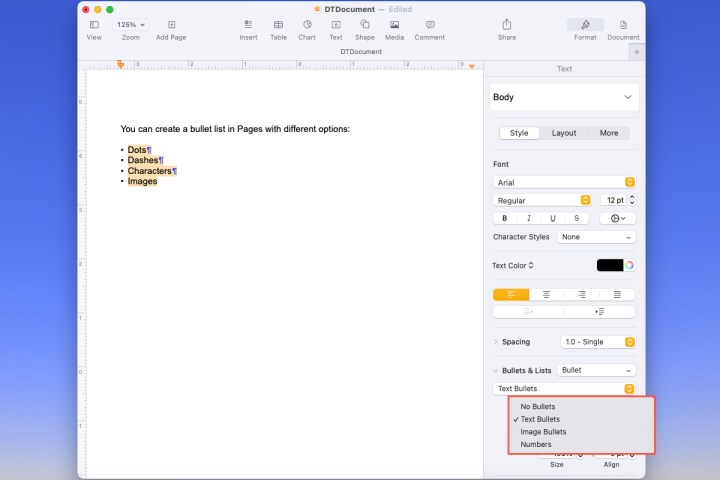
Step 4: If you use Text bullets, select the Bullet drop-down box beneath to pick the one you want to use. To the right, you can use the palette to pick a different color.
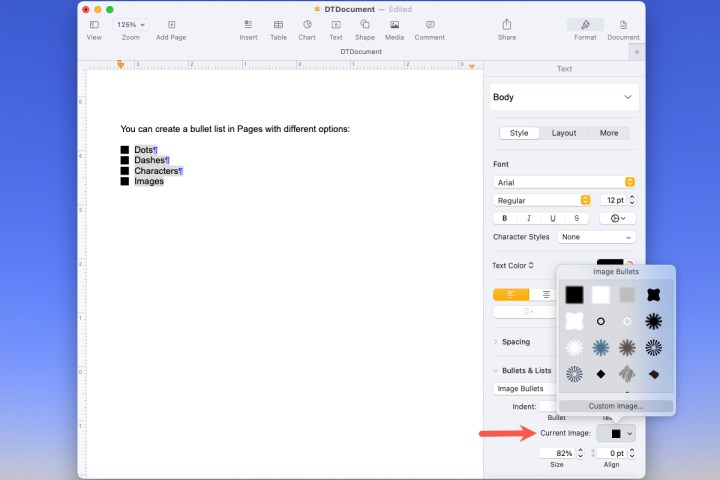
Step 5: If you use Image bullets, select the Current image drop-down box beneath to pick a pre-made image. To use your own picture, choose Custom image. Then, browse for and select your image and pick Open.
Step 6: After you select the bullets you want to use, whether text or images, you can adjust a few other options.
Indent: Use the Bullet field to adjust how far from the margin to place the bullet and the Text field to adjust how far the text is from the bullet.
Size: Increase or decrease the sizes of the bullets.
Align: Increase or decrease the spacing between the bullets.
Add bullets in Pages on iPhone
Just like on Mac, you can add bullets in Pages on iPhone as you create your list or after you have your items.
Step 1: To begin a list, place your cursor where you want the first item.
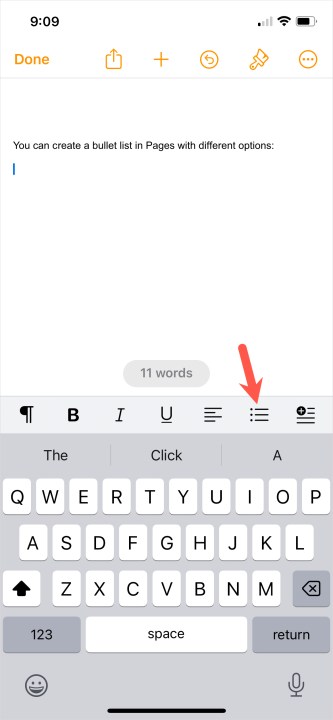
Step 2: Tap the bullet list button in the toolbar above your keyboard.
Step 3: Choose the list style you want to use from bullets, dashes, or images.
Step 4: You’ll see your bullet appear in the document. Tap the X to close the pop-up window. Then, add your first list item, tap Return, and enter the next item until you complete your list.
Tap Return twice to end the list.
Step 5: If you already have your list items, select all of them. Then, tap the bullet list button in the toolbar and choose the style.
Add bullets in Pages on iPad
If you use Pages on your iPad, you can add bullets to your document on that device just as easily.
Step 1: Place your cursor where you want the first list item or select all of the items if you’ve already created a list.
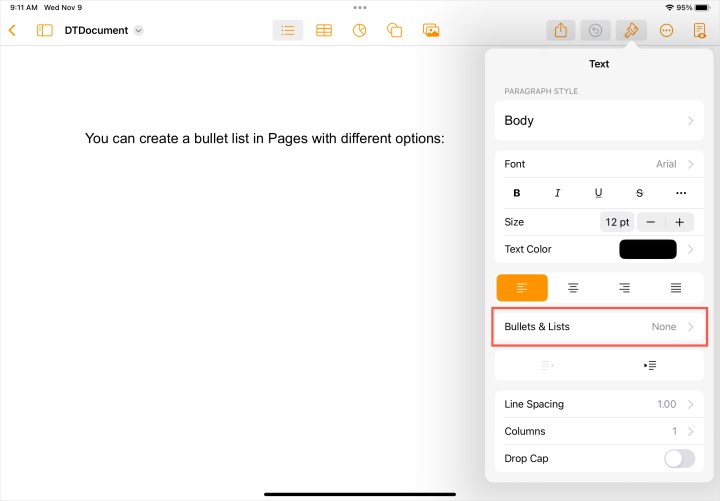
Step 2: Tap the Format icon on the top right.
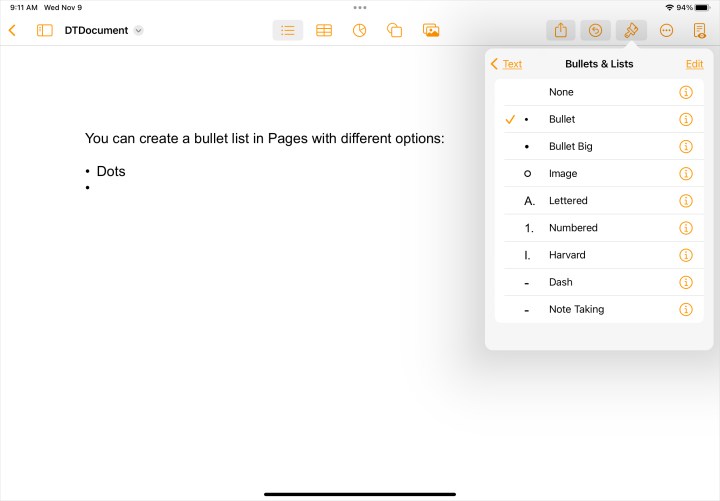
Step 3: Select Bullets & lists. Then, choose the style you want to use.
Step 4: Just like on your other devices, add your first list item if you haven’t already, and tap Return on the keyboard to add the rest.
Tap Return twice to finish the list.
Customize the bullets in Pages on iPhone and iPad
You have the same options for customizing your bullets on your mobile device as you do on your Mac too.
Step 1: Select a bullet, list item, or the entire list if you want to customize all bullets.
Step 2: Tap Format at the top.
Step 3: Choose Bullets & lists in the pop-up window.
Step 4: Next to the type of bullet you’re using, tap the info icon (small letter “i”).
Step 5: For a Text bullet, pick the one you want to use, optionally change the color, and adjust the size.
Step 6: For an Image bullet, choose the pre-made image you want to use or select Custom bullet to use your own picture. Then, optionally adjust the size.
Step 7: On iPhone, tap the X on the top right of the pop-up window to close it. On iPad, simply select a spot outside of the pop-up window when you finish.
Pages gives you a great amount of flexibility when you create bullet lists. So, you can use whatever size or image you want, change the color or size, and make your list look clean and professional.
Now that you know how to add bullets in Apple Pages, look at how to get the word count for your document or how to convert Pages to a PDF.
Editors' Recommendations
- The Vision Pro is already in trouble. Here’s how Apple can turn the tide
- How to contact Apple support for help with your Mac, iPhone, and more
- We may have just learned how Apple will compete with ChatGPT
- How to create multiple user accounts on the Apple Vision Pro
- I need to change how I use Apple tech in 2024. Here’s how I’m going to do it

