How to add page numbers in Microsoft Word

how to download microsoft word purchase website macbook
Digital Trends

Adding page numbers to Word documents is a great way to better organize them as they grow longer, and especially if you print it all out. What if you dropped all that paperwork and it went out of order?! Page numbers to the rescue! Here's how to add page numbers to Word in a few different ways.

Looking for more general tips on how to make the most of Word? Check out our beginner's guide to Word.

Difficulty

Easy

Duration

5 minutes

What You Need

  • Microsoft Word

  • PC

Adding page numbers

Page numbers can be added to the header (top), the footer (bottom), the margins, and a few other places depending on your preferences. You also have the option to apply different styles, as well as the ability to adjust the appearance of the page number itself.

Step 1: Select the Insert tab located at the top row next to Home.

Step 2: Select the Page Number button and choose exactly where you want it to be displayed within the document. You can choose from several options: Top of Page and Bottom of Page are the most common choices. The Page Margins option will place it within the side of your choosing, while Current Position will implement it to wherever your mouse pointer is situated.
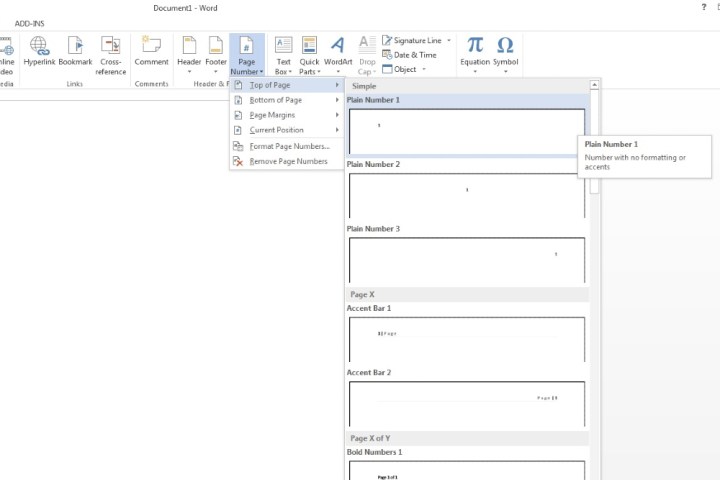
The Page Number menu in Microsoft Word.
Image used with permission by copyright holder

Step 3: After you’ve selected the location of the page number, select a style of your liking. Now click the Close Header and Footer button at the top, or double-click anywhere on the main body of the Word document.

A page number will now be automatically added to every page of your Microsoft Word document.

Other customization options

Step 1: Formatting page numbers: Select the Insert tab, followed by the Page Number button. Instead of selecting where you want to add the numbers, though, instead select the the Format Page Number menu. You’ll be greeted with various formatting choices, including the number format, chapter numbers, as well as page numbering.
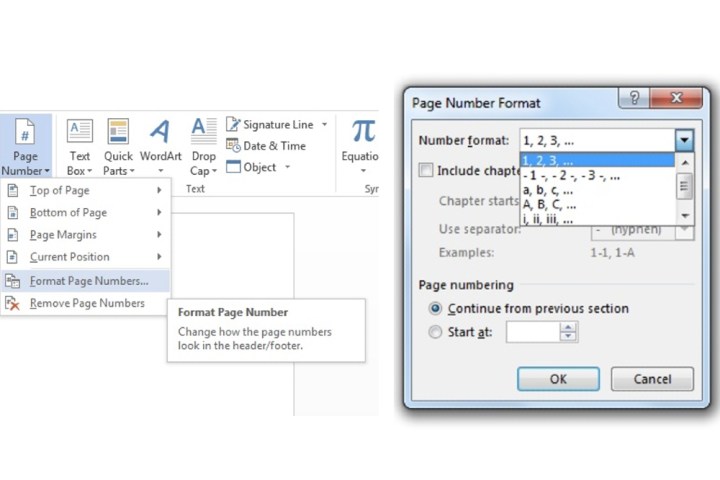
The Format Page Numbers location and associated options on Microsoft Word.
Image used with permission by copyright holder

Step 2: Customize the appearance of page numbers: Double-click wherever your page number has been added to. Highlight the page number by double-clicking on it. Now go to the Home tab, after which you can change the font, style, size, and color. You can also apply different positioning for the page number.
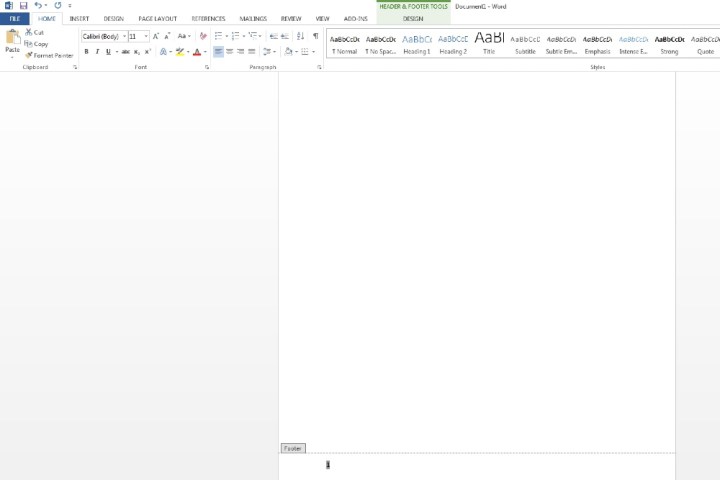
The options to customize the appearance of page numbers in Microsoft Word.
Image used with permission by copyright holder

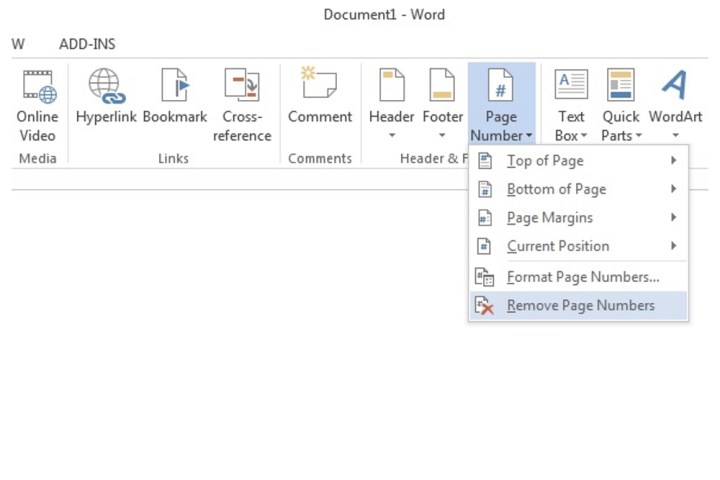
Step 3: To remove page numbers: Select the Page Number tab within Insert. Below the Format Page Numbers field, select Remove Page Numbers.

The Remove Page Number tab used for removing a page number for a Microsoft Word document.
Image used with permission by copyright holder

Starting page numbers from page 2

If the first page of your document has an index, an introductory image, cover, etc., you might want the page numbers to start from a page other than the first. Here's how to do that.

Step 1: Double click the area where you placed the page number (header or footer) on the first page or select Insert > Header or Footer > Edit Header or Edit Footer. Inside the Design tab that is now displayed within Header & Footer Tools, select the Different First Page button. Click Close Header and Footer.
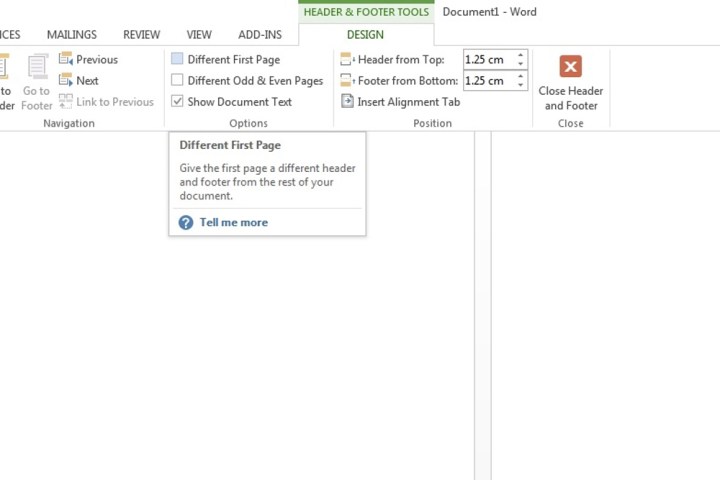
The Different First Page box in Microsoft Word.
Image used with permission by copyright holder

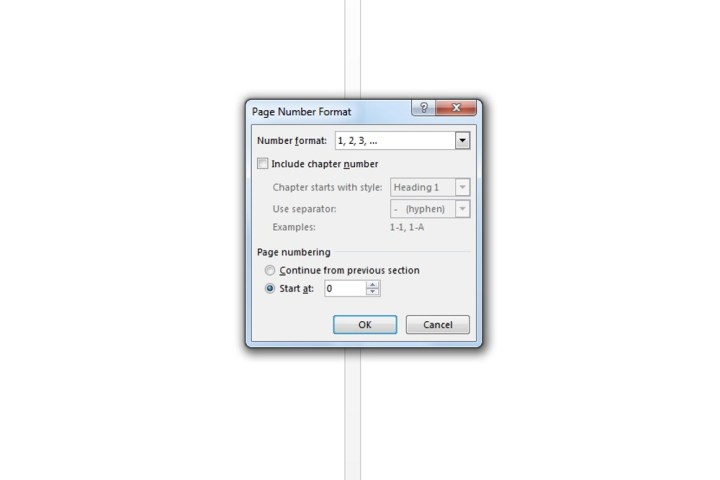
Step 2: Select the second page, then select the Insert tab, choose Page Number, and Format Page Numbers. Within the Start at box, enter 0. Select OK.

Setting the Start at box value to 0 so the page number commences on the second page in Microsoft Word.
Image used with permission by copyright holder

Step 3: The Insert tab should still be opened. Select the Page Number menu. Finally, select where you want to place the page number and a style.
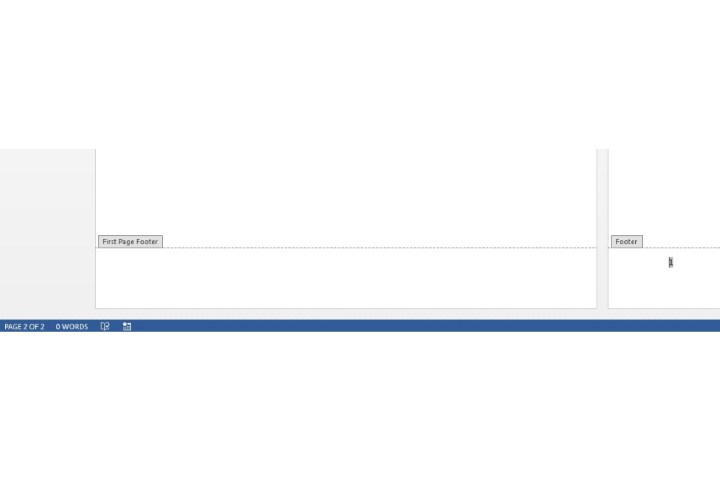
The page number starting from page 2 in Microsoft Word.
Image used with permission by copyright holder

Starting page numbers on a specific page

If you don’t want the page number to start from the first page in your document, you can start page numbers on a specific page in Word with the following process.

Step 1: If you want your page number to start from, say, page four, click or tap anywhere on page three. Now select the Page Layout tab, select Breaks, and choose the Next Page button.

The Next Page box located within Breaks on Microsoft Word.
Image used with permission by copyright holder

Step 2: The entry field should automatically be moved to the fourth page. If not, select that page manually. Now head to the Insert tab, click Page Numbers, and add where you want to input the page number.

Step 3: By default, the page number will now be highlighted. The Link to Previous field will already be selected at the top panel. Click that button to deselect it.
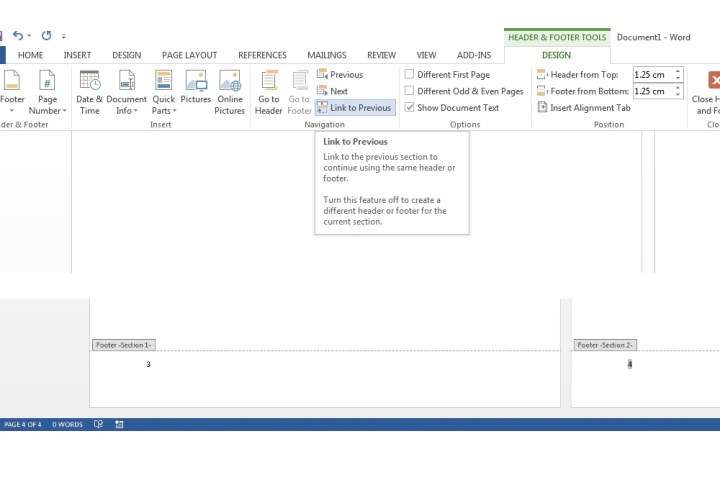
The Link to Previous box in Microsoft Word.
Image used with permission by copyright holder

Step 4: The page number will still be highlighted by default. Now go to the Page Number menu within Insert and select Format Page Numbers. On the Page Numbering field, select Start at. This should automatically enter "1" in the box. If it doesn’t, input the number "1" into it yourself. Select OK.

You will now see the page you’ve selected to start your page numbering from will showcase the number 1. In this case, the fourth page will have the page number set as 1. The 5th page will now have the page number set as 2 and so on and so forth.
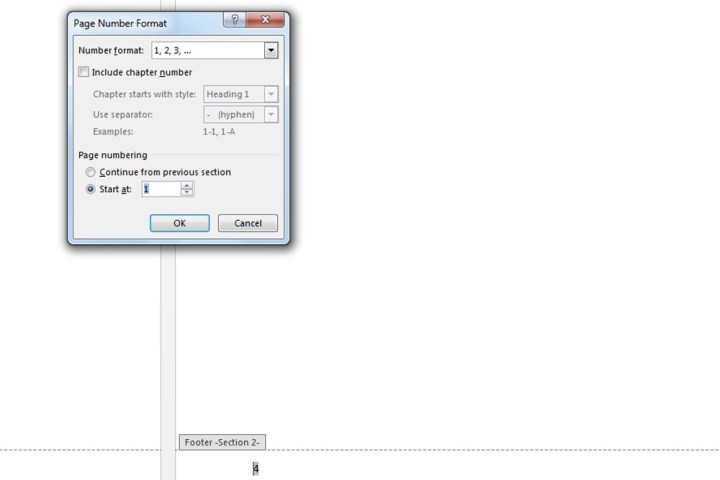
The Start at box within Page Number Format in Microsoft Word.
Image used with permission by copyright holder

Step 5: The footer sections will still be opened for editing. On the previous page, highlight the page number (in this case, the third page will have the number 3) and delete it, after which all previous page numbers before that specific page will be automatically removed.
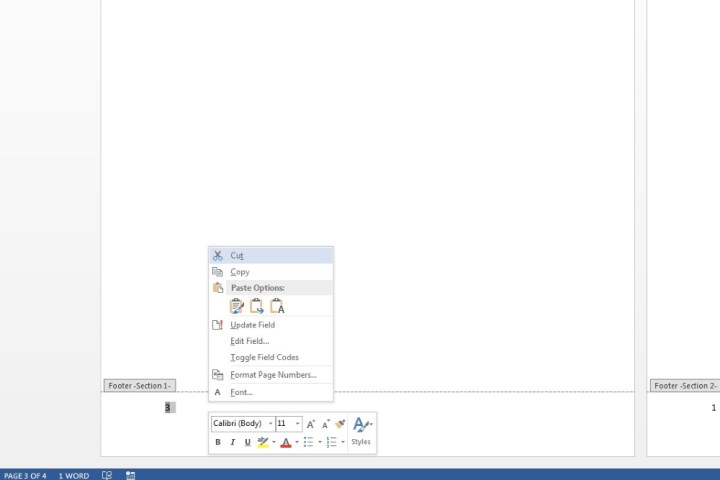
Deleting a page number from the footer in Microsoft Word.
Image used with permission by copyright holder

How do I remove the page number from a specific page?

To remove a specific page's number, select the page, then navigate to Insert > Page Number and select Remove Page Numbers.

If you find that the "Remove Page Numbers" option isn't available, or is grayed out, double click/tap the header or footer location of the number and then try again.

How do I show total page numbers in Word?

If you want to show the current page number and the total number of pages, you can do so when adding the page numbers to your document. After selecting Insert > Page Numbers, and choosing your location, you'll be presented with a number of style options.

Find the subheading "Page X of Y" and select the style of number you want within that subsection. It will then display the current page number and the total number of pages, as "Page X of Y."

Organizing page numbers in Microsoft Word is straightforward, and they can be positioned in the header or the footer, and styled appropriately. Whether you have page numbers displayed or not, inserting a table of contents will still work, although it might be tricky for the reader to find the right page.

Note that if you delete a page from the Word document, the page numbers will automatically update to accommodate this.

Zak Islam
Former Digital Trends Contributor
Zak Islam was a freelance writer at Digital Trends covering the latest news in the technology world, particularly the…
How to password protect a Word document
Word resume on a MacBook on a table.

Microsoft Word is suitable for creating all manner of documents. But it doesn't matter if you use Microsoft Word to create shopping lists or legal documents, you might want to protect the file from prying eyes.

Password protecting a Word file is a great way to add an extra layer of protection to your documents with sensitive data inside. It won't make it fullproof, but it will make it much harder for anyone to look at the contents of your files without finding out the password first.

Read more
Best Microsoft Office deals: Get Word, PowerPoint, and Excel for free
Students using Microsoft Office software on their laptops outside.

While the fight between Microsoft vs. Google might last forever, if you're in the Microsoft ecosystem, then you know that it can be pretty hard to get your hands on cheap or free versions of Microsoft Office. While there is a free trial of Microsoft Word, that's only a partial solution, and it doesn't give you access to the wider Microsoft Office suite. That said, you can find some solid deals out there, and while the deals aren't very steep, they're a good opportunity to save a little extra when buying the software.
Best Microsoft Office deals
Microsoft Office is a pay once, receive once service. You don't have to pay recurring monthly fees to use it, but the software also never updates. For what it's worth, the Microsoft Office packages are labelled "2021", so they're all fairly recent but also ripe for a good deal. With the exception of AI integrations, not much has really changed in the past couple of years when it comes to your basic document creation and these programs should continue to be effective for years to come. Depending on what package you get, you'll get access to different apps, based on the needs of the target audience. For example, Microsoft Office Home & Student 2021 keeps it lean and cool and with Microsoft Word, Microsoft Excel, and Microsoft PowerPoint being the only apps included.

Here are our favorite deals for the classic Microsoft Office experience:

Read more
How to remove a page break in Word
Working From Home

Think you know how to use Microsoft Word but can't work out how to remove an inconvenient page break?

Don't worry, you do have options. In some cases, you can the break outright, and in others, you can adjust your page break so that it doesn't interfere with the flow of your text. And we can show you how to handle either instance in a few quick, hassle-free steps. Let's take a closer look at how to remove a page break in Word.

Read more