If you own a Mac, one of the best ways to take advantage of the built-in Music app is with Smart Playlists. These are automated song libraries that will periodically update, based on criteria you select when building this special playlist. It’s totally free to make a Smart Playlist, and there’s no cap on how many you can have either.
To help you out, we’ve put together this guide to teach you how to build and customize a Smart Playlist.
Create a Smart Playlist in Music on Mac
Open the Music app on your Mac to get started.
Step 1: Select File > New from the menu bar and pick Smart playlist in the pop-out menu.
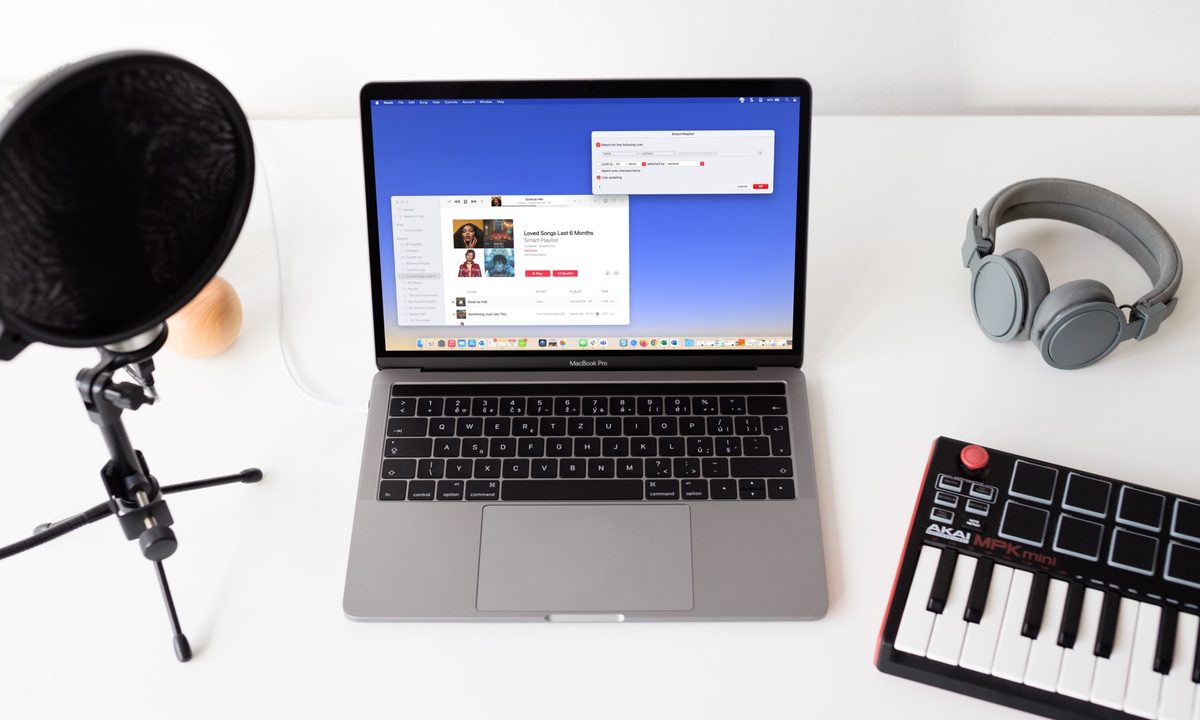
Step 2: When the Smart Playlist setup window opens, check the box at the top for Match the following rule. This is where you choose the criteria for your playlist.

Step 3: Use the first drop-down box on the left to select the first condition. You can pick from many options, like artist, date added, genre, love, purchased, year, and more.

Step 4: After you make that selection, use the drop-down box to the right to pick from options like Contains, Begins With, Is After, Is Not, or another option. These choices vary depending on what you choose in the first drop-down box.

Step 5: Next, you may need to add an item to the text box, drop-down list, or calendar that appears on the right. This also depends on the previous two selections.
For instance, if you choose Artist > Contains, you’d enter the artist’s name. Or, if you pick Date added > Is before, you’d enter the date.

Step 6: Once you have the criteria for your playlist, you can add another condition if you like. For example, you may want a list with your favorite artist and songs that are added after a certain date.
Select the Plus sign on the right side of the first rule to add a second one. Then, use the drop-down and subsequent boxes to set it up, just like the first one.
Next to the checkbox at the top, choose Any or All to match any of the conditions or all of them.

Step 7: After you have all of your criteria added, you can optionally check the boxes for the other items for your playlist. You can limit the number of items in the playlist and how they’re selected, match only checked items, and enable live updating.
When you finish, choose OK to save your Smart Playlist rules.

Step 8: You’ll then see your playlist in the main section of the Music app. Enter a name in the Playlist field and press Return. You can then play your new Smart Playlist right away.
As you continue to listen to, purchase, or add new items in the Music app, those that match the rules you set up for your Smart Playlist will be automatically added to it.

Access or edit your Smart Playlist
Listening to or making changes to the rules for your Smart Playlist is just as easy as setting it up on Mac.
Step 1: You can access and play your new Smart Playlist any time by selecting it in the Playlists section of the left-hand menu in the Music app.

Step 2: If you sync the Music app with your iPhone or iPad, you’ll also see the Smart Playlist in the Playlists section of the Library on those devices as well.


Step 3: If you want to make changes to the playlist, you can do so in Music on Mac. Select the playlist and choose Edit rules below the playlist name on the right.
You’ll then see the rules you set up initially. Make any changes you like and choose OK to save them.

Why is my Smart Playlist empty?
You go to open your Smart Playlist, but all its songs and albums are missing. No worries: You may have accidentally clicked a button you didn’t mean to when building the playlist in the first place. This is a pretty easy fix, too.
Start by heading into your Smart Playlist settings. If you’re using any kind of “match all” or “match any” filters, you should try resetting them; even if they appear to be set correctly. In many cases, this might be enough of a refresh to put your Smart Playlist back together.
What is a Genius playlist?
Unlike a Smart Playlist, which leverages user settings to automatically add songs, artists, and albums to your Music app, a Genius playlist is a list of songs that Apple’s Genius tool uses to group similar songs together.
To make a Genius playlist in the macOS Music app, simply start playing a song. Then click File > New > * Genius Playlist*. Music will then start automatically building a playlist of similar-sounding material.
Genius Shuffle is another extension of the Genius tool. If you can’t even decide what genre of music you feel like listening to, Genius will pick a random song, and then pair it with similar-sounding songs.
Now that you know how to create a Smart Playlist in Apple Music for automatically updating music, take a look at how to share your Apple Music library.