If you've ever gotten dinged or notified about something from a site while browsing the web, you probably wanted to know how to turn off notifications in Chrome. They can be super annoying, especially if you accidentally allowed one. The pop-ups asking for notification allowance are small, you might click through them without noticing. Similarly, if there is a website where the notifications would be useful and you've reflexively turned off Chrome notifications for it, you'll likely want to learn how to turn on Chrome notifications for that site again.
Turn off (or on) all notifications in Chrome
Use the following steps to turn off or on all website notifications on Chrome.
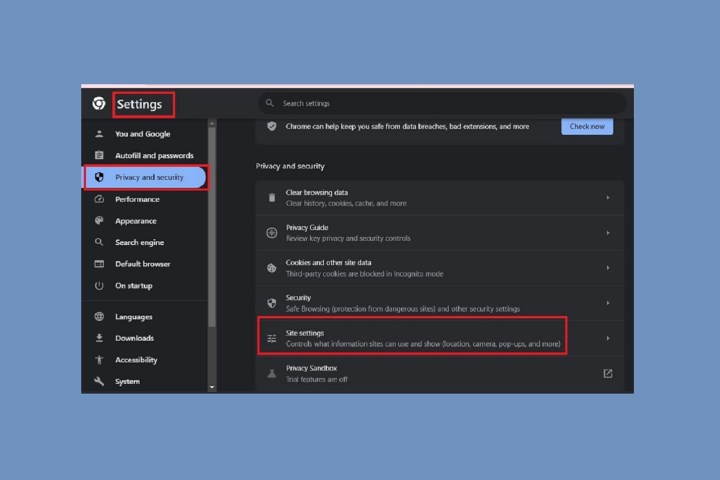
Step 1: Notification controls vary based on what system you’re using. If you have a Windows-based machine or a Mac, then start by opening Chrome and selecting the Chrome Menu icon, which is located in the upper-right corner and looks like three vertical dots.
Step 2: Go to Settings > Privacy and security > Site settings, then navigate down to and select Notifications.
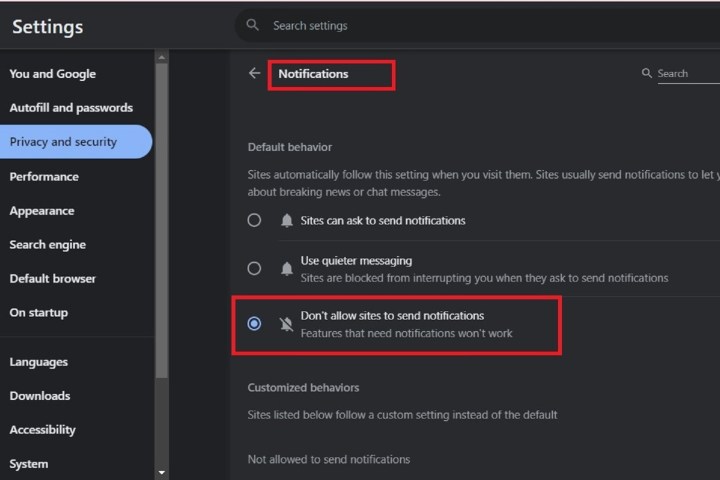
Step 3: From there, you can choose from three main options:
- Sites can ask to send notifications
- Use quieter messaging
- Don't allow sites to send notifications
To turn off all notifications, select the Don't allow sites to send notifications option.
Step 4: If you are on a Chromebook, you don’t need to worry about opening the browser. Instead, go to the status area in ChromeOS, where your account icon is.
Step 5: Select the Notification next to the clock — it can look like an app or extension resembling a bell in the bottom-right corner next to the clock. Any notifications you have waiting will pop up, and if not, you will see a message reading “No Notifications.”
Step 6: Select the Settings icon resembling a gear from the pop-up window, locate an app or notification in the list and deselect the box next to it. If updates are required for an extension or app, the entry will remain, but the box will be unchecked. User permission is required for the first time the new version of the program loads.
Turn off individual website notifications in Chrome
Any notifications already allowed can also be managed. Changing the settings is easy, and every website with notifications will be listed.
Step 1: Open Chrome and go to Settings > Privacy and security > Site settings > Notifications, as we did in the previous section.
On the Notifications screen, select the Three dots icon in a listed website’s entry to change the options for any listed site.

Step 2: The options are different depending on which section the listed website is in: Not allowed to send notifications or Allowed to send notifications.
If the website is listed under Not allowed to send notifications, your options will be: Allow, Edit, or Remove.
If the website is listed under Allowed to send notifications, your options will be: Block, Edit, or Remove.
Step 3: If you want to add a new website to either of those sections, select the respective Add button on the right side of the page, and use the text box that appears to enter the web address.
Adjust notification settings from a site
When you allow or block permissions for specific sites, these settings will be applied instead of the default settings — you can also remove data for a site if you want a fresh start.
Step 1: When you open Chrome and go to a website, select the icon you see to the left of the web address bar — either Lock, Info, or Dangerous.
Step 2: Select Site settings to edit a website’s permission settings, and any changes on the Settings screen for that website will be automatically saved.
You'll need to reload the webpage to apply the new settings though.
Turn specific notifications off and on in Chrome
Not all notifications are bad. There’s a good chance that you may want a few for your favorite websites and services. You will note that there was an option to decide whether Sites can ask to send notifications among the choices we listed earlier in this guide. When this is activated, a site must always ask permission, and you can say “no” to the sites you don’t want to hear from.
If you’ve already given sites permission to push notifications, this won’t help much. Most people don’t realize that you can adjust the Android and ChromeOS properties to turn off these preexisting permissions. Fortunately, it’s easy if you know where to look.
Step 1: You can use this method using Chrome on any Android device. Just look for the Lock icon beside the address bar on any website. Select it to access a pop-up menu, from which you'll then choose Permissions > Notifications.
On the next screen, toggle on or off the Show notifications setting.
Step 2: Chromebook devices make all alerts and notifications visible on the bottom right-hand corner of their screens, facilitating the ease with which you can choose the notifications you want to silence versus the ones you activate.
Select the Settings icon, which looks like a gear. The Settings icon brings up a list of apps, extensions, and websites using notification alerts. Here you can easily deselect any notification that you don’t want to see going forward.
Editors' Recommendations
- The most common Microsoft Teams problems and how to fix them
- The most common GoTo Meeting problems and how to solve them
- How to keep your laptop battery healthy and extend its life
- The most common Zoom problems and how to fix them
- How to schedule an email in Outlook for Mac, Windows, and web