Browser cookies may have a bad reputation for helping companies track us online and enabling intrusive advertising, but they’re also a core component of how many modern websites function. Without them, you would have to log in to every website each time you visit, which can be a real pain.
Although you can block third-party cookies, or tracking cookies, to help prevent targeted advertising, first-party cookies are mostly for convenience. Despite what your antivirus software might report, they’re not viruses or malware.
Most browsers enable cookies by default, and we certainly don’t suggest you allow them to store any personal information if you’re using a public or shared computer. If they’re disabled and you want to learn how to enable cookies, however, the process is pretty straightforward, no matter which browser you use.
Google Chrome (v83)
Step 1: Launch Chrome and click the button with three dots lined vertically in the top right corner. Alternatively, you can type chrome://settings/content/cookies into the address bar, press Enter, and skip to Step 6.
Step 2: Click the Settings option listed on the drop-down menu.

Step 3: On the following page, click Privacy and Security listed on the left. This automatically scrolls you to these settings on the right.
Step 4: Click Site Settings.
Step 5: Next, click Cookies and site data.
Step 6: You’ll see a toggle next to Allow sites to save and read cookie data. Click it to enable (or disable later if needed).
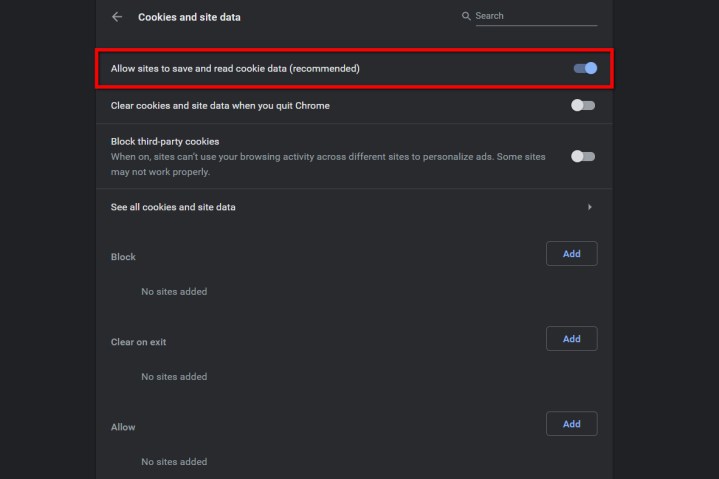
You can block and allow cookies on specific sites or block third-party cookies if you want a more nuanced implementation than an internet-wide cookie acceptance.
Mozilla Firefox (v77)
Step 1: Click the icon with three horizontal lines located in the top right corner. Alternatively, you can type about:preferences#privacy into your address bar and press Enter then skip to Step 4.
Step 2: Click Options listed in the drop-down menu.

Step 3: The General category opens by default. Click the Privacy and Security category listed on the left.
Step 4: Under Enhanced Tracking Protection, select Standard. This setting enables general cookies but blocks cross-site tracking cookies. Strict does something similar, though Firefox warns that this setting may break some sites.
If you select Custom, however, you can manually enable and disable cookies. Moreover, this setting provides four options in a drop-down menu.

While you’re here, you can scroll down to Cookies and Site Data to block cookies from specific websites (via the Manage Permissions button). You can also have Firefox delete cookies when it closes.
Microsoft Edge (v83)
Step 1: Open the Edge browser and click the three-dotted icon located in the top right corner.
Step 2: Click Settings at the bottom of the drop-down menu.
Step 3: Click on the Site permissions tab on the left-hand side of the screen.
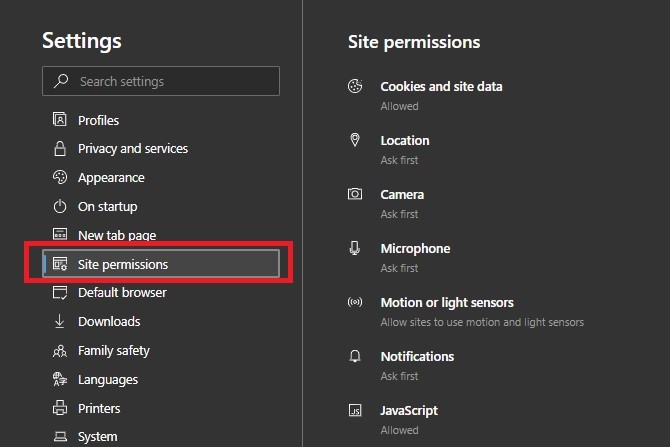
Step 4: Under Site permissions, click on Cookies and site data.
Step 5: Click on the toggle button next to Allow sites to save and read cookie data to enable cookies in Edge.

Safari (v13)
Step 1: Launch Apple’s browser and click Safari listed next to the Apple icon on the menu bar.
Step 2: Choose Preferences from the drop-down menu.
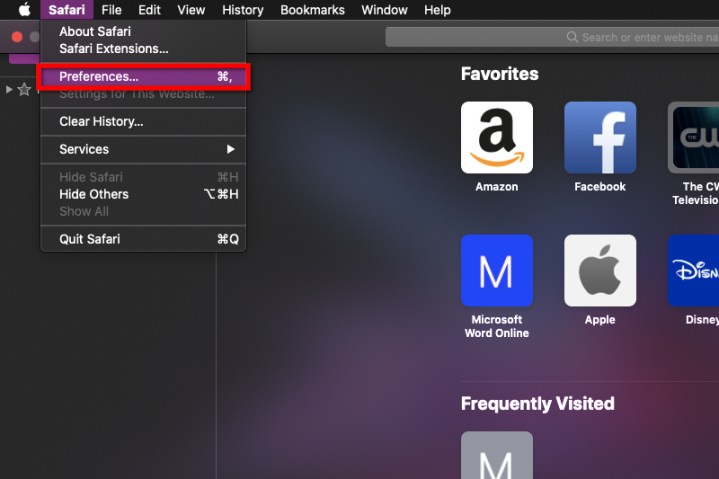
Step 3: The Settings panel appears on your screen. Click the Privacy tab.
Step 4: Be sure the box next to Block all cookies is not checked.

If you don’t want cookies used to follow you across the internet, enable Prevent Cross-Site Tracking. If you want to manage specific cookies and data, click the Manage Website Data button.
Opera (v68)
Step 1: Click the red Opera logo located in the top left corner.
Step 2: Click the Settings option listed on the drop-down menu.

Step 3: Click Advanced to expand the menu on the left.
Step 4: Click Privacy & Security on the expanded menu followed by Site Settings on the right.

Step 5: Select Cookies and Site Data on the following page.
Step 6: Make sure the Allow Sites to Save and Read Cookie Data setting is toggled on (blue).
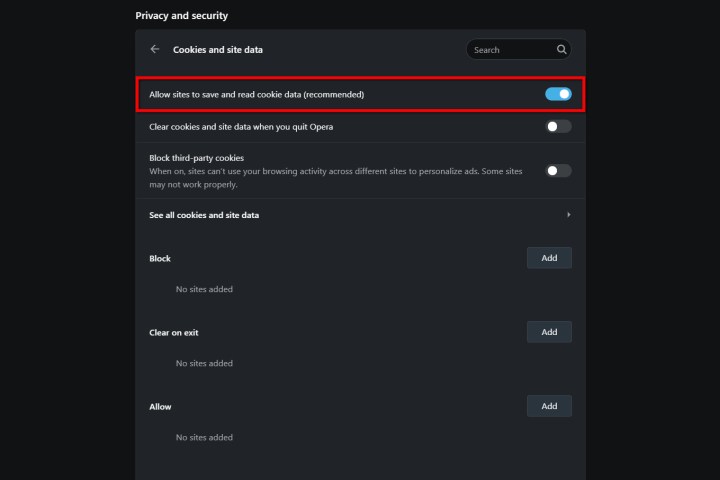
Here’s the shortcut you can insert into the address bar: opera://settings/content/cookies
If you want additional options, you can store cookies until you quit a browsing session, block third-party cookies only, or select which sites can use cookies.
Editors' Recommendations
- 9 best 2-in-1 laptops in 2024: tested and reviewed
- How to clean a laptop keyboard without damaging the keys
- How to clean a laptop screen without scratching it
- How much RAM do you need for a laptop, gaming PC, or tablet?
- Here’s how to choose the right printer to buy in 2024