
Keeping your Microsoft Teams status as "Active" can be a stressful experience if your boss is constantly looking over your shoulder. It might not be the most common Teams problem, but it's one we've all experienced at some point. While you might be getting on with something productive, if the person in charge doesn't know that and doesn't take kindle to "Busy" statuses, you may want to try some tricks to keep your status active when using Microsoft Teams.
Fortunately there are a number of ways you can do that, from the honest and transparent, to the slightly sneaky. No judgement here. You do what you need to do. We're just here to teach you how to keep your Team status active.
The bad news is there are no settings in the Microsoft Teams app to keep your status as Available when your computer goes to sleep. The good news is there are ways to prevent that from happening, no matter if you use Windows or Mac. But first, you should learn about User Presence.
User Presence
The first step to keep Microsoft Teams active is to understand the aptly named User Presence choices. These are pre-set statuses that identify what you're up to for other team members. It also informs Microsoft's AI engine, CoPilot, what you're doing so it can help you with your other tasks.
CoPilot can also automatically assign User Presence status depending on what you're doing. For example, if you have a meeting scheduled in your Outlook calendar, CoPilot will automatically set your status to In a Meeting. Little tricks like this are actually extremely helpful for some people.
Here are all the User Presence statuses:
- Available
- Out of office
- Busy
- In a meeting
- On a call
- Focusing
- Away
- Offline
- Do not disturb
- Be right back
- Offline
Not all of these statuses will be available to everybody. Your organization can choose to limit some statuses. However, most of them are standard. CoPilot will attempt to notice what you're doing and set your User Presence accordingly.
You can choose a duration for any of these statuses, at which point you will default back to Active, or Away. However, while they are enabled, you won't default to those, so manually setting your status can be a good way to give you a few minutes or hours without worrying about your status changing depending on what you are (or are not) doing.
Remember, while keeping your status active might be tricky, it's straightforward to set an "out of office" message in Microsoft Teams.
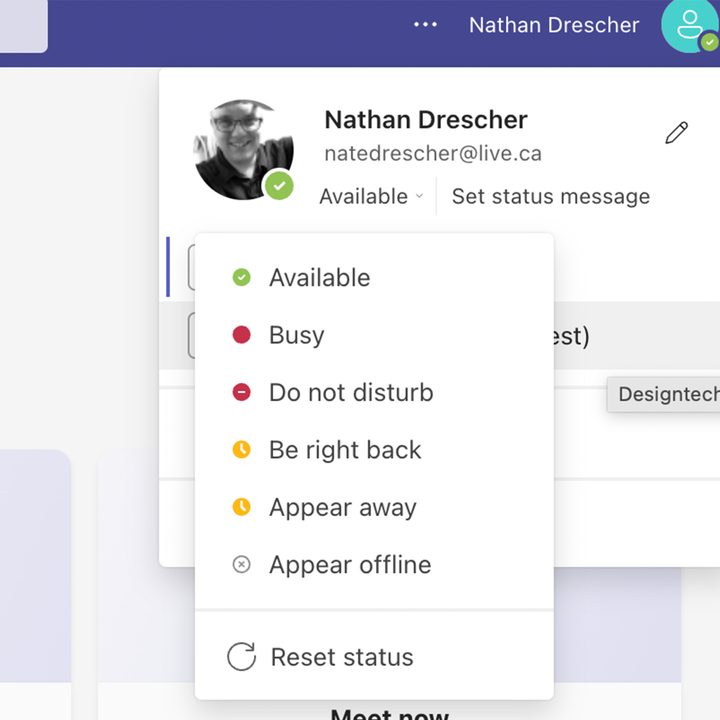
Set your User Presence to Available
The first thing you need to do is set your User Presence to Available. This is the only way to keep your status active if you are using Microsoft Teams online app, rather than the installed option.
Step 1: Click on your Profile picture on the top right of the Teams screen.

Step 2: Click on your current status.

Step 3: Choose Available from the drop-down.

Change power settings to always appear available
Microsoft won't let you directly tweak your Teams status settings, so you'll need to use some workarounds. One of the easiest ways is change your computer's power settings so it never goes to sleep. The only drawback to this method is if you forget to change the setting back once you're finished using Teams for the day.
Step 1: On Windows, open the Settings menu by pressing the Windows + I keys or searching for "settings" in the Windows search bar. Then select System.
If you're on a Mac, open System preferences > Battery.
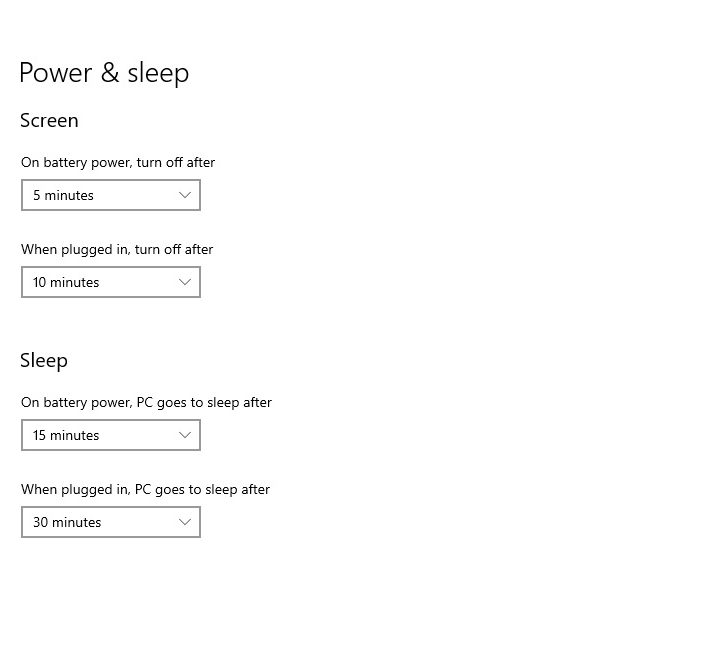
Step 2: On Windows, select Power and battery > Screen and sleep. You can adjust when your system goes to sleep when plugged in and when on battery. Either turn off the sleep setting to make sure that Teams doesn't automatically set you to Away or at least limit it to only engaging after an extended period of time.
On Mac, select Power adapter and adjust the slider under Turn display off after. If you're on a MacBook, then select Battery and do the same thing.

Install Caffeine on Windows to keep your Team's status active
Windows users can install a fantastic little app called Caffeine to keep their computer awake and their Teams status active. Caffeine works by simulating a key press every 60 seconds so your system thinks it needs to stay awake because you're still plugging away at the keyboard.
The best thing about Caffeine is how unobtrusive it is. It sits in the bottom-right of your screen, minding its own business, and you can turn it on or off depending on your needs.
Step 1: Go to the official website and download the Caffeine app.
Step 2: Extract the download from your downloads folder.
Step 3: Double-click the extracted program to launch Caffeine and run through the installation process with the on-screen wizard.
Step 4: Once it's installed and running, Caffeine will appear on the bottom-right of your toolbar. Hover your mouse over the icon, and a pop-up will appear where you can choose how long to keep it active.

Install Amphetamine for Mac to keep Teams active
If you're working with a Mac, you can install a handy toolbar app called Amphetamine. This small app will keep your system from falling asleep for a set period of time, thus keeping your Microsoft Teams status active.
Step 1: Open the Mac app store.
Step 2: Search for "amphetamine."
Step 3: Click Get on the Amphetamine app.
Step 4: Open Launchpad and click on the Amphetamine app once it is installed. It will automatically appear on the top toolbar.
Step 5: Click on the app's toolbar icon to reveal a drop-down. Select the length of time you want to keep your Mac awake.
Microsoft may not offer any direct ways to keep Teams active, but there are a couple of workarounds you can use. Whether tweaking your computer's settings so it doesn't go to sleep or installing a third-party app such as Caffeine or Amphetamine, there are easy ways to keep your status active on Teams.
If you run into any issues with Teams, we also have a guide on the most common Teams problems, which might have the fix you need.
Frequently asked questions
How do you keep your Teams status green?
Manually setting your Teams status as 'Available' (green) and keeping your computer active via the techniques above should work if you are near the computer. However, if you are paranoid about your settings or have a boss that will never accept anything less than a green Teams status, finding a way to keep your computer active at all times will help in a pinch. Two popular techniques are to keep your mouse moving constantly (such as by connecting it to a massager) or to put a heavy book on your spacebar with a Notepad document open.
How do I appear busy on teams?
You can try setting your status to "Busy." That will stay that way until you say otherwise and will make sure that you won't automatically switch back to "Away," or "Active." However, if you give it a set duration, you will need to return and make some more changes to your system to prevent it switching back to "Active" at the end of that time period.
How do you keep Microsoft Teams active on iPhone?
If you want to keep Microsoft Teams active on your iPhone, you need to keep the app open and focused. Updating your power and screensaver settings to allow your screen to stay active for a longer amount of time (without user interaction) can help you greatly in this regard.
Is there a Microsoft Teams keylogger?
All of this staying available stuff won't help you much if there is a Microsoft Teams keylogger. Fortunately, there is no Teams keylogger. However, you may be surprised at home much your boss can spy on you in Teams.
As a general rule of thumb, if you do it in Teams, your boss might have permission to see it. So, if you have to risk it and badmouth your mouth with a coworker, do so somewhere else, like a Discord chat.