
How to make an Administrator user account in Windows 8

Not having Administrator access in Windows 8 can be extremely frustrating. Without admin access, performing many tasks in Windows 8 can be a pain, and unless you have the password written down somewhere, you’ll end up calling the initial account administrator to type it in for you every time you need to do something that requires you to have it. The key to total PC user freedom is having an account with administrative rights.

Here’s our three-step guide on how to give administrator rights to a user account in Windows 8. Additionally, check out our guide on how to upgrade to Windows 8.1 if you have yet to install the newest refresh of Microsoft’s latest OS.

Windows 8 Settings

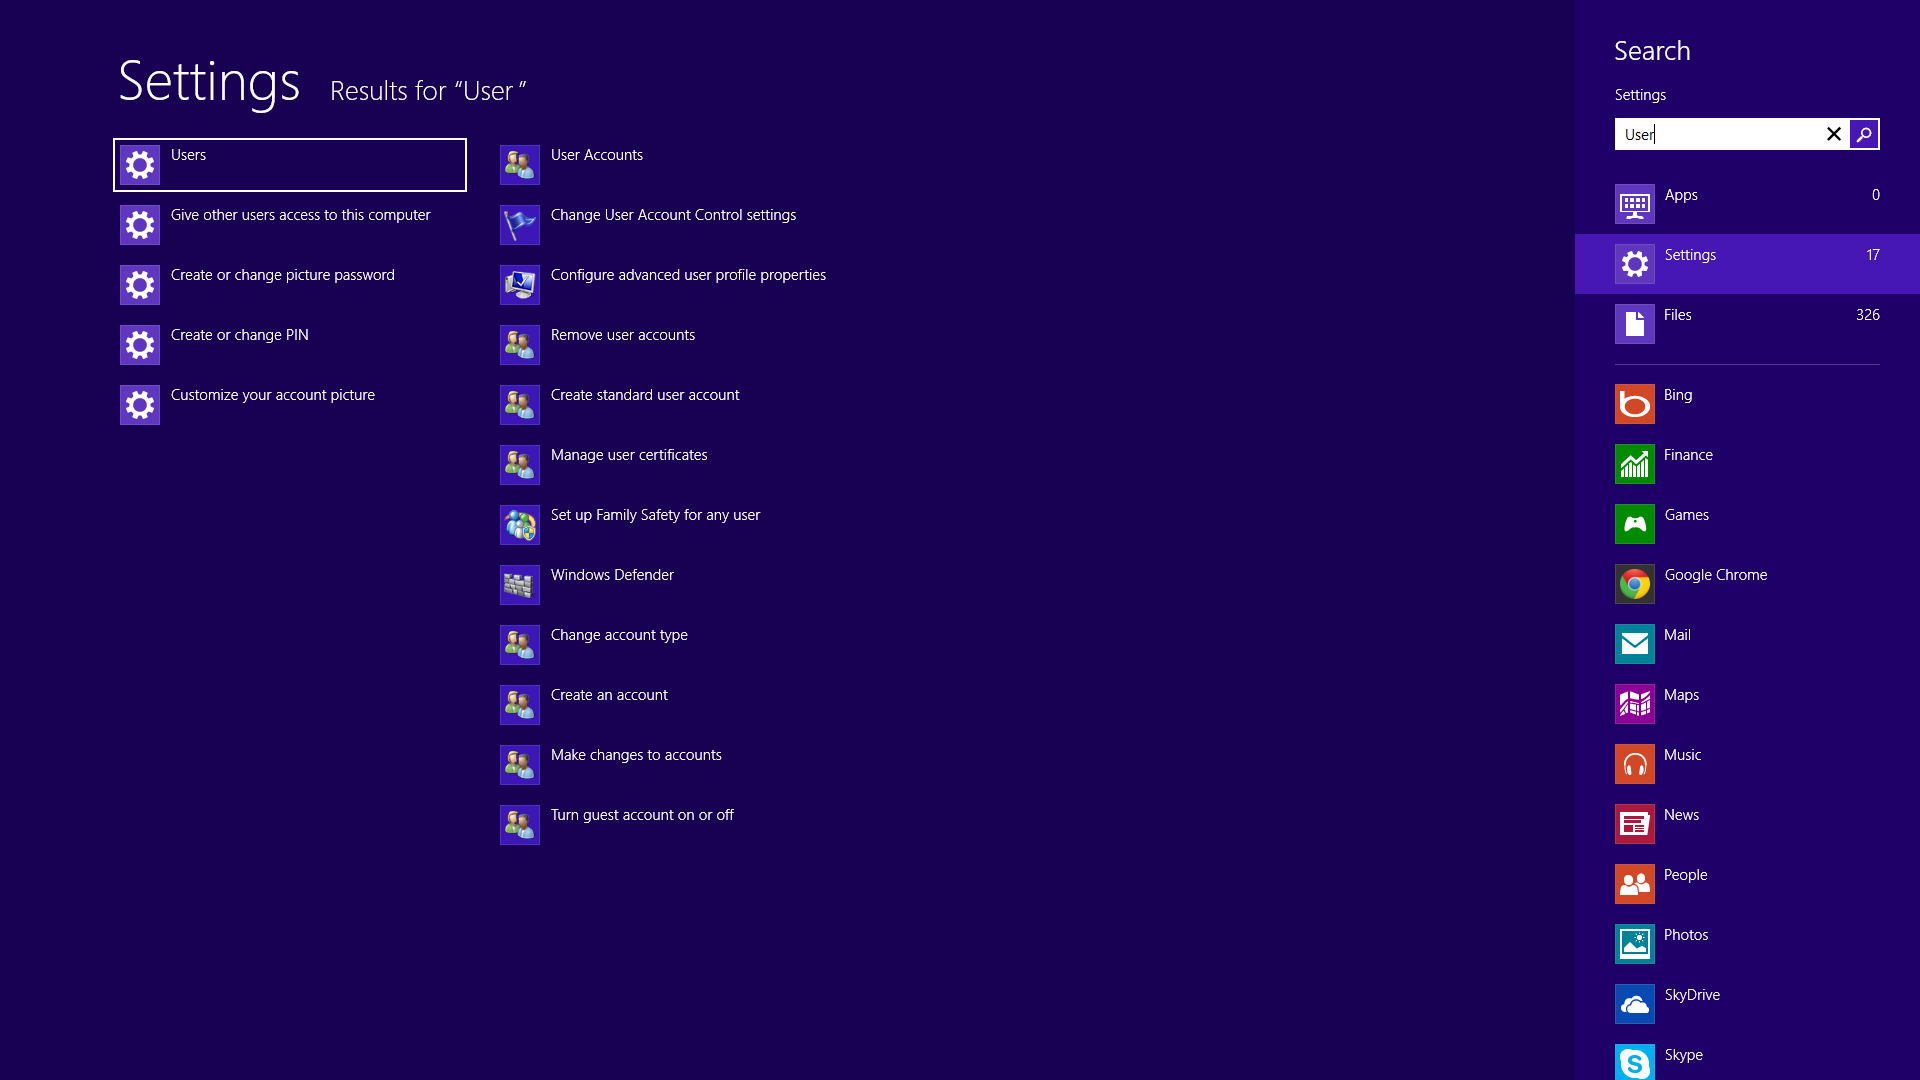
Step 1: Log on to your computer with an administrator account. Enter the Metro/Moudern UI and type “user”. Then, click Settings from the list on the right hand side of the screens.

User Accounts
Image used with permission by copyright holder

Step 2: Click User Accounts located at the very top of the second column.

admin_usersaccounts
Image used with permission by copyright holder

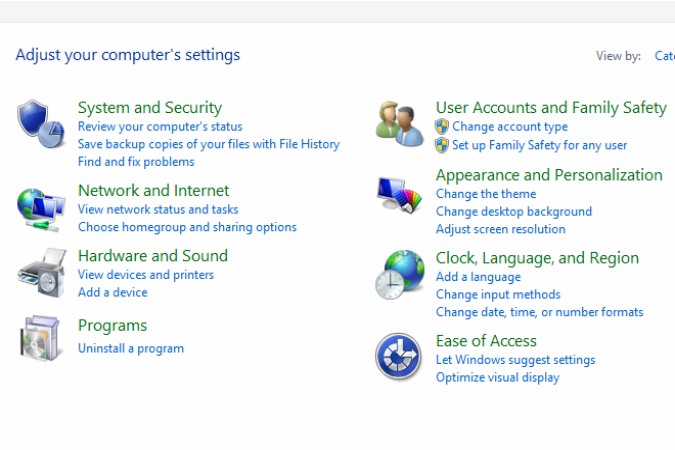
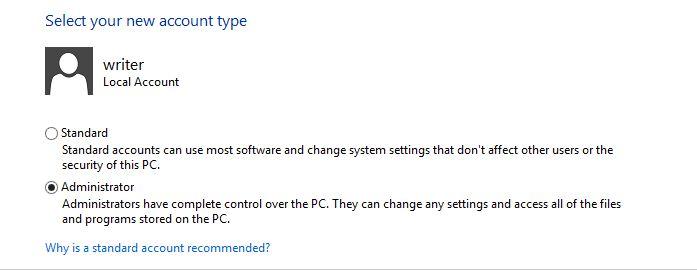
Step 3: Click Change your account type in the User Accounts menu, select the account you wish to change, and click the bubble directly right of the administrator option below the account type. Afterward, click the gray Change Account Type button at the bottom of the window, and once done, feel free to install any software or make any changes you deem appropriate with your new account privileges.

Admin rights
Image used with permission by copyright holder
admin_laststep
Image used with permission by copyright holder

Windows 8 launched Oct 28, 2012, and will be without a doubt the most divisive update to the operating system Microsoft has ever released. While other updates have rearranged, reskinned and retooled the desktop, Windows 8 is the first to push it away entirely and challenge the notion that a mouse and keyboard are necessary at all. It includes many new features which give users the opportunity to use Windows in different ways. A new interface, and new ways to interact with your computer, as well as new shortcuts, new menus and an entirely new class of apps, are all waiting within the new OS. All of these features can be useful, that is, if you know how to use them. Want to learn more? Explore 8 of our favorite Windows 8 tips and tricks.

Emily Schiola
Former Contributor
Emily Schiola is an editorial assistant at Digital Trends where she covers mostly social media and how-to pieces. In her…
How to uninstall Microsoft Edge on Windows 10
A laptop running Microsoft Edge.

Although the Chromium-based Microsoft Edge is the company's flagship browser, you may want to learn how to uninstall Edge. Perhaps you've run into problems with Edge that you're not sure how to fix. Or maybe you've never once used it, but it still keeps popping up occasionally. It doesn't matter that Edge, according to some, is now comparable to Google Chrome -- sometimes, you just want it gone.

No matter the reason, if you want to uninstall Microsoft Edge on Windows 10, it can be done. (However, uninstalling Microsoft Edge on Windows 11 is a little different.)

Read more
How to adjust display refresh rate in Windows
HP Laptop on table.

The refresh rate on your monitor refers to how many times the image on the screen refreshes per second -- 60Hz, 120Hz, 144Hz, etc. The higher the refresh rate, the smoother the image appears. While maximum refresh rate is an innate feature of the best monitor models, it can also be controlled on the software side.

This is where problems can creep in: If your Windows 11 PC’s refresh rate is mismatched to what the monitor or its resolution can handle, it can cause problems like stuttering. If you have recently upgraded to a monitor with a better refresh rate, you may also want to double-check that Windows is set to the higher rate for a smoother experience. If you’re on a laptop, you can even set the refresh rate lower to help conserve battery life.

Read more
How to use Windows 11 Snap Groups
Windows 11 on a tablet.

Windows 11 brings many new features to play with, and one of those is known as Snap Groups.

These are the groups that are saved when you create a layout via the Snap layouts feature in Windows 11. If you're wondering how that works, then we've got you covered with our Windows 11 guide on how to use Snap Groups.
Step 1: Create a Snap layout

Read more