You may have a photo, illustration, or other type of image where you want to keep the subject but remove the background. We’ll show you a handful of ways to do this in Photoshop so you can pick the best method for your image.
Because there’s more than one way to delete the background from an image in Photoshop, we’ll start by looking at a few of the simplest methods. These allow you to delete the background in just a few mouse clicks. We’ll finish by explaining methods that are somewhat time-consuming but give you more control.
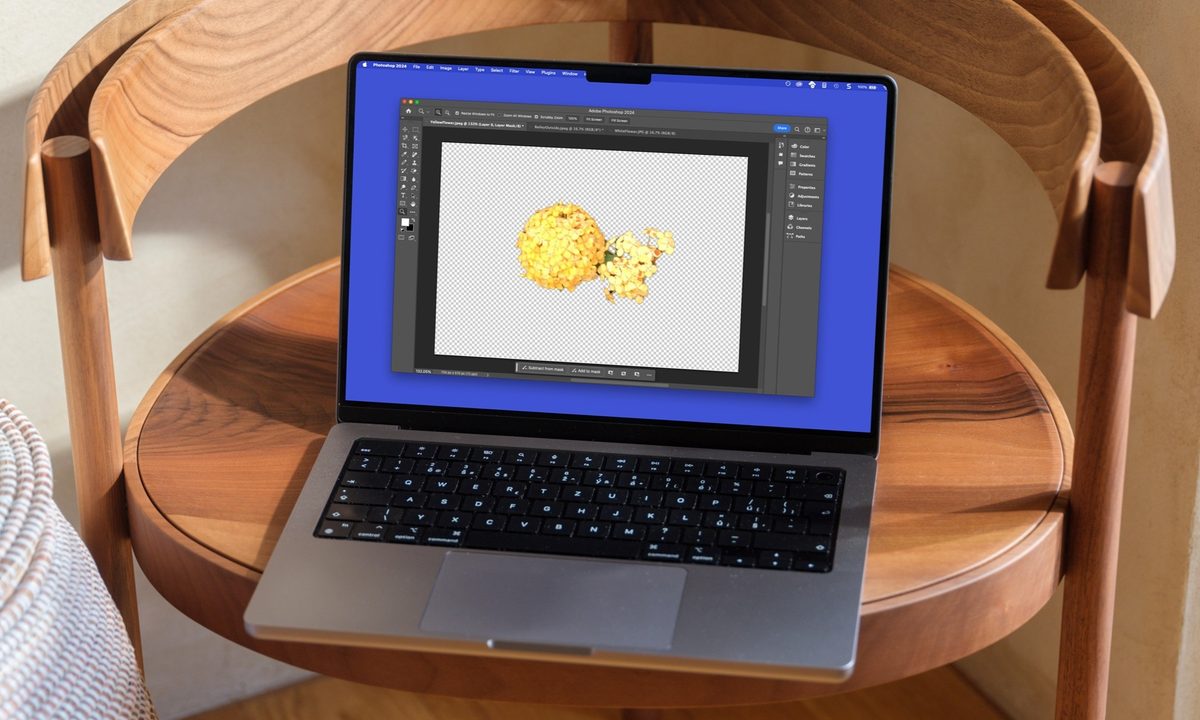
Use the Contextual Task Bar
One of the easiest ways to remove a background in Photoshop is using the Contextual Task Bar. This is a floating toolbar that displays near the bottom of the window by default. The tool shows the relevant steps or actions you may take on an image, making it a convenient option.
Step 1: If you don’t see this toolbar, select Window > Contextual Task Bar in the menu. You’ll then see it appear in the Photoshop window and can drag to move it where you want it.

Step 2: For an image that has a prominent subject, like in the photo below, you should see Remove Background.

Step 3: Expand the Panels on the right side if they’re hidden and in the Layers group, and select the padlock to unlock the layer.

Step 4: Choose Remove Background in the Task Bar, and your background should vanish.

Use the Quick Actions
Photoshop also provides what are called Quick Actions for removing or blurring a background, cropping or changing the image size, and more, making this another handy option.
Step 1: Expand the Panels on the right side if they’re hidden.
Step 2: In the Layers group, select the padlock to unlock the layer.

Step 3: In the Properties group, expand Quick Actions.

Step 4: Select Remove Background and you should see your background disappear.

Use the Object Selection Tool
Another method for removing a background in Photoshop is using the Object Selection Tool. This is a good way to go if the above methods don’t capture all of the background you want to delete.
Step 1: In the Tools Panel on the left, pick the Object Selection Tool.

Step 2: Hover your cursor over your image until you see the subject highlighted, then click.

Step 3: Go to Select in the menu and choose Inverse. You’ll then see the background selected as well.

Step 4: In the Layers group on the right, select the padlock to unlock the layer.

Step 5: Press the Delete key, and you’ll see the background removed.

Use the Magnetic Lasso Tool
If you want complete control over the background you’re removing, you can use the Magnetic Lasso Tool. It takes a bit more time but allows you to minutely trace your subject and include anything extra you may want to keep, as you’ll see in our example below.
Step 1: In the Tools Panel on the left, pick the Magnetic Lasso Tool. You can find it by right-clicking the Lasso Tool and selecting it in the list.

Step 2: Use your cursor to trace around your subject. You’ll need to drag slowly and use a continuous movement to connect the ending point back to the starting point.
Step 3: When you see the small circle at the connection points, release and you’ll see your subject selected.

Step 4: Go to Select in the menu and choose Inverse. You’ll then see the background selected too.

Step 5: In the Layers group on the right, select the padlock to unlock the layer.
Step 6: Press the Delete key and you’ll see the background disappear.

Use the Background Eraser Tool
This final method uses the Background Eraser Tool. Similar to the Magnetic Lasso method, this one takes a little time, but lets you remove the background by making it transparent.
Step 1: In the Tools Panel on the left, pick the Background Eraser Tool. You can find it by right-clicking the Eraser Tool and selecting it in the list.

Step 2: In the Layers group on the right, select the padlock to unlock the layer.
Step 3: Adjust the following settings in the Application bar at the top:
Choose a Brush Size. You may want a smaller size if your subject has a lot of detail on the edges or a larger size if you want to move through the process faster.
Select Sampling: Continuous, which is the icon on the left side of the group. This removes the colors that match as you drag. If you have just one color, you may choose Sampling: Once instead.
Pick Find Edges in the Limits drop-down menu.
Set the Tolerance by entering a percentage or using the slider. This determines how wide the color bracket is as you drag the brush across the image. You may choose a low amount like 25% to start and adjust from there.

Step 4: Drag your cursor (brush) around the subject of your picture to start. You should see the brush move smoothly around your subject’s edges and the background become transparent (gray and white checkered).
(Don't forget, you can install brushes in Photoshop for a more natural, textured result.)

Step 5: Continue to drag across the image to remove the remaining background.
FAQs
How do I select just the background in Photoshop?
Using Photoshop’s Discover tool, you can select a background easily. Pick the Search button (magnifying glass) on the top right. In the pop-up window, enter “select background” in the search box, hit Enter or Return, and choose Select Background when it displays in the results. You should then see your image background selected.
What’s the difference between eraser tool and background eraser tool in Photoshop?
The Eraser Tool is good for transforming pixels to the background color or making them transparent while the Background Eraser Tool eliminates pixels of the selected color. This makes the latter more effective for removing backgrounds.
What does magic eraser tool mean in Photoshop?
In the same menu as the Eraser and Background Eraser Tools, the Magic Eraser removes pixels based on their color values. You can click a spot in an image instead of dragging to delete neighboring pixels of the same color.
Photoshop is becoming more powerful thanks to its integrations with AI. Make sure you know how to use Photoshop's Generative Fill to enhance your projects.