Diagnosing the problem
Before you start drilling holes into your wall to run ethernet cables, you’ll want to identify exactly what the problem with your Wi-Fi connection is. No matter your preferred device, you have options for identifying potential issues with your network, and you’re better off testing the network with the device you’ll be using the most. Ideally, a laptop will show you the most detailed information and widest array of access to software, as well as allow you to identify relevant issues in problem areas.
On a laptop, inSSIDer is a great paid option for finding and solving issues. If it’s a priority to get your Internet working at full efficiency, the program is worth shelling out for, because it will show you nearby conflicting channels, identify problem devices, and help with blind spots and router placement. If you’re just trying to patch the holes, there are a few free software options that should get the job done. Acrylic Wi-Fi Analyzer has a free version that should be more than comprehensive enough for the basic user, displaying detectable networks and real time channel usage.
For Android, Wifi Analyzer is a free, well featured app that can show you networks and channels, as well as graph connection strength over time as you move about the house. As an added bonus, it runs on your tablet or smartphone so you won’t have to awkwardly carry your laptop around trying to test the signal.
For iOS, Apple actually has its own software available in the app store that lets you scan and view the information of available wireless networks easily, as well as see the channel spread for possible interference. The functionality is a bit hidden, but if you download the Airport Utility to your phone, and go into the global settings pane for the app, you can turn on the Wi-Fi scanner. Back in the app, simply tap Wi-Fi Scan in the upper right corner to see what networks are nearby.
Router placement
One of the easiest ways to improve your Wi-Fi signal strength is to move your router’s location to take full advantage of its signal strength. Walls, fish tanks, microwaves, even large pets can obstruct the signal, so it’s important to carefully consider your options and test different placements. There are a few consistent schools of thought behind router placement that you should start with.
Despite looking so nice sitting there on your bookshelf, if you want a stronger signal, it helps to flip your router vertically. If it has antennas that are bendable, you can simply turn them upward to improve the signal strength. If your router doesn’t have that feature, it nonetheless makes a big difference to point the back side of the router straight up. You can mount it to a wall to both raise the elevation and orient it correctly, but make sure you check the signal around the house before you screw it into the wall. This will also help elevate the router away from common sources of interference, like televisions and cell phones without having to worry about placing it in the right corner.
While your neighbors Wi-Fi signal may be interfering with yours (we’ll get to that in a minute) there are other devices that can easily get in the way of good connectivity. Cordless phones, baby monitors, and wireless speaker sets can all operate at 2.4 GHz and mess with your Wi-Fi signal if your router operates in that range (and most do). There’s an even greater number of common household devices that may hinder your access, and the list includes garage door openers, microwaves, car alarms, and Bluetooth devices, so it’s best to keep it away from any other electronics at all.
Conflicting channels
All Wi-Fi signals run on a set band of frequencies, and within that range there are a set of channels to prevent devices close together from using the exact same frequencies. These channels are easily changed in the router settings and are an easy way to avoid conflicts and boost your signal strength.
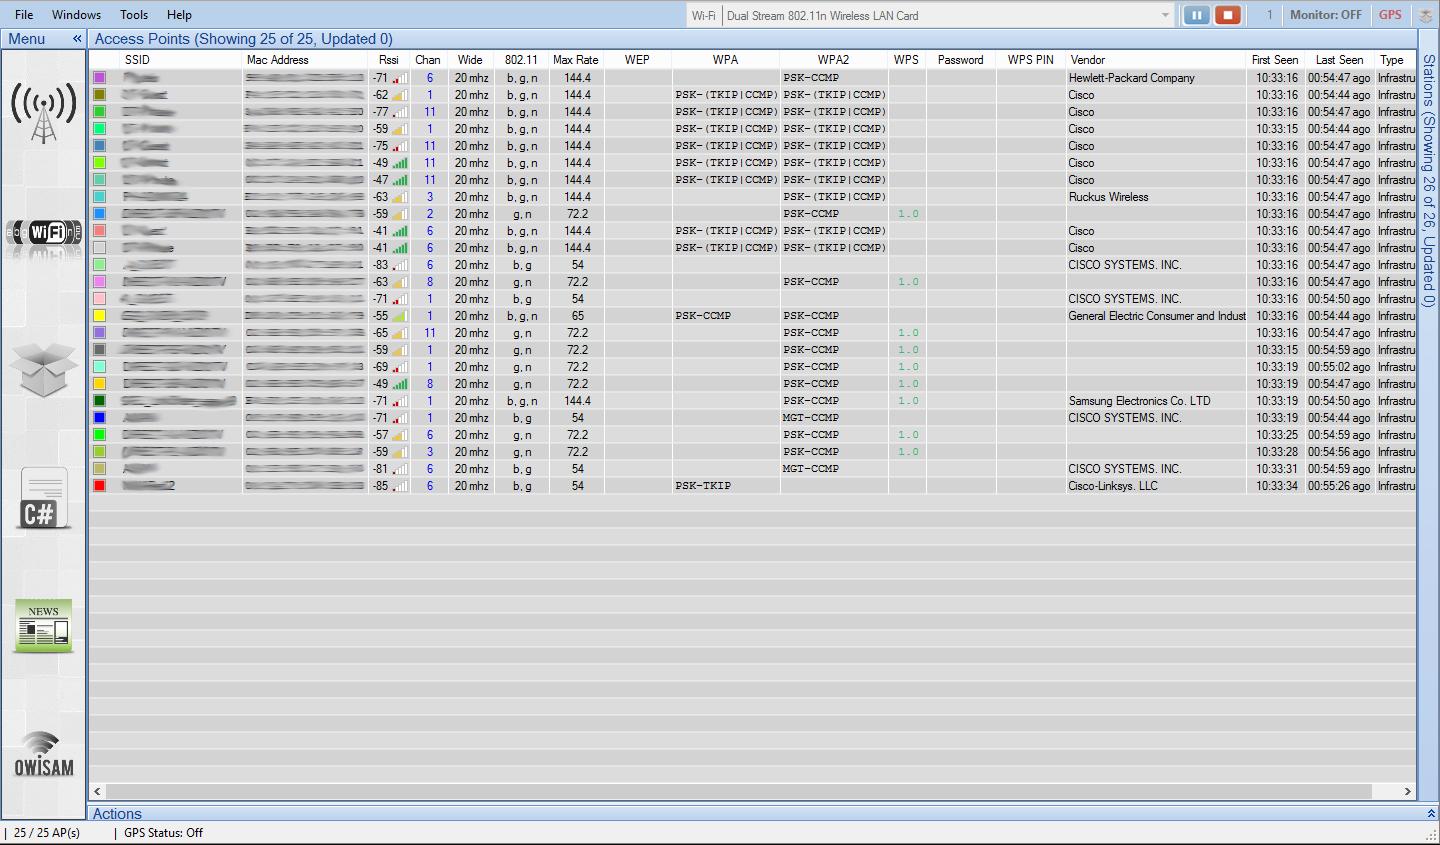
From the eleven channels available on standard Wi-Fi broadcasts, the most common default setting is 6, although higher-end routers may be set to automatically scan and switch to the most open channel at set intervals. Only channels 1, 6, and 11 don’t overlap at all with each other, but are usually the default channels for routers when they come out of the box. By running a scan you can find the range of channels that are the least used in your area, you can set your router to broadcast on the quietest frequency.

In the above example, you’d want to set your router’s channel to 3 or 4. While you have more interference at the outside ends of the spectrum, the bulk of it will fall at a point with relatively low use. If you take your laptop or portable device to where you’re having issues, you can identify interference at that exact spot and choose the right channel.
Hardware
If you’ve got a big house, or despite trying everything above you still can’t get a strong signal, you may need to look into setting up a wireless repeater or bridge. They’re sold for that explicit purpose, or if you’ve got an old router lying around you can put some new software on it. While a wireless bridge lets you catch a wireless signal and output it to a wired device, a repeater will take an existing Wi-Fi signal and rebroadcast it, either with the same name as the other network, or a separate one.
You might also consider a power-line adapter. If you have a spare wall slot near the router, you can plug an adapter into the wall, then run an ethernet cable to it. Running said cable to a network switch will make a single power-line adapter work with numerous desktops. The adapter runs network connectivity over the wires in your home, but you’ll need to plug them into the wall and not a power strip for them to work. They don’t have as high a theoretical speed as a Wi-Fi connection, but if you’re having issues that you just can’t get around, like concrete walls, it might be your only option. Depending on your Internet speed, you might not actually notice any limits on your speed because of it.
Editors' Recommendations
- Save $100 on this Netgear mesh Wi-Fi system at Crutchfield
- These TP-Link mesh Wi-Fi systems are up to 40% off right now
- What is packet loss, and how do you fix it?
- The 5 best Wi-Fi adapters for PC in 2024
- How to find your printer IP address and WPS PIN