Video-conferencing is a tool that is consistently growing. Whether you need to join a video call with your coworker or want to connect with family members who are far away, Zoom is a great option that’s easy to use.
- How to set up a Zoom meeting
- How to mute, stop video, and chat in Zoom
- How to share your screen on Zoom
- How to invite people to your Zoom meeting
- How to join a Zoom meeting
- How to update Zoom
- How to change your Zoom reaction’s skin tone
- How to raise your hand in Zoom
- How to use Breakout rooms in Zoom Admin Accounts
Zoom allows you to set up a video call with many participants, and it will enable you to be virtually present even though you are not physically there. This tool is valuable when you are working remotely.
In this guide, we show you how to get started. You can also check out some Zoom tips and tricks and discover how to troubleshoot issues that may come up with our guide to the most common Zoom problems and how to fix them.
How to set up a Zoom meeting
Zoom can be free to use with some limitations, like limiting meetings hosted via free accounts to 40 minutes for groups of three or more attendees.
Starting a Zoom meeting is easy enough. The first thing you need to do is to install the Zoom client on a PC.
Step 1: Go to the Zoom website and sign in to your account. If you don’t yet have an account, click on the Sign Up, It’s Free button in the top right corner and follow the on-screen prompts to create one. You can also click on Sign In and scroll down to sign in with your Google or Facebook account. Once you’re signed in, hover over Host A Meeting and then choose to create a meeting with one of three modes: With Video Off, With Video On, or Screen Share Only.

Step 2: Once you kick off your first meeting, the Zoom client will prompt you to launch your previously installed Zoom desktop app or prompt you to install the Zoom app. If it’s the latter, download and open the installer and follow the installation instructions. In this example, we hosted a meeting with the video already enabled.
Step 3: Another important first step is to test your audio and video. You’ll have this option each time you start a meeting. Click on Test Speaker And Microphone to kick off the process.

You’ll have the option to test and configure your speakers and your microphone. If either doesn’t work immediately, select the proper speakers and/or microphone from the drop-down menus provided.
Once you’ve confirmed that your audio is working, you can join the meeting.
Note: Once you install the Zoom desktop app, you don’t have to start meetings via the Zoom website anymore. To instantly start a meeting, open the Zoom app and click on the New Meeting button.
How to mute, stop video, and chat in Zoom

All the most important controls of Zoom are in the toolbar at the bottom of your screen. Need to mute your audio? Just click Mute in the bottom-left corner. Next to that, you’ll find Stop Video, which will turn off your webcam.
If you click on the Chat button, it’ll pull up the text chat for the meeting, where you can group message the other meeting attendees.
How to share your screen on Zoom
Sharing your screen is a useful feature if you’re giving a presentation or providing instructions. Start by clicking on Share Screen in the bottom toolbar. From there, you’ll see a menu of types of sharing you’d like to perform.
Under the Basic tab, you can choose to share your screen, share a specific app, share your iPhone or iPad display (if that option is configured), or create a whiteboard session. Creating a whiteboard session lets you collaborate on notes and drawings. Under the Advanced tab, you can choose to share things like a PowerPoint presentation as a virtual background (currently a beta feature), a portion of your screen, or even content from a second camera. And finally, the Files tab will let you share files from several cloud services like Google Drive or Dropbox. Once you’ve made your selection, click the blue Share button to share your screen.

Note that if you choose to share your screen, it’ll share your whole screen, so make sure you’ve tidied up your workspace a bit before showing it to the world.
How to invite people to your Zoom meeting
Since you created the meeting, you have control over a few features. First, you can invite participants to the meeting. To do so, click on the Participants button at the bottom of your screen and then click Invite on the right side of your screen. Under the Email tab, you’ll have a selection of email clients and services to distribute your invitation.

Here, we used the default client (Windows Mail). The email sent out will contain all the meeting information and how to gain access. Just add your desired recipient(s), and your chosen email service will take care of the rest.
Another way to invite people to your meeting is by sending them the meeting ID, shown at the top of the window. Look for a numerical code. Finally, at the bottom of the Invite People To Join Meeting window, you can click Copy Invite Link, which will give you the full link to share with others.
Once your meeting has started and you have participants, you can manage them. Click on More to see options for the entire session.
Click on the Participants button at the bottom of the screen, hover over individual participants listed in the sidebar menu that appears on the right side of the screen, and then click on More for participant-specific options like Ask To Start Video or Make Host.

You can record your meetings as well. To do so, click on the More icon and then choose Record on This Computer from the menu that pops up. Zoom will then record the session. A set of controls will show up on the upper-left portion of the Zoom interface. Hit the Stop button when recording has concluded. It will save your video as an MP4 once your meeting ends.
Once your meeting finishes, you can end the Zoom session. If you want to leave but keep the meeting running, you must assign a new host.
How to join a Zoom meeting
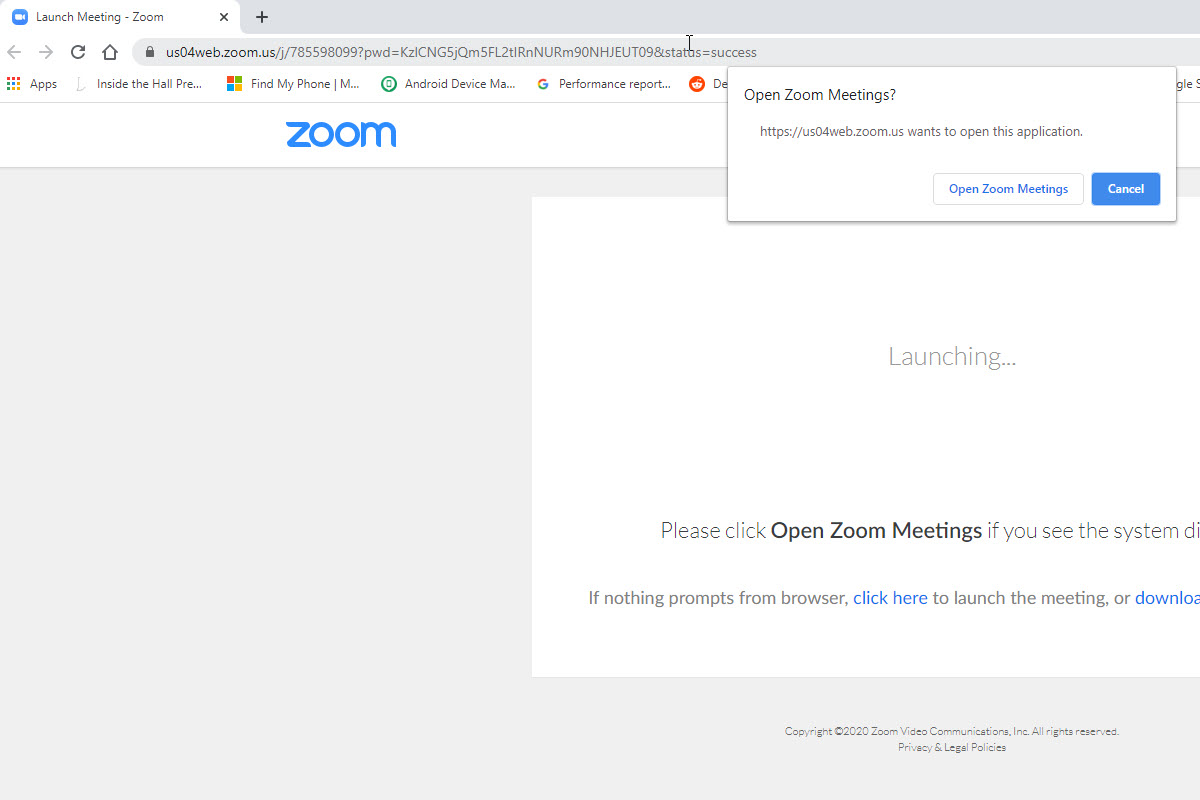
There are two ways to join a Zoom meeting. The host should provide either a link or a meeting ID. If it’s the full link, paste it into your web browser, and you’re on your way.
If you have a meeting ID, head over to Zoom.us/join. From there, paste in the meeting ID and click Join.
If you haven’t set Zoom up yet, then follow the same instructions as at the beginning of this guide. Once you get set up, you’ll have the same option to join the meeting with audio and to test and configure your audio settings.
Once you’re in the meeting, you’ll have similar options as the meeting host but without the administrative functions. You can kick off a chat, record the meeting, invite other participants, share your screen, and view a list of participants. You can also mute your audio and stop your video.
When you’re finished, click the Leave button in the bottom right.
How to update Zoom
Since Zoom is on the rise, with increasing popularity and utility, the company has been coming up with updates at a record pace to keep up with user demands and resolve problems as they occur. Whether you are the host of the meeting or just attending, having an out-of-date version can lead to issues, unnecessary annoyances, and wasted time for every group member. Fortunately, updating Zoom is a pretty simple task.
Anyone who has the Zoom client already installed can sign in to their account, click on their profile picture, and select Check For Updates. If there are new updates, you’ll be able to download and install them right away via the updates screen: Follow the on-screen prompts.
How to change your Zoom reaction’s skin tone
If you weren’t aware, Zoom offers two skin-tone specific reactions to use during meetings — a finger pointed upwards and hands clapping. Personalizing your Zoom reactions with skin tones can add a more personal feel to your meetings and better represent your identity in a digital workspace. All you have to do is sign into Zoom via your computer or phone.
After you have signed into your PC or Mac device and uploaded the picture you’ve chosen for your profile, you can then adjust your skin tone by going to Settings, clicking on General tab, and choosing one of six skin tone offerings presented. Mobile users should sign into the Zoom app and tap the Settings icon > Meeting > Reaction Skin Tone to change their reaction skin tone.
How to raise your hand in Zoom
The simplest and most successful method for calling attention to ourselves is a visual cue that we have been using since grade school: raising our hand. However, rather than needing to physically raise your hand and potentially interrupt the meeting, (and risk looking a little silly), you can perform the digital interpretation of it in the Zoom chat. Should the host give you the floor, you may be prompted to unmute yourself. While unmuted, your profile picture and name are displayed to the host and panelists. Only your name is displayed to other attendees.
Step 1: Click Raise Hand in the Webinar Controls that resembles a grey hand, which will notify the host that you’ve raised your hand.
Step 2: Click Lower Hand to lower it if needed. Note that if you are unmuted, this will not automatically mute you.
How to use Breakout rooms in Zoom Admin Accounts
As if it wasn’t challenging enough to deal with ten to twelve participants in a single meeting, Zoom offers breakout rooms that allow a host to organize and split up to 50 participants to encourage spontaneous chats that the host can switch between and modify at will. You can create a breakout room by hand or have one preset. This allows participants to break off and create individual sessions as needed. It should be noted that you will need to be the owner of the account or have admin privileges to use or modify the setting of breakout rooms.

Step 1: Log in to the Zoom web portal as the owner or admin with account settings editing privileges.
Step 2: Select Account Management > Account Settings from the navigation menu.
Step 3: From the Meeting tab, locate the Breakout room option and verify that the setting is switched on. Note that you may be required to verify the change to ensure the option is enabled. You can tick the box to let meeting hosts assign breakout room participants in advance and make the setting mandatory for all account users by selecting the Lock icon and confirming the setting.
How to enable Group settings for Breakout rooms
Step 1: Log in to the Zoom web portal as the owner or admin with account settings editing privileges.
Step 2: Select User Management > Group Management from the navigation menu.
Step 3: Select the name of a group and click the Settings tab.
Step 4: Locate the Meeting tab and check that the Breakout room option is enabled. Note that you may see this slider greyed out, indicating it has been disabled on the account level. You can tick the box to let meeting hosts assign breakout room participants in advance and make the setting mandatory for all account users by selecting the Lock icon and confirming the setting.
How to enable Group settings for Breakout rooms on individual accounts
Step 1: Log in to the Zoom web portal as the owner or admin with account settings editing privileges.
Step 2: Select Settings from the navigation menu.
Step 3: Locate the Meeting tab and check that the Breakout room option is enabled. Note that you may be required to verify the change to ensure the option is enabled.
Editors' Recommendations
- The most common Zoom problems and how to fix them
- Best refurbished laptop deals: How to find cheap used computers
- Copilot: how to use Microsoft’s own version of ChatGPT
- GPTZero: how to use the ChatGPT detection tool
- How your boss can spy on you with Slack, Zoom, and Teams