“Anyone looking for a compact, attractive 8MP point-and-shoot digicam should give this camera serious consideration.”
- Huge high-quality 3-inch LCD screen; excellent software bundle
- onscreen menus
- Slow response saving large files; no video output; no printed owner's manual
Summary
In digital imaging HP is best known for its inkjet printers. Yet the company has over a half-dozen digital cameras meant for casual picture taking. While not targeted to Ansel Adams wannabes, better HP Photosmart digicams more than do the job for the vast majority of photographers. We were big fans of the now discontinued 5MP HP R707. That model is long gone, replaced–and then some–by HP’s top-of-the-line R927, an 8.2-megapixel point-and-shoot camera with a 3x optical zoom. What really sets it apart is its 3-inch LCD screen, one of the largest you can get. The camera has a number of other pluses and minuses. Does the Photosmart R927 offer more plus than minus? Let’s start shooting and find out.
Features and Design
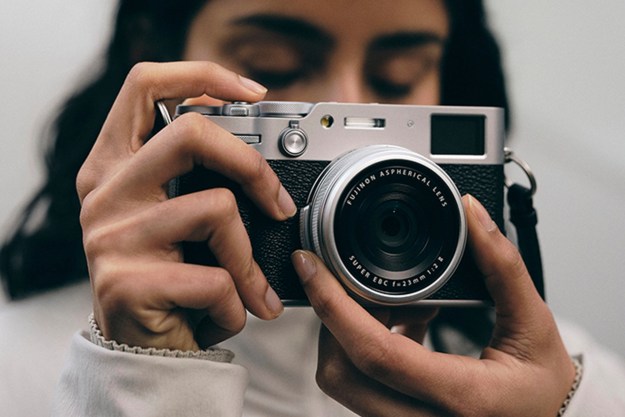
Along with its LCD screen, the most noticeable external feature is a very smooth-edged silver-finished metallic body. This camera looks very slick and is extremely compact, measuring 3.8 x 2.4 x 1 (WHD, in inches). Since it does have a metal case not the usual plastic the R927 weighs 7.8 ounces with battery, media card and wrist strap. Still it won’t break your back and easily fits in your pocket. I carried it around for a week in my front pocket hitting some tourist spots and found it very unobtrusive–just what a compact digicam should be.
The front of the R927 is simple yet very distinguished (if a camera can be such a thing). The 3x optical zoom recesses into the body when powered down and there’s a built-in lens cover. The lens is equivalent to 35-105mm, the traditional point-and-shoot range. You’ll find the flash, a flash assist/self timer lamp, tiny microphone, some subtle logos and numerical nomenclature. There’s also a subtle indent so the fingers of your right hand fit nicely in place.
The top of the camera has six keys along with the shutter button. These keys control most of your normal needs including adjusting the flash, focus (normal, macro), the Photosmart Express menu for sharing and printing images, record/playback and power on/off. A cool blue RAZR-like light comes on when you power up. There’s also a separate button for recording VGA videos but the frame rate is only 24 fps compared to the more common 30. The speaker is here as well.
The rear is dominated by the 3-inch LCD screen rated 230K pixels, about the best you can get. It has a 170-degree angle of view so even friends off to the side can see your snapshots. To the right of the screen are the wide/tele switch and the typical four-way controller with center menu/OK key.
On the bottom of the camera is the slot for the battery and memory card. Although it has 32MB of internal memory, this is useless for shooting 8MP images so budget around $50 for a one gig card. There’s also a tripod mount and a dock connector. One of the reasons the R927 is so compact is the fact there are no outputs on the camera itself; they’re on the supplied camera dock. You place the camera in the dock which then recharges the battery in-camera and there’s a USB port. Missing is a video output, just like the Sony DSC-S600. What is going on with these companies? Do they think everyone has flat-panel or microdisplay TVs with built-in SD card slots that handle video files or would rather check their videos on a 3-inch screen rather than a 42-incher? Hoo, boy, what an oversight. If you really want to see your photos and videos on your TV HP plans to sell an optional Photosmart 6221 Premium Camera Dock (around $80, due April). The dock also lets you recharge the in-camera battery, plus a spare.
That said, the camera comes with everything else you need (other than an SD card) to start taking pictures. The kit includes a wrist strap, rechargeable lithium ion battery, dock, USB and AC cable, a slim 26-page Quick Start Guide and a CD ROM that’s loaded with excellent software including HP Photosmart Premier, one of the best bundled packages around. Although the User Guide is on the CD ROM, I prefer a printed version since I usually don’t walk around with a laptop to check instructions.
After charging the R927 for about three hours and snapping in a 2GB Kingston Ultimate card it was time to start taking photos.

Image Courtesy of HP
Performance
The R927 jumps to life in less than two seconds once you hit the power key. Setting the date/time is a breeze as is rigging the camera for a day in the field. Although primarily a point-and-shoot camera, the R927 offers a wide variety of options for those who want to go beyond Auto. Although it doesn’t have a mode dial to pick specific shooting modes (like portrait or sunset), the very intuitive menu system lets you choose the one you’d like. It even has aperture- and shutter-priority options and full manual.
Before I get into the nitty-gritty of the camera, I’d like to complement HP for the excellent onscreen menu system, probably one of the best you can find. Go into the Shooting Modes, pick one you think that’s appropriate and HP gives a concise explanation and a sample shot. Very good stuff–especially when you see it on the 3-inch LCD screen. If you want to adjust Exposure Compensation it shows the +/- graph but then tells you why you would want to do this (make images brighter or darker). The long list goes on including saturation, sharpness, contrast and many others. For the record ISO maximum is 400, lower than many competing cameras. Still this camera has a lot to offer if you want to go beyond Auto. It was a very pleasant surprise for an unassuming digicam.
Along with the operational menus, the R927 has a very cool new feature called the HP Design Gallery. Usually the internal special effects you can apply to snapshots are fairly weak and limited. With the R927 there’s practically a editing program built into the camera. Once you’ve taken a shot, you go into the playback mode then go into the Design Gallery Menu. You can apply over a dozen effects such as Ink Dots, Watercolor, Kaleidoscope to your shot and it’s saved as a separate file. An inset shows what the effect does so you can quickly decide if it’s worth the effort. You can also modify the overall color or add a ton of borders including Soft Edge, Burned Edge, Spatter and a half-dozen more. Again you can see a preview before you save the new file. It’s also simple to crop the images in the camera by using the arrow keys on the main control pad. And if you crop too much, the camera even tells you resolution is going to drop. This was informative, a lot of fun and highly recommended. The camera even has internal red-eye removal along with a red-eye reduction setting. I took a guaranteed red-eye image of a cat’s face and it eliminated the problem before it even occurred so I didn’t need a post-processing fix.
Another very nice feature is called Image Advice. Here HP gives you advice for taking a better picture. Unfortunately it comes after the fact. So if you have the Adaptive Lighting cranked up along with the ISO, the camera suggests you lower both settings to cut down on noise. But if the shot of a lifetime is gone, better luck next time! To eliminate such problems the camera has a series of articles under the Help Menu such as Top 10 Tips, Using Shooting Modes, Sharing Images and so on. The features cover the basics so don’t expect to find the DaVinci code. Like Kodak cameras, this HP has a share button that lets you mark images for emailing or printing once you connect to your PC. And since HP owns the Snapfish photo site, you can even mark prints to be purchased online. Isn’t that nice?
Now how were the photographs? As noted, I took hundreds of shots during a combo business trip/vacation in the San Diego area. Photos were taken in bright California sunshine, overcast days, indoors, outdoors and at night. I had the camera set at maximum resolution (8.2MP, three stars or Fine mode). When done, the images were offloaded to a laptop with the supplied HP software. Prints were then made on a Canon MP780 with no editing (other than the ones with in-camera special effects or cropping).
First off, the camera’s LCD screen handled the bright California sunshine with ease–once I turned the setting up to High. I used the camera on the beach with no problems at all. The photo results outdoors in Auto were stellar although I have to admit I cranked up the Saturation simply because I like vivid color. Even without the increased Saturation colors were very accurate with very little purple fringing. The lens rarely grabbed for focus but there was some delay as camera saved the large 8MP files to the card. This internal chugging really separates point-and-shoot digicams from D-SLRs and premium-priced all-in-ones like the Sony DSC-R1 but it’s a bit unfair since these camera cost two or three times the price.
Indoors the R927 also performed well, thanks to the AF Assist lamp, a feature I strongly recommend, no matter which camera you choose. Shots were taken in available light with the maximum ISO. While there was noise, you could live with it on a 5×7. Given the large 3-inch screen, battery life was commendable. Although the camera has a digital zoom it was kept in the Off position since resolution drops as you increase the zoom. I found myself wishing for some additional zoom length, especially when traveling through the San Diego Zoo’s Wild Animal Park. And although you can zoom while shooting a video, the camera picks up the lens mechanism loud and clear–not the best background “music” for your productions.

Image Courtesy of HP
Conclusion
Anyone looking for a compact, attractive 8MP point-and-shoot digicam should give this camera serious consideration. Although the R927 had some flaws, the large LCD screen, the great menus, the built-in special effects and–most important–the photos it took put it on the plus side of the ledger. Still for the next go-around HP engineers should figure a way to juice up the time it takes to save a shot. And for God’s sake, put a video out on the supplied dock rather than forcing buyers to shell out another $80 for an accessory.
Pros:
- Excellent image quality
- Easy-to-view LCD screen
- Terrific onscreen menus
- Good battery life
Cons:
- Accessory dock required to watch videos on TV
- Slower video frame rate than competition
- Pokey saving large files