
Fight through Anamnesis Anyder with this FFXIV: Shadowbringers dungeon guide

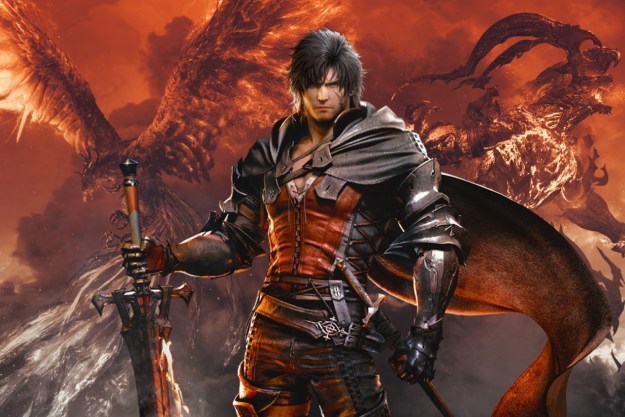
Anamnesis Anyder follows in the footsteps of one of Final Fantasy XIV’s jazziest dungeons. The second of what we expect to be many Anyder-suffixed instances, it’s a fountain of knowledge that’s used to deliver another story revelation in an expansion that’s hardly short of them already. In case you’re not willing to go in blind and embarrass yourself by falling flat on your face in each boss fight, this Anamnesis Anyder boss guide will see you through the story with barely a scratch to show for it.

If you’ve been slacking in your duties as a Warrior of Light *ahem* Darkness, your average item level will need to be 455 or above to head into battle. Unlike the 5.1 story dungeon, there is a lot of subtext to get through before you unlock this. Just keep plodding through the main story until you get there.

Unknown

FFXIV Anamnesis Anyder boss guide Unknown
Image used with permission by copyright holder

No, my video footage didn’t disintegrate on me. That’s this thing’s actual name (or lack of).

First off, get acquainted with Fetid Fang. That’s your tank buster. Right after this hits, Unknown will scream to the skies and start its next skill: Scrutiny. You’ll have three safe spots to choose from around the center to avoid the numerous explosive orbs, but what you need to do is hopefully avoid being in whichever slot Unknown chooses to physically strike as they go boom. So long as you’re topped off and not getting hit by multiple things, you’ll be fine. Avoid the linear Luminous Ray and you’ll reach the next phase.

Unknown then summons another of its kind right as it sets up Scrutiny yet again. The tank gets a stack marker from the new monster’s Ectoplasmic Ray, so it’s up to the team to crowd onto one of the safe spots together. Top up after the hit and it shouldn’t matter whether the original Unknown hits your position or not. Inscrutability then deals raid-wide damage, which should be enough to warn you to kill the weaker of the two before things get tough — which should be the original Unknown. Until they die, expect the two to cast their various beams, Unscrutability, and introduce Clearout and Setback; the former being a frontal cleave and the latter a rear. It’s just a matter of bursting the original down before things get a bit too hectic. Down both for the victory.

Kyklops

FFXIV Anamnesis Anyder boss guide Kyklops
Image used with permission by copyright holder

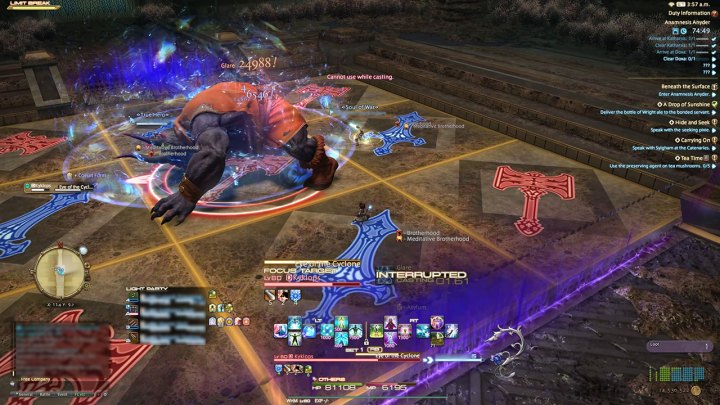
This is the one you might have seen on the patch website. Kyklops looks daunting, but the real enemy is panic. Keep your cool and take each mechanic as they come.

He starts things off with a tank buster and The Final Verse- raid-wide blast. There’s nothing you can do about those. Hell-bent on showing you everything he’s got, Kyklops then introduces Eye of the Cyclone as a donut strike on the outer edges (get in for this), Terrible Hammer, and Terrible Blade. These two mechanics paint hammers and blades onto the arena tiles. Whichever set spawn first with explode first. Get in for another Eye of the Cyclone, then reposition quickly to a safe square before sliding to the next as it blows.

Kyklops then brings out the classic moves. There is the Raging Glower eye beam and a powerful frontal cleave. Tanks can (and should) move through the boss to avoid said swipe as it charges. It hurts. At that point, you’ve seen everything. Just deal with raid-wides, know when to hug the boss, and keep your cool during hammer/blade sequences.

Kukshs Dheem

FFXIV Anamnesis Anyder boss guide Kukshs Dheem
Image used with permission by copyright holder

Known as the Merciless Matriarch, the story prepped you for the context you’ll need to hate yourself a little after this brawl. This one is a test of your beliefs for sure.

This chubby fish kicks things off by whacking the tank with Bonebreaker before casting Seabed Ceremony, dealing raid-wide damage and summoning a line of water in the middle of the arena. Death Grip then summons hands from the pool to slap the area they face in sequence while Falling Water drops on two players, and Rising Tide blasts anyone who isn’t on the boss’ diagonals. There are a few ways you can dodge what’s going on here, but avoid a hand and think nothing of the rest.

Then the Sastasha remix begins to make sense. The bubbling grates. One less mob will spawn for every bubbling grate a player positions themselves on, so you can cut this issue in half with the right mentality. The boss is immune while the mobs are on the field, so just burst them down and get on with the job. She will still cast Bonebreaker during this — tanks and healers beware.

Then the arms come back — this time four on each side. The real way to avoid these is to walk with them and back up again, but you can eat one with enough HP if you’re all about that top DPS. The last real trick in her book is when she combines the hands and her fish babies. Each hand can only strike one half of the total arena width. With their layout in this phase, you can avoid them by just being at the max distance of one. No biggie. Then it’s just the case of a stack marker and a few red markers before it’s rinse and repeat.

Editors' Recommendations

Josh Brown
Josh Brown is a UK-based freelancer with devoted interests in video games, tech, film, and anime/manga. Just don't talk to…
All Wall of Memories curiosities in Final Fantasy 16
Final Fantasy 16's cover showcasing its protagonist infront of two demon summons.

Clive is a more sentimental guy than you might expect from looking at him. Even though he puts on a tough face, it's clear he still cares deeply for those around him in Final Fantasy 16. This is most obvious once you unlock the Wall of Memories where he will store all the trinkets and items he finds to display. These curiosities are the main collectibles you will be picking up throughout Final Fantasy 16, but only the first is handed to you. The remaining ones will be off the main path and take a little more work. If you want to fully stock Clive's Wall of Memories with every collectible, here's where you can find them in Final Fantasy 16.
All curiosities

There are a total of 22 curiosities to find to fill up your Wall of Memories in Final Fantasy 16, but you could really say 21 since the first is given to you as part of the story. Here's where to get them all so you can unlock the For the Hoard trophy.
The Oath
Automatically obtained once you reach the "Cid the Outlaw" main quest.
Ambrosia's Tack
Rewarded to you after completing "The White-Winged Wonder" sidequest.
Martelle Apples
Rewarded to you after completing "The Fruits of Her Labors" sidequest.
Cid's Goblet
Rewarded to you after completing the "Payback" sidequest.
Guardians Scarf
Rewarded to you after completing "The Flames of War" sidequest.
Continental Censer
Rewarded to you after completing the "An Eye for an Eye" sidequest.
Hanged Man Signboard
Rewarded to you after completing the "For Great Justice II" sidequest.
Martha's Rest Signboard
Rewarded to you after completing the "Rekindling the Flame II" sidequest.
Crimson Caravans Signboard
Rewarded to you after completing the "Trading Places II" sidequest.
Charred Sparring Sword
Rewarded to you after completing the "More than Words" sidequest.
Scholar's Bonnet
Rewarded to you after completing the"An Inconvenient Truth" sidequest.
Stolas Quill
Rewarded to you after completing the "A Tail to Tell" sidequest.
Model Airship
Rewarded to you after completing the "Aiming High" sidequest.
Winter Mead
Rewarded to you after completing the "Silver Linings" sidequest.
Rusted Battlehelm
Rewarded to you after completing the "Where There's a Will" sidequest.
Snow Daisy Garland
Rewarded to you after completing the "Priceless" sidequest.
The Triunity Accord
Rewarded to you after completing the "Three's Company" sidequest.
Briar's Kiss Signboard
Rewarded to you after completing the "Lines in the Sand II" sidequest.
Clayhearth Signboard
Rewarded to you after completing the "Duty Undying II" sidequest.
Veil Signboard
Rewarded to you after completing the "Under New Management II" sidequest.
Medicine Chest
Rewarded to you after completing the "Back to Their Origin" sidequest.
The Circle of Malius
Rewarded to you after completing all of the trails in every chronolith.

Read more
All Chronolith locations and rewards in Final Fantasy 16
A chronolith trial pillar glowing in the sunlight.

Every Final Fantasy game changes up the battle system in one way or another. Final Fantasy 16 isn't the first to have real-time, action-focused combat, but is by far the most polished and refined one. The story is by no means secondary, but for the first time players are able to really express themselves through the various combos and abilities you can pull off. Square Enix recognized this and included special combat trails called Chronolith Trials. These are somewhat similar to the special missions you can find in games like Devil May Cry 5 where you are faced with a unique challenge for a reward. As tough as these challenges are to beat, finding them is also a bit of a chore. Hop on your Chocobo and follow our lead to find all the Chronolith locations in Final Fantasy 16. 
What are Chronolith Trials?

Chronolith Trials are unique combat trails that put you into an arena that spawns waves of enemies. There will always be three rooms that each spawn three waves of enemies, plus a boss at the end. You're on a timer, and can only use a designated Eikon with predetermined abilities. By pulling off Battle Techniques, including Precision Dodge and Ability Finishes, you can extend your time. If you're quick enough to beat all the enemies without running out of time, you'll earn a special accessory as a reward. There are seven in total, and completing them all will also unlock the final Wall of Memory item you need to complete that collection.
All Chronolith Trial locations
Phoenix
In Greensheaves in Rosaria, fast travel to Martha's Rest and exit to the north. Follow the path east and you will find it just before the path leading to Rhiannon's Ride.

Read more
Final Fantasy 16 Renown explained: what is Renown and how to earn it
Final Fantasy 16's cover showcasing its protagonist infront of two demon summons.

Every JRPG, and even games with RPG elements, likes to introduce new systems into the mix for you to learn and interact with. Most of the mechanics in Final Fantasy 16 will be familiar, like sidequests, upgrading gear, and unlocking abilities. However, later on, the game will introduce you to the Renown system once you take control of the Cursebreakers. This occurs once you reach the main hub of the game called Cid's Hideaway after going through the main story until you reach A Chance Encounter. While you might be feeling content ignoring this new mechanic and just pushing on with the main story, there are plenty of reasons to learn it. Here's a simple explanation of how the Renown system works in Final Fantasy 16.
What is Renown and how to earn it

Without spoiling much, after Clive takes on a certain mantle and is in charge of Cid's Hideaway, the Renown system will automatically be put into effect. This is meant to represent how much inspiration and support Clive has earned from the people of Valisthea in his cause and fight against the Blight. You can see how much Renown you currently have by visiting the Patron's Whisper and talking to Desiree.

Read more