Animal Crossing: New Horizons gives players of all walks a chance to show their creativity. The custom design tool uses a mixture of QR codes and pixel painting to create and share designs that can be used a variety of ways. From adorable dresses to new pathways, you can create your island any way you want.
Learning to use the custom design tools can be a little tricky. The game offers two different tools for designing: Custom Designs and the Pro Designs upgrade. We’re here to share the differences between these two design tools, talk about how to get the most out designing, and offer a few resources for inspiration! If you’re looking to make your town the best and brightest with your own designs, you’ve come to the right place!
Further reading
- The best Custom Designs in Animal Crossing: New Horizons
- The coolest Animal Crossing: New Horizons islands
Unlocking Custom Designs and the Pro Designs upgrade

Right off the bat, we need to talk about the Pro Designs upgrade. It doesn’t take long to nab this updated NookPhone app, but it will make a big difference to your game. Custom Designs have only four squares to work with. Pro Designs have a grand total of nine. That’s a lot more room to add loads more detail to a wider range of items.
The Pro Designs upgrade adds the Pro Designs tab to your NookPhone app. To unlock it, all you need to do is wait for your tent to become a house, and you’ll be able to pick up the upgrade from the Resident Services terminal for a paltry 800 Nook Miles. With this on your in-game phone, you’ll be able to do far more with custom designs than you could at the start.
Only custom designs can be placed on the ground, so you’ll be relying on this basic feature for floor decorations like cobblestones, pathways, and the occasional crude sand drawing. Pro designs can be displayed when not worn, but only as mannequins to show off your threads.
Making custom designs in Animal Crossing
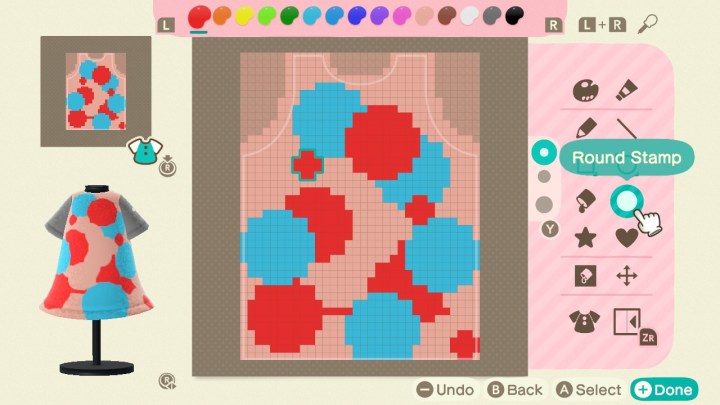
All you need to get started with Animal Crossing designs is your imagination. Open up the Custom Designs app on your NookPhone and select an empty slot. If you’re making a custom design, you work on the drawing first and then choose how to use it after the fact. If you’re on the Pro Designs tab, you select the kind of clothing you want to make before starting on your design. Want to recreate Ash Ketchum’s hat? Choose the cap. Have a special beanie at home you want to add in? You can do that. Want to live out your school idol anime fantasies? A balloon-hem dress is probably a good starting point.
Once you’re in the editor, it’s a case of painting with the joystick rather than the Nintendo Switch’s oft-forgotten touchscreen. It’s not the easiest way to do things, but with a bit of practice and some helpful tools, you’ll be working miracles in no time. Failing that, there’s an unofficial tool you can use to convert images into Custom Designs automatically. Upload a photo, see the blocky result, scan the QR code it spits out, and your custom design is ready to be used. Don’t expect a fancy balloon-hem dress here, though. Remember: Custom designs and pro designs aren’t wholly the same.
How to download custom Animal Crossing pro designs

The internet is awash with Animal Crossing designs these days. You’re probably seeing codes and creator IDs in every other post on your social media platform of choice. How do you use these? It’s pretty straightforward, but you’ll need the Able Sisters shop to get started.
Mable shows up to sell her wears in the town plaza a few times a week. If you spend 5,000 bells on her wares, she’ll soon decide to open up a full-fledged shop on the island, bringing her sister along for the ride.
Once the business is all up and running, you’ll find a terminal in the top right where you’re able to enter Design and Creator IDs to track down new custom designs. It’s here where you’ll want to enter the codes listed on people’s shared designs online, or you can enter the creator ID of someone whose style you like enough to browse through all their shared designs.
Once you’ve found a design you like, it’s simply a matter of saving it to an empty slot. You can save up to 50 Custom and Pro Designs at any one time. Reach that limit, and you’ll have to save over another entry.
Animal Crossing design resources
Beyond looking up clothing ideas online, the many-million strong Animal Crossing community has already been hard at work conjuring up almost every custom design pattern you could ever want. You just have to find them.
There are multiple purpose-built Animal Crossing pattern share websites with a bunch of cool features for cataloging these things listed below. Another method is to follow the Twitter trail. Slap the #AnimalCrossingDesigns hashtag into the search bar and be ready to scroll for days. There’s no guarantee of quality doing this, but it’s a good way to find some cool designs made by non-English speakers who’re unlikely to use some of the other resources.
- Reddit (/r/horizondesigns)
- Nook’s Guide
- Nook’s Island
- Animal Crossing Closet
- ACNL Paths Tumblr
- Bidoof Crossing Tumblr
- ACNL QR Database
- Twitter (#AnimalCrossingDesigns)
How to import designs from New Leaf and Happy Home Designer

If you’ve been an Animal Crossing fanatic for a while now, you most likely have a few designs in your New Leaf and Happy Home Designer games you’d love to recreate and rework. Both games utilize QR codes so people can send designs to each other and receive them, meaning you can use the Nintendo Switch Online smartphone app to move them directly into New Horizons.
To get everything situated, all you have to do is download the app, log into it with the Nintendo account you use on your Switch, and tap Animal Crossing to access the hub on the homepage. Once you make it in, you’ll want to hold the Plus Sign (+) button on the Animal Crossing: New Horizons titles screen to get to the game’s settings. Here is where you’ll see mention of the Nintendo Switch Online app. Load up the app, allow it to do its thing, and then restart your phone app when it’s finished. Navigate back to the Animal Crossing hub in the midst of playing the game, and you’ll quickly notice all its fresh, impressive features.
With all that ready to go, just load your designs in your New Horizons or Happy Home Designer games and scan them in using your phone. From here, you can just follow the steps included in the conventional method. Open your Custom Designs app while you’re in the game and click the Plus Sign (+) button to download scanned designs into your game.
Editors' Recommendations
- Xbox, PlayStation, and PC: Is Elden Ring cross-platform?
- The most common Xbox Series X problems and how to fix them
- Lego’s Animal Crossing sets are every bit as adorable as the games
- Dave the Diver: most valuable items and how to sell them
- How to start the Burning Shores DLC in Horizon Forbidden West