Amidst Call of Duty: Black Ops 3‘s cinematic single-player campaign and addictive-as-ever multiplayer is none other than the franchise’s signature Zombies mode. As is typical with previous and future iterations of the feature, players take to the task (by themselves or with friends) of ridding a particularly large, labyrinth-style map of a near-infinite horde of flesh-hungry zombies. Appearing originally as an Easter egg “Nazi Zombies” mode in Treyarch’s Call of Duty: World at War, the feature quickly gained notoriety for its addictive, over-the-top fun and change of pace regarding the gameplay. The mode has since become a staple of the series, with the latest iteration appearing in last year’s Call of Duty: Black Ops Cold War.
- Step into the Shadows of Evil
- Take on The Giant
- Brave Der Eisendrache
- There’s no “I” in team
- Know your enemy
- Choose your guns and equipment wisely
- Don’t forget about your equipment
- Use map advantages at your own risk
- Killing in the name of strategy
- More money does not mean more problems
- Harness Beast mode
- Make use of public transit
- Pack-a-Punch weapons pack a punch
- Gobblegum machines
- Be smart with dropped power-ups
- Crack open an ice-cold Perk-a-Cola
So, when Black Ops 3 released, it came as no surprise the Zombies mode would also make its triumphant return, and, even less surprising, it’s still a wild good time years later. Though the basic concept and end goal remain unchanged, exactly how you survive and get to pay dirt is as convoluted and difficult as possible. And that’s a good thing. To help you enter the realm of the undead and escape unscathed, we’ve put together this survival guide aimed at giving you everything from the mode’s basics to some advanced tips for staying alive. Good luck.
Further reading
- The best call of Duty games, ranked from best to worst
- How to find the new Wonder Weapon in Firebase Z – Black Ops Cold War Zombies
- The best zombie games of all time
Step into the Shadows of Evil
At first glance, seeing just one available Zombies map right out of the (standard) box for Call of Duty: Black Ops 3 may move some gamers to assume Treyarch took a step back with the popular game mode in 2015. The thing is, there couldn’t be a statement further from the truth. In reality, Shadows of Evil represents one of the most diverse and varied Zombies experiences ever created by Treyarch, providing gamers hours of over-the-top, undead fun. And, since release, two additional maps have been added that are just as large and complex as Shadows of Evil. The Giant was first available in Collector’s Editions of the game but can now be purchased in the Rezurrection DLC pack, and Der Eisendrache came later in the Awakening DLC.
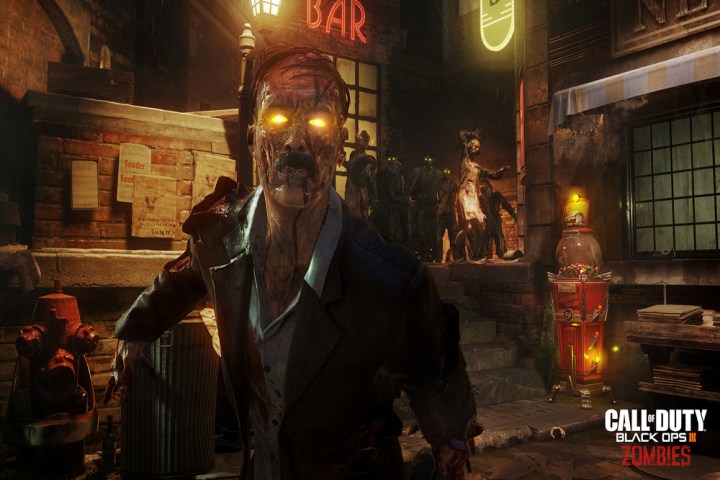
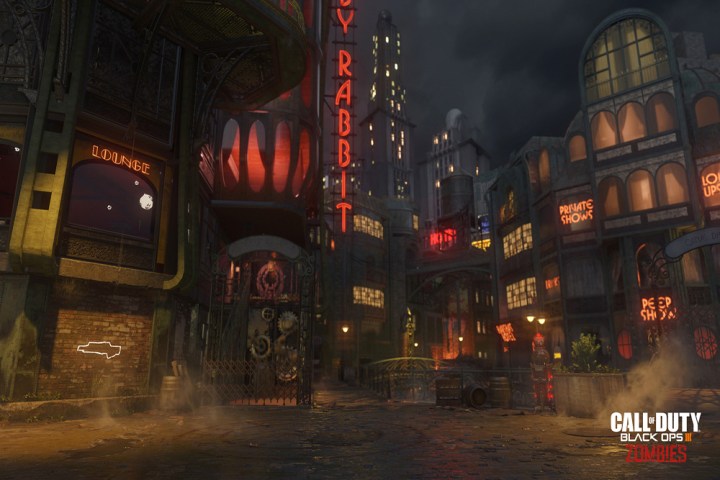
Set in a fictional, mind-bending town known as Morg City, players assume the role of four separate protagonists: Nero Blackstone, Jessica Rose, Jack Vincent, and Floyd Campbell. As is true with past Zombies mode iterations, Treyarch pulls out all the stops with the mode’s cast, employing the voice-acting talent of Jeff Goldblum (Nero), Heather Graham (Jessica), Neal McDonough (Jack), and Ron Perlman (Floyd). Moreover, each character possesses a unique (and twisted) backstory, which only lends itself to the overall craziness of the mode. For instance, Goldblum’s character Nero is an arrogant magician sent to Morg City for murdering his wife so he could collect her life insurance. Again, it’s twisted.

The characters aren’t alone, however, as Morg City is just as demented. Set in the 1940s and more an ethereal setting than a real city, the backdrop for Shadows of Evil is a sprawling nightmare chock-full of hidden secrets, something called a Gobblegum machine, and, of course, the soulless corpses vying for your flesh. No big deal. As we get into the best ways to stay alive in Morg City, one principle reigns supreme: Just stay alive. Famous last words, right?
Take on The Giant
Fans of World at War‘s first go at the Zombies mode will already be familiar with this map. A recreation of the original Der Riese map, you’ll find the entire layout identical to how it was in past iterations. The only major differences, aside from it looking much better, are the weapons and GobbleGum machines, which we’ll get to later. In this map, you will once again fill the sues of the original Zombie survivors: “Tank” Dempsey, Nikolai Belinski, Takeo Masaki, and Edward Richtofen. You pick up right where the story left off on this map in the previous game with new teleporting and time-traveling shenanigans best experienced for yourself.
Brave Der Eisendrache
German for The Iron Dragon, the last map released for Black Ops 3 brings the same crew of survivors from The Giant up to a fortress set high up in the Austrian Alps to track down anything they can find about Group 935. This level takes place chronologically after The Giant and only furthers the already-complex and cryptic story where no one is to be trusted.
As you’ll notice before booting up any of the three maps, Treyarch includes a brand new, XP-based progression system that allows you to customize your Zombies experience even further. This is another standard this game set that would carry forward in future games. Experience points earned while battling horde after horde of undead zombies allows you to upgrade the weapons found throughout the map, including adding different attachments and earning new classes for your weapons. Right out the gate, however, you wake up in the level of your choosing as an experience-deprived character pushed to fend for yourself with nothing but the basics. That’s why we’re here to help.
There’s no “I” in team
We’re well aware this is the easiest tip in the book, but don’t overlook the simple fact that staying near your teammates is the single easiest way to stay alive for long periods of time. Whether this means standing back-to-back and shooting or slashing your way to the next round or methodically working your way through Morg City like Seal Team 6, playing as a team is paramount to Zombies mode success. Of course, you won’t have the ability to stick together the entire time, but the more time spent covering your teammates’ backsides, the deeper into the game you’ll get. Plain and simple.
With that said, this tip goes completely out the window if you choose to slay some zombies solo. There’s no shame in doing this, but know the mode gets incredibly more challenging without a teammate by your side. Luckily, Treyarch makes it possible to either link up with players online while also allowing for offline, local split-screen play. So, after going at it alone causes enough stress for you to throw a controller, find someone to play with. You won’t regret it.
Know your enemy
If you’d believe it, Black Ops 3’s Zombies mode isn’t just about fending off hordes of flesh-hungry undead, as a slew of equally destructive foes stand between you and the final credits. As the waves increase in difficulty, you’ll begin seeing different enemy types that range from flying insects and rolling bombs to a gigantic charging baddie. Here’s a bit more of each basic enemy type to give you a better idea of what to expect.
The Keepers
These are a rare enemy type that typically only spawn during rituals or after you or a teammate picks up an item that you need to reach the Pack-A-Punch machine. They have massive teeth that take up most of their heads and no eyes, but hopefully, you won’t get a close look at them. They appear depending on what causes them to spawn, and you’ll need to deal with them differently. If you find one after picking up an item needed for a ritual, for example, then you need to kill them just like any other zombie. On the other hand, if one spawns during a ritual, they will only keep spawning until the ritual ends, so don’t waste your ammo if you don’t have to.
Parasites
Simply called Parasites, these flying insects are incredibly adept at pulling your attention away from the onslaught of zombies just long enough for you to meet your eventual demise. We recommend selecting one of your teammates as the go-to Parasite destroyer while the others continue to beat back the advancing dead. If you’re lucky enough to survive this wave (and there’s no reason you shouldn’t), the last Parasite killed drops a Max Ammo power-up. We’ll cover more about power-ups below.
Margwas
This three-headed monster is the stuff of nightmares. Seriously. Armed with three tentacles capable of critically damaging any player stupid enough to get close to this thing, the Margwa is a force to be reckoned with. In order to down this beast, simply wait until it opens one of its three mouths before unleashing an onslaught of bullets into said mouth. Continue this process until you’ve successfully destroyed all three heads. Keep in mind that after the removal of a head, Margwas move faster and typically dole out a Parasite to further impede your process of ousting it.
R.A.P.S.
Known as the Robotic Anti-Personnel Sentry, the R.A.P.S. is essentially a rolling time bomb. Similar to Parasites, these frustrating contraptions have their own dedicated round, so once again, we recommend assigning one player to eliminate them while the others go after zombies. Keep your eyes on the ground for these annoying bots — they’ll roll up on you quickly and explode on unsuspecting players before you know it.
Hellhounds
Very similar to the R.A.P.S in terms of behavior, Hellhounds are zombie dogs that will attempt to maul you and come in two types. One is just the normal bloodthirsty mutant dog, and the other is a flaming version. Kill the non-flaming version however you like, but the flaming Hellhounds have a nasty trick of exploding after death, so get some distance before putting them down. They tend to spawn in packs of two or four, and like Parasites, also drop a Max Ammo when the last one on their dedicated round is killed.
Choose your guns and equipment wisely
Pick a gun, any gun
Zombies mode presents two ways for you to pick up its variety of weapons: Chalk outlines scattered around the map and Mystery Boxes. Concerning the chalk outline gun varieties, it may take some guess and check work before finding your favorite combination. Whether you prefer shotguns, pistols, or assault rifles, it takes a bit of time before settling on your deadliest weapon of choice. Once you rack up enough experience points, we recommend outfitting your favorite gun with some useful attachments to give you a leg up on the undead. As you level-up throughout the game, you’ll also unlock upgraded versions of each chalk-outlined weapon type.
As far as Mystery Boxes go, these useful crates pop up randomly around the map and require a chunk of change to enjoy what’s inside. With that said, however, they do tend to house some of the most powerful weapons in the entire mode. Unfortunately, these guns also require some cash to reload, so we recommend taking it easy with the ammo while you can and save it for some of the more formidable foes that show up in later rounds.

Don’t forget about your equipment
You know how annoying a well-placed claymore is while playing Call of Duty multiplayer? Yeah, us too. Well, guess what? These little nuisances prove wildly effective against a gaggle of your undead fan base, providing a perfect way to take out several at once. The same can easily be said for utilizing grenades, strike beacons, and the rest of the array of available equipment, just don’t forget you have it at your disposal.
Use map advantages at your own risk
Scattered across the Morg City map are a few pod-like plants that can either be your best friend or worst enemy, depending on your luck. To activate these pods (and unleash their innards), simply pick up the Fumigator located at the beginning of the map and proceed to fire it at the alien-looking plant. Once destroyed, pods drop either a weapon, a useful power-up, a non-useful live grenade, an increasingly-useless attacking zombie, or nothing at all. It’s like playing the lottery, only sometimes your life depends on it. So yeah, just like playing the lottery.
In Der Eisendrache, you can utilize the Wundersphere and Gondola as means of transportation all across the map. The Wundersphere costs points to use but is an instant teleport from one pad to another. There are four scattered around the map you can activate and pass between, but they’re broken into pairs, so entering one will always take you to the same place. The tram is another great method for escape, but instead of points, you need to be holding a tram fuse to call it. You start with one, but after that, you will need to get additional fuses as random drops. The gondola will go back and forth from the bottom of the mountain to where you first spawn in on the map and comes with one random power-up each time you use it as an extra bonus.
The Giant also has paid teleporters, but traps are the more useful and unique feature. You will find them in the garage area on the West side of the map. For 1,000 points, you can activate them using the red electrical box on the wall, which will set off an electrical wall that will kill any zombie that attempts to pass through it. Just be aware that you won’t get any points back for killing a zombie using a trap.
Killing in the name of strategy
Do bring a knife to a zombie fight
Killing zombies is the name of the game, no doubt, but how and when you kill zombies can make or break your time in the zombie apocolypse. When starting out, we recommend going easy on the ammo and busting out your trusty knife to lay waste to the first one or two waves. Not only does this preserve precious ammo, but racking up knife kills nets you some serious coin. Doing this early on — when the waves aren’t nearly as deadly — provides the best opportunity to rack up valuable cash to store away for unlocking better weapons and other areas of the map.
Headshots are effective, but body shots make money
There’s no denying how quickly an accurate headshot disposes of an advancing zombie, but if possible, shooting off their limbs is a great way to earn more money. As mentioned above, make use of this cash-grab technique in early rounds when it’s easiest, then go for the head when the waves get tougher.
Take advantage of lone zombies
Playing with fire rarely pays off, but in the case of Morg City’s reanimated locals, it’s worth it. It may seem stupid, but we recommend letting the last one or two straggling zombies of a wave stumble after you while you collect ammo, upgrade your weapons, or simply take a breath. There exist very few (if any) stress-free moments to simply explore the map unhindered, so taking advantage of a few slow-moving enemies is your golden opportunity to plan your next move.
More money does not mean more problems
As mentioned throughout this guide, one of the central themes to doing well in Zombies mode lies with making money and spending it wisely. It’s particularly easy to amass wealth in the early rounds of the game as the zombies remain less deadly and easier to fend off. Though we’ve touched on how using your knife or shooting at a zombie’s limbs helps quickly rack up dough, don’t forget to board up windows during your downtime for some easy cash. We also recommend letting the zombies break through the boarded-up windows, because while it’s easy to mow them down from behind a barrier, having the ability to repair the windows (and earn money) is much more beneficial. More money equals better weapons, and better weapons equal a higher chance of survival.
Harness Beast mode
Perhaps the strangest new addition to Treyarch’s Zombies mode, at least in the Shadows of Evil map, is the inclusion of allowing you to transform into something called the Beast. Located within several purple chalice-looking objects around Morg City, the Beast presents a perfect opportunity to get out of sticky situations a bit easier and open secret areas of the map while looking like some sort of fantastical octopus. Wielding several tentacles, the Beast allows you to easily defeat advancing zombies with its melee attack and also grants the ability to revive teammates quicker. Unfortunately, any hard work done while in creature form comes pro bono, as you won’t accrue any money for your efforts. Still, it presents a great way to get out of trouble quickly and to investigate the nooks and crannies of Morg City.
Make use of public transit
Though not central to successfully advancing through Black Ops 3‘s Zombies mode, utilizing the map’s running train or tram greatly helps you in a variety of ways. While it allows for travel to previously-locked areas of Morg City and Der Eisendrache, it’s also an excellent resource for escaping potentially life-threatening hordes of zombies and just generally catching a breath of fresh air. As you play and explore, you’ll discover three separate train stations located across the map. Simply discovering one of the stations allows for quick travel to the other two, even if you’ve yet to unlock those areas.
Pack-a-Punch weapons pack a punch
The Pack-a-Punch — seen in prior Call of Duty: Black Ops games — is the weapon-enhancing power-up capable of granting game-changing advantages to some of the mode’s more powerful weapons. Each Pack-a-Punch costs a staggering $5,000 to use, but if done correctly, you’ll go from running for your life to being a zombie’s worst nightmare in a matter of seconds. While you have the option of using this power-up on any weapon of your choice, it makes the most sense to pump up, say, the uber-effective Ray Gun instead of a pistol.
With that said, it’s not easy to build one of these useful contraptions. After completing 10 separate steps scattered across the map, you’ll finally unlock the ability to build a Pack-a-Punch station. Stay tuned for an in-depth walkthrough of how to best go about completing the 10 steps.
Gobblegum machines
Yet another new feature in this go-around for Treyarch, Gobblegum machines offer a variety of useful perks as you fend off swaths of zombies. When you first begin your descent into any of the three maps, your character has just five basic perks to choose from. As you level up, more become available, though you do have to switch them in and out from the home screen to have access to them in-game. While each perk allows for a single use, it’s often strong enough to get out of most dire straights. All told, there exist 15 Gobblegum perks, most of which unlock as you progress through the game.

Be smart with dropped power-ups
As you blast your way through waves of rotting flesh, you’ll start to see a slew of advantageous golden power-ups drop at your feet. While it’s incredibly enticing to snag these as soon as you see them, hold off until you absolutely need them. For instance, picking up the Nuke power-up is a massive waste of good fortune if only two or three zombies remain staggering around the map. Instead, wait until you’re either neck deep in the dead or going up against a stronger baddie before picking up your goods. The more you play, the more you’ll start to get the hang of when to activate these golden tickets.
Crack open an ice-cold Perk-a-Cola
Dispersed sporadically across each map, Perk-a-Cola machines provide a welcome boost to your zombie-slaying arsenal, granting a temporary spell of good fortune once picked up. All told, there are seven different perks available via these machines, but only four active perks are permitted at any time. To activate the Perk-a-Cola machines, simply turn on the generators located near the machines. Moreover, some perks are only available in some Perk-a-Cola machines, while others circulate among the machines in each district. Choose wisely.
Note: Some perks (i.e. Widow’s Wine and Mule Kick) are only available in an area referred to as “the rift.” To access the rift, simply activate the Beast mode, search for what looks like a false wall, and then destroy it. Once the wall is gone, step into the rift to teleport to a new area of the map.
Inside the new area, activate Beast mode yet again to activate a series of power switches that then turn on the required perk machines. However, don’t get the idea this whole rift business is a walk in the park. Like any area of Morg City, you’ll face an array of baddies looking to take you out. You’ve been warned.
Mule Kick
This perk transforms your character into a pack mule of sorts, allowing you to tote up to three weapons at the same time. Forget having to choose between an assault rifle or shotgun — take ’em all with you. To find the Mule Kick perk, visit one of the machines found in the rift.
Jugger-Nog
For a temporary boost to your overall health, the Jugger-Nog perk is the way to go. Effectively doubling the number of hits you have the ability to endure, a well-timed Jugger-Nog pickup easily turns the tables on the flesh-hungry goons hot on your tail. Luckily, this perk circulates between the Perk-a-Cola machines located in each district.
Quick Revive
As the name suggests, this boost gives a downed player the ability to quickly revive themselves should they succumb to a horde of unruly zombies. If this strikes your fancy, track Quick Revive down in the alley in which you spawn at the beginning of the game.
Double-Tap Root Beer
As soon as you pick up Double-Tap, your character’s weapon of choice immediately receives an uptick to its rate-of-fire and, the best part, the perk doesn’t expend any extra ammunition while in use. Like the Jugger-Nog perk, this boost circulates between machines in all three districts.
Speed Cola
Circulating between machines in any district, the Speed Cola perk grants a significant increase to a player’s reload speed. You’ll find this an especially helpful upgrade if you’ve ever lost massive chunks of time battling a seemingly eternal bombardment of Morg City’s zombies.
Widow’s Wine
Yet another item found strictly in the rift area of the map, this surprisingly useful perk switches out a player’s normal grenade stock for a pair of Widow’s Wine grenades. You’re likely killing two (or more) birds with one stone when you use this weapon because its web-like material will adhere to the zombie you are aiming at while also reining in surrounding zombies so that you ultimately blow up a whole ball of zombies with one grenade. Also, melee attacks against a character temporarily wrapping that player in a spiderweb and setting off a brief explosion. Regardless, the damage is still done despite the web.
Stamin-Up
When the walls start closing in and you’re running low on bullets, you don’t have a lot of great options. Unfortunately, you can only run so far before your character gets winded and their speed starts slowing down to its normal rate. When you see this happening, it’s time to utilize the Stamin-Up feature. It allows your character to sustain his/her running pace for a remarkably longer amount of time. Lucky for you, this perk rotates among the popular machines in all districts.
Editors' Recommendations
- Is Call of Duty: Modern Warfare 3 cross-platform?
- Best Perk-a-Colas in Modern Warfare 3 zombies, ranked
- The best field upgrades for Modern Warfare 3 Zombies
- Modern Warfare 3 Zombies: tips and tricks for MWZ
- How to access the Call of Duty: Modern Warfare 3 beta