It’s been a long wait for competitive Destiny 2 players, but Trials of Osiris is finally back. The mode returns from a long hiatus thanks to the Empyrean Foundation community project, which was completed in the game’s last season. Trials of Osiris should be familiar to long-time players, but there are a few notable tweaks this time around. Here’s everything you need to know so you can begin your journey to the Lighthouse.
How does it work?
Trials of Osiris is a high-level player-versus-player (PVP) mode where two teams of three compete. In previous iterations, the playlist would cycle between two different objectives, but this time it’s only elimination. The mode is only available to play on weekends and can be accessed from the Crucible node on the director. There is no matchmaking in this mode, so you’ll need to go in with a full fireteam to compete.
The objective is simple: Kill everyone on the other team to win. There are no respawn timers here, but teammates are able to revive one another if they die. Each game lasts up to nine rounds, so the first team to survive five rounds wins the whole thing. Each round is two minutes long.
The catch is that power level matters in Trials. If you’re 10 levels above your opponent, you’ll have an advantage in battle. Luckily, extra levels gained from your seasonal artifact don’t carry over into the mode after its first week, so you’ll only get that perk from your base armor and weapons.
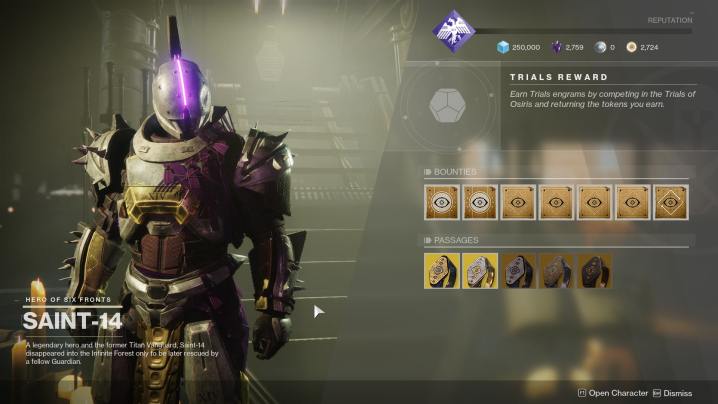
In order to start Trials, you’ll need to make sure you’ve hit power level 960. Once you reach that, head to Saint-14 on the Tower. He’s the mode’s vendor this time around, and you’ll need to visit him often as he sells bounties and trials passages.
What are trials passages?
In order to enter Trials of Osiris, you need to purchase a trials passage from Saint-14. Think of this like a scorecard that tracks your overall win-loss record. The goal of Trials isn’t to simply win one game; it’s to string together as many wins on one card as possible. The ultimate goal is to achieve seven wins overall. If you lose three times in one card, you’ll have to turn it in and buy a new one.
Passages provide unique perks that help you, similar to how boons used to work. Two passages are available at first, but more will unlock depending on how many wins you get in one passage. Here are the perks and requirements.
- Mercy – forgives one loss.
- Ferocity – gives extra win after three wins without losing.
- Wealth (requires seven wins) – increases the Trials tokens gained from winning matches.
- Wisdom (requires flawless passage) – gives bonus XP from wins.
- Confidence (requires five wins) – gives an extra reward from flawless chests.
You can only use one passage at a time, so you can’t stack perks. Every time you buy a new passage, it will reset the progress of any card you’re currently holding, so make sure to fully finish and turn in a passage before buying a new one.
Once you hit three losses, you can reset the passage in your Quest tab, so you won’t need to buy a new one after ever three losses.

How do I get rewards?
Trials of Osiris brings tons of unique gear and weapons to the game, including armor from the original Destiny. There are two ways to gain rewards in Trials. The easiest method is through trials tokens, which are a new currency. These are gained from turning in Saint-14’s weekly and daily bounties. You’ll also earn them from simply playing rounds.
You can use trials tokens to upgrade your reputation with Saint-14, much like you can with all vendors. Each time you rank up, you’ll get a trials engram, which will contain loot. So even if you don’t win, you can still earn rewards.
The ultimate goal is to go “flawless,” which means seven games in a row on one passage. Perks like Mercy and Ferocity can help make that a little easier if you’re having a hard time stringing wins together.
Once you go flawless, you’ll go to a special social space called The Lighthouse, where you’ll receive the best rewards Trials has to offer. Very few players make it to The Lighthouse, so don’t be discouraged if you’re having trouble getting there.
If you can’t win seven in a row, you can still earn rewards from your passage. Getting three wins will give you a piece of tier two gear, five wins rewards a piece of powerful gear, and seven non-flawless wins pays out a piece of pinnacle gear. You can only earn these once per week.
As is the case with most modes in Destiny, the best way to earn rewards is just to play it a lot. Even if you’re not the best PVP player out there, you can still get plenty of loot from participating.
Editors' Recommendations
- Destiny 2: The Final Shape’s new subclass combines light and dark
- What is dragonsplague in Dragon’s Dogma 2 and how is it cured?
- The best skills for each Vocation in Dragon’s Dogma 2
- All sphinx riddle solutions in Dragon’s Dogma 2
- How long is Dragon’s Dogma 2?