Fortnite chapter 3, season 2 is beginning to wind down, but that doesn’t mean the challenges are stopping any time soon. For week 10, there are plenty of quests available, with some sending you to various locations around the map to complete specific tasks, while others require the use of certain items found across the world.
Here, we’ll dive into the week 10 challenges with guides on how to complete them all in Fortnite.
Recommended reading
- The best games like Fortnite
- The best places to land in Fortnite
- Fortnite vs. Warzone: Which battle royale should you play?
Season 2, week 10 quests
- Deploy a Tent at a Seven Outpost (1)
- Emote on Top of an IO Outpost (1)
- Enter a Vehicle Within 10 Seconds of Landing (1)
- Fly Into The Collider’s Energy Field (1)
- Repair Any Turret Using the Repair Torch (300)
- Use a Med-Mist While Sliding (1)
- Use a Mounted Turret to Damage Opponents in Vehicles (1,200)
Season 2, week 10 quest guide
Deploy a Tent at a Seven Outpost (1)
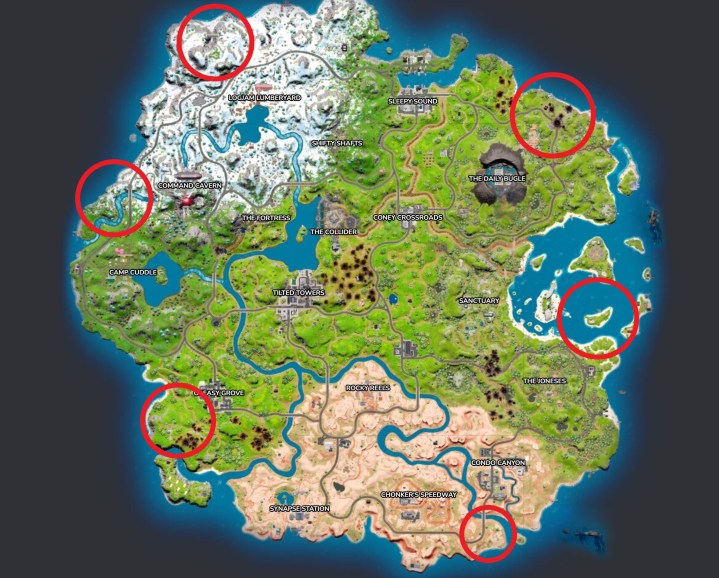
For this quest, we recommend landing somewhere near one of the Seven Outposts shown above, with the goal of getting your hands on a tent. You can find them as floor loot, so keep your eyes peeled for a tent as you loot. After you acquire a tent, make your way to the nearest Seven Outpost and deploy it to earn credit for this challenge. We recommend deploying it close to the Seven Outpost’s main buildings to ensure it counts.
Emote on Top of an IO Outpost (1)
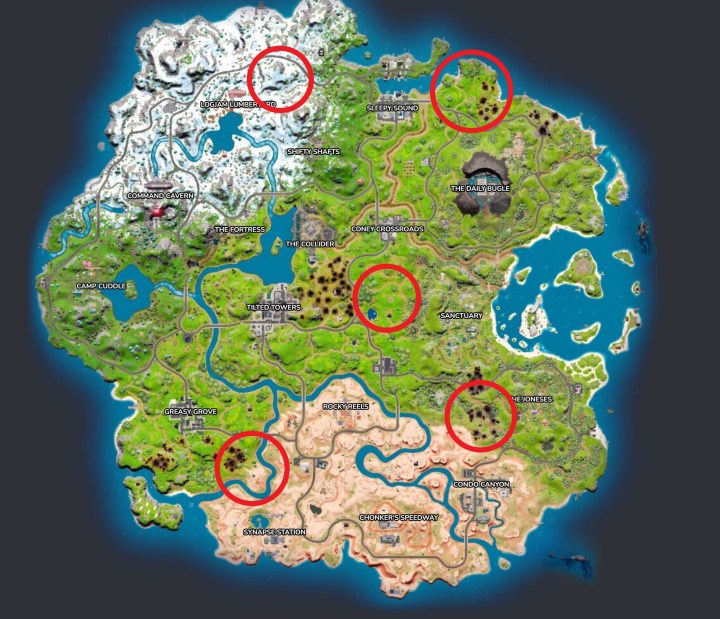
Next, pick one of the IO Outposts highlighted on the map above and use any emote you have. Just make sure you land directly on top of the building to earn credit for this one. You don’t actually have to land on top of the Outpost right after you jump from the Battle Bus for it to count since you can simply use the stairs to reach the roof as well.
Enter a Vehicle Within 10 Seconds of Landing (1)
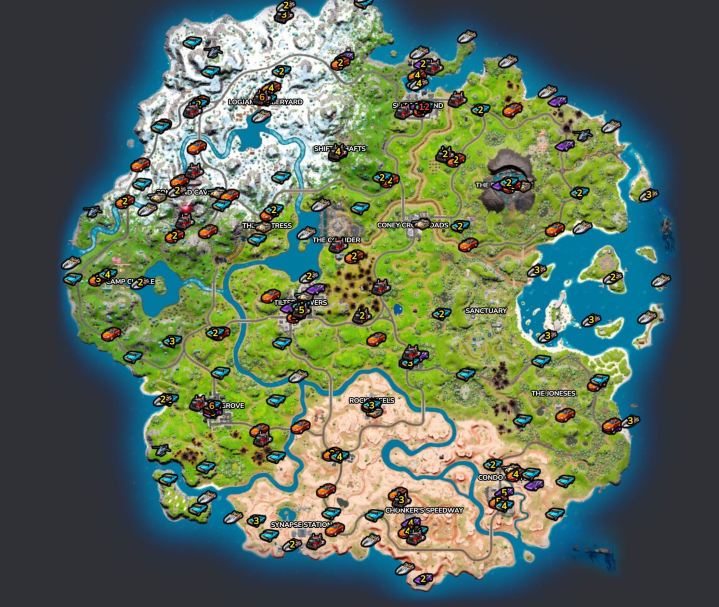
Above is a slightly overwhelming map of most available vehicle spawns (thanks, Fortnite.gg). Our recommendation is to land somewhere on the outskirts of the map to grab a vehicle — that way, you’re less likely to come across an enemy player. Better yet, try to grab a Choppa so you can easily make your way to the safe zone when the storm comes in. Either way, make sure you jump in a vehicle within 10 seconds of your feet touching the ground to earn credit for this one.
Fly Into The Collider’s Energy Field (1)

The Collider is found sort of in the middle of the island and features a massive energy field that can be spotted from far away. The easiest way to complete this challenge is to land directly inside the yellow and orange parts of the energy field after jumping from the Battle Bus. But you can also use a turret to launch yourself up into the air for the same effect (just in case you didn’t initially land close to The Collider).
Repair Any Turret Using the Repair Torch (300)
There are lots of places you can go to complete this quest, but we like landing at The Daily Bugle since it has plenty of turrets and loot, making it easy to get your hands on a Repair Torch. Be on the lookout for red toolboxes, which contain Repair Torches, and once you find one, head to one of the many turrets in this area. You have to repair 300 damage, so slice at the turret with your pickaxe and continuously fix it until you’ve completed the quest.
Use a Med-Mist While Sliding (1)
Here’s a quick and easy one. As you loot, keep your eyes open for Med-Mist, which is one of the many healing items in the game. It’s fairly common and can be found as floor loot or within chests. Once you have one, position yourself at the top of a steep hill. Slide down and as you’re on the move, use the Med-Mist to heal yourself. You only need to use it once and don’t need to heal a certain amount of HP to earn credit for this quest.
Use a Mounted Turret to Damage Opponents in Vehicles (1,200)
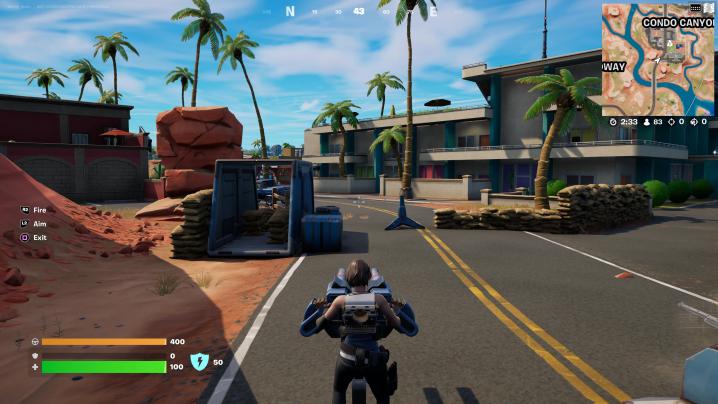
This is arguably the toughest challenge of the week since it’s heavily dependent on luck. To make it as easy as possible, we advise heading to Condor Canyon to the nearby mounted turrets while you wait for enemies to drive by in vehicles. This isn’t guaranteed to happen, but since this area is on the outskirts of the map and there are so many vehicles nearby, you’re bound to come across someone in a car or truck. You need to deal 1,200 damage, which isn’t too bad depending on whether you land your shots. You can also drive a Battle Bus (which is found in Condor Canyon, too) and use it to drive around the island. Then, switch to the turret if you come across an enemy in a vehicle to make progress toward this quest.
Editors' Recommendations
- How many skins are in Fortnite?
- All companions in Baldur’s Gate 3 and how to get them
- Can you fix the Fortnite servers not responding error?
- Helldivers 2: all Boosters and how to get them
- All Charms and Trinkets in Lego Fortnite