The best skills to unlock in Ghostwire: Tokyo

Ghostwire: Tokyo is an interesting and unique blend of a lot of different elements. On one hand, it’s a first-person open-world game set in a haunted version of real-life Tokyo. On the other, it’s an action RPG where you improve your combat abilities via leveling up and acquiring new skills and abilities. These RPG elements are much more prevalent than it might have initially seemed when the game was first shown off, focusing more on the flashy first-person spell-casting and horrific enemies you will encounter on the streets of Tokyo. However, they are a major factor in how your adventure to solve this mystery will unfold.

Skill points will be rewarded for earning XP and raising your Synergy Level, which is how strong Akito’s bond is with KK, the spirit who gives him his mystical powers. Like any traditional RPG, XP will come as you defeat enemies and complete both main and side missions. On first glance, the skill menu might feel overwhelming, especially when you don’t know what will be useful long term, or what you will even like using. Rather than waste your points on something you’ll never use, here is a quick rundown of all the best skills you should unlock in Ghostwire: Tokyo.

See more

Ground Core Grab and Melee Core Grab

The hero of Ghostwire: Tokyo uses supernatural powers.
Image used with permission by copyright holder

We’re lumping these two together since they’re so similar, but we think Ground Core Grab is a bit more essential to get first at the very least. With this skill you can do a Quick Purge on a downed enemy. Knocking enemies over is a major focus for combat, so being able to get a fast takedown by stunning and pummeling foes is essential.

On the other hand, Melee Core Grab is another faster version of your normal purge move, though it does require you to be up close and personal with your target. Their core does still need to be exposed, of course, but is handy for enemies that are harder to knock over.

Core Grab — HP Restoration

Now that you’re grabbing cores faster and more often, make it worth your while by increasing the amount of HP you regain for each grab. Health is a constant concern in Ghostwire: Tokyo, and while you should always have food on hand, it’s always better to save it for tough situations. This won’t completely remove the need for it, but should at least negate any chip damage you take in smaller encounters.

Core Exposure — Duration

Our last core-focused skill you need to grab (get it?) is a straight-up increase to how long an enemy’s core will remain exposed and open to being grabbed. This can help remove some of the stress you feel when exposing a core of a distant enemy and feel like you need to risk it all to rush over and get the grab. Now, you can be much safer and deal with other threats before going for the core.

Perfect Block — Ether Generation

Akito attacks enemies with magic in Ghostwire: Tokyo.
Image used with permission by copyright holder

Ghostwire: Tokyo wants you to learn perfect block timing. This is an insanely powerful move if you can pull it off, allowing you to counter basically any attack sent your way, ranged or otherwise. Ether is your ammo of sorts for your Ethereal Weaving attacks, which you never want to run low on. This skill gives you back some free Ether every time you perform a perfect block. Again, considering how often you should be using this skill, it can basically become your primary Ether source.

Wind Charge Attack — More Shots

We picked the wind style for this ability since it will be your most-used weapon in Ghostwire: Tokyo, but if you really prefer water or fire, feel free to get the equivalent skill for those elements. In terms of wind, buffing this normally underwhelming spell makes it that much better to have as your reliable attack. Each time you upgrade this skill, you get more shots added to your charged-up attacks, maxing out at four. That’s essentially quadrupling your damage output if you can land the hit.

Charge Attack — Speed Boost

Whichever element you upgrade, the charge attack is always a better option when you can pull it off. Speeding up the time it takes to do that charge allows you to use these stronger attacks, regardless of which spell type you’re using, much faster and more often. We recommend upgrading this one as high as possible.

Prayer Beads — Extra Set

Finally, we have the Prayer Beads. These are equipable items that give you some kind of boost, and while all are useful, you start off only being able to wear one at a time. However, this skill will let you wear up to three, stacking all the effects and really upping your power. These beads alone can be worth more than leveling up a specific skill on their own, so dump your points here if you’ve got spare beads burning a hole in your pocket.

Editors' Recommendations

Jesse Lennox
Jesse Lennox loves writing, games, and complaining about not having time to write and play games. He knows the names of more…
The best vocations in Dragon’s Dogma 2
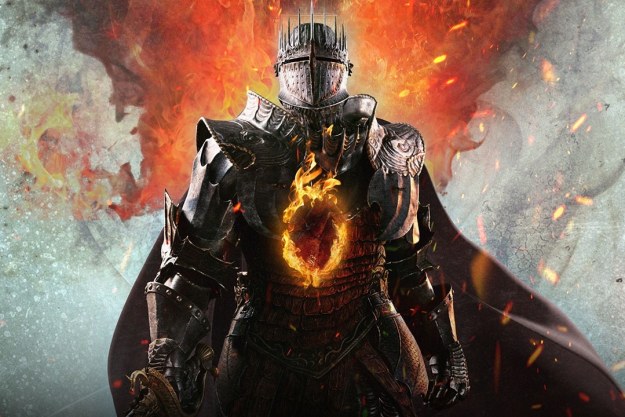
Dragon's Dogma 2 key art featuring a knight with a fiery hole in their chest.

Your Vocation defines your role in combat in Dragon's Dogma 2. Everything from your skills to what weapons and armor you can use is tied to this class. You will pick from just a handful at the beginning of the game, but can easily change Vocations later on, as well as unlock more than twice as many new options than what you start with. It can take a while to really get a feel for a Vocation and how it performs in combat, as well as to look through all of its skills and augments, before knowing if it's worth sticking with to level up. Personal preference will play a part to some degree, but these Vocations have the most potential to make you the strongest Arisen in history.
The best vocations in Dragon's Dogma 2

You can pick from 4 Vocations at the start of Dragon's Dogma 2, but will end up with a total of 10 by the end of the game if you unlock them all. New Vocations are unlocked by completing quests, but they are almost unmissable. Four Vocations -- the Magick Archer, Mystic Spearhand, Trickster, and Warfarer -- can only be used by your character and not any Pawns.
Warfarer
There's very little downside to being a jack-of-all-trades in Dragon's Dogma 2, which is exactly what the Warfarer is. This is the only Vocation that can use any weapon in the game AND learn any skill from other Vocations. This is the only Vocation that really lets you build whatever class you want and gives you the ability to adapt to any situation you find yourself in. The main downside to this class is it has the lowest base stats, but that is a small price to pay for how versatile you can be.
Mystic Spearhand
Hybrid Vocations are all quite powerful, but we put the Mystic Spearhand at the top of the heap. This class turns you into a fighter that can take advantage of magic to output crazy damage. The two almost overpowered abilities you get here are the ability to slow enemies for a short time and to create a magical mimic that doubles all your actions. It is great for both crowd control and large single targets, but takes a while to unlock and lacks some range.
Warrior
If you're going to be a straight-up melee fighter, you might as well hit with the biggest weapon you can, right? The Warrior swings swords large enough to make Guts blush and is a full-on tank. You won't be doing anything fancy with this vocation beyond charging up and swinging as hard as possible. The obvious drawback is any flying or ranged enemy will counter you, so bring some Pawns in those classes to cover your bases.
Sorcerer
For those who fancy themselves a pure mage, stick to the Sorcerer over the actual Mage vocation. While the Mage is more focused on healing, it is the Sorcerer who gets the best offensive spells you will want to be casting. If you have a second Sorcerer with you, you can even sync up and decrease your casting time. If not, you will need some tanks to take aggro while you deal with some slightly long casting times and low total health.
Thief
As far as the starting Vocations go, the Thief is the one we find the most fun and viable for the entire game. This is a light and speedy build focused on critical hits and being able to climb and hang on to large beasts. Once on, you have a number of great skills to stagger and knock down an enemy so the rest of your squad to gang up on it. Just don't get hit because you're one of the squishier Vocations.

Read more
How to solve every Merlin Trial in Hogwarts Legacy
Hogwarts Legacy running on the Samsung Odyssey OLED G8.

Hogwarts Legacy is the best Harry Potter game to ever land on consoles and PC, and the title’s open-world setting is one to be reckoned with. You’ll spend hours exploring the fantastical universe, completing an array of inspired side quests and puzzles, all while evolving your character. The Merlin Trials is a particular set of challenges you’ll want to take on, as you’ll earn additional inventory slots when you beat one. And if you’ve ever played an open-world RPG, you’ll know just how vital these extra digital cubbies can be.

Merlin Trials are unlocked after completing the “Trials of Merlin” main quest. After this, you’ll be able to find all Merlin Trials, but you’ll also need to make sure you have Mallowsweet Leaves on hand. You won’t be able to begin a trial without one. 

Read more
All Call of Duty games in order, by release date and chronologically
e3 2021 missing games call of duty

Call of Duty is one of the most successful video game franchises of all time. The original Call of Duty set a new standard for first-person shooters, the series' online multiplayer work has been a must-play for gamers for nearly two decades, and Warzone has been one of the top battle royale experiences of late.

The series has covered a lot of warfare, from World War II to futuristic fictional wars in 2187, but never in any set order. Players have been bounced around from era to era with each annual COD release and even revisited the same conflicts multiple times from different perspectives through direct sequels and remakes.

Read more