
With sweaty palms, crumbs, and a plague of dust, keeping your PlayStation 4 controller clean can be a chore. From sanitizing to cleaning out the gunk lodged in between the creases, we’re here to show you how to clean your PS4 controller.
We’re going to cover cleaning the outside and inside of your controller. Although most jobs simply require an external wipe down, you may have to take apart your controller to fully clean it out. As a warning, you could break your controller if you need to open it up, so proceed at your own risk.
Further reading
Cleaning the outside of your PS4 controller
Getting crumbs and dust
Before getting to the detail work of cleaning your PS4 controller, you’ll want to get any loose crumbs and surface dust removed. It’s a good idea to give your controller a quick once-over with a can of compressed air before and after cleaning the outside. Because of all of the crevices on the PS4 controller, though, you’ll want to be careful where you point your can.
The goal is to have the stream of air pointing away from your controller, not toward it. Crumbs that would otherwise break free can get lodged deeper in the controller if you’re not careful with your can of compressed air. Although it’s easy to skip past this step, it’s critical in the process. The goal is to clean smaller and smaller particles off the controller as the process goes on, so getting anything big cleaned out at the beginning helps.
The wipe down
Now that you’ve gotten crumbs and dust out of your controller, it’s time to sanitize. Baby wipes are the best tool for the job, but if you don’t have them, a microfiber cloth will work, too. In that case, mix together equal parts water and isopropyl alcohol, then gently wet the cloth. Be sure you’re using a microfiber cloth or something similar, too. Paper towels and the like will leave your controller looking dirtier than when you started.
With your baby wipe or microfiber cloth in hand, work your way around the controller, paying close attention to the under section of the triggers. This step is mainly focused on cleaning the surface of the controller, not getting between all the nooks and crannies. For relatively clean controllers, a can of compressed air and a wipe down is all that’s necessary. Larger jobs require a little more attention to detail, however.
Dealing with the details
After a general sweep of the controller, it’s time to deal with the dirty details. For this process, you’ll want to ditch the water and be sure to have isopropyl alcohol, cotton swabs, and toothpicks handy. Unlike water, isopropyl alcohol isn’t electrically conductive, so if a little slips into the guts of your controller, you’re fine.
Starting with the cotton swab, soak it in isopropyl alcohol to fully saturate the tip. Then, work your way around the controller, be sure to wipe off the face buttons and under section of the thumbsticks. Once finished, leave the controller to dry naturally. Alcohol evaporates quickly, and you don’t want to leave lint on a controller you just cleaned.
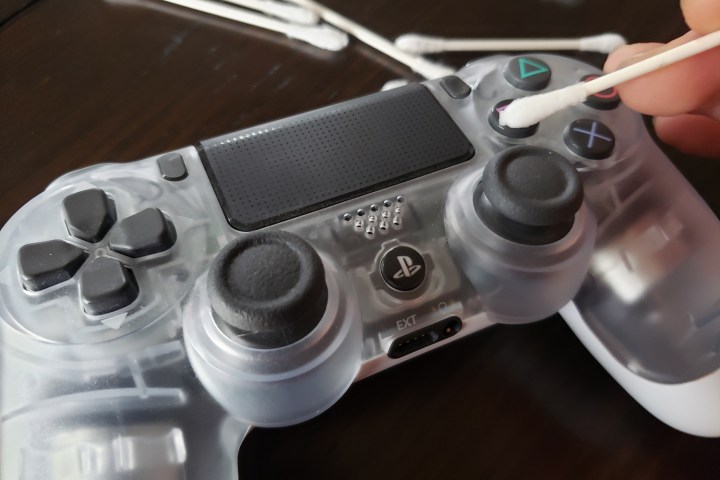
Before ditching your cotton swabs, soak a new one in alcohol and use it to clean the micro USB, headphone, and EXT ports on the controller. You’ll want to be very gentle here, as pressing down too hard will leave some cotton lodged in the port.
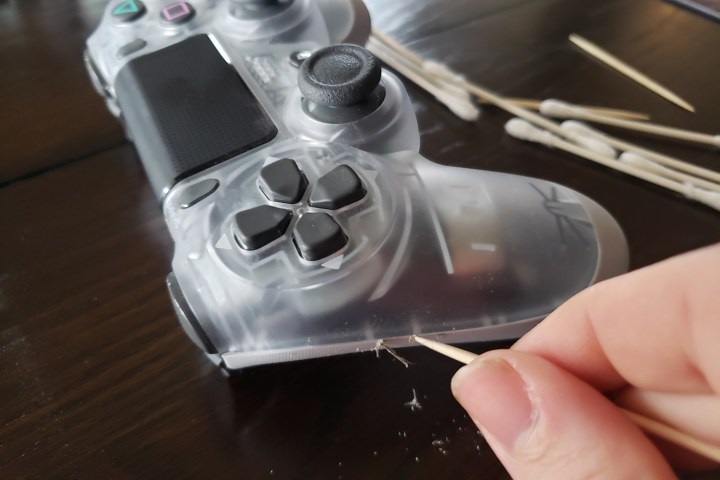
After everything is dry, use dry toothpicks to shallowly dig around the creases of the controller. That includes getting around the touchpad, cleaning between the triggers, and picking around where the controller body meets. You can also pick around the speaker grille on the front, but be careful not to bury any crumbs stuck inside further.
With all the junk out — you’ll be shocked just how much oil from your hands works its way into the controller — it’s a good idea to go over the body of your controller with a can of compressed air and a baby wipe again. For most people, this is a suitable stopping point. If, however, you have some grime inside the controller, you’ll need to break it open.
Cleaning the inside of your PS4 controller
Undo the screws
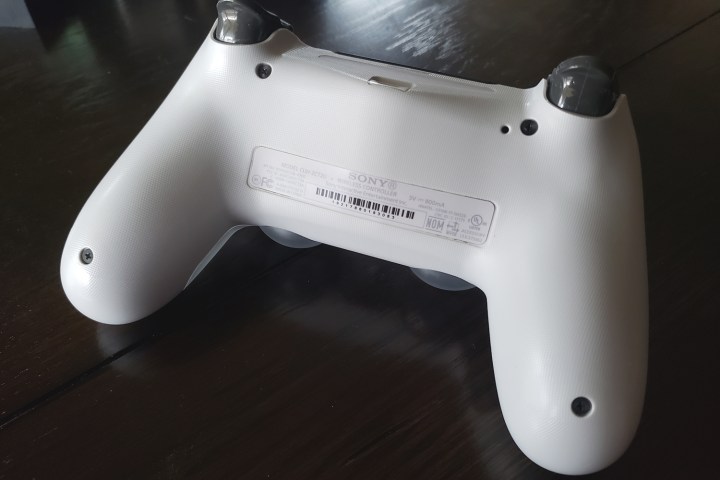
It should go without mentioning that opening your controller will void any warranty you have and that you should attempt the process at your own risk. Still, the process isn’t too difficult. Using a small Phillips head screwdriver remove the four screws on the back of the controller. Like most electronics, the screws are very soft, so you’ll want to be extra careful not to strip them. They’re also very small, so you might want to keep them in a magnetic parts tray.
In addition to the screws, the body of the controller is held together with plastic tabs. Once you have the screws removed, insert a plastic pry tool in the side groove of the controller and gently peel it away from the rest of the body. Don’t move too quickly here, however. There’s a white ribbon cable connecting the back of the controller to the rest of the body, so gently remove that using your plastic pry tool.
Remove the battery
Now inside the controller, remove the battery by disconnecting the power cable and gently peeling it away from the adhesive strip. Although easy to remove, it’s critical to use a plastic pry tool to remove the battery connector, not a screwdriver. It’s likely your battery still has juice in it, so the last you want to do is complete the circuit with a metal tip.

Gently wiggle the battery until it comes loose, being careful not to pull too hard. Once it releases, there’s a single screw holding the battery holder on the back of the board. Remove this screw and set it in your tray along with the battery holder. With it gone, you can lift up the board, analog sticks, triggers, rumble motors, and touchpad as a single unit. This middle section is, essentially, the controller, so be very careful when setting it aside. Also pay attention to the ribbon cable attaching the touchpad. You’ll need to remove it to allow the middle section to come free.
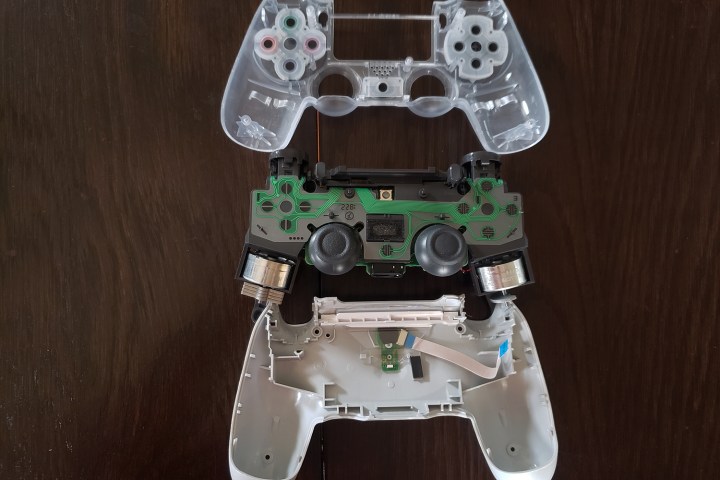
You should be left with the front and back of the controller, along with all the buttons (be careful with those, as they’ll fall out if you flip the front section upside down). Again, run through the inside of the controller using the cotton swab and isopropyl alcohol process above, allowing everything to dry fully before reassembling. You can use water to clean the plastic shell, but it’s a good idea to stick with isopropyl alcohol. Water and electronics don’t play well, and the last you want is some rogue moisture locked in your controller.
Editors' Recommendations
- Best PlayStation Plus Deals: Save on Essential, Plus and Premium
- GTA 5 cheats: codes and phone numbers PS4, PS5, Xbox, and PC
- The best Fallout 4 mods
- All Fallout 4 cheats and console commands
- The PS5 Pro may be coming even sooner than we thought


