How to plant a money tree in Animal Crossing: New Horizons

A staple of the Animal Crossing franchise for years, the beloved money tree makes a return in New Horizons. If you’ve never played any of the previous titles, you might be surprised to find out that money does, in fact, grow on trees. There’s a bit of nuance to planting your own, but with some luck, you’ll have your own cash crop growing in no time.

Further Reading

 Look for the glowing spot

Screenshot | Jon Bitner

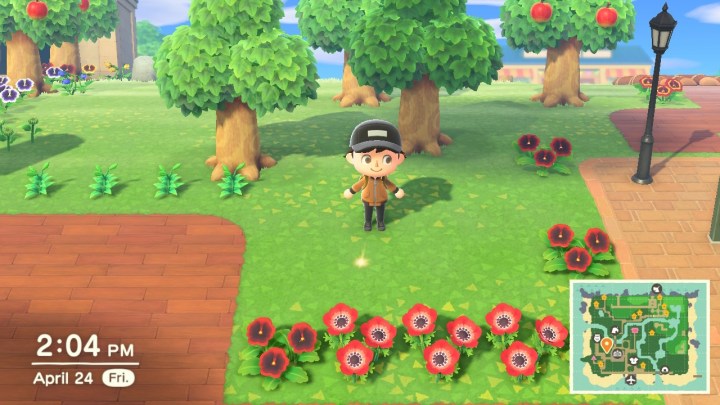
Sadly, you can’t just bury a bag of Bells in the ground and expect it to grow. Instead, scour your island for a spot on the ground that is glowing. It appears on your island every day, although it can be hard to spot. If you’ve looked everywhere and can’t find it, try standing behind buildings and zooming the camera in on your character — too often, the glowing spot will be hidden behind a villager’s home. Once you’ve found it, break out your trusty shovel and dig it up — beneath the dirt, you’ll find a bag filled with 1,000 Bells!

Better than that, this is the spot where you can plant a money tree. Head to your inventory, withdraw the Bells you’d like to use as your “seed” money, then bury the bag in the glowing hole. Wait a few days for the tree to grow, and you’ll have a money tree that holds three Bell bags, each containing the amount of your initial investment. Once the money tree is harvested, it goes back to being a boring, old, regular tree. Feel free to chop it down and make space for the next one.

Play it safe

Animal Crossing money tree
Image used with permission by copyright holder

There’s one catch when planting your money tree — burying more than 10,000 Bells doesn’t guarantee a three-fold return. Although some players have been successful when planting 20,000 Bells — earning a cool 60,000-Bell return — the success rate drops for any investment over 10,000. That means your best bet is to play it safe. Otherwise, you could lose out on a load of cash. We’d recommend simply planting 10,000 Bells, waiting a few days for the money tree to grow, and harvesting your 30,000-Bell return.

Move your money tree to a safe location

Screenshot | Jon Bitner

The glowing money spot appears on your island each day, but it’s not always in an ideal location. Often, it will be positioned too close to other trees or objects to grow properly. The money tree typically needs at least one or two open spaces on all sides in order to flourish. To move your investment, simply take out your shovel and dig it up. Then, head to a new spot, open your inventory, and plant the sapling. There’s no penalty for doing this, so feel free to move it as often as needed until you find the best location.

Editors' Recommendations

Jon Bitner
Jon Bitner is a writer covering consumer electronics, technology, and gaming. His work has been published on various websites…
Animal Crossing: New Horizons terraforming guide
Animal Crossing player poses with their terraformed waterfall.

Animal Crossing: New Horizons is all about customization. With the version 2.0 update, returning players are opting for a complete island overhaul, while new players have plenty of tools and toys to work with. They'll re-shape the landscape of their island through terraforming, a mechanic that elated long-time Animal Crossing fans when it was announced in New Horizons. You will have to unlock the terraforming app, aka the Island Designer App, on your NookPhone if you plan to reshape the landmass around your island. Here's how to unlock terraforming in Animal Crossing: New Horizons and some helpful hints on using it best.

How to swim in Animal Crossing: New Horizons
How to play the turnip Stalk Market in Animal Crossing: New Horizons
Animal Crossing: New Horizons beginner’s guide

Read more
How to find Brewster and unlock the Roost in Animal Crossing: New Horizons
Brewster at the Roost in Animal Crossing.

The 2.0 update to Animal Crossing: New Horizons packed in far more content than anyone could've anticipated. From new mechanics like cooking to farming and even a new camera system, this update has breathed fresh life into this game that already had so many people hooked. Some of the new additions are obvious and can be accessed immediately, while others take a little time and effort to earn. Perhaps the most substantial addition, The Roost, is just one of those new features you may not know how to get right away.

Brewster the pigeon, the owner and operator of The Roost coffee shop, was heavily featured as part of this update. Now that it is out, though, there are almost no clues in the game itself of how to find him and actually open up his cafe. Whether you're a caffeine connoisseur or not, The Roost is a perfect hang-out spot that you will certainly want to have access to on your island. To help you find Brewster and unlock The Roost for your island in Animal Crossing: New Horizons, we'll show you all the steps that you need to do to set up shop.

Read more
How to cook in Animal Crossing: New Horizons
Cooking in Animal Crossing: New Horizons

It's been well over a year, and yet Animal Crossing: New Horizons is still giving us more new things to do on our islands. With the latest 2.0 update, a whole host of new activities and features were added, both for free and as part of the paid DLC. While there were many parts that fans were eager to see return -- or show up for the first time in the series -- there was one aspect in particular everyone seemed to be craving more than others.

Cooking was the perfect ingredient to add to Animal Crossing: New Horizons in this update. Collecting materials, including food, fishing, and crafting, all felt like cooking was the next logical step, and thankfully, it was. Just like in real life, cooking isn't so easy, though. You'll need to do some prep work to get your kitchen in order before you can start whipping up some delicious dishes. If you want to know everything there is about how to cook in Animal Crossing: New Horizons, we've got a step-by-step recipe for you to follow.

Read more