Like a much more cute, friendly, and kid-friendly Mega-Man, Kirby’s claim to fame has been his ability to suck up enemies and absorb their powers to use as his own. Part of the fun of each game is to see what new powers this pink little ball of fun will get to play with, or what new spin on previous powers will be. In Kirby and the Forgotten Land, our charming hero might not have the most copy abilities he’s ever had access to in a game, but aside from the new 3D world he inhabits, the game does offer a new and exciting way to make his copy abilities fresh for his latest outing.
After acquiring a copy ability, Kirby typically gets a new move or two related to whatever power he’s picked up to use until he loses it or trades it out for a new one. Kirby and the Forgotten Land makes copy abilities a little more meaningful by allowing you to upgrade them at a special shop in the game’s hub level, Waddle Dee Town. These upgrades can change a bunch of aspects of your favorite abilities, but unlocking the ability to do so, and what you need to do in order to upgrade different abilities, is a bit of a challenge. If you want to make your Kirby’s copy abilities the most powerful they can possibly be in Kirby and the Forgotten Land, here’s everything you need to know about how to upgrade all of his abilities.
Note: We will be listing all the copy abilities in the game at the bottom of this guide. If you’d rather not know what every ability in the game is, skip the final section.
See more
- Kirby and the Forgotten Land beginner’s guide
- Kirby and the Forgotten Land review: Waddle Dee-lightful
- The best Kirby games, ranked from best to worst
How to upgrade copy abilities
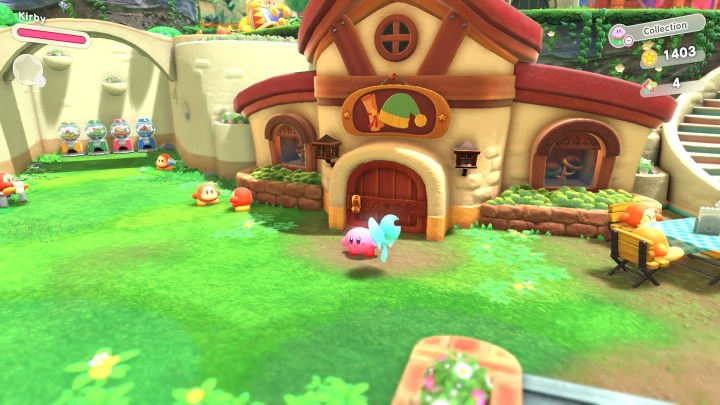
Before getting ahead of yourself, there’s one roadblock in your way before you can even look at upgrading any copy abilities in Kirby and the Forgotten Land. That roadblock is the Natural Plains area, and the boss is Gorimondo. This massive gorilla is the game’s first boss and isn’t too difficult, but must be overcome before you are whisked away to Waddle Dee Town. Once there, you will see that the Waddle Dee Weapon Shop has been erected and is ready for business. This is where you will do all your copy ability upgrading, but can also test out any ability you’ve found so far and equip one to take into your next mission.
Upon your first visit, the shopkeeper Waddle Dee will gift you enough resources to upgrade either your Fire or Cutter ability one time right off the bat. The three things you need to upgrade abilities are Coins, Rare Stones, and the Blueprint for the ability you want to upgrade.
Upgrades can be as simple as damage boosts, but can also change how the ability functions entirely, as well as how it appears visually on Kirby. The higher level you want to upgrade the ability to, the more coins and Rare Stones it will cost you.
How to get Rare Stones

Coins are easy enough to come by, but Rare Stones are, as the name suggests, less common. These special items can only be found in two ways: Completing Treasure Road levels or as rewards for competing in the Colosseum. The Colosseum will eventually become available in Waddle Dee Town and hosts combat-focused challenges as you would expect, while Treasure Road stages appear as you progress through the main levels. When they pop up, take them on to be challenged with a stage that gives you either an ability or Mouthful Mode transformation to use in an attempt to finish the stage as fast as possible. While there is a Target Time you can aim for, you don’t have to beat it to claim the Rare Stone reward.
Where to find all Blueprints

Perhaps the most important component to upgrading your copy abilities is the Blueprints. Without these scrolls, you won’t be able to power up a copy ability no matter how many coins and Rare Stones you have. Here are the stages you can find all the copy ability Blueprints:
Clutter Needle Blueprint: Scale the Cement Summit
Chain Bomb Blueprint: Fast-Flowing Waterworks
Noble Ranger Blueprint: The Tropical Terror
Toy Hammer Blueprint: Welcome to Wondaria
Gigant Sword Blueprint: Circuit Speedway
Time Crash Blueprint: Invasion at the House of Horrors
Fleur Tornado Blueprint: The Wondaria Dream Parade
Pencil Drill Blueprint: Danger under the Big Top
Dragon Fire Blueprint: Metro on Ice
Frosty Ice Blueprint: The Battle of the Blizzard Bridge
Homing Bomb Blueprint: An Unexpected Beast King
Crystal Needle Blueprint: The Wastes Where Life Began
Buzz-saw Cutter Blueprint: Searching the Oasis
Wild Hammer Blueprint: Alivel Mall
Twin Drill Blueprint: Moonlight Canyon
Blizzard Ice Blueprint: Collector in the Sleepless Valley
Space Ranger Blueprint: Conquer the Inferno Road
Deep Sleep Blueprint: Burning, Churning Power Plant
Storm Tornado Blueprint: Gathering of the Beast Council
Meta Knight Sword Blueprint: Waddle Dee Town Colosseum
Masked Hammer Blueprint: Waddle Dee Town Colosseum
Editors' Recommendations
- How to hack in Fallout 4
- How to fix ‘servers at capacity’ error in Helldivers 2
- How to get pets in Sea of Thieves
- How to make money fast in Content Warning
- How to sign up for the Marvel Rivals playtest