
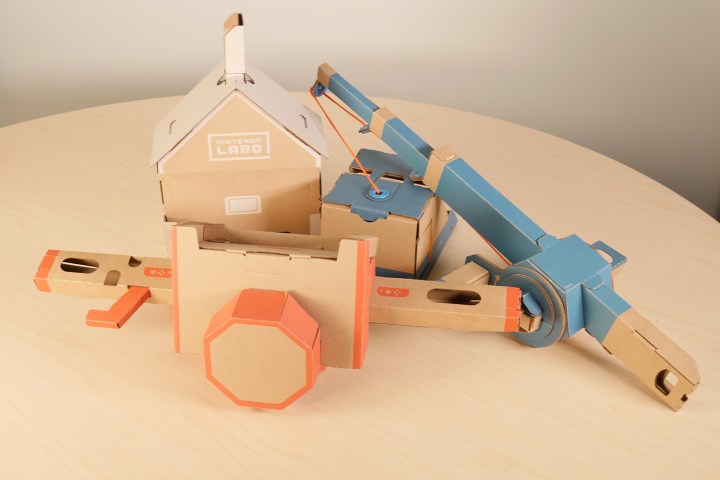
Much, if not most, of Nintendo Labo‘s appeal is the building process itself. Piecing together cardboard cutouts into functional toys is a neat and rewarding experience (especially for youngsters). As such, Nintendo has made sure that builders know exactly what to do with an excellent set of interactive instructions for each Toy-Con. As a result, it’s unlikely you’ll encounter any problems in the build process. That said, we’ve put together all of the available Toy-Cons and have some tips that will help make your time with Labo an efficient and hopefully stress-free endeavor.
Build on the floor
First things first, you need a sizable area to construct Toy-Cons. The cardboard sheets are big and most builds require dozens of pieces, with multiple needing to be pulled at the same time from separate sheets. We started building at the kitchen table, but quickly realized that we needed more space. A nice open space on the living room floor works well. This gives you enough room to spread the pieces out and avoid misplacing stuff from step to step.
Put needed sheets on top
If you’re building the robot, skip this tip, but the Variety Kit has five different Toy-Cons. Each cardboard sheet has a color-coordinated icon to tell you which build it belongs to. Depending on which Toy-Con you choose to tackle next, you won’t always be picking from the top of the box. It makes things easier to retrieve the required sheets and put them at the top of the stack before you start.
Don’t forget to punch out cardboard holes
Almost every piece of a build has at least one, and usually multiple, holes to punch out. Often it’s spots for tabs, sometimes it’s circles. When you’re removing pieces from sheets, flip the piece over to the backside to easily identify where the holes are and start punching them out before you make any folds. It’s pretty annoying to fold a piece together only to realize you punch out a hole where the tab goes in. You have to remember to do this yourself because the instructions don’t remind you — each step starts with the holes already removed.
Similarly, be careful when you do this. Although the cardboard is sturdy, if you jab recklessly, you can wind up ripping out a little more than you bargained for. Also, make sure to make to distinguish between holes that result in fully detached pieces and spots where you are just punching out a couple sides (usually a tab that connects the piece together).
Have a trash can handy
Piggybacking off of punching out holes, you should definitely have a garbage can nearby. You’re bound to accumulate a massive graveyard of tiny rectangular pieces of cardboard if you don’t. Each time we finished a step, we scooped the cardboard shreds into a plastic bag to keep our area clean.
Save the cardboard sheets
You’ll start to notice this as you build, but there are more pieces than needed to complete each Toy-Con. By all means, toss the sheets that have been fully utilized, but you’ll want to hang onto the ones with stray pieces still attached. Some of the extras are spare parts if the original piece breaks, while others can be used to create your own Toy-Cons or add to existing ones. Put these sheets back in the box when you finish a Toy-Con.
Crease firmly
It’s cardboard, yes, but that doesn’t mean you can’t apply a little force. Nintendo Labo largely revolves around folding cardboard along its creases. While this activity can get tedious over time, don’t take any shortcuts. You really do need to fold all the way down flat with each fold, until cardboard touches cardboard. If not, a finished piece will feel loose and flimsy. Solid folds create solid structures.
Rotate the camera
While every piece joins together smoothly, sometimes it’s hard to tell exactly where things go without looking at the demonstration from a different angle. If you’re building while in docked mode, you can use the thumbstick to turn the camera and zoom in. If building in tabletop mode, the touchscreen handles the controls. It’s always smart to turn the camera so you can where tabs go in and pieces join together.
Tired? Take a break
Labo builds take longer than you’d think. We hope you won’t need a break building the RC car (it takes 10 minutes), but all of the other Toy-Cons take more than hour. And you could watch Titanic in the time it takes to build the piano or robot. Taking breaks is a good idea, and don’t worry about leaving your Switch on — Labo saves your progress. When you’re feeling re-energized, you can pick up right where you left off.
Where should you store finished Toy-Cons?
Your guess is as good as ours.
Editors' Recommendations
- Nintendo Indie World 2024: How to watch and what to expect
- Best gaming console deals: cheapest prices on PS5, Xbox S and X and Switch
- All upcoming Switch games: 2024, and beyond
- How to get the Finishing Touches achievement in Hogwarts Legacy
- How to get Wild Greens in Zelda: Tears of the Kingdom


