
Sonic Frontiers beginner’s guide: 5 tips and tricks to get started

Grab your chili dogs and start blasting some Crush 40 because Sonic is back in action in his latest 3D adventure. When Sonic Frontiers was originally shown off, many people classified it as a Breath of the Wild-like game due to it being set in a massive open world. In some ways, that comparison is correct, but approaching this game like it’s another Zelda title will only trip you up. While it doesn’t reinvent any individual mechanic, Sonic Frontiers puts its own spin (dash) on many open-world tropes.

Fans of Sonic games – either 2D, 3D, or both — will be in for some major surprises when starting Sonic Frontiers. The open world, or open-zone as Sonic Team has classified it, is easy enough to understand, but all the new mechanics and systems can be overwhelming and confusing when put together. Before you break out into a sprint across this new adventure with the blue blur, here are some important tips and tricks to get started in Sonic Frontiers.

Recommended Videos

See more

Gotta go fast

Sonic grinding on a rail.
Image used with permission by copyright holder

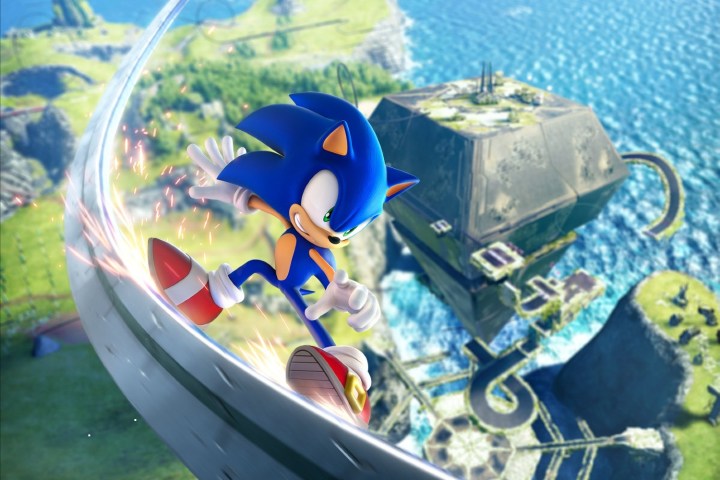
Sonic’s main mechanic has always been, and likely always will be, running very fast. That’s no different in Sonic Frontiers, however, the way speed works here is much different. You may notice that your little hedgehog isn’t quite as speedy as you might hope when first playing. That’s because Sonic now has stats that you need to level up, with Speed being one of them.

Sonic’s Speed stat can be leveled up all the way to 99, and you will want to prioritize this stat first. Each area in Sonic Frontiers is massive, and being able to blast your way across them will make the entire game flow much smoother.

Prioritize Memory Tokens and Vault Keys

Eggman's ship landing.
Image used with permission by copyright holder

As you scan the map of Sonic Frontiers, you will be hit with tons of things to collect. Everything has its uses, of course, but if you want to focus on making progress in the main story, then the two you should prioritize are the Memory Tokens and Vault Keys.

Memory Tokens are what you need to contact Sonic’s lost friends on that specific area of the map. These will unlock further parts of the story, plus sidequests to perform.

Vault Keys are what you need to unlock all the Chaos Emeralds. Once you’ve gotten all the emeralds on that island, you can face the boss.

Clear the map

Sonic stares at a landscape in Sonic Frontiers.
Sega

Your map will be your best friend in Sonic Frontiers. But, just like most open-world games, you can’t see the entire thing without clearing it first. Whenever you enter a new area, head for the icons of red question marks first. These are mini challenges or puzzles that should take less than a minute to complete and will reveal a portion of the map once done.

Tweak your hedgehog

Sonic dodges an enemy attack in Sonic Frontiers.
Image used with permission by copyright holder

Sonic Frontiers offers the most options of any Sonic game to date. How Sonic feels to control is arguably the most important part of any Sonic game, and your options here are actually quite extensive for making the blue blur more responsive.

In the Game Settings menu, the most important settings to tweak, if you feel something is a bit off, are steering sensitivity, acceleration, bounce height, and auto combo. The first three are sliders you will need to tweak and test individually, but auto combo is one you should just turn on right away. Sonic has a lot of moves to unlock in this game, and remembering these combos can be a little awkward. Auto combo lets you just mash attack and lets the game select the ideal set of moves (most of the time) for a given situation.

Fish for easy items

Sonic lifts his finger to Amy Rose's cage in confusion.
Image used with permission by copyright holder

While some of us may have nightmares when thinking about fishing with Big the Cat, it’s actually one of the most useful ways to progress in Sonic Frontiers. You have to manually find Big yourself on the map, but seeking him out is well worth your while.

Fishing rewards you with Tokens, which can then be exchanged for just about any item in the game, including Memory Tokens, Vault Keys, and upgrade materials. Because of how fast and easy fishing is, this is the quickest way to grind any items you might need.

Jesse Lennox
Jesse Lennox has been a writer at Digital Trends for over five years and has no plans of stopping. He covers all things…
The best Palworld tips and tricks for beginners
A pal base with a farm and bath.

As a new resident of the Palpagos Islands, things may seem a bit confusing -- even frightening. Not only are there dangerous Pals out there ready to ambush you, but humans as well. This isn't a turn-based game like Pokemon, so you will need to rely on your skills in addition to strategy if you want to be a great Pal Tamer in Palworld. Being a survival game at its core, combat is just one aspect of the equation, along with exploration crafting, breeding, and more. The learning curve can be steep, but we can help you get your footing and begin your journey to be the best Pal Tamer in the land with a few tips and tricks every player should know.
Best Palworld tips and tricks

Palworld has a lot of mechanics going on under the hood, and while it does its best to explain them all, a lot of nuance is left for you to figure out on your own.
Get the essentials
First, you need to get yourself a pickax as soon as possible. Crafting is the key to progression in Palworld, and the trusty pickax lets you gather all the most necessary materials, including, most importantly, Paldium Fragments. These blue rocks are necessary for crafting Pal Spheres that you need to catch Pals with, which we shouldn't have to explain the importance of. You can make a Workbench out of just 2 Wood, and then use it to craft the pickax out of 5 Wood and 5 Stone. From there, your next priority should be the Palbox, so you can start catching and holding as many Pals as you can catch.
Put your Pals to work

Read more
Best cooking recipes in Avatar: Frontiers of Pandora
Harvesting a fruit in Avatar: Frontiers of Pandora.

While it isn't quite a survival game where you're required to eat, foraging for ingredients to cook meals is highly encouraged in Avatar: Frontiers of Pandora. Sure, you could just eat raw ingredients to make sure you never fully deplete your energy, but you'd be missing out on some very powerful buffs that a well-crafted meal can provide. You obviously will be unfamiliar with basically every ingredient you come across on Pandora, as it's an alien planet after all, and even your character will have no idea what effect mixing up a couple of plants or bits of meat will yield until you try it out. If you didn't come to this planet to play Gordon Ramsey, here's a breakdown of the best recipes you can cook in Avatar: Frontiers of Pandora and how to make them.
Best recipes and how to cook them

Cooking is done at any cooking station that you can find at every Na'vi or resistance base. Once you interact with it, you can select two ingredients to mix together and see what meal you come up with. Meals can have one or two buffs depending on if they're a standard or specialty recipe, but they always refill your energy.
Crunchy Seafood
Ingredients: Any fish + any seed.

Read more
All Ancestor Skill locations in Avatar: Frontiers of Pandora
An Ikran flies towards a ship in Avatar: Frontiers of Pandora.

After being raised by humans up until the start of Avatar: Frontiers of Pandora, your Na'vi has a lot to learn about where they come from and their lost heritage. Part of that is learning how to actually survive and navigate Pandora, but another major aspect is learning new skills. You have your standard five skill trees to invest points into, as well as a set of 12 Ancestor Skills that you can't get by normal means. These skills are far more meaningful when it comes to adding new gameplay options, and can only be obtained by hunting down specific plants to connect with on the map. It's a big world out there, Na'vi, so call your ikran (a dragon-like creature) and we'll guide you through the wilds to the location of every Ancestor Skill.
Where to find all Ancestor Skills
You will get the first Ancestor Skill early on in the game as part of the main story, which unlocks a short double-jump ability. The remaining 11 are completely optional as to whether or not you go out of your way to find them. We recommend waiting until you get your ikran before going after any skills other than the first as the ability to fly will not only make the process infinitely easier, but some skills can't be reached without it.

1. Eject
Eject makes short work of those dangerous RDA soldiers piloting power armor suits by letting you rip them right out of the cockpit. You do have to get close enough to do it, though, so be careful.
2. Drop Impact
Melee attacks are already strong considering you're a giant Na'vi, but you can make them downright deadly with this skill. Any jumping attack you do gets a damage multiplier, up to a maximum of 3, depending on how fast you're running when you melee in the air. As a nice little cherry on top, any nearby enemies also get staggered when you pull off this move.
3. Deeper Connection
Get in touch with your ikran and strengthen your bond, which gives it more stamina for whatever reason.
4. Soft Landing
Falling to your death is a real concern on Pandora. You're constantly climbing trees, mountains, and even floating islands. While it won't save you from a fall from the latter, Soft Landing lets you slide after a long fall to avoid breaking a leg.

Read more