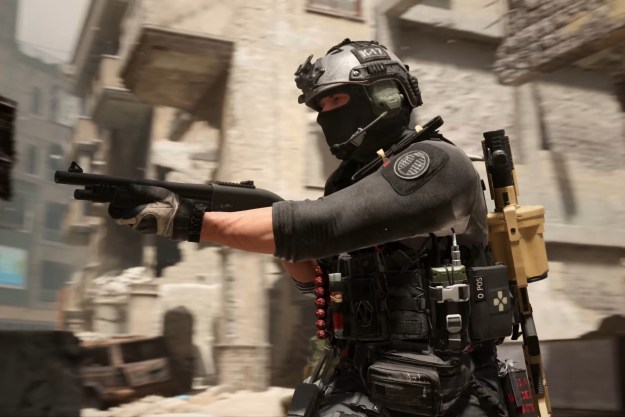
Following the recent Vanguard integration, Call of Duty: Warzone players have a slew of additional weapons to master and experiment with. Many of the Vanguard weapons are at least worth checking out, while others should be prioritized, as they’ve made their way into the Warzone meta. One such weapon is the MP-40, an SMG that has made frequent appearances throughout the Call of Duty series. This is easily one of the best in the game, at least in its current state. But how should you build it? Now that we have 10 attachment slots to work with, there are even more possible combinations of class setups you can use.
These are the best MP-40 loadouts in Call of Duty: Warzone.
Recommended reading
- How to level up your weapons fast in Call of Duty: Warzone
- Best settings for Call of Duty: Warzone
- The best places to land in Warzone
MP-40 overview

As always, let’s take a look at the MP-40 before getting to the recommended builds. According to TrueGameData, the MP-40 has a base fire rate of 600 rpm, and a base time to kill (TTK) of 600ms within 13 meters if you land chest shots. It’s an SMG, so it’s lightweight and features fast aim down sights (ADS) and reload times, but is also relatively accurate and easy to control.
Because of this, you can actually build the weapon in a variety of ways — from extremely fast and mobile, to more stable for mid-range, with several variations in between. It’s best paired with an assault rifle or sniper, as it works well up to around 20 meters.
Here are some recommended MP-40 setups.
Close-range

Recommended attachments:
| Muzzle | Recoil Booster |
| Barrel | Krausnick 221mm 01B |
| Optic | Krausnick IS02M |
| Stock | Krausnick 3mm Folding |
| Underbarrel | Mark VI Skeletal |
| Magazine | 7.62 Gorenko 45 Round Mags |
| Ammunition | Incendiary |
| Rear Grip | Fabric Grip |
| Perk | Unmarked |
| Perk 2 | Quick |
First up, let’s dive into one of our favorite close-quarters MP-40 loadouts. This setup prioritizes fast ADS, rate of fire, and sprint-to-fire speeds. It isn’t the easiest to control, but since you’ll primarily be using this weapon within 10 meters or so, it won’t be that difficult to hit your target.
Start with the Recoil Booster Muzzle for an improvement to your fire rate. This does penalize your accuracy, but again, this isn’t a big deal up close. After that, to gain faster ADS speed, sprint-to-fire speed, aim walking movement speed, and hip-fire accuracy, utilize the Krausnick 221mm 01B Barrel. This will allow you to start firing much faster, even if you’re sprinting. Follow that up with the Krausnick IS02M Optic, which is effectively an iron sight. This improves your ADS times even further.
For the Stock, you can either use the Removed Stock option or the Krausnick 3mm Folding. We prefer the latter, as it boosts your sprint-to-fire speed, which is essential for winning certain gunfights up close. Then, go with the Mark VI Skeletal Underbarrel for yet another ADS speed boost. You’ll be aiming at your enemy before they even know you’re there with this build. It might be tempting to equip the 8mm Kurz 40 Round Mags since the game says it deals more damage, but this attachment slows your fire rate, along with your ADS speeds, so you should use something else. Instead, utilize the 7.62 Gorenko 45 Round Mags, which gives you improved recoil control, better movement speed, faster ADS times, and fire rate. Not only will you be able to hit your targets easier with this attachment, but you’ll be able to start shooting before your opponents.
As for Ammunition, we like Incendiary rounds since they deal slight burn damage over time after impact. This could be the difference between winning and losing a gunfight, so give them a try. After that, use the Fabric Grip for additional boosts to ADS speed, sprint-to-fire speed, and hip-fire accuracy. Then, equip the Unmarked Perk, which conceals your footsteps temporarily after you earn a kill, making it easier for you to navigate close to enemies. Finish the build with the Quick Perk 2 for increased sprint speed.
Perks
| Perk 1 | Quick Fix |
| Perk 2 | Ghost |
| Perk 3 | Combat Scout |
When it comes to Perks, Quick Fix is a great option for the first slot, as it allows you to instantly recover health after earning an elimination. After that, you can’t go wrong with Ghost for slot 2, keeping you off the minimap during enemy UAVs. Finally, we’ve been enjoying Combat Scout for slot 3 lately, since it pings enemies you damage for your entire squad — even through walls.
Equipment
| Lethal | Molotov Cocktail |
| Tactical | Stun Grenade |
Depending on whether you’re playing on Caldera or Rebirth Island, you should consider using Molotovs as your lethal equipment. If you’re on Rebirth, Throwing Knives are a good option as well, since you can quickly finish off a downed opponent without wasting ammo. Finally, Stun Grenades are highly effective across all modes since they cause your foes to be immobile for a couple of seconds.
Accuracy/recoil control

Recommended attachments:
| Muzzle | Mercury Silencer |
| Barrel | Krausnick 317mm 04B |
| Optic | Slate Reflector |
| Stock | VDD 35M Wire Grip |
| Underbarrel | m1941 Hand Stop |
| Magazine | 9mm 64 Round Drums |
| Ammunition | Hollow Point |
| Rear Grip | Polymer Grip |
| Perk | Perfectionist |
| Perk 2 | Fully Loaded |
For the next build, let’s touch on a setup that works best at mid-range. This version of the MP-40 will prioritize accuracy and recoil control, making it an effective sniper support weapon without sacrificing too much mobility.
To improve recoil control and keep you from showing on the minimap when firing, we advise using the Mercury Silencer Muzzle. Then, swap over to the Krausnick 317mm 04B Barrel for improved stability and reduced gun bob while aiming. Since you’ll be using this at mid-range, having the Slate Reflector Optic equipped is ideal, as it gives you a clear picture of your targets. Then, follow that up with the VDD 35M Wire Grip Stock, which boosts accuracy, flinch resistance, recoil control, and offers improved aiming stability. This will help you take on gunfights from afar.
For a further boost to recoil control and accuracy, equip the m1941 Hand Stop Underbarrel. This does penalize your hip-fire accuracy, but its benefits outweigh the downsides. Since you’ll need more ammo to take out opponents at range, we advise swapping over to the 9mm 64 Round Drums Magazine. If you’re a skilled player, you can get away with using the 7.62 Gorenko Mags, but we like the extra ammo for mid-range battles.
From there, use the Hollow Point Ammunition, which increases limb damage. This will help you secure more eliminations if you’re missing chest or headshots. You can also use the Lengthened Ammunition for improved bullet velocity, but Hollow Point works wonders. After that, go with the Polymer Grip for improved accuracy and recoil during sustained fire, allowing you to stick to your target more effectively. As for your weapon Perk, we recommend Perfectionist, which boosts your recoil control yet again. Finally, go with Fully Loaded for weapon Perk 2 for max starting ammo, which is great in all situations.
Perks
| Perk 1 | Quick Fix |
| Perk 2 | Overkill |
| Perk 3 | Combat Scout |
Stick with Quick Fix for slot 1, for the reasons listed above. Then, use Overkill to bring the sniper or assault rifle of your choice along with you (though, we recommend grabbing a second loadout later so you can grab a Ghost setup for the latter portion of a match). From there, stick with Combat Scout, but if you find yourself swapping weapons frequently, Amped for slot 3 is a great option.
Equipment
| Lethal | Molotov Cocktail |
| Tactical | Stun Grenade |
When it comes to equipment, we advise sticking with Molotovs and Stuns, but if you’re playing on Rebirth Island, you can get away with swapping over to Throwing Knives and a Heartbeat Sensor if you choose.
All-around

Recommended attachments:
| Muzzle | Recoil Booster |
| Barrel | Krausnick 317mm 04B |
| Optic | Slate Reflector |
| Stock | Removed Stock |
| Underbarrel | Mark VI Skeletal |
| Magazine | 7.62 Gorenko 45 Round Mags |
| Ammunition | Hollow Point |
| Rear Grip | Polymer Grip |
| Perk | Momentum |
| Perk 2 | Quick |
The final build will emphasize practicality, balancing accuracy, speed, fire rate, and ease of use. This will be a build that works well in many situations, covering your bases for whatever comes your way.
To help you during close-range engagements, swap back over to the Recoil Booster Muzzle. Remember, this boosts your fire rate. After that, go back to the Krausnick 317mm 04B Barrel for improved accuracy and reduced scope sway and gun bob. After that, we advise going with an Optic such as the Slate Reflector but go with whatever you’re comfortable with — ideally something that doesn’t penalize ADS times. Follow that up with the Removed Stock, which increases your hip-fire accuracy and movement speed.
Stick with the Mark VI Skeletal Underbarrel attachment for improved recoil control and accuracy, countering the downside of the Recoil Booster Muzzle. Likewise, continue using the 7.62 Gorenko 45 Round Mags, which improves your recoil control, accuracy, movement speed, ADS speed, and fire rate. This is key to a versatile setup. After that, equip Hollow Point Ammunition for increased limb damage, giving you more consistent TTKs.
From there, keep the Polymer Grip equipped, once again for improved accuracy and recoil control. To help keep you light on your feet, we advise using the Momentum weapon Perk, which increases your speed after you earn kills. Then, finish the build with the Quick Perk 2 for a boost to overall sprint speed. You’ll zip around insanely quickly with this build while still remaining accurate with your shots.
Perks
| Perk 1 | Quick Fix |
| Perk 2 | Ghost |
| Perk 3 | Combat Scout |
As always, it’s tough to go wrong with Quick Fix for slot 1, but if you aren’t an aggressive player, you can swap to E.O.D., which boosts your damage resistance to explosives. Follow that up with Ghost to keep you from appearing on the minimap during enemy UAVs. Though, High Alert is great, too, if you’re a more advanced player, as it causes your screen to flash orange when an enemy looks at you. For slot 3, go with Combat Scout or Amped depending on playstyle.
Equipment
| Lethal | Molotov Cocktail |
| Tactical | Stun Grenade |
Once again the Molotov/Stun combo is great, but your mileage will vary depending on mode and map. If you’re playing standard Battle Royale on Caldera, we advise going with Semtex and a Heartbeat Sensor, but if you’re on Rebirth, Throwing Knives and Stuns are your best options.
Editors' Recommendations
- Is Call of Duty: Modern Warfare 3 cross-platform?
- Call of Duty: Warzone is finally coming to mobile in March
- The best weapons in Call of Duty: Modern Warfare 3
- The best Call of Duty games, ranked
- The best field upgrades for Modern Warfare 3 Zombies