The Outer Worlds has finally touched down on Nintendo Switch, bringing a manageable RPG that feels much like a modern take on the Fallout series. It originally released in the fall of 2019 to PS4, PC, and Xbox One. Before you embark on a mission across the stars, however, there’s some vital information you need to know. There is a lot to manage as you take on (or befriend) the many mega-corporations of deep space. From companion relationships, to inventory management, and even applying the right specs to your character, we’ve compiled an introductory guide to staying alive.
Further reading:
- The Outer Worlds journey not yet over as Obsidian promises story DLC in 2020
- The Outer Worlds character build guide: Attributes, skills, and aptitude
- The best single-player games
Tips and tricks for surviving The Outer Worlds
Manage your inventory carefully

Loot in The Outer Worlds is aplenty. You’ll regularly be lining your pockets with new weapons, healing items, and armor. Many of these items will need to be repaired with use, with weapons degrading after being fired, and armor breaking down after taking heavy damage. You’ll be able to monitor this from the inventory screen.
Make sure that you’re equipping your highest level gear and either dismantling or selling the rest. But always make sure to have a backup weapon or helmet just in case yours breaks while out exploring. That being said, we recommend picking up as much as you can as you explore.
Invest in hacking
At the game’s outset, you’ll be able to drop some points into the hacking ability. It’s highly recommended to invest a few points into hacking, no matter what build you are going for. You’ll encounter quite a few vending machines in the field, allowing you to purchase a variety of items. But if your hacking ability is higher than 20, you’ll be able to sell your items at these machines as well. A hacking level of 40 will even allow players to access restricted items on sale at vending machines. Plus, investing in hacking will allow you to temporarily turn off Automechanicals to make your missions go more smoothly.
Take care of your crew

Unlocking companions is a core part of the game, and it comes with a few perks. Not only will you have another gun on your side, but you’ll also have an increased carry capacity! Companions will level alongside you and also have their own skill trees.
Make sure to check in with them from time to time for new conversations and even new quests. Make sure they’re kitted out with the best gear to provide more protection, as they’ll be downed for the duration of a firefight if their health reaches zero. Also, be sure to equip them with their preferred weapon of choice, to make them as deadly as possible.
Scavenge everything
The in-game world isn’t exactly open. It’s filled with carefully hand-crafted zones, packed with little nooks and crannies for you to poke around in. You’ll find tons of consumables and other items to trade if you just look around.
Make sure to scavenge for goods to pilfer, and keep track of locked doors and containers. You’ll find lockpicks laying around, and we found that returning to locked off areas once we’ve picked up enough lockpicks has always yielded some great loot. Even if the items aren’t particularly useful, you can still sell them for cash. With that in mind, it’s always best to keep track of your encumbrance stats, which can be found in the inventory menu in the top left, by your character’s level. Don’t go into a new area if you’re close to reaching the maximum amount you can carry.
Play smart
During our playthrough, we found that many sidequest objectives were located near my main quest locations. It is recommend to stack up on quests and to speak to all available NPCs in hub locations to cut down on the back and forth. If there’s one thing that galactic mega-corporations love, it’s efficiency. One tip is that you can actually show all available quests from the map inside the Unreliable. Head to The Unreliable Navigation Terminal and press Toggle Inactive Quests to highlight every planet that has a quest you’ve started. This will make it much easier to plan your route.
Don’t be a hero

The Outer Worlds doesn’t emphasize combat, instead, giving players a myriad of ways around a given problem or challenge. But if you do happen upon some enemies, or even decide to draw on your allies, do not underestimate them.
We went charging into battle a few times, only to be overpowered by enemies who were just around the corner. Make sure to assess situations carefully, and look around for additional enemies when out in the open. And don’t be afraid to come back to an area later if the enemies out-rank you. There’s no point in dying over and over again, when you could just partake in a different quest that matches your character’s level more appropriately.
Be sneaky
Stealth users have a bevy of tools in this game to facilitate their clandestine activities. Players can sneak through tall grass to conceal themselves from enemies while in outdoor areas. When indoors, players can use cover to conceal them before launching a sneak attack for bonus damage.
You also have access to a Holographic Shroud, which essentially casts a holographic disguise around your character, allowing you to hide in plain sight. While it will project a disguise, the shroud becomes obvious to enemies who get too close. You’ll also want to keep an eye on the awareness indicator over enemy heads. The Holographic Shroud is found during the Passage to Anywhere quest, on the second floor of your ship.
Weigh out your options
Throughout your adventures, you’ll undoubtedly make a few friends and way more enemies. Choosing sides in conflicts will change your standing with the various corporations and factions in the game. You can monitor your faction standing in the character menu.
This standing will affect your ability to travel to certain places, and if a group grows hostile towards you, they can open fire on sight. Over time, however, the heat may die down with certain corporations, allowing you to interact with them once more.
You’ll find that this won’t always work, however, as some mainline quests require to make decisions that will affect the in-game world for the duration of your playthrough. It’s best to speak to all involved NPCs and even check with your companions before making a decision.
Don’t forget to modify and tinker with your weapons and armor

You mustn’t ignore your ability to upgrade your equipment in The Outer Worlds. You will come across Workbenches either onboard your ship or at specific spots in more prominent hubs. Once you access these, you can start altering armament and safety shields. After you’ve made your adjustments, you can begin modifying your weapons, which will give you specific buffs depending on the mods you discovered during your exploration. These modifications can make the weapon more durable, damage output, and even consist of elemental enhancements. If you’d like, you can also Tinker your weapons and armor to improve their efficiency and effectiveness. However, remember that this will cost you in bits.
Avoid the Nintendo Switch version (if possible)

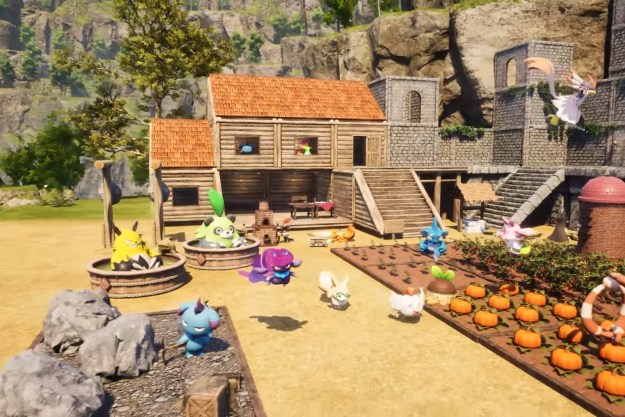
Nintendo Switch released their port of The Outer Worlds on June 5, 2020, but it seemed much better in the advertisements than in reality. The PS4 and Xbox One remain in the top spots. They currently still rule over Switch, whose graphics and visibility leave much to be desired (if we’re completely honest). Take a look at the screenshot above that’s showing one of the biggest hubs in the game. You’ll quickly find that the textures are blurry and definitely far from the high-quality graphics expected from a game. Sadly, you’d have to willingly sacrifice your game time because you’d have to put yourself in front of most of these images so you can read them; if not, they are completely illegible. And not only that, but they eliminated numerous assets so that Switch can run more comfortably.
The Switch offers gyro-controls, but we highly recommend finding another console to play The Outer Worlds. On the Switch, The Outer Worlds is nearly 50 percent slower, making for an irritating experience. Painful extended loading times take away from the enjoyment of the game. Although you might appreciate the Switch controllers’ convenience, the poor-quality graphics are bound to hinder your amusement while playing the game.
Editors' Recommendations
- All Teddy Bear locations in Fallout 76
- Where to find the Unmaking Arrow in Dragon’s Dogma 2
- How to solve every Merlin Trial in Hogwarts Legacy
- The best Wordle starting words, tips, and tricks for beginners
- Final Fantasy 7 Rebirth: Queen’s Blood tips and tricks