When it comes to hardcore tactics games, it doesn’t get much better than XCOM. The classic PC franchise is still in full force thanks to Firaxis’ XCOM 2 and the excellent War of the Chosen expansion, as well as the recent XCOM: Chimera Squad. Our XCOM 2 beginner’s guide will get you started on the right foot, detailing soldier classes, Avenger rooms, and general gameplay tips.
Further reading
General XCOM 2 tactics
Plan your turns in advance

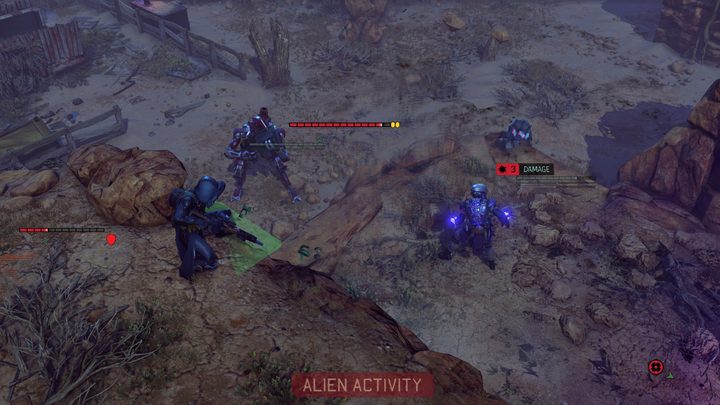
XCOM 2 is a turn-based game, so you can take as much time as you want to plan out your turns. That includes swapping to other members of your squad for a tactical advantage. Before making your moves, you’ll want to take stock of your squad and what they’re capable of. Although it’s tempting to dive in and start shooting targets right away, it’s better to plan what you’re going to do with all your squad members before confirming a single action.
War of the Chosen added a clutch feature that many players had already modded in, which is the ability to preview available targets when deciding where to move your units. Holding Left Alt will bring up all of the targets your soldier will be able to shoot from the tile you’re highlighting, taking out all the guesswork and making it much easier to plan your turns precisely.
Concealment and Overwatch make a deadly combo
New to XCOM 2, you’ll begin many missions “concealed.” While you’re concealed, enemies will be unaware of your presence and will have a much more limited range of sight. This gives you an opportunity to position your troops before the fight begins, or, if you have a stealth soldier in your squad, sneak up and take out enemies undetected.
While you’re concealed, position your soldiers on high ground and around flanks, if possible. Then, have all but one of the members of your squad activate Overwatch, attempting to target as much of the enemy field as possible. With your last soldier, fire at one of the aliens and let the fireworks begin. Enemies will start pouring into the battlefield, triggering Overwatch and giving you a free attack. Just make sure to position your Overwatch to take out as many targets as possible. It’s better to face three enemies at full health than five enemies at 25% health.
Make sure to extract your soldiers
Permadeath is still present in XCOM 2, so if you lose a soldier on the battlefield, you lose them forever. However, their bodies remain on the battlefield, along with all the gear they have equipped. Whenever a soldier dies, make sure to extract their body back to the Avenger. Doing so allows you to re-equip any gear they have and save their body from alien desecration.
Lead with explosives

Armor works a bit differently in XCOM 2 than its predecessor. The yellow lozenge at the end of a character’s health bar acts as a constant reduction on all damage taken. However, armor can be shredded by explosives (or normal grenadier attacks with certain upgrades), which permanently removes it for all subsequent attacks. Furthermore, many of the cover-providing environmental elements can be destroyed by grenades.
Accordingly, it is often best to lead a round of attacks with explosives, which will shred armor, destroy cover, and generally make enemies more vulnerable to attacks from the rest of your squad, ensuring the most value for your actions. This is especially pertinent for ambushes from concealment, when unwitting enemies are more closely clustered than they will be once engaged.
Grow the resistance early and often

While the geoscape strategic metagame is certainly much more interesting in XCOM 2 than building satellites in Enemy Unknown, there are certain similarities to how you should approach it. The game will present you with lots of tempting options for ways to spend your time in the Avenger, picking up valuable resources or recruits. Focus on expanding the resistance early in the game, contacting new regions, and building radio towers in regions you own, once you have researched them. All of these will increase your monthly supply income, which is critical to your long-term success.
Radio towers also have the added bonus of reducing the intel cost of contacting new regions, which is based on the distance to the nearest tower. Global access becomes increasingly important as the game goes on and you are prompted to investigate alien facilities around the world. Having to spend weeks contacting multiple new regions in order to access a critical story mission or Avatar Project facility on the other side of the world can completely kill your momentum.
Stay classy — Character roles and builds
Grenadier

While all of your soldiers can carry grenades into battle, grenadiers specialize in raining down explosive destruction on the battlefield, and accordingly can carry more with them than anyone else. Propelled by a specialized launcher, their grenades fly farther and hit for more damage over a wider radius. Because so many of the cover-providing environmental elements in XCOM 2 are destructible and armor can be shredded by explosives, grenadiers serve primarily as a control class, reshaping the battlefield in your favor.
- The Demolitions Expert skill tree has skills like Heavy Ordinance, Volatile Mix, and Salvo, allowing for grenade fire to be more frequent and effective.
- Heavy Gunner, on the other hand, emphasizes the cannon and shredding armor through direct fire.
- All of the grenadier’s grenade-related bonuses apply to all grenades, such as the defensive smoke grenade or the various experimental grenades from the proving grounds. Armor-melting acid grenades are particularly synergistic with what grenadiers are already trying to do.
Ranger

Like Enemy Unknown‘s assault class, rangers are up-close-and-personal heavy damage dealers. Their biggest change this time around is enhanced synergy with the new concealment mechanics. Able to dish out huge damage in single shots, they’re perfect for finishing off the most imminently threatening enemies on the field.
- The Scout tree focuses on stealth, allowing your rangers to extend and abuse the tactical advantage granted by concealment.
- Assault instead emphasizes the Ranger’s new sword for melee attacks.
- Both builds are greatly supported by the Spider/Wraith Suits from the proving ground and the enhanced mobility that they provide.
Sharpshooter

Redesigned from Enemy Unknown‘s sniper class, the sharpshooter’s name change reflects more robust support for their secondary weapon, the pistol. Sharpshooters focus on damage from a distance, either concentrated into powerful, single attacks with the sniper rifle or spread out through a series of rapid pistol shots.
- The Sniper tree supports the traditional role of a high damage dealer who provides cover for the rest of the squad from a distance.
- Gunslingers, on the other hand, are much better at maintaining pressure while staying on the move, reserving rifle shots for more specialized situations.
- Keep in mind that weapon upgrades only apply to the sniper rifle, and cannot be used for the pistol.
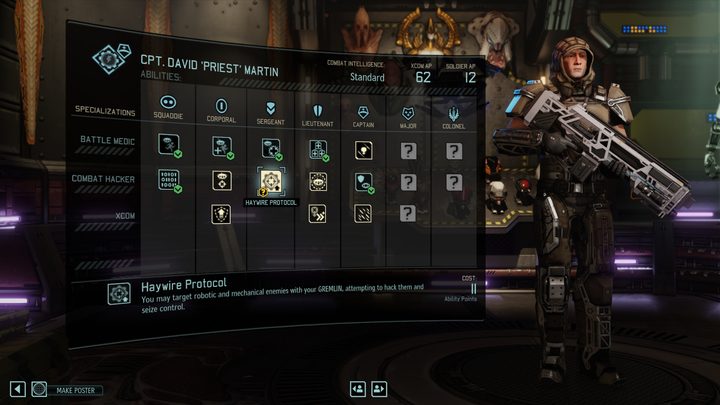
Specialist
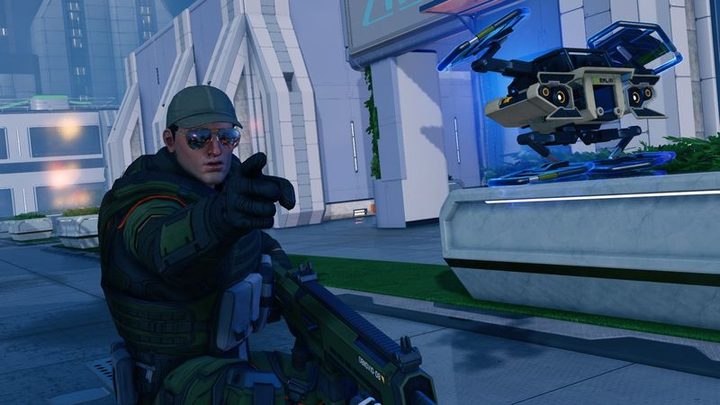
A flexible support class, specialists primarily act through their flying gremlin drones, which heal and protect their squadmates or harass and disable robotic foes. They also specialize in another of XCOM 2‘s new mechanics, hacking. Having at least one specialist focused on healing with you at all times is practically a requirement for keeping your squad alive as the game goes on. Because the two skill trees fill such different roles, doubling up on Specialists can be one of the best ways to capitalize on the increased squad size bonuses from the guerrilla tactics school.
- Battle Medic skills do exactly what you would expect, allowing for the Specialist to keep their squadmates fresh with medical and revival protocols.
- Combat Hackers become more important as the game goes on and you encounter some of its nastier robots, such as the advanced MECs and the towering sectopods.
- Note that all of the gremlin’s protocol abilities require a single action and do not end the turn, allowing for immense flexibility in how Specialists conduct their turns.
- Because Specialists benefit the most from medkits or the hacking-aiding skulljacks, they are particularly well served by the additional utility item slot in the basic Predator and Warden Armors.
Psi Operative

The fifth soldier class introduced in XCOM 2, the psi operative works differently from the others. Instead of gaining promotions through field experience, Psi operatives level up through training in a specialized facility on the Avenger. Moreover, rather than progressing linearly through a sequence of choices for new abilities, psi operatives choose each successive ability to train from a random selection, meaning they can get access to their most powerful abilities from the beginning, or learn both abilities from the same tier. These powers can be extremely impactful on the field, so it behooves you to get a jump on training your psi operatives as early as possible, which is easy with some focused research.
In order to access psi operatives, first kill a Sectoid in the field. Instructing Dr. Tygan to complete the Sectoid Autopsy will unlock the Psionics research project, which will in turn let you build the Psi Lab. Stick a fresh recruit in there and start them training, and you’ll be mind-controlling aliens in no time. Staffing the Lab with an engineer or gremlin substantially accelerates the training process.
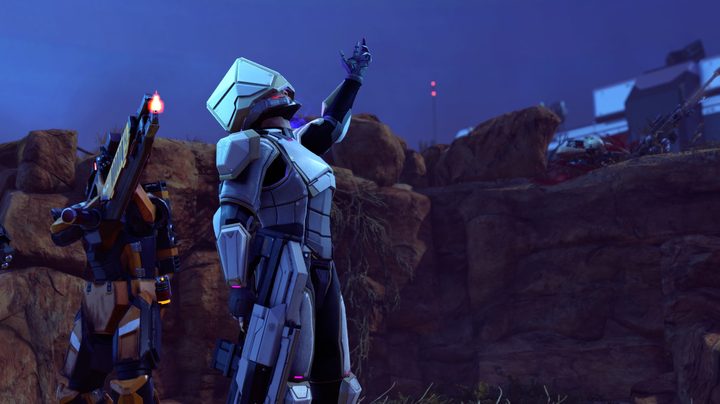
SPARK
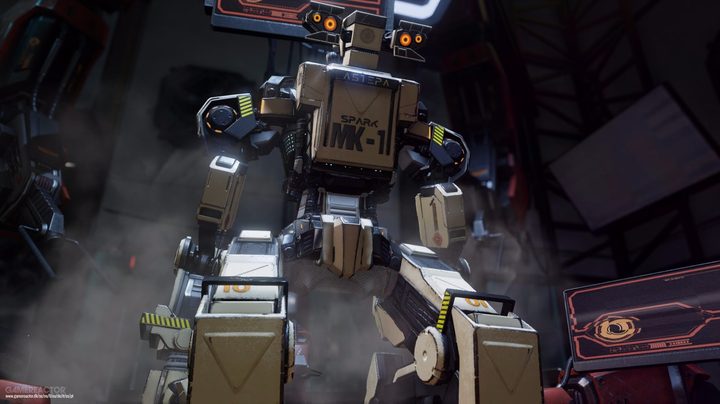
SPARK soldiers are robotic units similar to MECs in XCOM: Enemy Within. SPARKs are very powerful soldiers with high defense and attack. That makes them devastating on the battlefield, allowing you to position a SPARK soldier as a high-powered damage dealer, or as a high-defense support unit.
SPARK units have the key Overdrive ability, which allows them to take up to three actions in a turn with no turn-ending actions. This is the first skill in the SPARK tree. After unlocking a few more, you’ll have two class trees to choose from:
- The War Machine skill tree focuses on raw power, allowing you to break through walls and cover, avoid recoil penalties in Overdrive, and rush forward to deal a massive melee attack to any enemy.
- The Future Combat is a general skill tree that balances offense and defense, offering boosts to Heavy Weapons and extra armor points.
Home is where your jet is — Base Building

At first glance, your base inside the mobile Avenger looks similar to the side-on view of your underground facility in Enemy Unknown — a bisected grid of stacked rooms reminiscent of Fallout Shelter or The Life Aquatic. Befitting the smaller, scrappier scale of your operation this time around, however, the grid is half the size at three by four rooms. That many fewer decisions make each one all the more important, so here are some tips for getting the most out of your base:
- Make sure all of your engineers are always busy. Shen reminds you when they are totally idle, but be mindful of ones that might be staffed in inactive rooms, like a proving ground with no project or the advanced warfare center with no injured soldiers.
- Exposed power coils are randomly distributed with (as far as we have seen) two in the lower half of the grid. These either reduce the power cost of rooms built on them or increase the output of power relays. The latter is ideal for getting the most use out of them. Similar to Steam Vents in Enemy Unknown, plan your base accordingly.
- Unlike in Enemy Unknown, adjacent rooms of the same type no longer confer any bonus to efficiency, and thus should not factor into your layout decisions. In general, you will rarely want to build more than one of any given facility, upgrading those you have instead of redundant expansion.
- Clearing out rooms comes with the added bonus this time around of giving you valuable supplies and alien resources for your trouble. Barring anything in particular you need them to do, this is the best default task for your engineers to be doing.
Build the Guerrilla Tactics School and start training soldiers
The most important room is the Guerrilla Tactics School, by far. First, it allows you to invest in Combat Tactics, a new feature to XCOM 2 that offers bonuses such as extra experience from kills for your squad and an increased squad size for missions. That last one, in particular, makes some of the later missions much easier.
Additionally, the Guerrilla Tactics School allows you to train rookies to take on whatever class you want. As you recruit new rookies, make sure to always have one of them training in the Guerilla Tactics School. That will allow you to invest in skills, shortening the gap between rookies and your key soldiers.
Build plenty of Power Relays
Each room in the Avenger has a power cost, and at the beginning of XCOM 2, you’ll only have enough power to provide electricity to a few rooms. The mechanic is pretty simple, then: Build Power Relays as you need them, and you’ll be fine. That works, in theory, but the reality is that you generally won’t have enough time or resources to build Power Relays as you need them.
Because of that, consider building an extra Power Relay or two from the get-go. Doing so will give you plenty of juice to power other rooms without worrying about running out, especially as you start to build out the Avenger.
Pay attention to adjacency
Although placement isn’t always important, there are a few key rooms that care about the rooms around them. The most important is the Workshop, which gives you two extra engineer drones to staff other rooms. The catch: You can only send Workshop engineer drones to rooms immediately above, below, or to the side of the Workshop.
You only have a certain amount of space to build new rooms, so make sure to keep in mind any adjacency conditions when building. Using the Workshop as an example again, you’d want to make sure to either leave space around the room or to build the Workshop around rooms you want to staff.
War of the Chosen tips
Get hunting
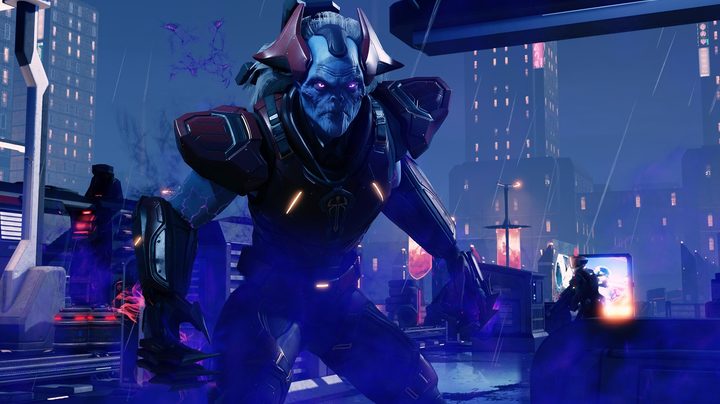
The eponymous chosen are the headline feature of the new expansion, and accordingly, you will want to prioritize dealing with them very highly. They will start to show up during random missions early in the game to mess with you, but their harassment quickly extends to the strategic layer as well where they will clamp down on regions you control, steal from you, and eventually hunt you down. The longer they go unaddressed, the more powerful they become, so it’s in your best interest to handle them as early as possible.
You proactively take on the chosen with a series of three covert actions with each of their respective rival resistance factions (which are randomly assigned each game), where completing the final action unlocks a conventional mission to raid their stronghold and destroy the regeneration device that keeps them coming back. In addition to the reward of no longer having such a powerful enemy bothering you, each Chosen also rewards unique and powerful weapons when defeated, which will give you a major leg up for the rest of the game.
Lost and gone forever
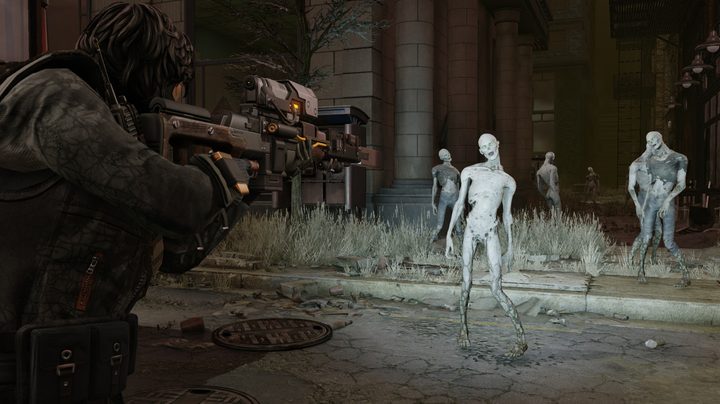
A zombie by any other name would smell as putrid. The Lost are another new and interesting threat that can seriously change up how you approach missions. They show up in large groups that, in some missions, will simply spawn endlessly until you leave, making last stands a futile, losing proposition.
Fortunately, to deal with them you get the added bonus of any conventional, ranged kill shot giving you a free action, which lets you chain Lost kills for as long as you have targets and/or ammo. Although it’s generally important in any mission, keeping your formation tight and not over-extending is crucial in Lost missions, where it’s possible to get swamped by unexpected pods.
Melee works in a pinch, but note that it will not trigger the headshot free action, so save that for when your ranger has run out of ammo/actions otherwise and won’t be left too exposed. Explosives can be helpful for dealing with large mobs, but keep in mind that they similarly do not trigger the free action and that the sound will draw more Lost. Use them only as a last resort, if you’re already close to your objective, or if there are also Advent troops to soak up their attention.
When chaining Lost headshots, be sure to take note of their health pools: Regular Lost have 2-4 health, and thus can be one-shot by most of your troops without too much problem, but the Brutes have a larger health pool that often takes two shots, so don’t accidentally end your turn early by failing to finish the job if you don’t have an ally to help mop up. Once your squad is securely at the evac zone, within reason you can stick around an extra round or two to mop up XP from endless Lost waves, but don’t get cocky.
Manage fatigue
In addition to worrying about your soldiers’ physical health and ensuring you always have enough in active rotation, War of the Chosen now adds their mental health to your concerns. Soldiers can be “tired” after missions even if they were not physically injured. As long as they are otherwise in good health you can always bring tired soldiers along on missions, but it gives them a much better chance of developing negative personality quirks that can become a real headache for you down the road. These include phobias of particular aliens, causing them to sometimes panic at the sight of sectoids or mutons, for instance, or compulsions that might cause them to act out of turn, like an obsessive-compulsive need to keep their ammo topped off, or a paranoia that leads them to hunker down sometimes on their second action.
This can be utterly devastating in later game missions where every action counts. You can mitigate this by avoiding bringing tired units along if you can. Sometimes you need to bring a sleepy soldier along for a crucial mission, however, and even fully rested troops can develop neuroses. When that happens it’s worthwhile to stick them in the infirmary for a few days, Darkest Dungeon-style, to purge the negative trait.
Believe in the power of friendship
Your soldiers can now form relationships from fighting alongside one another, called Bonds. Every member of your team has a compatibility rating with every other. Sending them out on missions together causes their Cohesion meter to fill, the rate at which it does depending on how compatible the soldiers are.
In addition to just going on missions together, soldiers grow closer by doing things like reviving one another from debilitating mental states, or surviving when the rest of the squad is wiped. Bonds lets them do things like lend their actions to one another once or twice per mission, reduce the time spent on covert actions together, or eventually take simultaneous attack actions. Level one bonds can be established instantly as soon as both soldiers’ cohesion meters are full, but advancing the bond to levels two and three requires both soldiers to spend several days in the Training Center, so you’re going to want to have that up and running by the mid-game.
Note that bonds are monogamous and “’til death do us part,” so don’t lock in those level one bonds if you are hoping to pair them off differently.
Maximize your AP
Rather than unlocking new abilities once per level, your soldiers now purchase them with a system of earned ability points. In practice, this works out the same in that you still pick one of several potential skills at each new tier, but now you can also go back and spend points on abilities from previous tiers as well, fundamentally changing the need to specialize your soldiers. Furthermore, where building the advanced warfare center in the base game gave you a chance for each unit to pick up one random off-class ability, now you have a selection at random levels available for buying with points, opening up even more customization options.
Every soldier has an individual AP count earned through experience, which scales to a new stat called “Combat Intelligence,” but there is now also a shared XCOM pool that can be spent on any character. These shared points are earned through several in-mission actions. Your soldiers taking shots from high ground, from a flanking position, or from concealment all have a chance to grant a single point to the shared pool, which increases in likelihood with higher combat intelligence.
Taking out the chosen during a mission will also net you five points for the organization. We recommend holding onto these for a little bit until you have a stand-out squad in which you are ready to start investing.
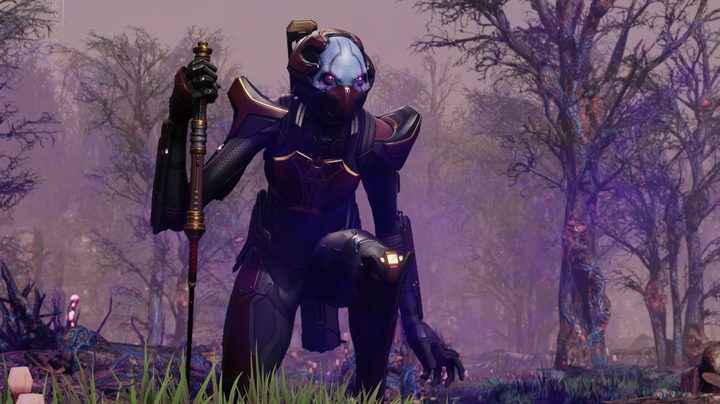
A Priest, a Purifier, and a Spectre walk into bar
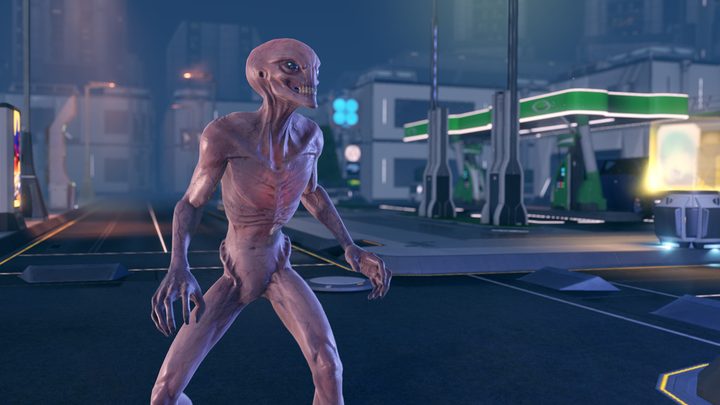
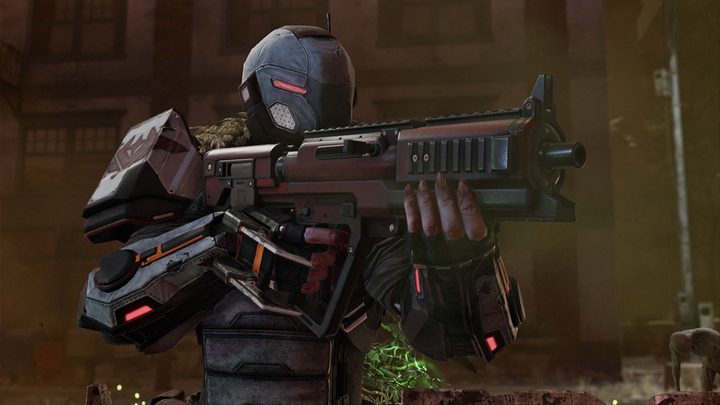
Beyond the chosen, Advent has also introduced a few new types of minions to complicate your missions. The priest is primarily a support class, similar to sectoids in that they like to hang back and manipulate the battle with psychic powers such as mind controlling, freezing your troops, and buffing their allies. Prioritize taking out priests early to make it easier for you to take down their allies — they’re not too tough, so it shouldn’t be hard if you get the drop on them.
Purifiers wield flamethrowers to blast out arcs of flame that seem particularly well suited for taking on hordes of Lost. The most important thing to note is that they explode on death, so don’t finish them off with melee attacks unless your rangers are expendable.
Spectres are a highly mobile pain in your butt that look like lithe humanoids but are actually an amorphous cloud of nanobots. Their most obnoxious ability is called Shadowbound, which instantly knocks out one of your soldiers at melee range and then creates a shadow clone of them for you to fight. You can revive them either by killing the clone or the Spectre itself, which will also take the clone down with it. You can also bring them back while both Spectre and clone are still up if you have a Specialist who can Revive.
Resistance faction classes
Countering the new threats of the Chosen are your three new resistance faction allies: The Reapers, Skirmishers, and Templars. All three of them are extremely powerful, so you will want to make sure that they are all recruited as early as possible.
During your first playthrough of the expansion with its narrative missions that introduce the new content, you will get hooked up with the Reapers early on, have to rescue Skirmisher Mox, and then locate the Templars in order to recruit them. During subsequent plays, you can start with any of the special faction soldiers in your ranks. Covert actions in the resistance ring will let you contact the other two factions, which will give you one of their powerful soldiers.
While it’s possible to recruit additional faction soldiers later in the game through covert actions, but these are rare and require very high influence with the faction in question. Accordingly, you will want to treat these soldiers like precious resources, breaking them out to tip the scales on crucial missions, especially when their rival Chosen is likely to be involved, but don’t throw them around like any regular recruit, since they are highly useful and hard to replace.
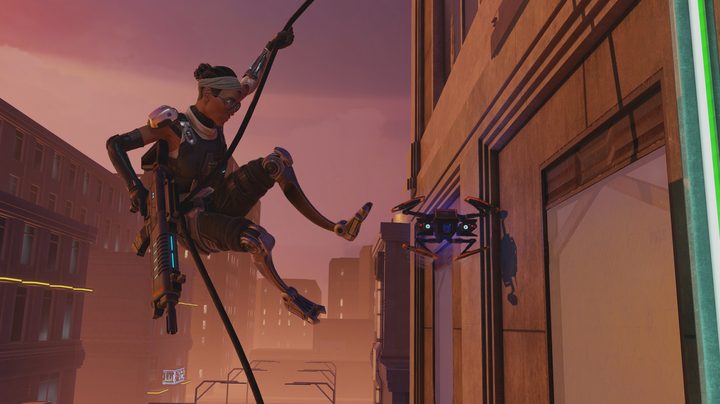
Reaper

Step aside, rangers, because the reaper is the best stealth unit in the game, bar none. In addition to being faster and being able to get substantially closer to oblivious enemies, taking actions that would normally break stealth now only provoke a chance to do so, allowing your reapers to scout and flank from the shadows for potentially the entire mission if you build them for it.
Pairing this aggressive mobility with a sniper rifle makes them a great counterpoint to the sharpshooter, who tends to hang back from the squad, providing a lot of coverage if you use both. Although their damage output isn’t ever quite as high as a comparably leveled ranger or sharpshooter, the added versatility of their stealth, plus their ability to take sniper shots on the second action, more than make up for it.
- Stealth skills do what you would expect, enhancing the reaper’s ability to maintain and go back into concealment while being increasingly aggressive the more you invest.
- Saboteur skills enhance the reaper’s destructive capability as a stealthy grenadier-lite, buffing their claymore mine and letting them carry an extra.
- Marksman enhances the reaper’s sniping capabilities, substantially increasing the amount of damage they can put out.
- Let reapers lead the charge and scout ahead whenever they’re on a mission, since they are least likely to kick up trouble from an unexpected Advent pod. Within reason, you should be aggressively positioning your reaper to get maximum information and provide flanking cover that other classes couldn’t.
Skirmisher
Once the genetically engineered puppets of Advent, the Skirmishers have thrown off their shackles and accordingly have a lot of anger to work out with Advent. Highly mobile and able to take as many shots as they have actions, skirmisher units excel at flanking and adapting to unexpected situations. Their grapple lets them zip around the level, particularly to high ground, without using an action, making them perfect for swooping behind a troublesome enemy and chewing them up quickly.
- Hussar skills are the core of why skirmishers can do so much on a single turn. Extra actions can be extremely powerful in the right circumstance, so both Reflex and Combat Presence are clutch skills.
- Judge primarily enhances your Ripjack melee attacks.
- Tactician offers a grab bag of skills to complement both reactive and damage-focused builds.
- Because firing their bullpup rifle does not end their turn, skirmishers are particularly good at taking advantage of additional actions, which can come from their own abilities (such as Reflex) or from other soldiers, through combat presence, soldier bonds, etc.
Templar
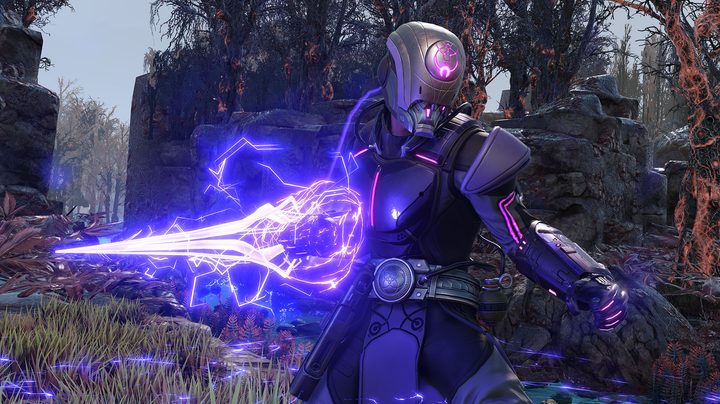
If you always wanted to mod Protoss Zealots from Starcraft into XCOM, templars are for you. They wield two wrist-mounted blades of psionic energy and cause havoc up close. The templar might be the most nuanced of the three new classes to use because of their unique Focus mechanic. Killing enemies with their primary Rend attack gains them one point of focus, up to a maximum of two (or three if you choose the Deep Focus ability when reach Captain rank).
Focus increases your stats overall but also lets you use certain special abilities. Ghost, for example, costs two Focus and allows you to create a duplicate of a Templar from the body of a fallen human.
- Psiblade skills enhance the Templar’s melee powerful capabilities, and taking these skills straight down the line is a solid, straight-forward build.
- The Dynamo tree makes the Templar the closest XCOM has to a straight-up spellcaster, giving him or her support abilities that let you spend focus to manipulate the battlefield.
- Sage is another support and focus ability tree, allowing you to stun and mark enemies, as well as gain Focus from various other actions.
- Templar are great in a lot of situations but are not especially well suited to dealing with the Lost, as their primary Rend attack does not trigger the headshot free action benefit that most units get.
New facilities in War of the Chosen

Resistance Ring
The most crucial new facility, which you will want to build as soon as possible, lets you coordinate covert actions with the three resistance factions. Send your soldiers away for several days in exchange for a whole plethora of rewards like equipment, intel, and recruits (eventually including the more special resistance class soldiers), in addition to experience for the soldiers involved. Most importantly, this is how you track down the Chosen in a series of three missions with each faction to track down their respective rival’s lair, unlocking the mission to kill them once and for all. This also nets you influence with the faction, unlocking new resistance orders and slots for you on subsequent months.
Infirmary
This assumes half of the advanced warfare center’s functionality because staffing it with an engineer increases the healing rate of your injured fighters. You can also place your soldiers here for several days to eliminate any adverse characteristics they have procured, much like the Sanitarium in Darkest Dungeon. Adding the Hypervital Module allows you to return hurt soldiers back to total wellness only for an individual mission, reverting to their former state immediately following. However, you can only do this one time per game, per fighter. This is a medium priority to develop but grows more critical in Ironman mode, or if you’re concentrating on generating a more modest, elite unit rather than a broad, rotating character lineup.
Training Center
Elaborating on the advanced warfare center’s ability to provide your warriors with premium talents from other classes, the training center employs War of the Chosen‘s new method of personal and shared skill points to purchase upgrades from any level in the course, including a random assortment of out-of-class powers.
You can also remove fighters from their duty for a few days to retrain their skills rather than acquiring new ones, which will refund their personal AP (but not any XCOM AP) you used on them. This is also where you prepare soldiers to raise their bonds beyond the primary level because it takes a while before your warriors move to level two bonds. And it doesn’t necessarily merit investing loads of points in extra abilities until you have a more refined crew, which is a lower priority build. Still, we know you will want it by the time you reach mid-game.