If you purchase a new smart device, you’ll need to connect it to your Wi-Fi network. This guide provides instructions on how to connect Alexa-enabled devices to Wi-Fi or switch your device to a different network. We’ll also help you troubleshoot problems that might arise and explain how to connect other devices to your Echo so you can use the device to its fullest capacity.
Preparing your Alexa-enabled device
To begin, take your Alexa-enabled device out of its packaging, and locate the power connector. Different devices will vary in how they are unpacked, but Amazon Echo devices should automatically start up once they are plugged into an outlet. Refer to the owner’s manual for any assistance plugging in your device.
The goal of this first phase is merely to get your product out of its box and turned on for use. Once you power on the device, ensure the Alexa app is installed on your iOS or Android device, as you will need it throughout the setup process.

Connecting your device to Wi-Fi
We are going to use the Amazon Alexa app to get your device connected to the internet. After unpacking and plugging in your product, it may begin flashing an orange glow or even verbally announce it is ready — we can now start the setup process.
With the Amazon Alexa app installed on either your iOS or Android device, follow these instructions:
Step 1: Open the Amazon Alexa app on your device.
Step 2: Sign in to the app using your Amazon credentials if you have not already.
Step 3: Tap the Devices tab at the bottom of the screen.
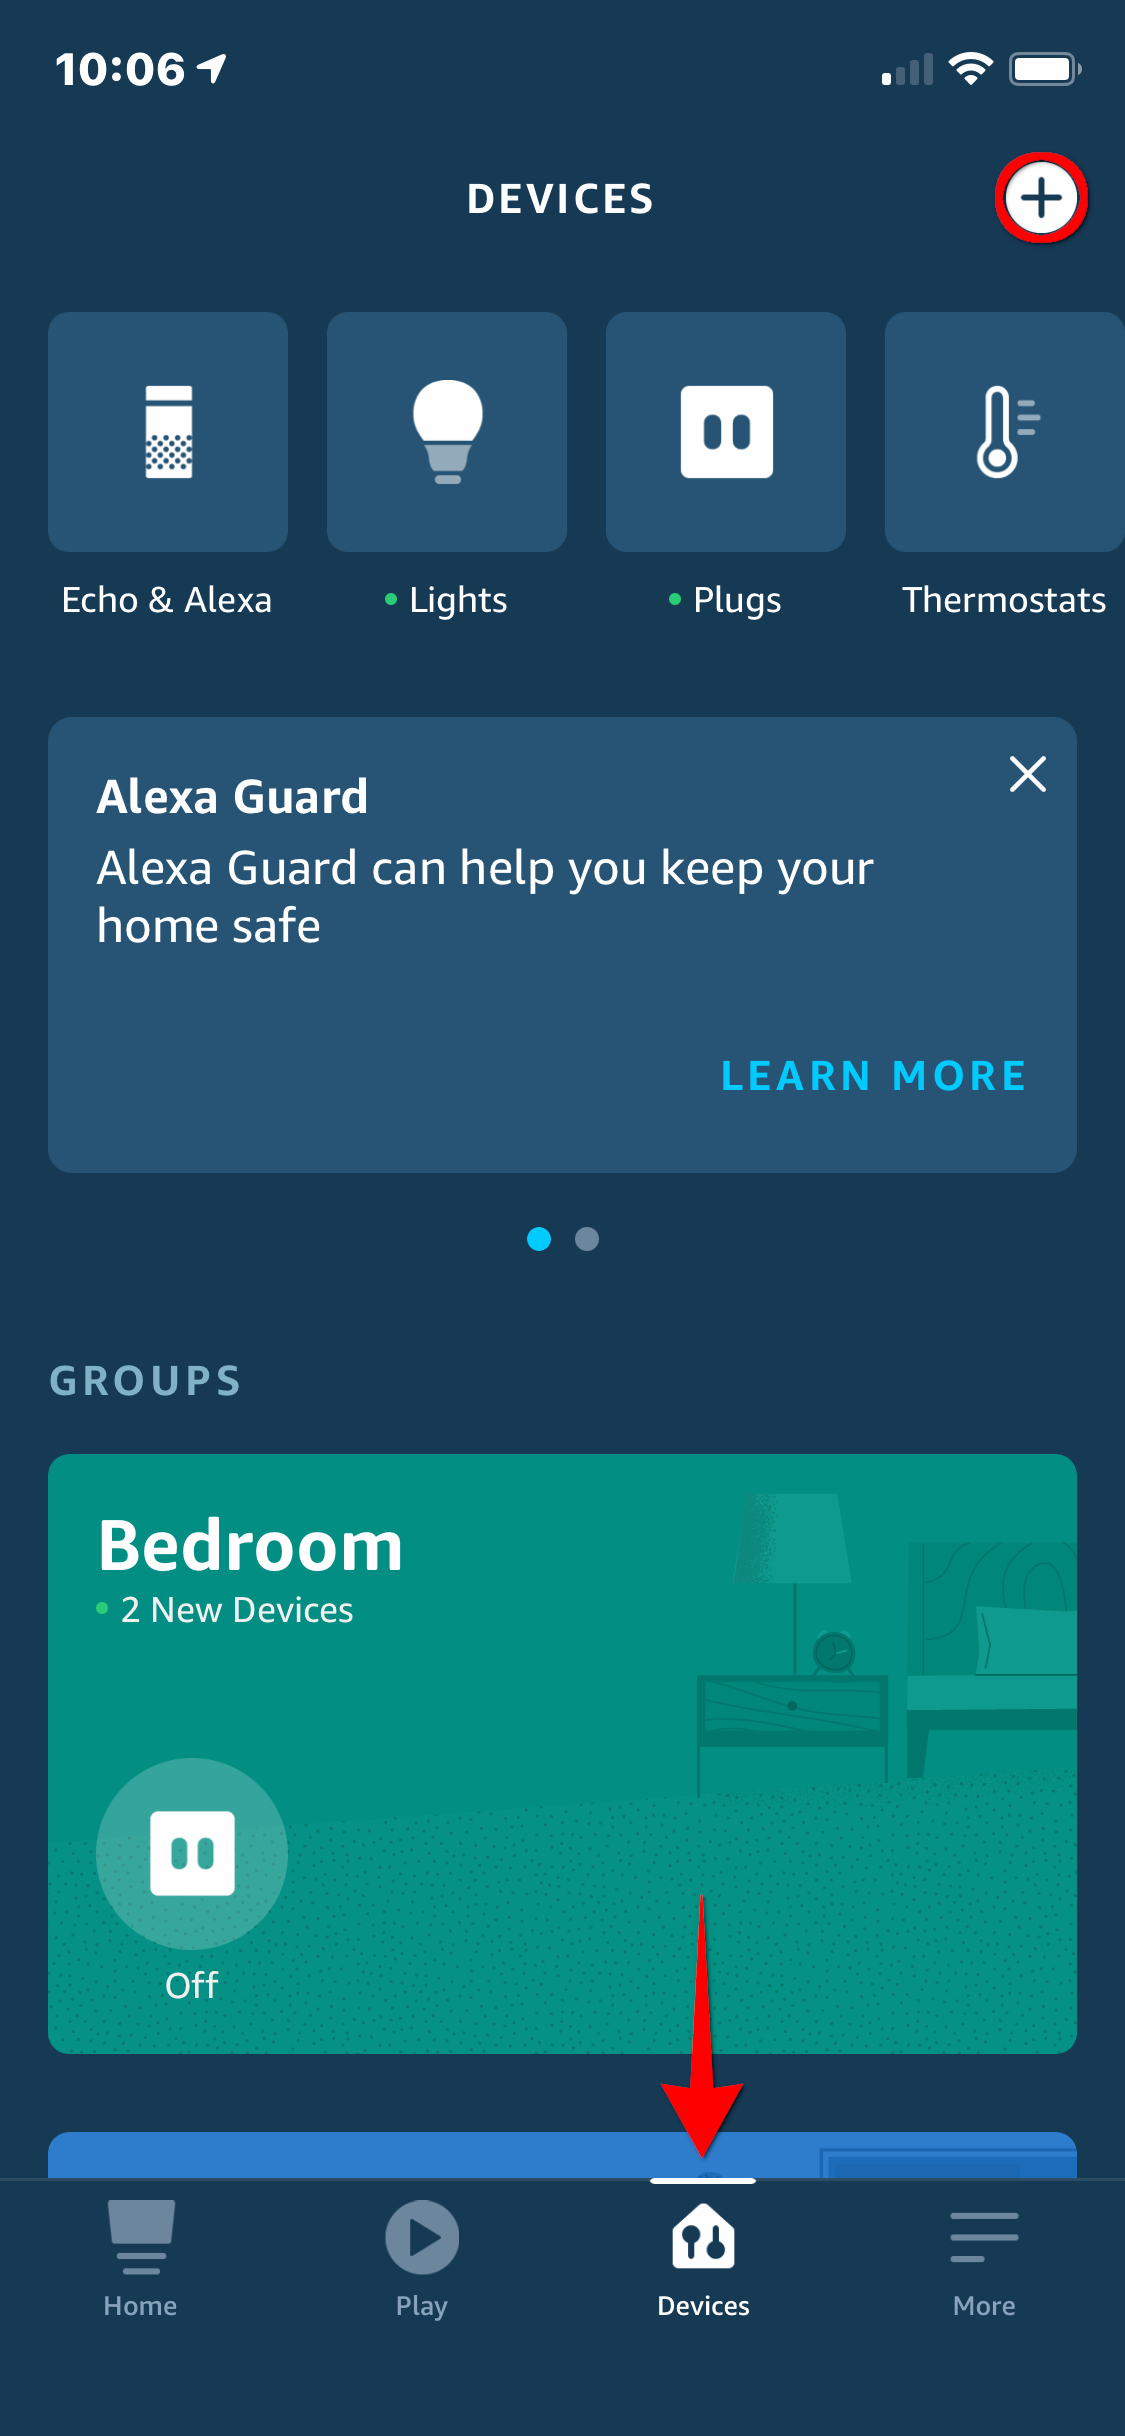
Step 4: Select the + button in the upper-right corner.
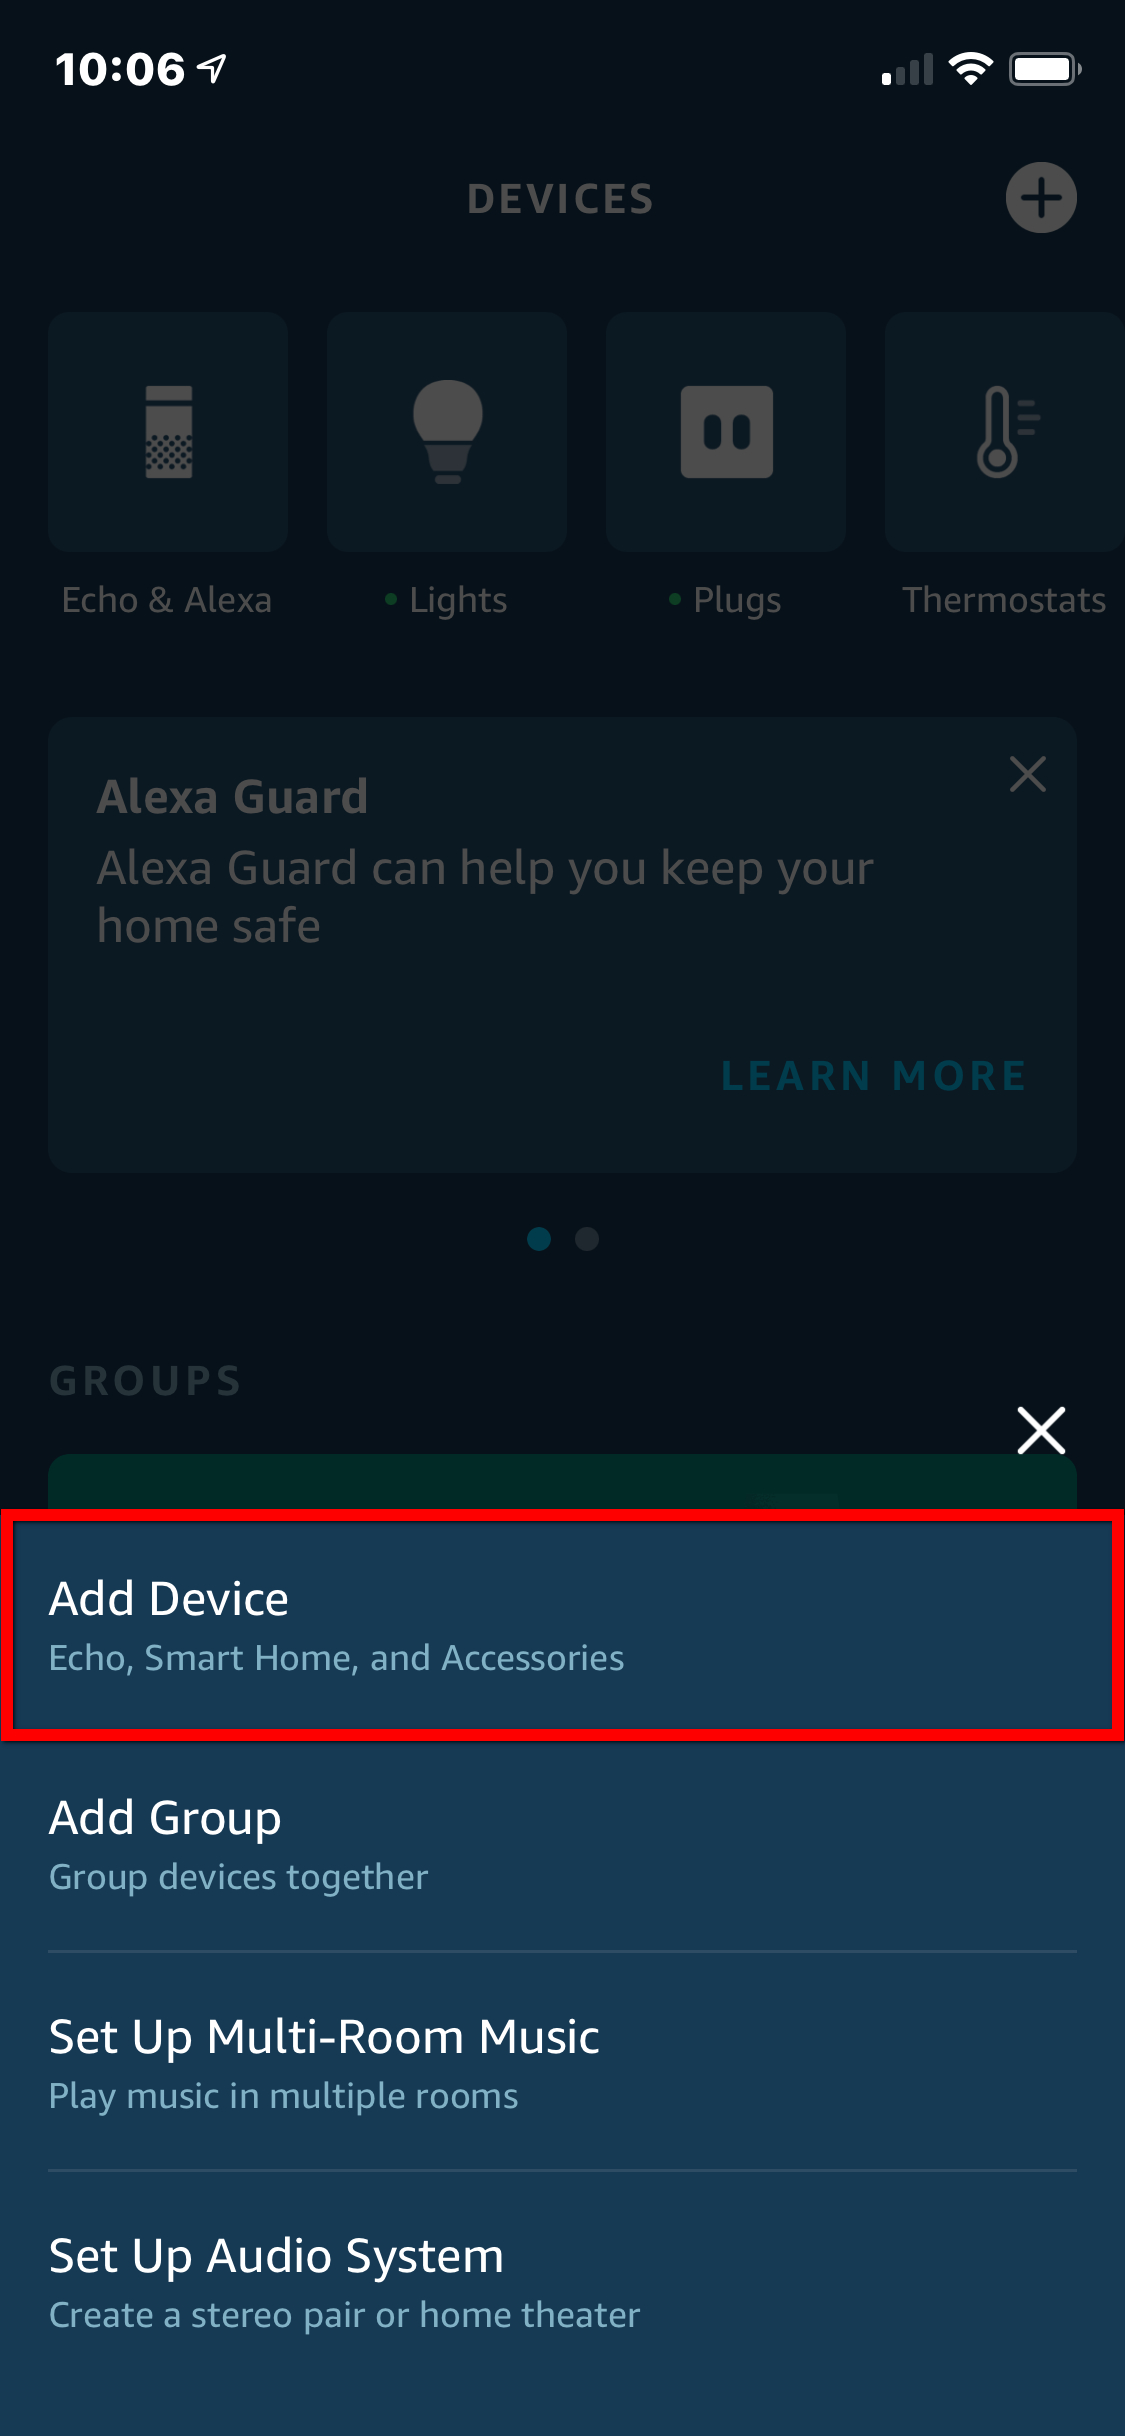
Step 5: From the pop-up menu, choose Add Device.
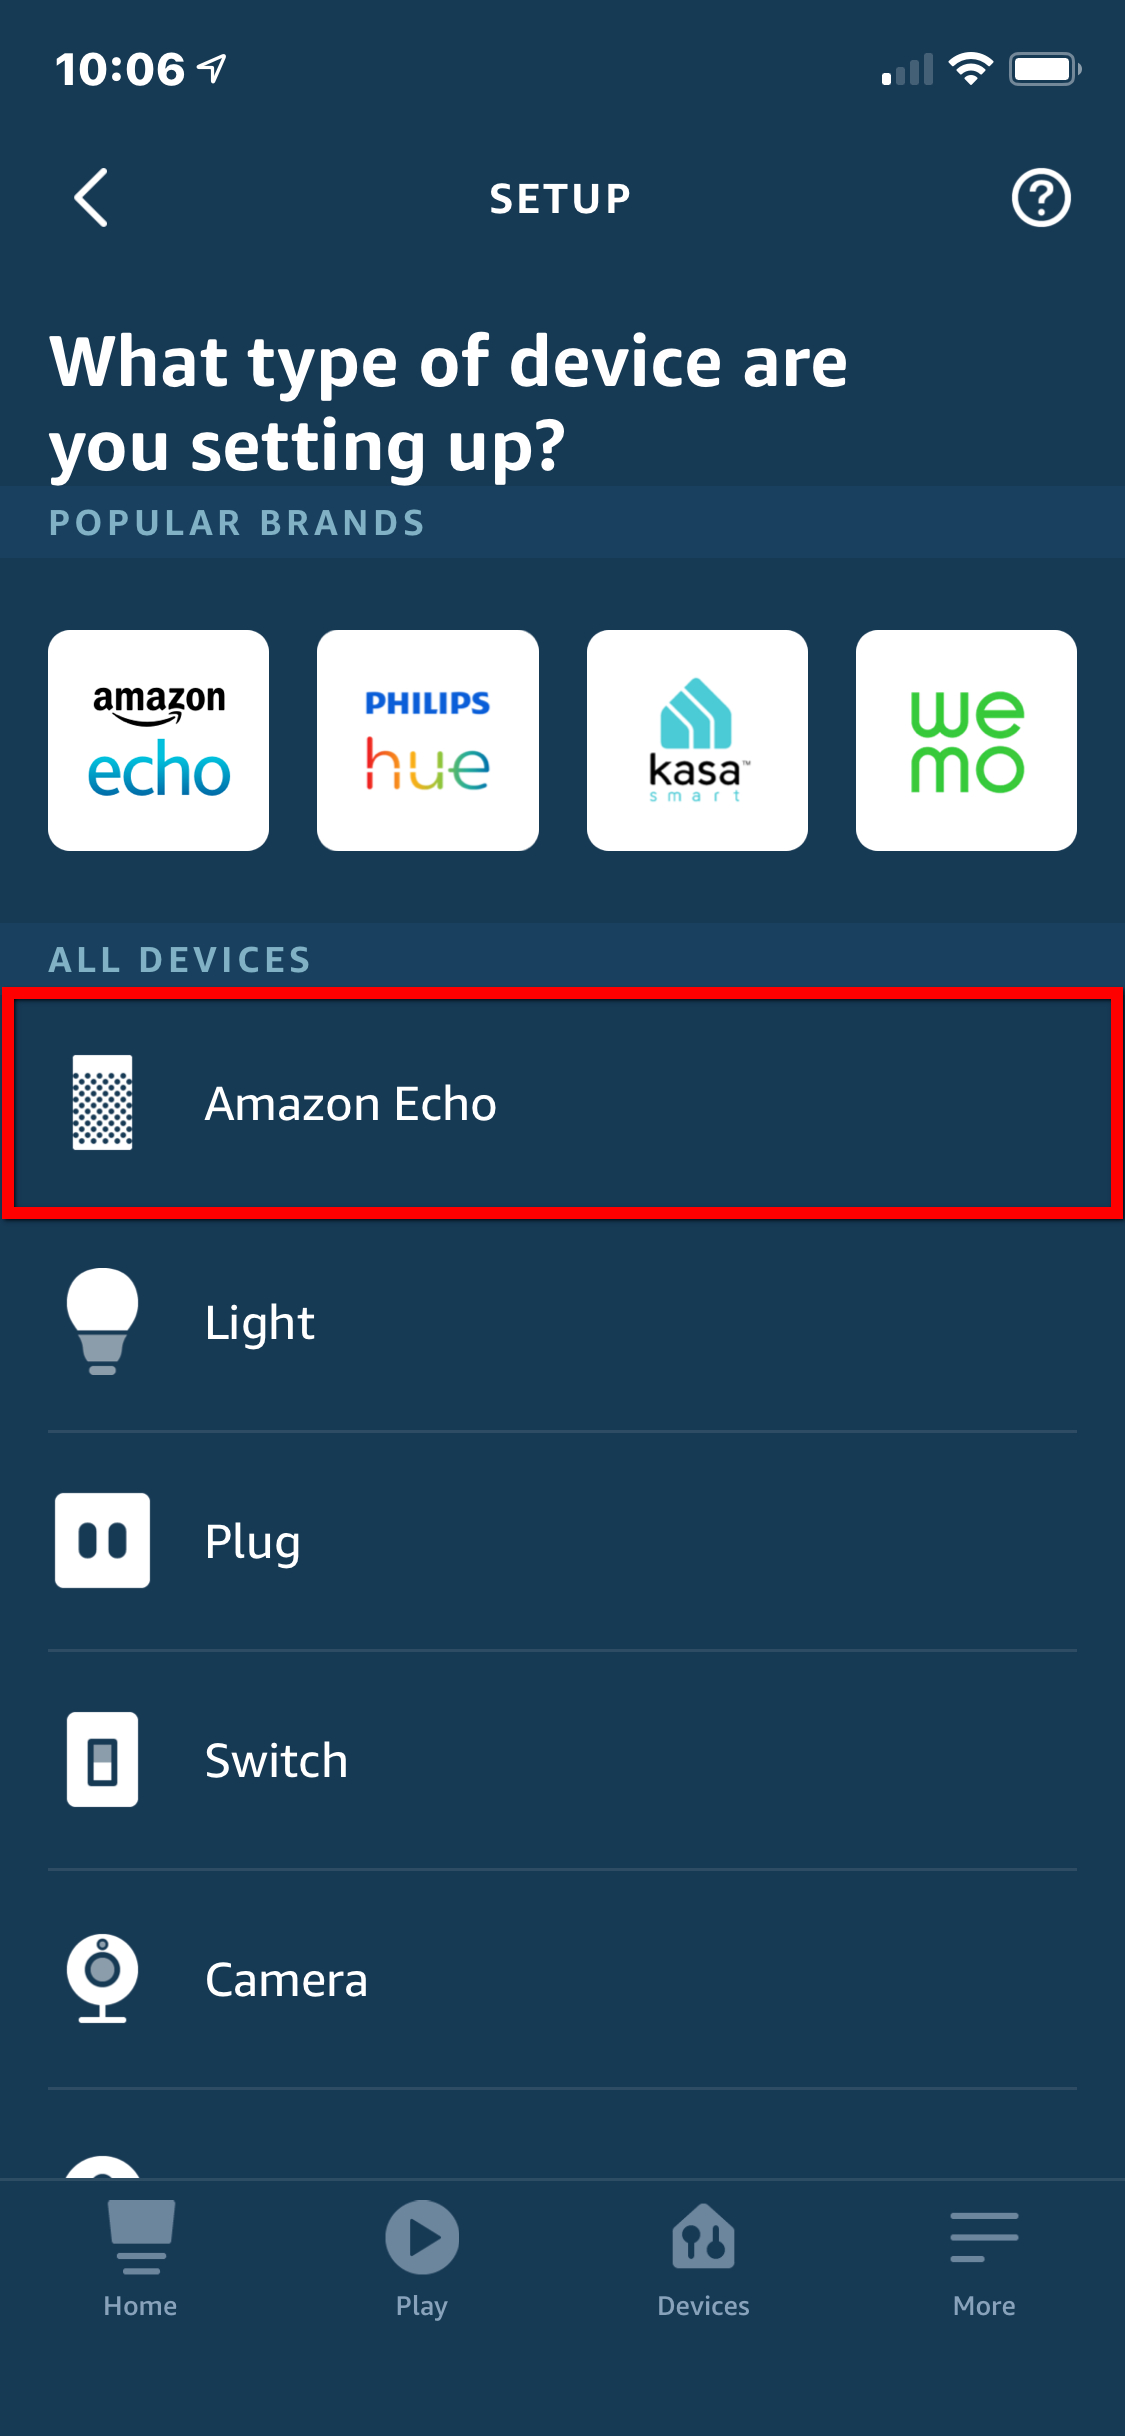
Step 6: Select Amazon Echo from the list.
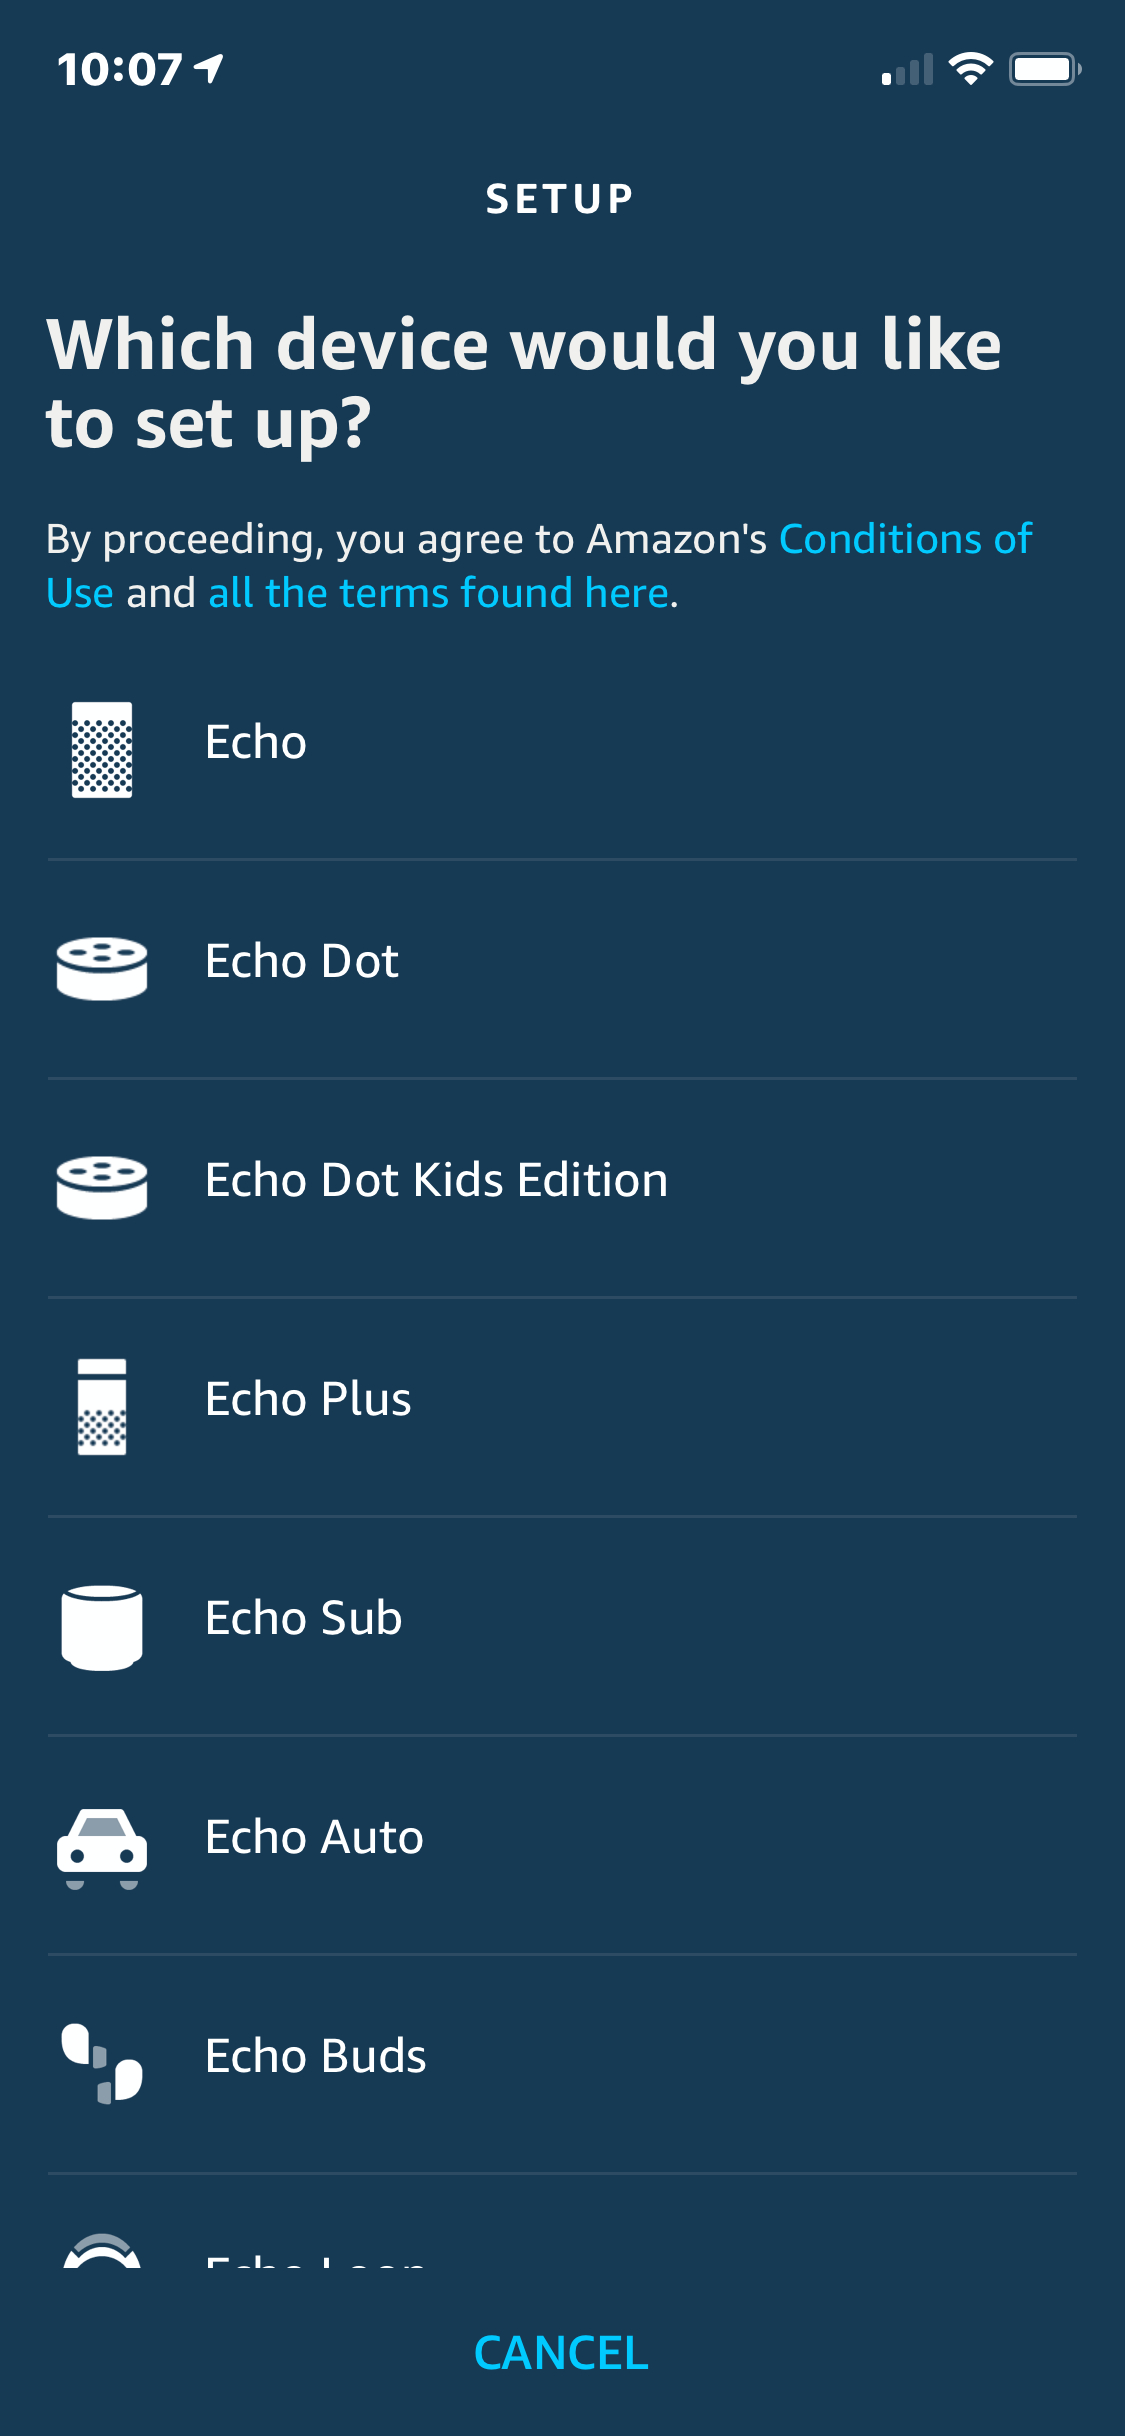
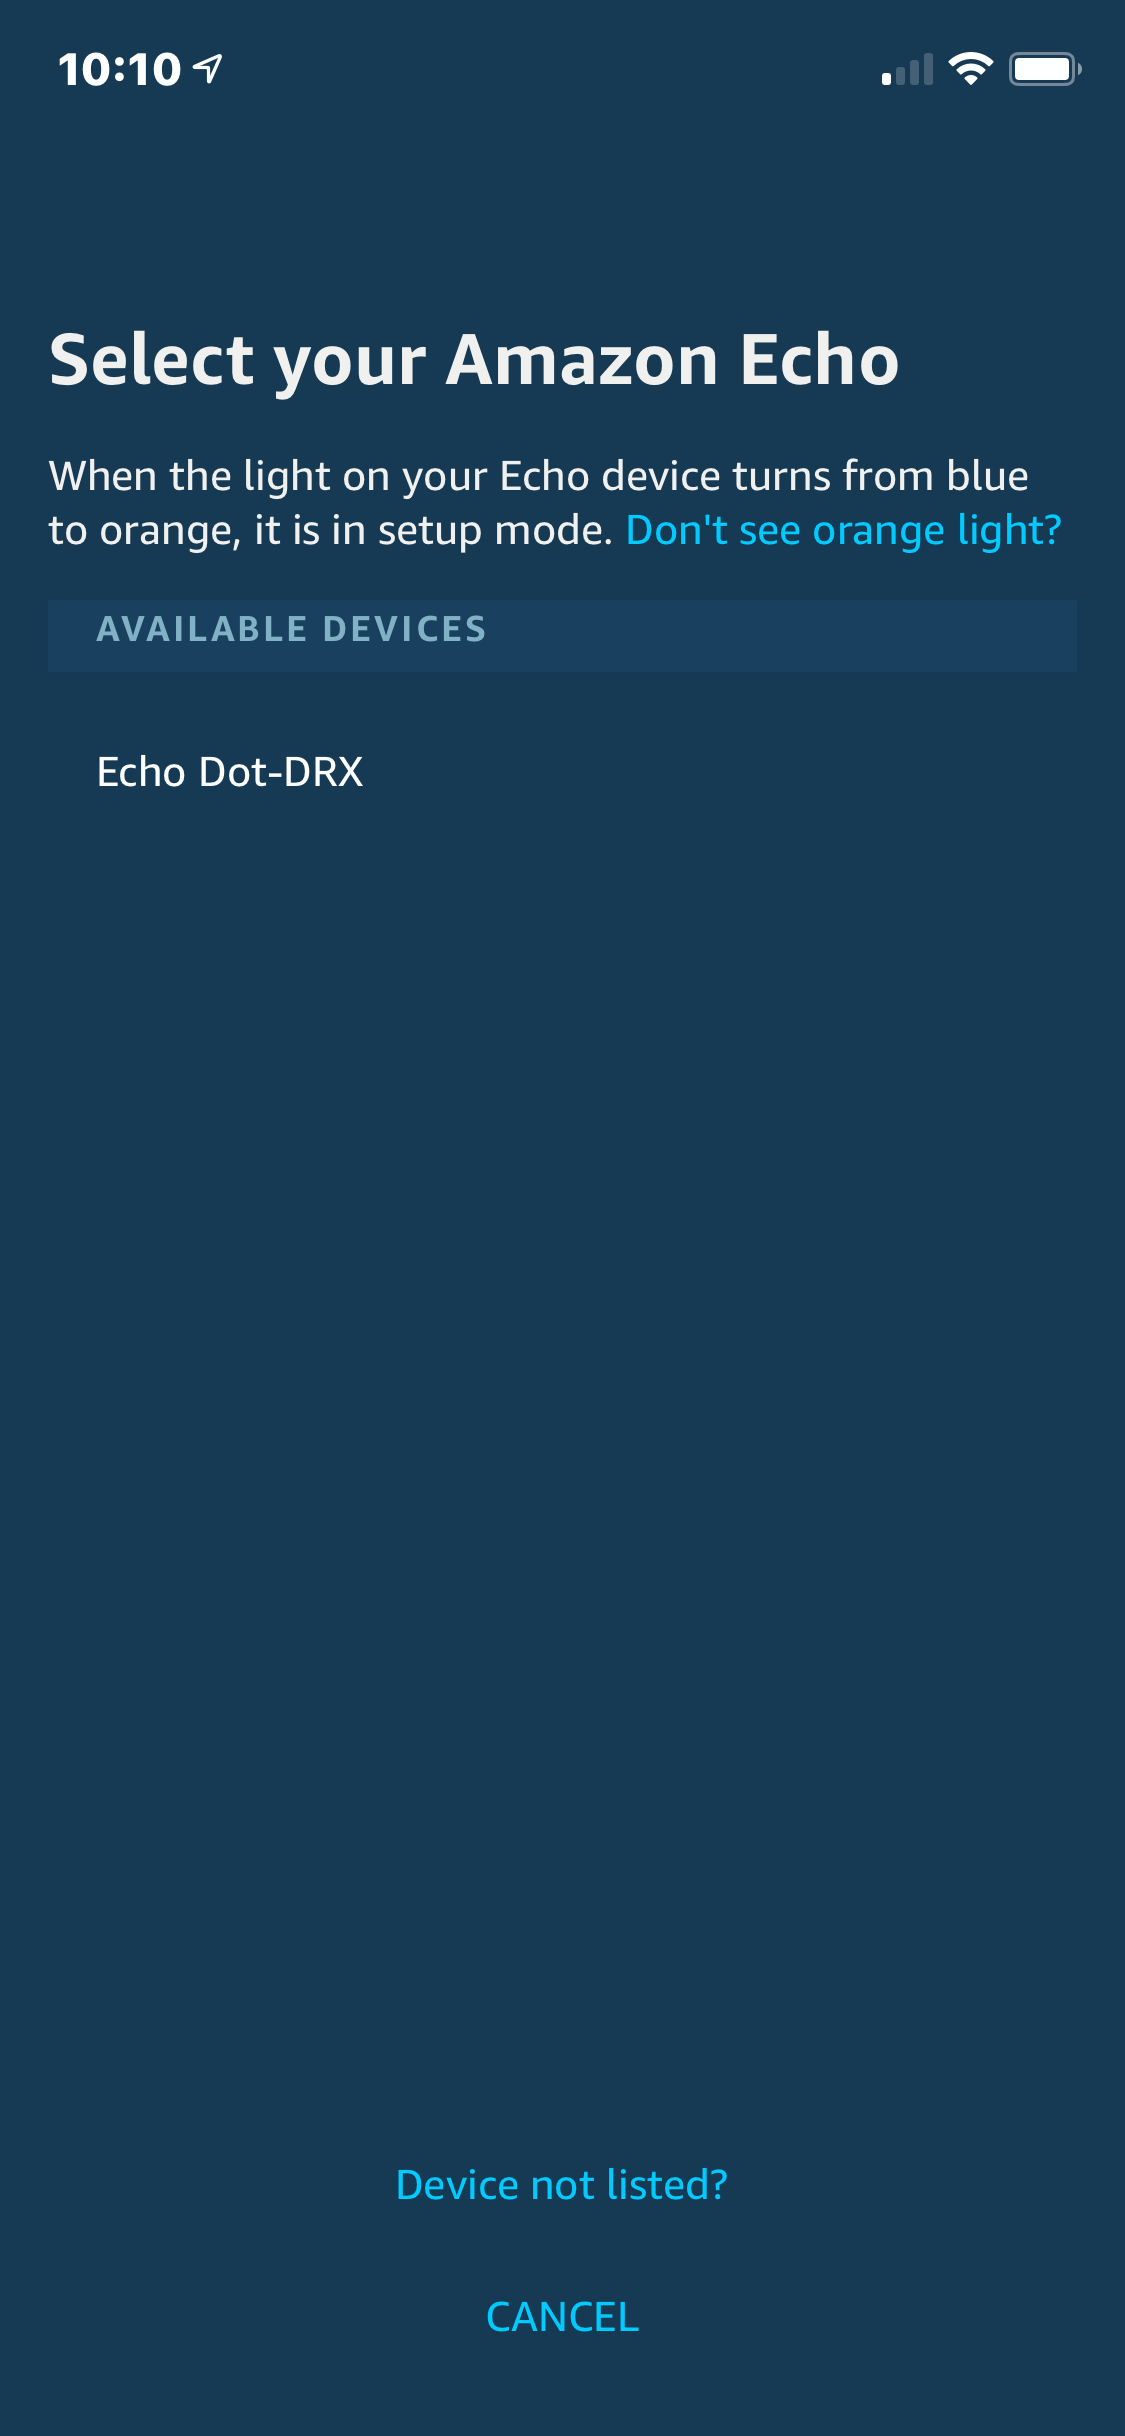
Step 7: Next, select your Echo device.
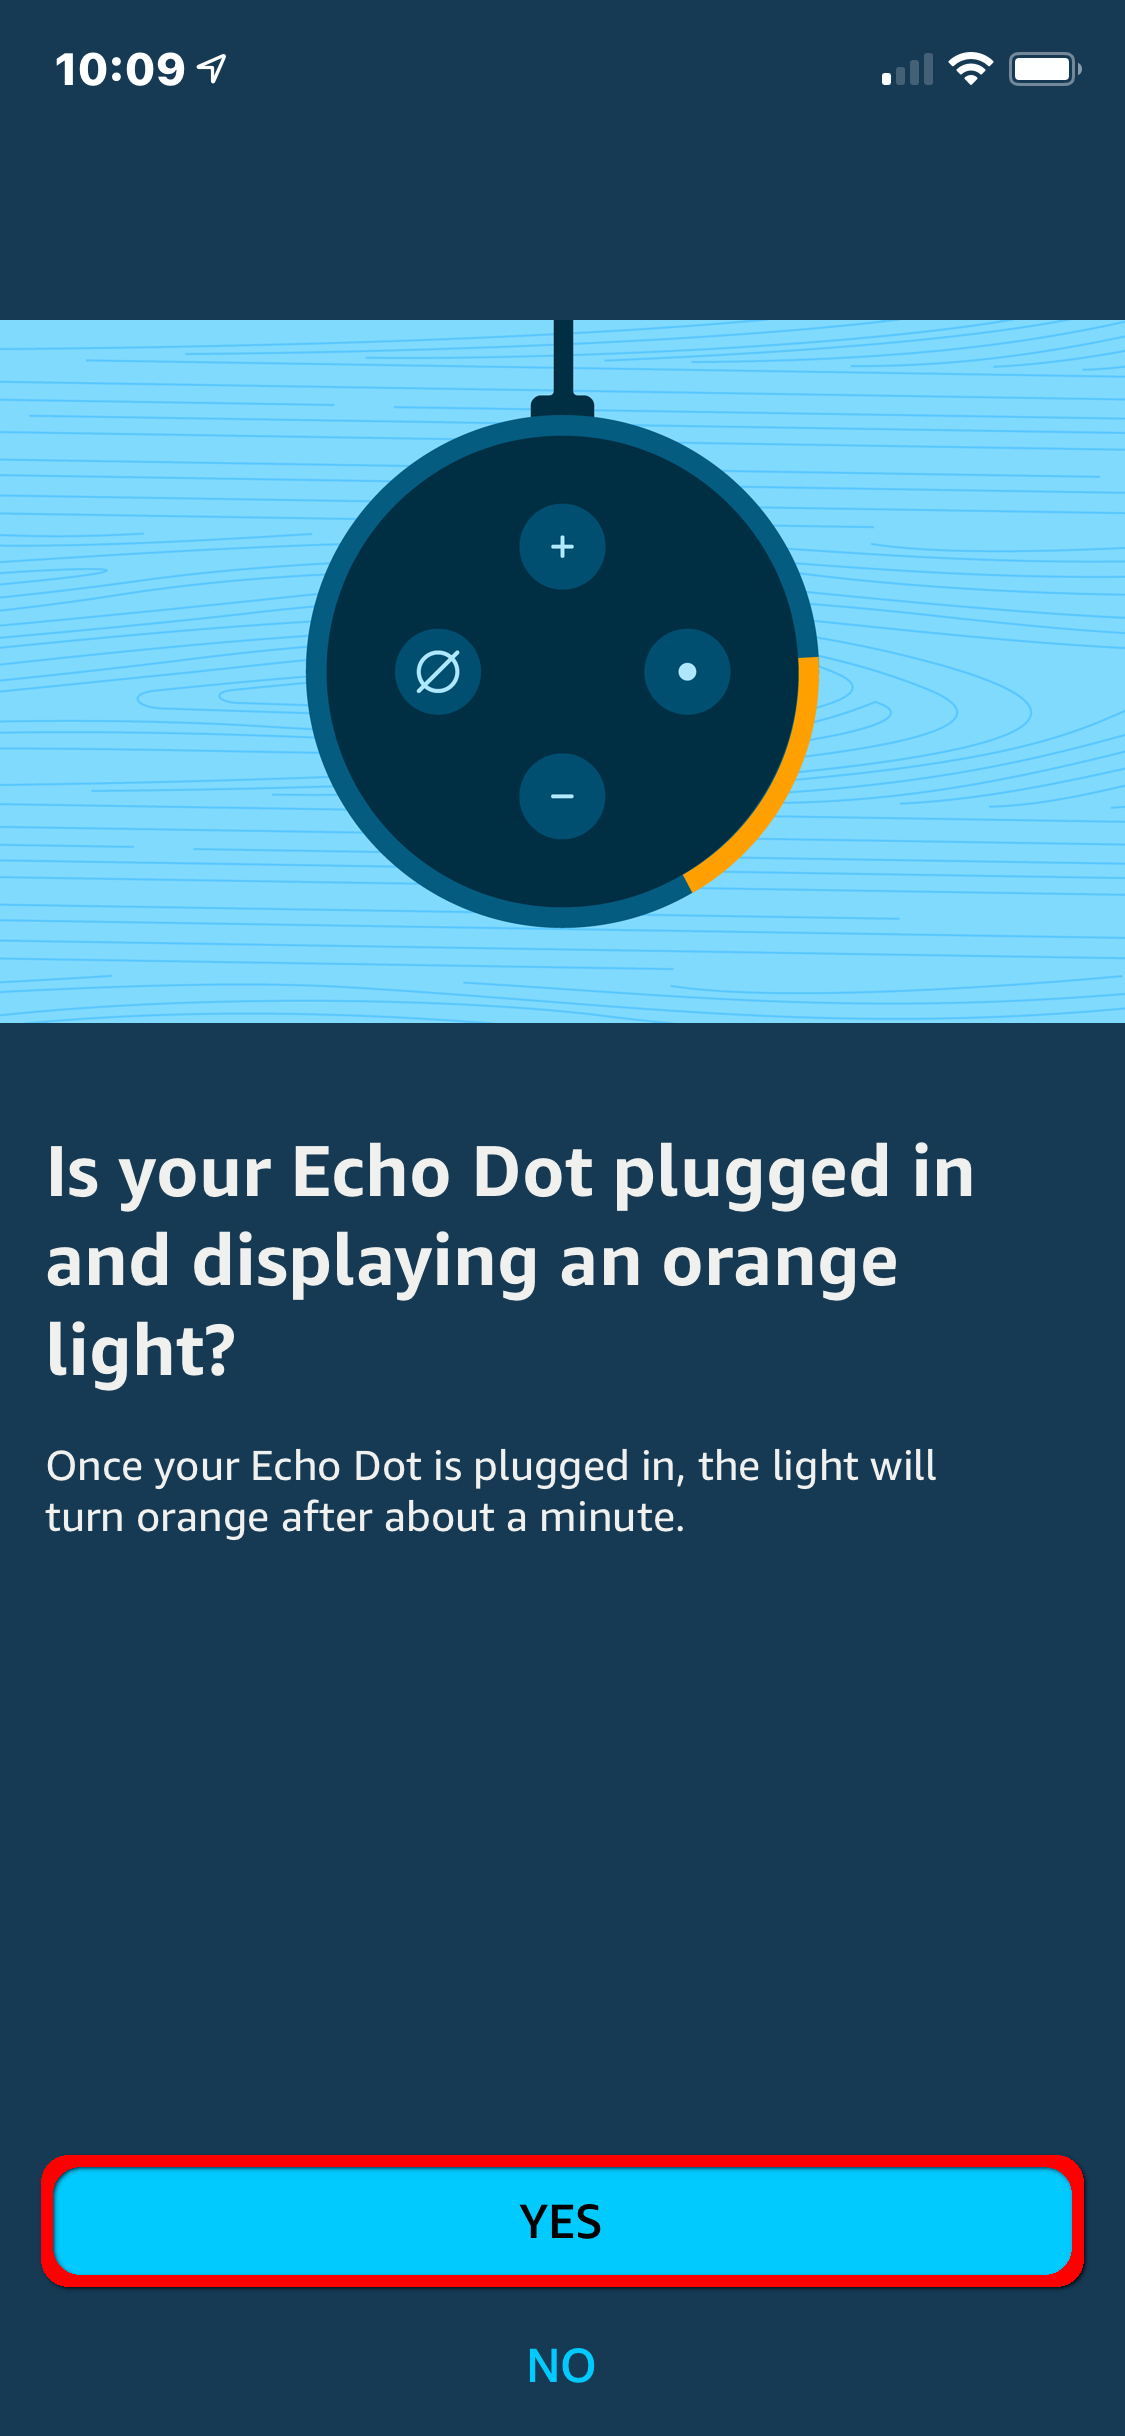
Step 8: Confirm that your Echo device is flashing orange, and tap Yes.
Step 9: Select the detected device from the given list.
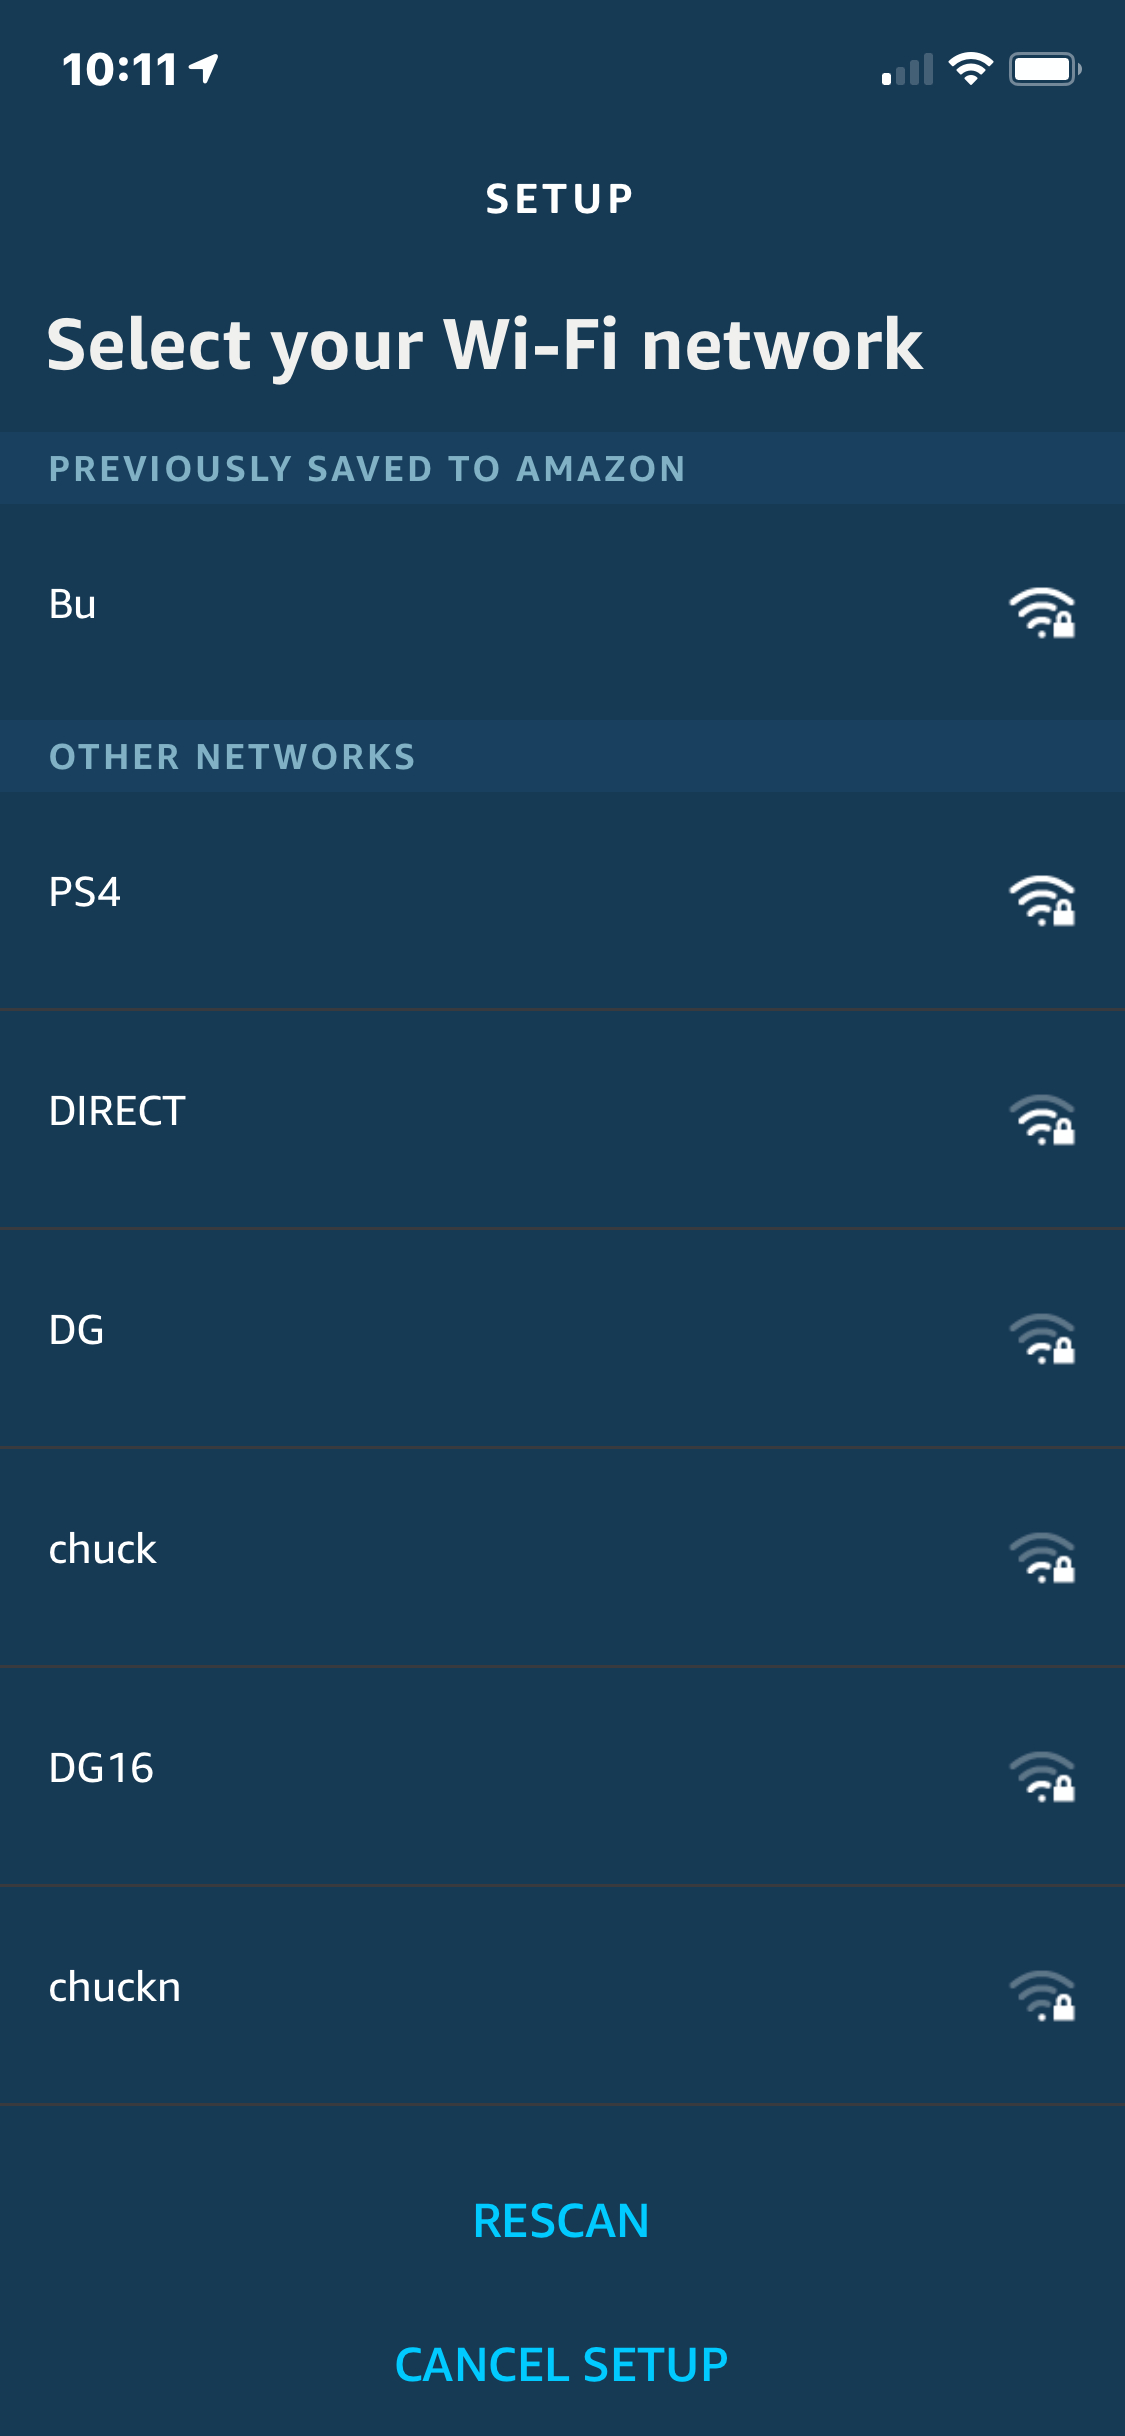
Step 10: Choose the Wi-Fi network to which you wish to connect.
You may be prompted for a password at this step. Otherwise, the Alexa app will begin its connection setup — this process may take a moment.
Step 11: Once your Alexa-enabled device is successfully connected, the screen will report as such. Tap the Continue button.

Step 12: Select a location where your device will reside, and tap the Continue button.
That’s it on the phone’s side. Alexa will move onto the interactive introduction phase on your new device, prompting you to try four commands like, “What’s the weather?” and “Tell me a joke.”
Once the introduction concludes, you can begin using your Alexa-enabled device. Try downloading some Alexa Skills to see what your new device can do for you.
Reconnecting your Alexa device to Wi-Fi
What happens if you change routers (and your SSID)? The Alexa device will have no idea where to connect. In this case, you’ll need to open the Amazon
Step 1: Open the Alexa app and sign in if necessary. On the home screen, select the Devices section from the bottom menu.

Step 2: In the Devices section, select the category for the kind of Alexa device you are using. For example, if you are reconnecting an Echo, choose Echo and

Step 3: You will now see all devices that are labeled as part of your Amazon account. Choose the device that you want to reconnect.
Step 4: Under Wi-Fi Network, tap Change.
Step 5: Verify the Alexa device is plugged in and displaying a light.
Step 6: Select the detected device from the given list.
Step 7: Choose a Wi-Fi network and supply the password.
Problems connecting to Wi-Fi
You may experience a few different issues when setting up your Alexa device:
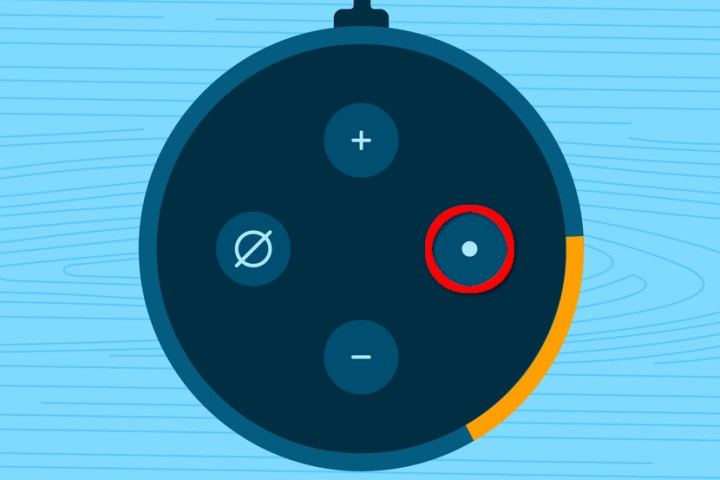
The app doesn’t see my new device If your Alexa app cannot see your Alexa-enabled device, ensure it is in setup mode and its light is orange. If your device is not in setup mode, you can force the process by holding down the Action button on the unit for 15 seconds.
Echo can’t find Wi-Fi If your Echo device is having trouble connecting to your Wi-Fi during the setup phase, take these steps:
Step 1: Turn off the device and wait a few minutes before turning it back on. If the issue is still there, go to step 2.
Step 2: Take a look at your modem. If it looks normal, move to step 3. If you notice that any indicator lights are either off or flashing, unplug the modem, wait 30 seconds, and then plug it in again. If all the LEDs become steady, you can move on. If not, you may have an ISP problem.
Step 3: If the modem looks good, restart your router (or, if you have a combined modem and router, restart it too). If your device still doesn’t connect after you reset your entire network, go back to step 1.
Step 4: If nothing else works, move your Alexa device closer to your router. Your signal might just be too weak.
The Echo device won’t accept my password
Make sure that you’ve typed in the correct password. Remember that router passwords are case-sensitive, so be careful to record the right use of capital letters in your password. If you are 100% certain that your password is correct, try restarting Alexa and start the process over.
If Echo Show doesn’t recognize your password, try unplugging the device for 10 seconds and replugging it so that it reboots. Rebooting can encourage your Echo Show to discover a new router and refresh from older settings.
There’s no option to change Wi-Fi
Double-check that your router is functioning correctly. If it is, make sure that you selected the right Alexa device. Sometimes older devices that have been inactive for a long time, have been switched off, or that you don’t even own anymore can still appear on your account. If your
If you’re still having trouble connecting, it’s a good idea to reach out to Amazon support for help. Most of the time, they can solve your problems quickly and efficiently.
Editors' Recommendations
- How to fix a Yale Assure Lock 2 that won’t connect to Wi-Fi
- What an Alexa red ring means and how to fix it
- How to connect Alexa to your TV for smart voice control
- Protect your personal data: how to secure an Alexa device
- Can Alexa call 911? How to set up Alexa for emergencies