What is kombucha, anyway?
If you’re still reading, you’re probably either a fan of kombucha, or have at least sampled a commercially produced version. For the newbies, kombucha is a zesty, fermented, lightly effervescent drink made by adding bacteria and yeast to sugar and tea (black or green), and then letting the process of fermentation do its work. Science, yeah!
Make no mistake: Kombucha is a funky drink, and it’s often an acquired taste. It’s sometimes referred to as “mushroom tea,” because it has an earthy, savory aroma with hints of alcohol and vinegar. That’s why aficionados often add juice to the base brew to make the tea taste better.
The drink is fermented in three stages, which we’ll discuss below. Kombucha is high in acid and contains sugar, vinegar, B vitamins, antioxidants, trace amounts of alcohol due to the fermentation process, and a few other trace chemical compounds. An eight-ounce mug of kombucha contains about 60 calories. By comparison, an eight-ounce café latte from Starbucks contains about 100 calories.
Kombucha is produced by fermenting tea using a SCOBY (this one’s important, so remember it for the test, kids). The acronym stands for “symbiotic colony of bacteria and yeast,” and while it sounds like some kind of scary mutant, this chemical cocktail is a crucial tool in creating a truly unique drink.
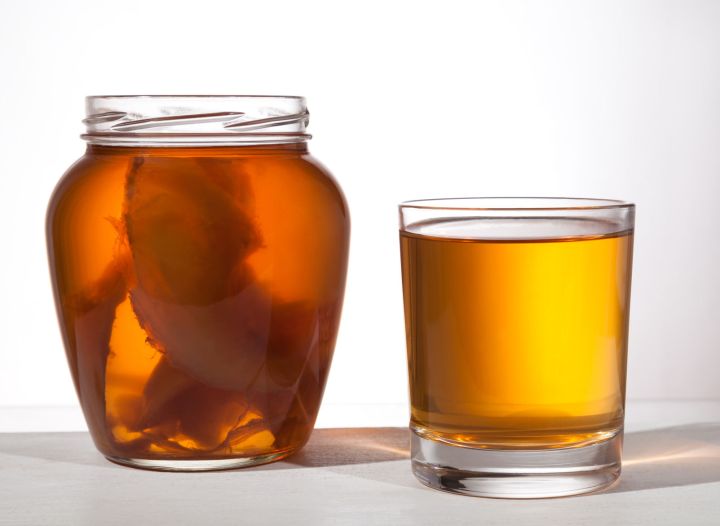
Home-brewers either buy a “kombucha mother” starter, or use a starter sample from an existing culture to grow a new starter that ferments in a jar for a couple of weeks.

A Brief History of Kombucha
No one really knows where kombucha originated, but here’s what we think we know.
The common wisdom is that kombucha originated in what is now Manchuria around 220 BCE and was largely limited to that region for over a century. It is apocryphally reported that the drink and its recipe was imported to Japan in 404 CE by Kombu, a Korean physician called upon to treat the Japanese Emperor Ingyo using a special tea. The Chinese referred to kombucha as the Tea of Immortality and the Elixir of Life, so the drink’s unproven health benefits have a long history.
The first recorded mention of kombucha comes from Russia and the Ukraine late in the 19th century. Spread via Russian and German POWs after World War I, kombucha began to reach new countries quickly, according to The Atlantic. By the 1920s, the drink was brewed throughout Germany as a home and folk remedy. It was also sold in pharmacies under a variety of names.
The word itself has a murky history as well. Dictionaries suggest it probably originates with the Japanese word kombucha, meaning tea made from kombu, the Japanese word for kelp. Kombucha was sometimes confused with a kelp-based infusion due to the thick, gelatinous nature of the drink’s base culture.
How to Brew Kombucha from Scratch (Hopefully without Making Yourself Sick)
There are a couple of things to talk about here. Every day, you hear about a new food or drink that’s some kind of miracle cure. Drinkers of kombucha regularly tout that it helps digestion, sleep, weight loss, and detox and prevents cancer, stops hair loss, and promotes liver function.”There is really very little evidence to support any kind of claims about kombucha tea,” Andrea Giancoli, spokesperson for the Academy of Nutrition and Dietetics, told NPR back in 2013. “So we don’t know if it does anything at all.”
Kombucha might be good for you, thanks to its probiotics — just like the yogurt you see Jamie Lee Curtis hocking on TV. But if you want probiotics, it’s much easier and safer to eat yogurt.

Why is yogurt safer? Because kombucha can kill you.
Seriously, kombucha is like anything else; every now and then someone isn’t careful or has a bad reaction. Adverse effects include severe liver and kidney toxicity, as well as metabolic acidosis (that’s acid in the blood, like Alien). At least one person is known to have died after consuming kombucha, although it has never been an official cause of death. Because it does pack a kick, it is not recommended for people with compromised immune systems, for women who are pregnant or nursing, or for children under four years old.
It’s also possible homemade kombucha could give rise to molds, such as aspergillus, that can produce mycotoxins, which are “fairly toxic and carcinogenic,” Cornell microbiologist Ramón Mira de Orduña told Mother Jones in 2010. “If you do that at home, and you’re not sure how to control that, that could be dangerous.”
If you still want to brew, make sure you follow the brewing process carefully, use sterilized materials, and some common sense. A good rule is if your SCOBY is healthy, your kombucha will be healthy. If you’re still nervous, go to Whole Foods and buy a commercially prepared and pasteurized kombucha and then ruminate on the long, slow co-opting of authentic world culture.
Everybody else, let’s go brew up some kombucha!
Step One: Acquire or Grow Your Own SCOBY
First, you’re going to need your “Symbiotic Colony of Bacteria and Yeast,” or SCOBY. Seriously, the easiest way to get a SCOBY is just to buy a kombucha starter kit online. You can also buy the SCOBY online for less than 10 bucks. If you have hipster friends, you can also probably borrow an extra SCOBY. If you live in Brooklyn or Portland, you can probably throw a rock in any direction and hit a kombucha supply store.

Finally, you can also make your own.
To make your own SCOBY from scratch, you will need:
- 7 cups of clean water
- One half-cup of white sugar – don’t use honey. (Fun fact: honey can contain botulism bacteria, which grows in yeast.)
- 4 bags black tea (or 1 tablespoon loose tea) – Don’t use decaffeinated tea, those fruity Celestial Seasonings varietals, or other experimental teas. Keep it simple.
- 1 cup of unpasteurized, unflavored store-bought kombucha
- A large glass or ceramic jar. You can find kombucha-specific jars online, but there’s nothing that says you can’t re-use a glass bowl or other container. Just stay away from plastic containers because you’ll ruin the SCOBY. The CDC cautions against using lead or ceramic containers, which might release toxic chemicals into the brew.
- You’ll need some kind of tightly woven cloth big enough to fit over the opening of your container; you can use coffee filters, paper towels, cheesecloth, or cloth napkins.
- Rubber bands
Note that if you don’t want to make a big batch of kombucha, you can make a one-quart batch by adjusting your ratios to:
- 1½ teaspoons loose tea or 2 tea bags
- One quarter-cup of sugar
- 2-3 cups of water
- A half-cup of starter tea
Once you have all the ingredients, you’re ready to start.
- First, boil the water in a clean pot. Remove the water from the heat and dissolve your sugar into it.
- Add the tea and allow it to steep while your water cools to room temperature; give it a few hours. When the tea has cooled, you’re ready for the next step.
- Pour the sweetened tea into your containers, then pour your store-bought kombucha into it, making sure to include any lingering bits at the bottom of the kombucha container.
- Cover your container with your woven cloth component to keep out bugs and dust, and rubber band your container shut.
- Set your container somewhere dark that stays at room temperature. You don’t want to put it somewhere shaky, like near the washer-dryer. Leave it alone for one to four weeks, until you have about a quarter-inch of gelatinous SCOBY.
- Keep your SCOBY in its original solution until you’re ready to brew your first batch. Keep in mind your SCOBY is a living thing, kind of like a yeasty house plant. You can actually grow new SCOBY from your original mix, as well as keep the original alive for years. However, your original tea will be completely vinegar-infused by this point, so don’t use it to make your first brew. You can also share the wealth by gifting it to a friend, along with your handy-dandy guide to making kombucha from scratch.

Step Two: Your First Fermentation
Wake up: it’s time to ferment the kombucha!
Here’s what you’ll need for the next step in this weird process.
- 14 cups of clean water
- 1 cup of white sugar
- 8 bags black or green tea (or 2 tablespoons of loose leaf tea, your choice)
- 2 cups unflavored starter tea (it’s easiest to use unpasteurized, unflavored store-bought kombucha)
- 1 or 2 SCOBYs (depending on how many containers you’re using, 1 SCOBY per container)
- A large glass container that will hold one gallon of liquid, or two containers that will hold a half-gallon each.
- You’ll need a tightly woven cloth big enough to fit over the opening of your container; you can use coffee filters, paper towels, cheesecloth, or cloth napkins.
- Rubber bands
Let’s get started:
- Boil your water in a clean pot. Remove the pan from heat and dissolve your sugar into it.
- Steep the tea in the water while it cools to room temperature. This takes a couple of hours, so don’t rush it at the risk of killing your SCOBY in water that’s too hot. Oh, you can use different teas in this step; you don’t have to use black tea. You can try green, oolong, fruit, or whatever — just make sure to mix in a few black tea bags to make sure the SCOBY gets fed properly.
- Carefully remove your SCOBY from the tea and put it on a clean plate. Discard the original solution the SCOBY was grown in.
- Pour your sweetened tea into your container(s), then pour in your starter kombucha.
- Gently place your pet SCOBY into the container, then cover the top with a few layers of your cloth and secure it with a rubber band.
- Back into the closet with your container, somewhere room temperature, for a week to 10 days. You can start tasting the tea after the first week; it will be a little sweet and have a slight vinegar tang at first. This is the chemistry part; the warmer the air where you’re storing the kombucha, the faster it will ferment. The longer the solution ferments, the more sugar molecules will be consumed, so it will be less sweet. With time you’ll learn where your “sweet spot” is, as to how you want your kombucha to taste.
- Preserve 2 cups from this round to use as starter kombucha for your next batch. The remainder can move on to your second and final fermentation. Once your SCOBY is about an inch thick, you can peel off a few layers to make a second SCOBY for yourself or a friend.
Step Three: Fermentation, the Second Round
Okay, last round, boys and girls. This is where you can experiment a little more with flavor, not to mention this is the fun part where carbonation gives kombucha its effervescent fizz.

Here’s what you’ll need for the final step.
- Your homemade kombucha from the first fermentation
- Sweetener (fruit, honey, or sugar)
- Here are a few ideas per each cup of kombucha:
- Mashed fruit or fruit juice
- A slice of orange, lemon, watermelon, mango or other citrus fruit
- 1 to 2 teaspoons of honey
- Raisins, ginger, or jalapeno chili
It’s also worth investing in some fermenting bottles, which have an airtight seal to keep your carbonation from escaping. You can use canning jars in a pinch, but you’ll get less carbonation action.

Commence fermentation:
- Strain your kombucha and funnel it into your fermenting bottles, leaving an inch or two at the top so your carbonation gas doesn’t blow open the bottle. If you suspect the pressure is getting too high, you can pop the bottle open to vent some gas occasionally.
- Add your flavoring ingredients and seal the bottle tightly. The more fruit or sugary ingredients you add, the faster the kombucha will ferment.
- Back in the closet; put the bottles somewhere dark and room temperature for three to ten days.
- You can strain out your flavoring ingredients or fruit before serving, if you wish. You can also put the bottles in a refrigerator to slow the carbonation process.
- Strain kombucha and funnel into bottles, leaving about 1 1/2 inches as the top (3.8 cm).
- Add your chosen sweetener and seal tightly with a lid.
- Let it ferment somewhere dark and room temperature for three to 10 days.
- If desired, strain out fruit before serving. Place in the fridge to slow the carbonation process.
So there you have it. Keep in mind that you can use your newly made kombucha for all sorts of things, from marinating meat to flavoring mixed drinks.
Editors' Recommendations
- The most common Instant Pot problems and how to fix them
- How a smart thermostat can protect your home from brownouts
- How to stream music from Google Home to Bluetooth speakers or headphones
- How to set up Voice Match on your Google Home device
- How to improve sound and voice recognition on your Google Home device