
How to rig up a doggy doorbell to let your pet tell you when it’s time to go outside

rig doggy doorbell let pet tell time go outside doggie
Image used with permission by copyright holder

If your dog isn’t very good at letting you know when it wants to go outside, or your house is arranged in such a way that you can’t always see him/her pacing around the door, this DIY doggie doorbell might be a worthwhile weekend project.

The design was posted to r/DIY the other day by Redditor turing5000. As the owner of a particularly shy and reserved dog, he needed a better way for his pet to communicate when it was time to go outside, so he repurposed a cheap wireless doorbell to get the job done. Sure enough, after a bit of training, his dog could easily alert him whenever he needed to go for a walk.

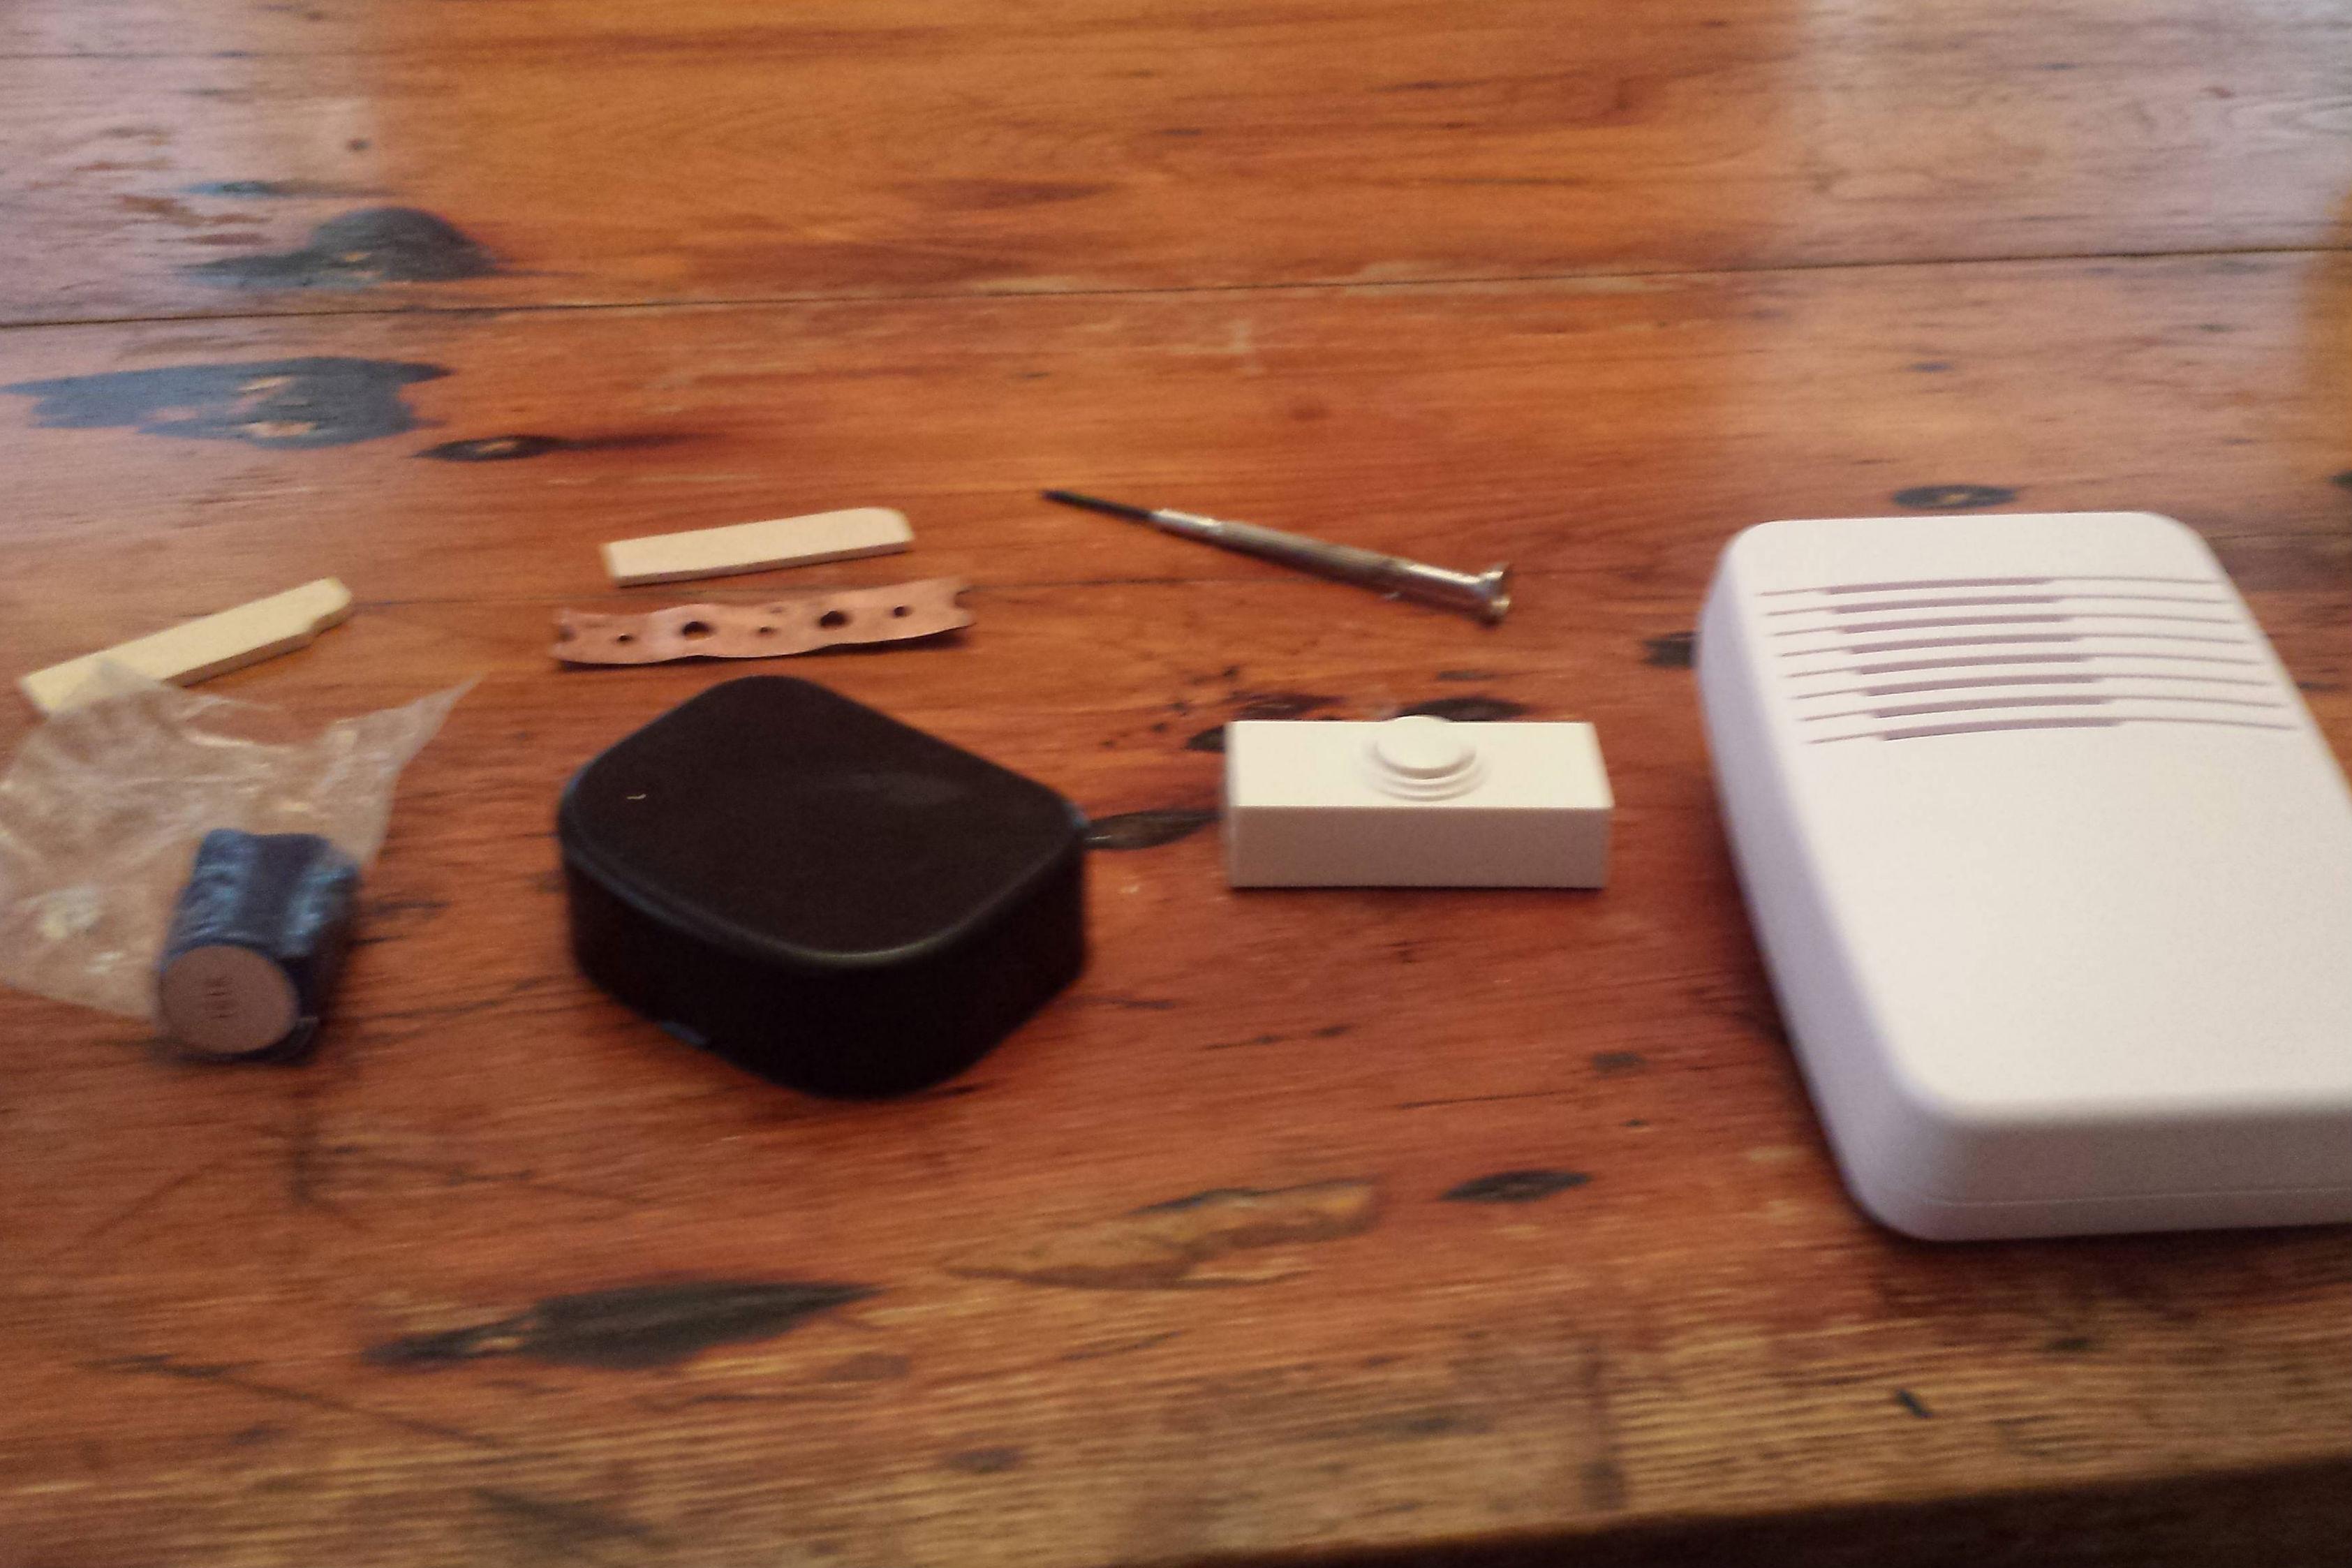
Here’s what you need to make one yourself:

  • Wireless doorbell from your local hardware store
  • Some sort of plastic cap for the dog to press (turing5000 used the bottom of an old retainer case – we suggest cutting off the bottom of a plastic cup)
  • Copper plumbers tape
  • Flat wooden shims or a popsicle stick
  • Epoxy putty or some other type of adhesive. If your dog is the type that eats stuff, go with something nontoxic
  • Extra small screwdriver or something else that can put a hole in the plastic button cap
doggie doorbell 1
Image used with permission by copyright holder

When you really get down to it, you’re basically just making the doorbell into a bigger button so you dog can hit it with a paw, so feel free to improvise with the materials and construction. Here’s how turing5000 put it all together:

doggie doorbell 2
Image used with permission by copyright holder

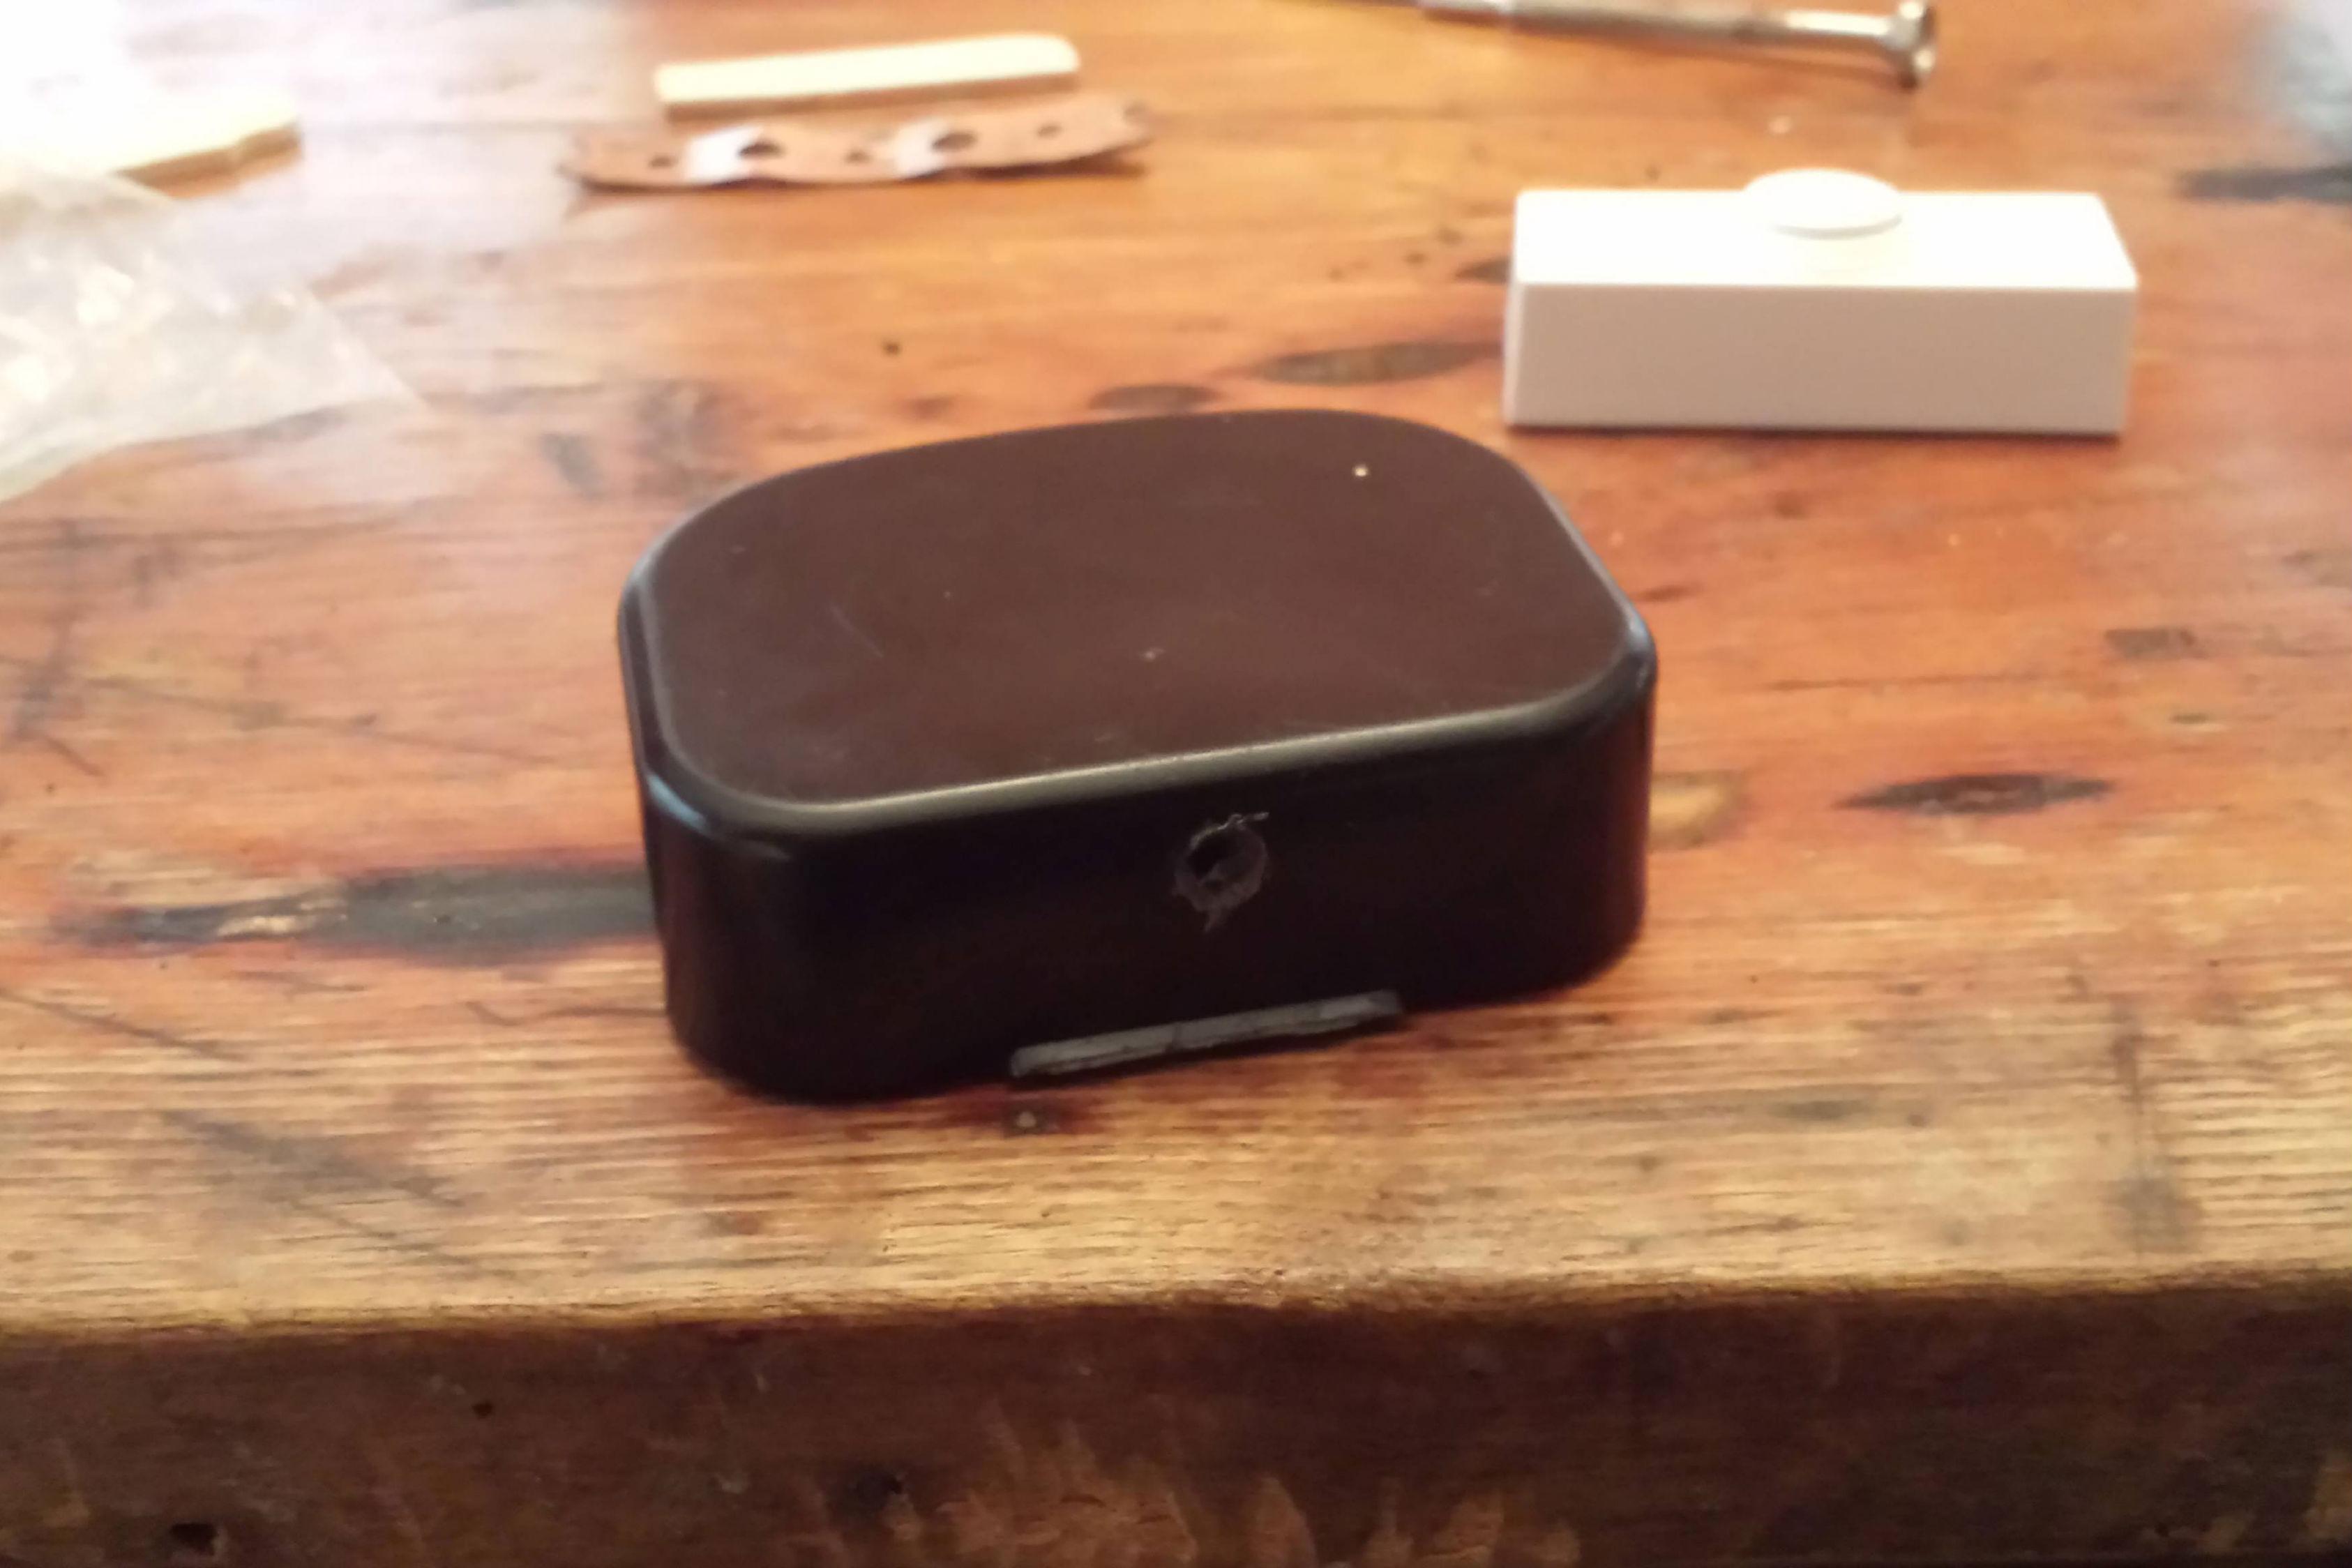
This is the button cap. Yours might look a bit different,

doggie doorbell 3
Image used with permission by copyright holder

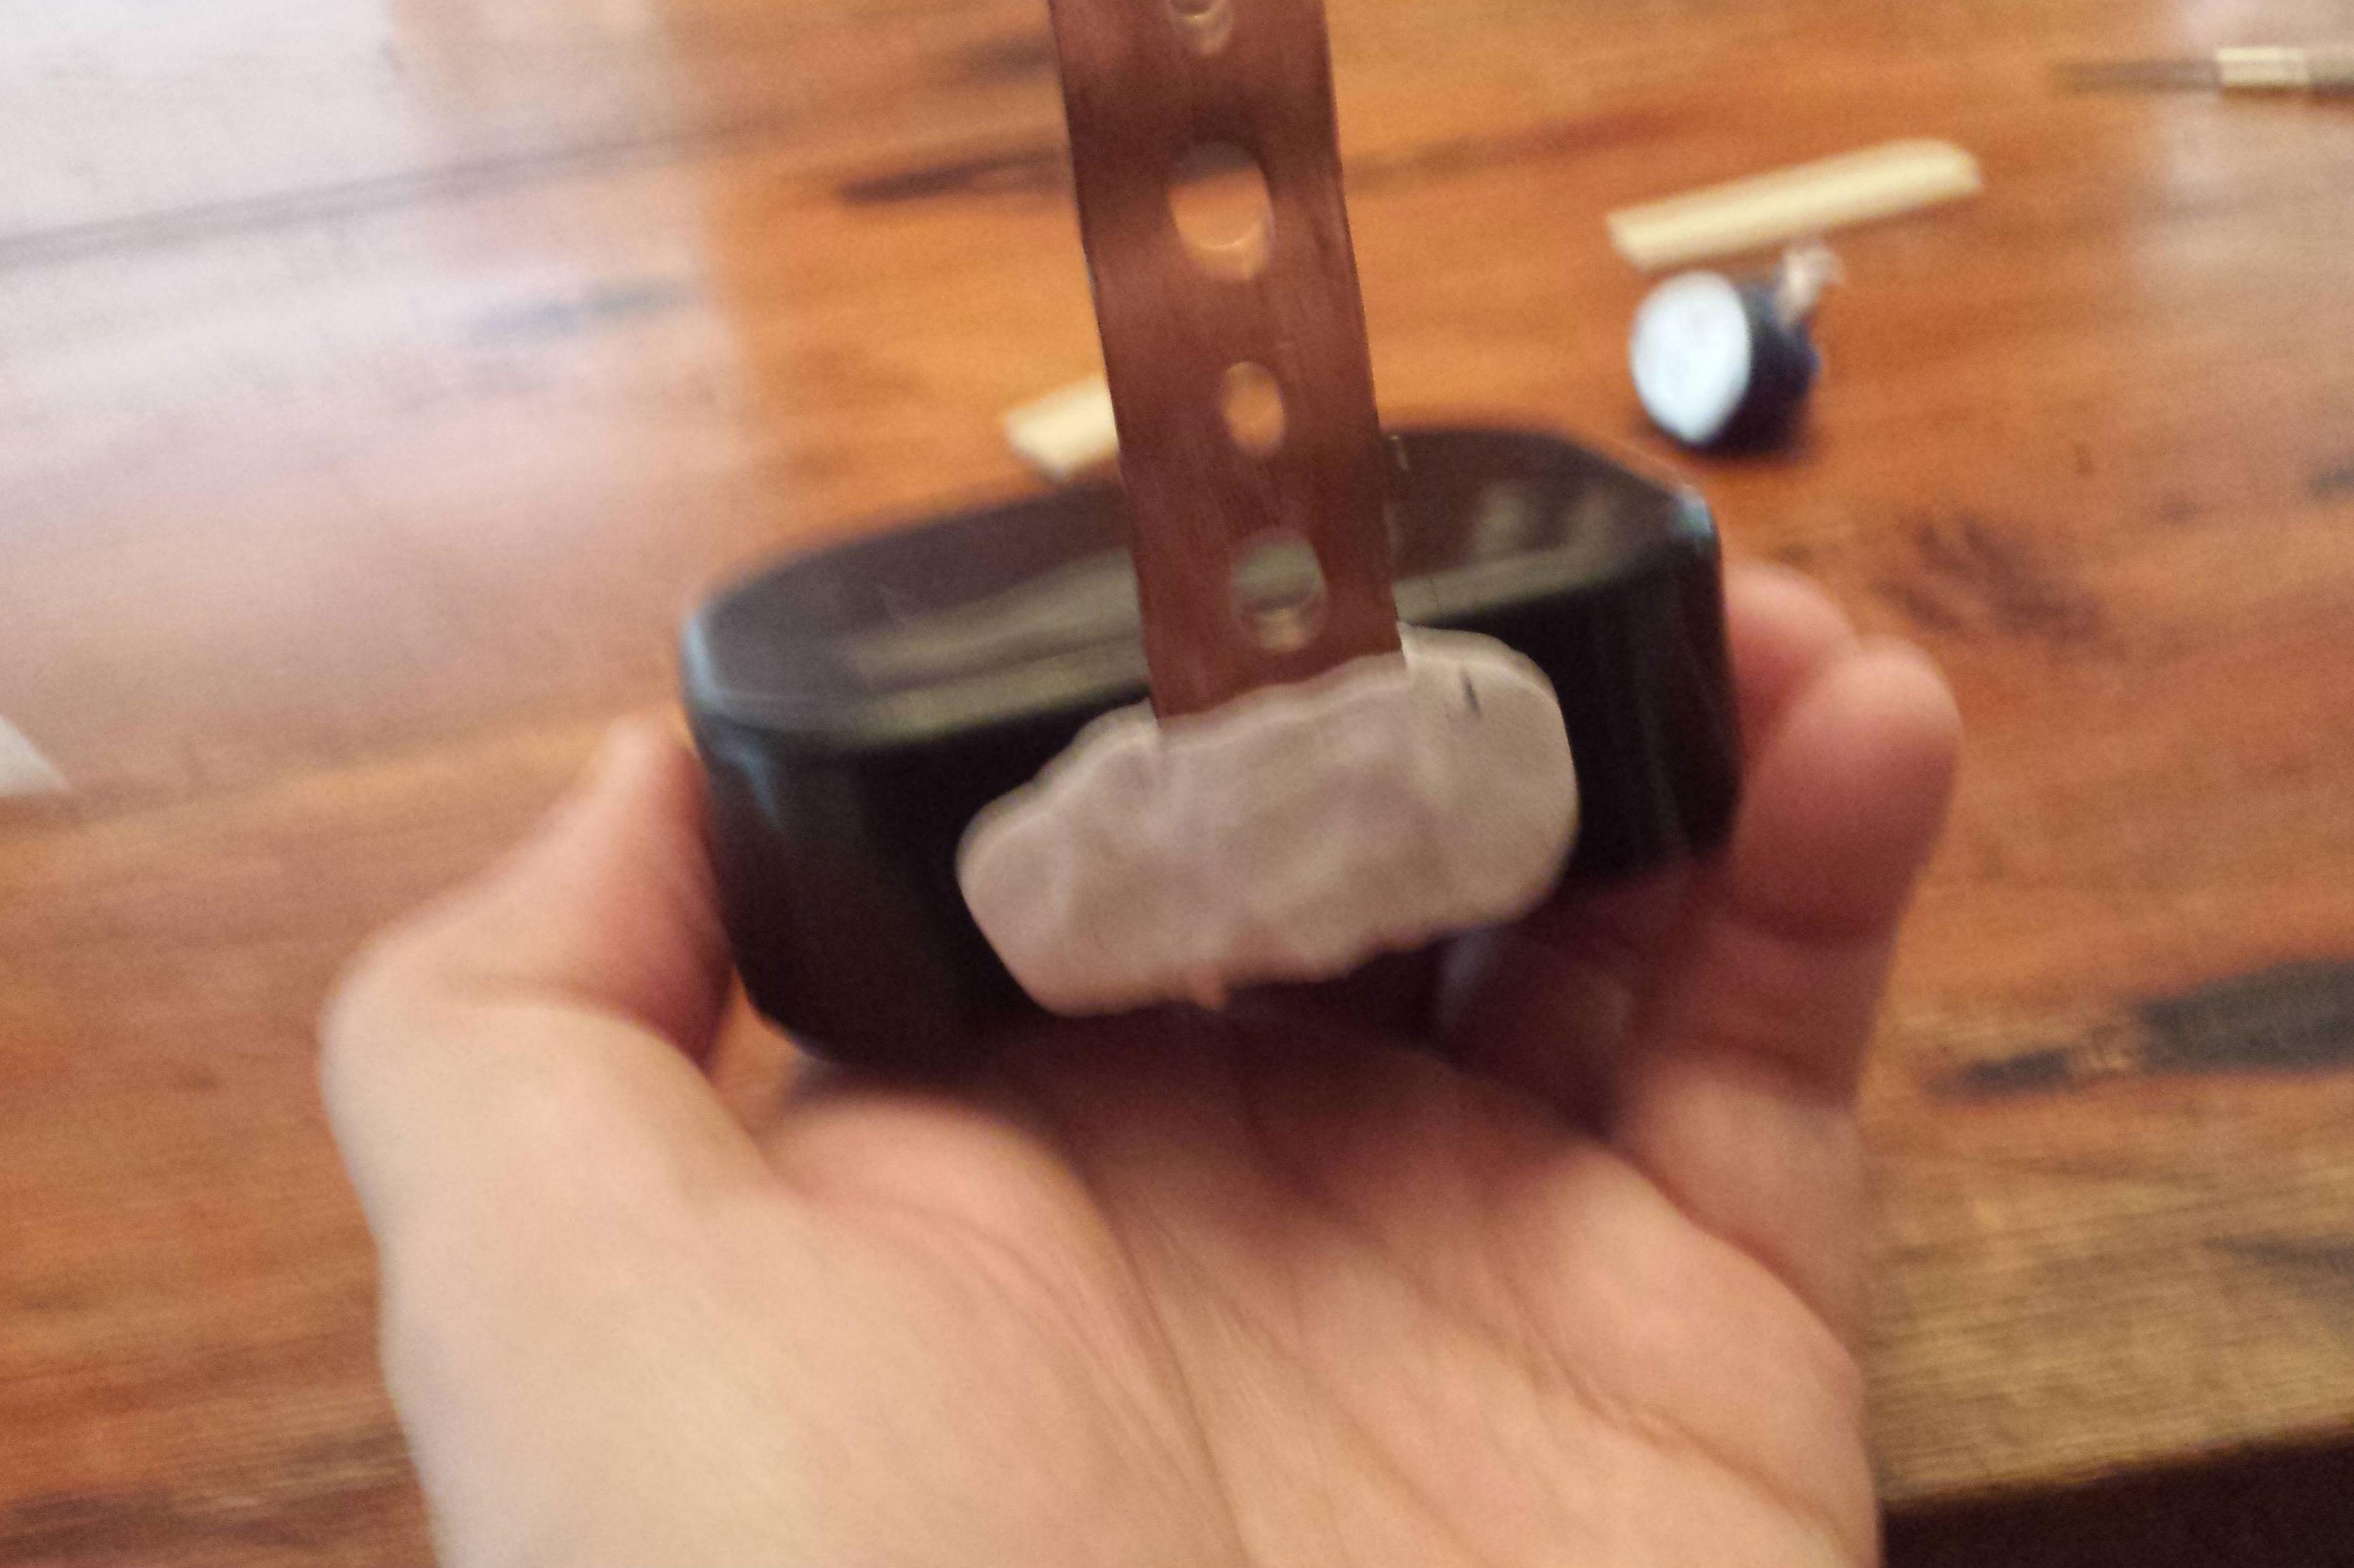
Using the epoxy putty, affix the copper plumbers tape to the button cap Use a screw or a short nut/bolt assembly if you want it to be more sturdy.

doggie doorbell 4 Make sure the epoxy goes all the way through the hole – otherwise it probably won’t hold up very well.

doggie doorbell 5 

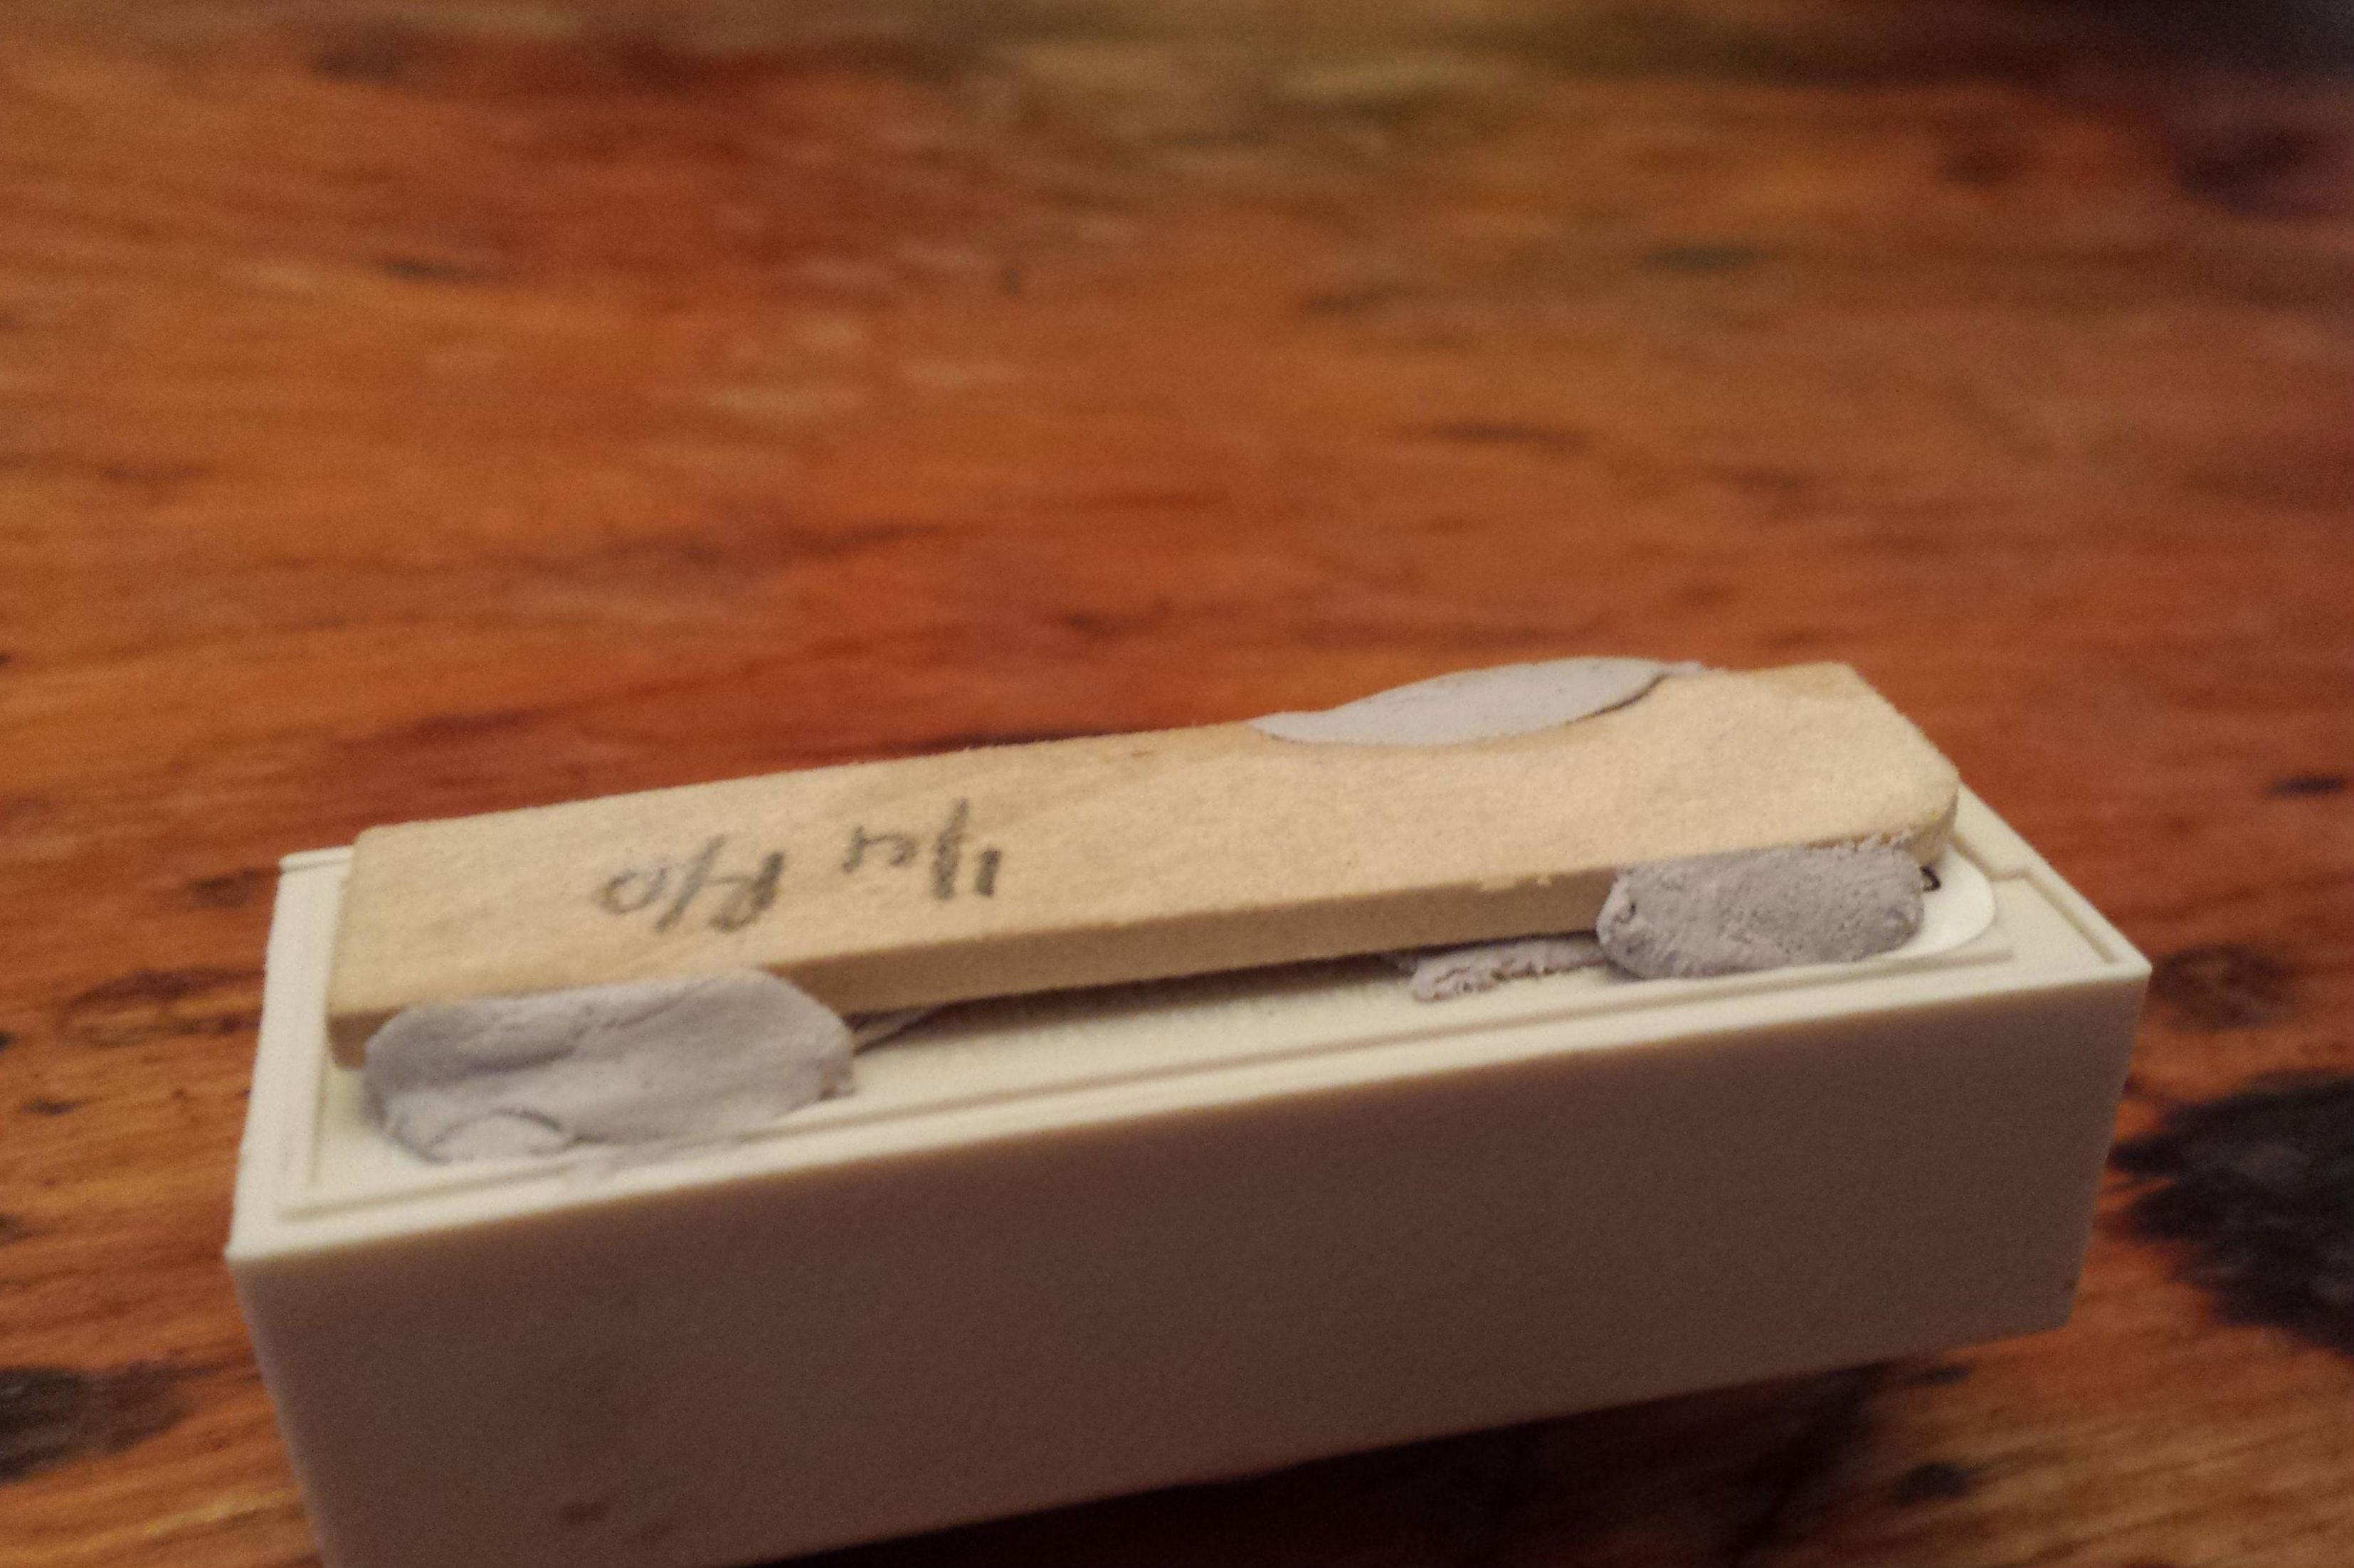
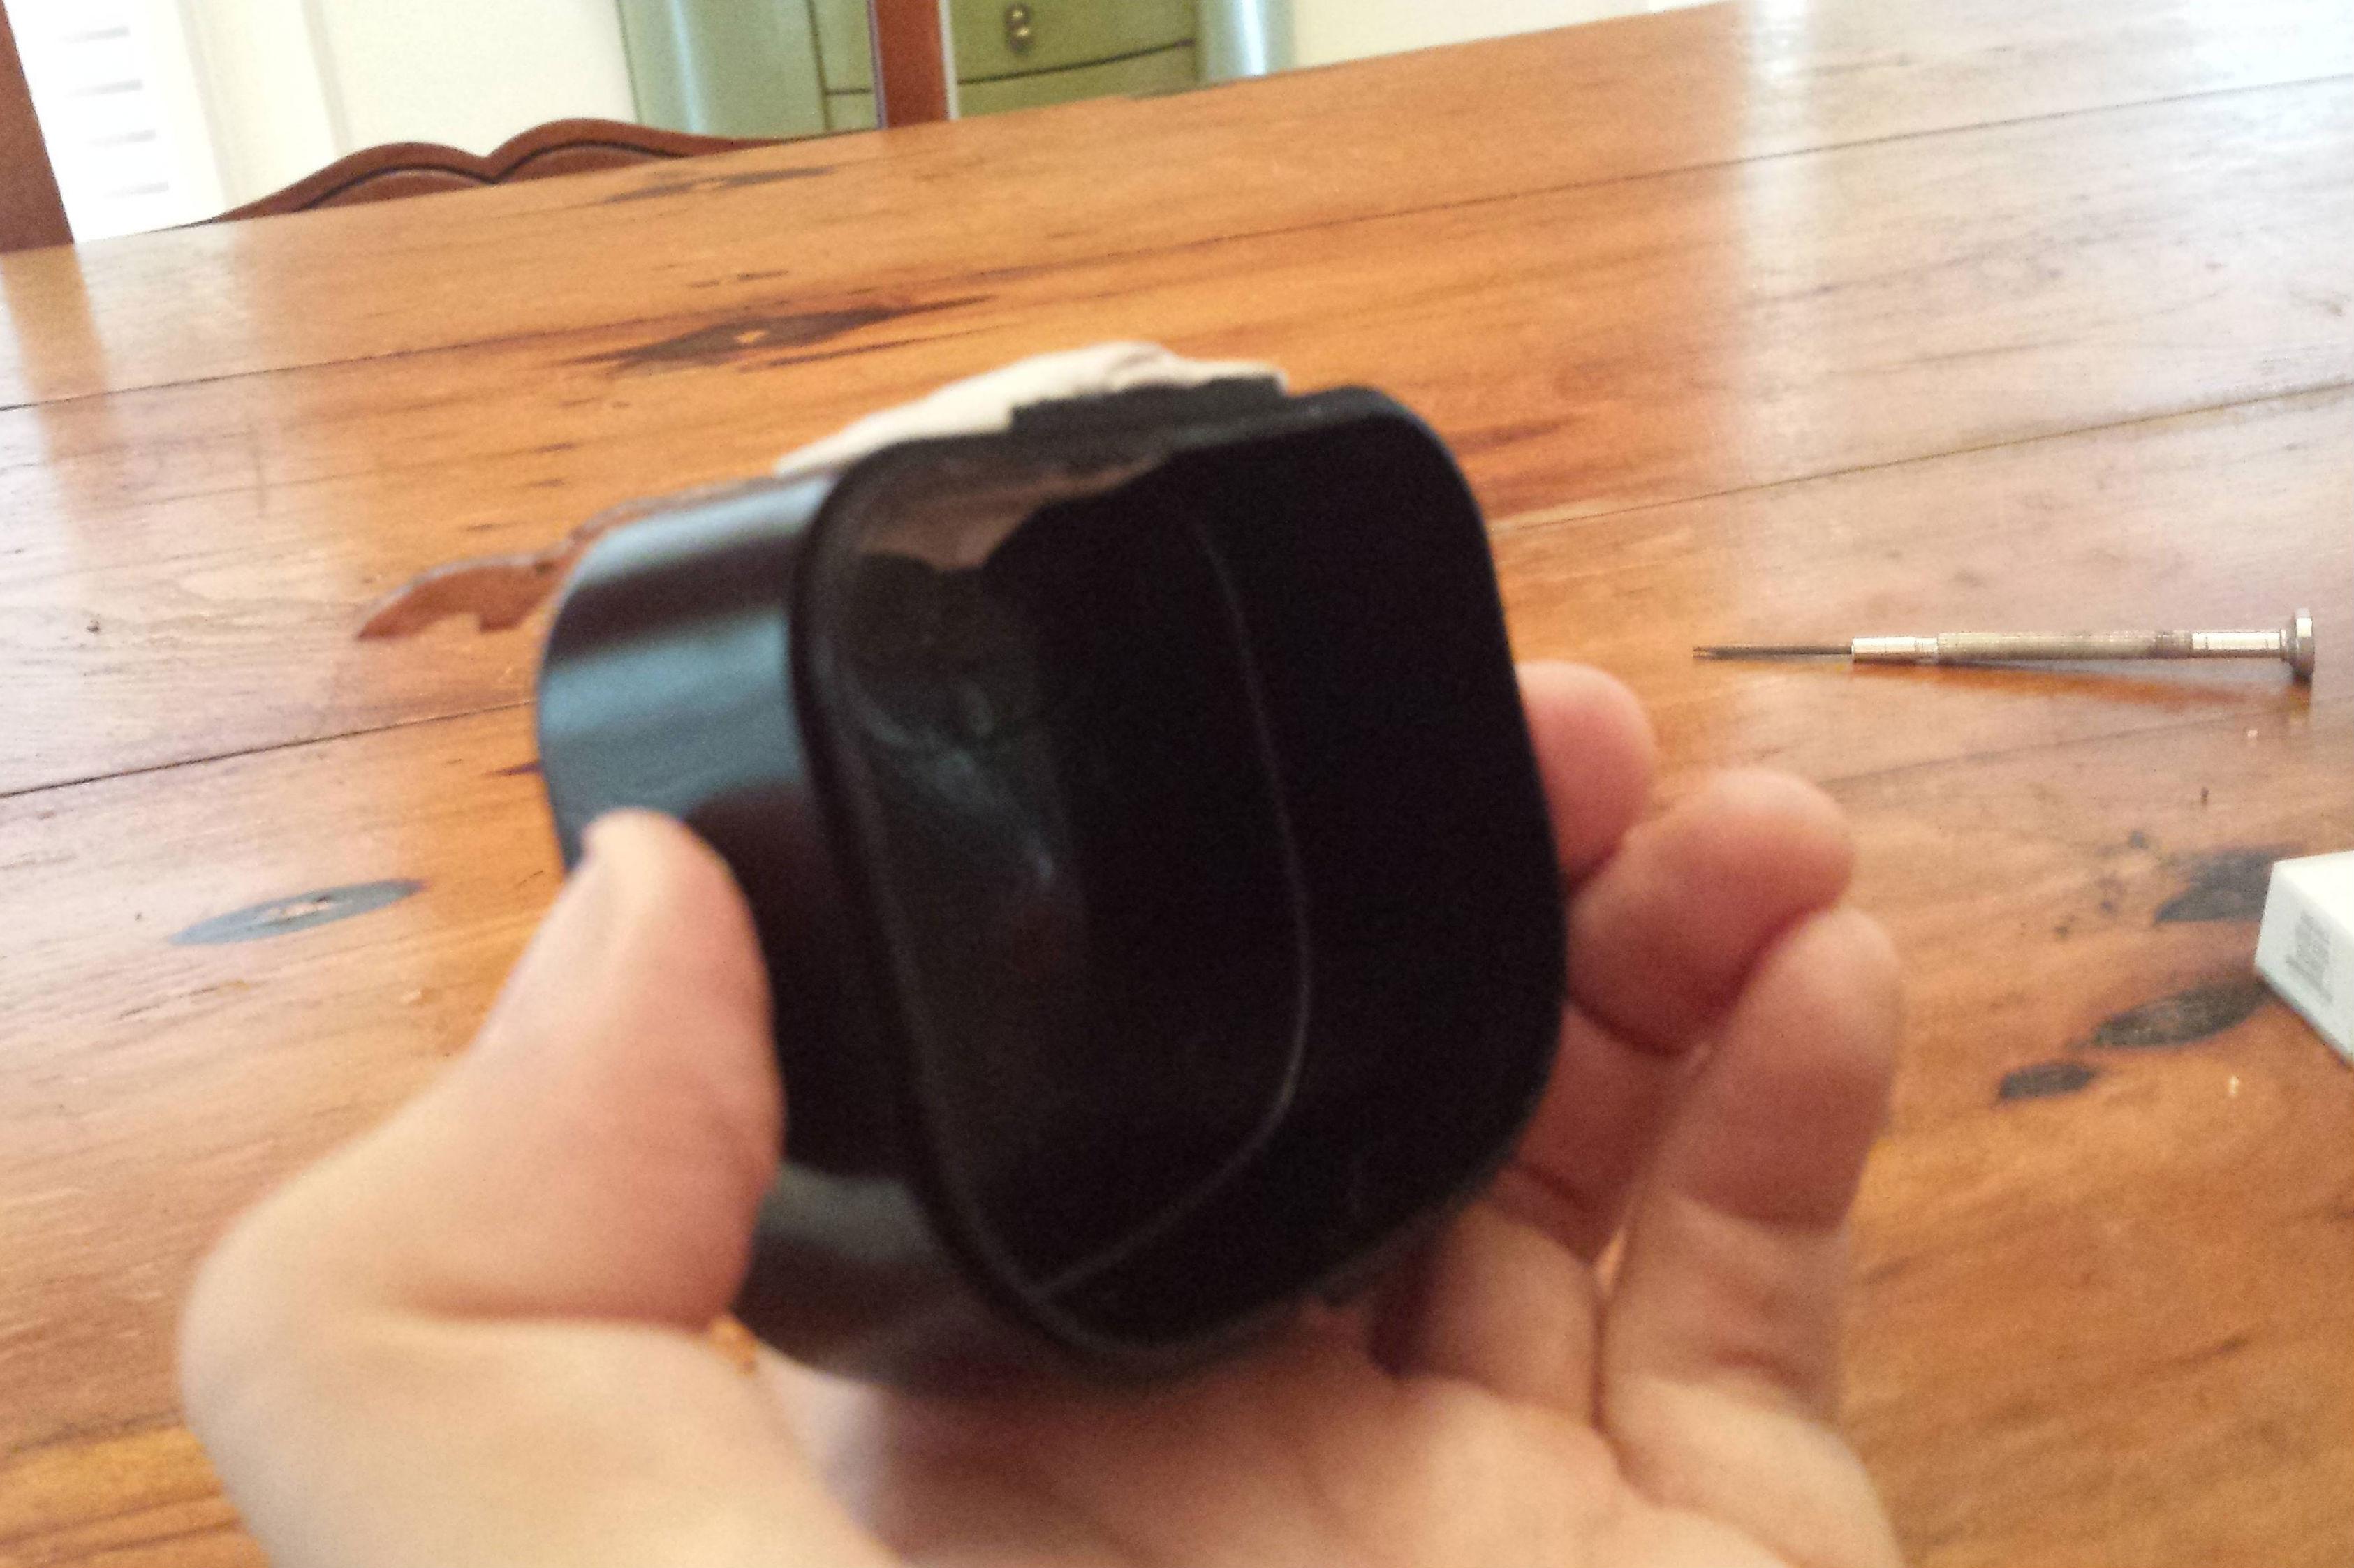
Affix the wood bits to the bottom of the doorbell button. The idea here is to make the button tall enough that it hits the floor before the edge of the cap does. You don’t want the edges of the button cap to bottom out before the doorbell button gets pushed, so do whatever’s necessary to make that happen.

doggie doorbell 6
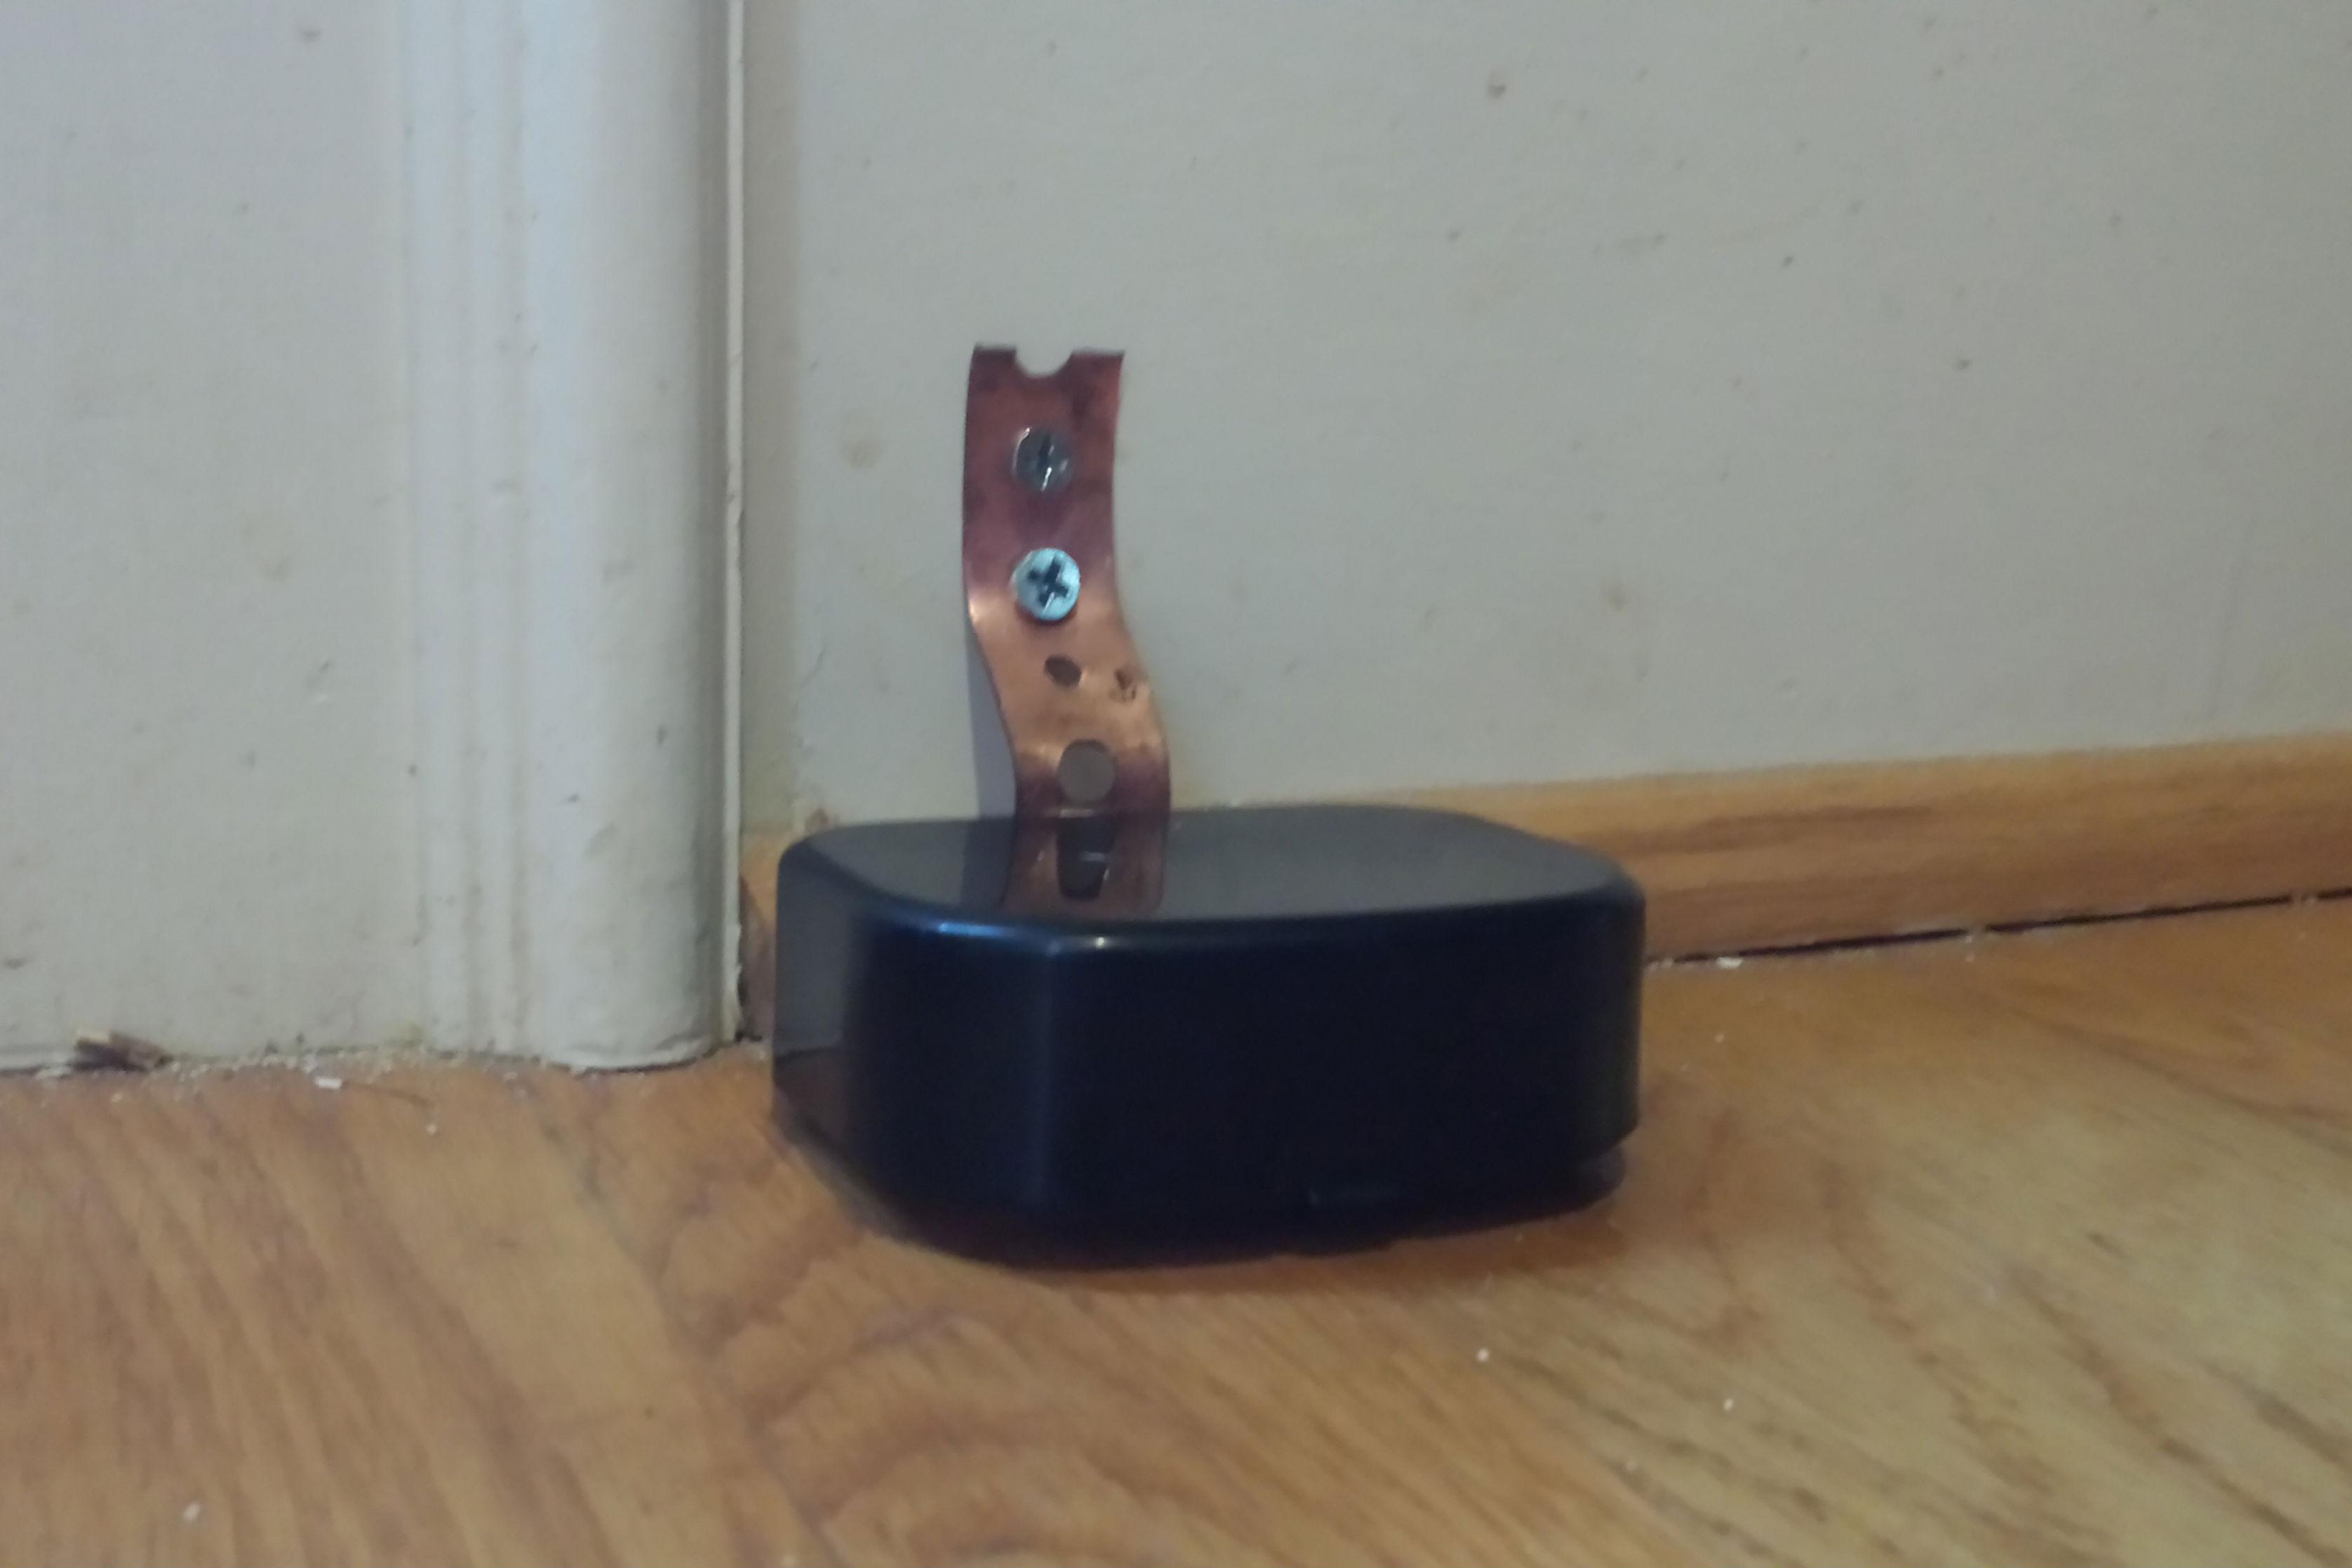
Screw the entire assembly to the wall so that the button hovers just barely above the floor. Then, just place the doorbell speaker at a central location in your house so it is audible throughout the house. Teach your dog to press the button by giving him treats when he uses it. It might take some time for your pet to pick it up, but once they do, they’ll have a foolproof way to let you know when it’s time for a walk.

 Images via Shutterstock/Imgur

Editors' Recommendations

Drew Prindle
Former Digital Trends Contributor
Drew Prindle is an award-winning writer, editor, and storyteller who currently serves as Senior Features Editor for Digital…
How to set up a geofence for your Ring cameras and doorbells
A man uses the Ring app.

Ring security cameras and Ring Video Doorbells are some of the simplest and best-functioning DIY home security devices on the market, if you’ll take one writer’s opinion. The biggest problem with them is the sheer number of alerts you might get if you have multiple devices.

While there are a variety of ways to minimize these alerts, from turning them right off to snoozing them, one of the most clever and useful has to be the option of using a geofence to squash alerts while you’re close to home. This is a feature Ring rolled out early in 2021 so it’s still fairly new, and some users may not even realize it’s an option. Here’s how to do it.
What is a geofence?
Before we get too far, some Ring users might be wondering what exactly a geofence setting can do and why you’d want to enable it.

Read more
Nest Hello vs. Ring Video Doorbell Pro: Which is better for you?
Ring Video Doorbell Pro

A video doorbell is a great way to add valuable home security to your property and convenience like no other. Using your bell's mobile app, you can see who's standing on your front stoop and communicate with them through two-way talk. Features like motion alerts are another huge advantage. If there's someone perambulating your property (who shouldn't be there), your bell will ping your mobile device with an alert, allowing you to check in and phone the authorities if need be.

There are several video doorbells for sale from a variety of different brands, but two of the most well-known options are the Nest Hello and the Ring Video Doorbell Pro. Between these two, which should you buy? We compared both side by side to determine which video doorbell reigns supreme.
At a glance

Read more
How to install a Ring Video Doorbell Wired
ring video doorbell wired, how to, install

Ring, makers of a massive array of smart-home security products, has launched a new video doorbell. Ring's Video Doorbell Wired is being touted as Ring’s smallest and most affordable video doorbell, putting it now in reach of more people who want to keep an eye on their kids or Amazon packages. Now with a dedicated wired design that lets you replace an old-school ding-dong doorbell, this wired version means you don't need to worry about recharging batteries.
Why add Ring Video Doorbell Wired?
Ring Video Doorbell Wired is much smaller than other battery-enabled Ring doorbells. That’s because this design eliminates the battery entirely, since your doorbell is hardwired to your home for power. This allowed Ring to design a doorbell that’s much slimmer and with a smaller profile than its other video doorbells, meaning it fits more easily on the trim around your door, where many of us have older doorbells wired and installed now. Wondering which doorbell is for you? Read our Ring Video Doorbell Wired vs. Ring Video Doorbell 3 comparison.
Afraid of wiring? Don’t be!
If you’re thinking, "Ooh, wiring! I can’t do that," the truth is, you can. Doorbells often use extremely low-voltage wires, and once you turn off your power on your breaker panel, it’s actually very easy to connect a new doorbell since it’s often just a couple of wires.
How to install a Ring Video Doorbell Wired
Having installed several video doorbells in the last few years, we can confidently say this is not a difficult job. You do need to know your existing wiring is connected and functioning, so from here on in, we’ll assume you already have a working basic doorbell. We will also assume here you’ve already visited Ring’s website to check if your existing setup and wiring are compatible with the product.
Step 1 - Turn off power at the breaker
Depending on how diligent and organized you and/or your electrician are, you may already know which breaker shuts off your doorbell. It may take some trial and error to find, but ensure the power is off: Your doorbell shouldn’t ring when you hit the button if the correct breaker is off.
Step 2 - Prep for your new chime
You’ll be bypassing your old doorbell’s bell or chime with the new Ring Video Doorbell Wired.
Find the Ring Jumper Cable, which will be how we bypass and disable your existing doorbell chime. It needs to be installed before you install your Ring Doorbell. Next, find your old chime and remove the cover (they usually pull off easily).
Step 3 - Connect the Ring jumper
Loosen the front and trans terminal screws on your chime, but make sure to keep the existing doorbell wires in place -- you’ll be looping in the jumper together with these old wires under the screw heads. Connect one end of the jumper cable to the front terminal and the other to the trans terminal. (It doesn't matter which wire you connect to which terminal.) Then re-tighten the terminal screws and pop the cover back on.
Step 4 - Uninstall your old doorbell
Next, it’s time to head outside for the fun part. Unscrew your old bell button from the wall or trim and pull it out gently. You’ll disconnect the wires from the two terminals at the back of the bell, but before you do, make sure your wires aren’t so short they could fall back into the wall. If you’re worried, grab some tape and tape them to the wall or tie a pen to them. Ring helpfully includes wire extenders too, if yours are too short to work with.
Step 5 - Ready the new Ring doorbell
Gently pull the faceplate off the Ring Wired by pulling it from the lower edge of the plate.
Using your Ring Doorbell base as a template, mark the location of the two mounting holes on the wall.
Step 6 - Prep the base
Depending on what you’re screwing into, you may need to install anchors. On stucco, brick, or concrete, use a 1/4-inch (6mm) masonry bit to drill holes in your wall, then insert the included wall anchors. If you're installing on wood or siding, you can skip that step.
Step 7 - Connect the doorbell wires 
Loop one doorbell wire around each of the screw terminals on the rear of your Ring Doorbell, and then tighten the terminals to hold the wires tightly.

Step 8 - Affix your Ring Doorbell Wired

Read more