Ever since the release of iOS 13 (actually, iOS 13.2), Siri has been able to automatically read your incoming text messages and iMessages aloud from your iPhone, iPad, or iPod Touch. The feature requires that you are wearing AirPods (second generation), AirPods Pro, Powerbeats Pro, or Beats Solo Pro headphones. When a new message arrives, Siri will play a tone, then read aloud the sender’s name and the new message. If a long message is received, Siri will simply announce the sender’s name and that a message has been received.
Update your device
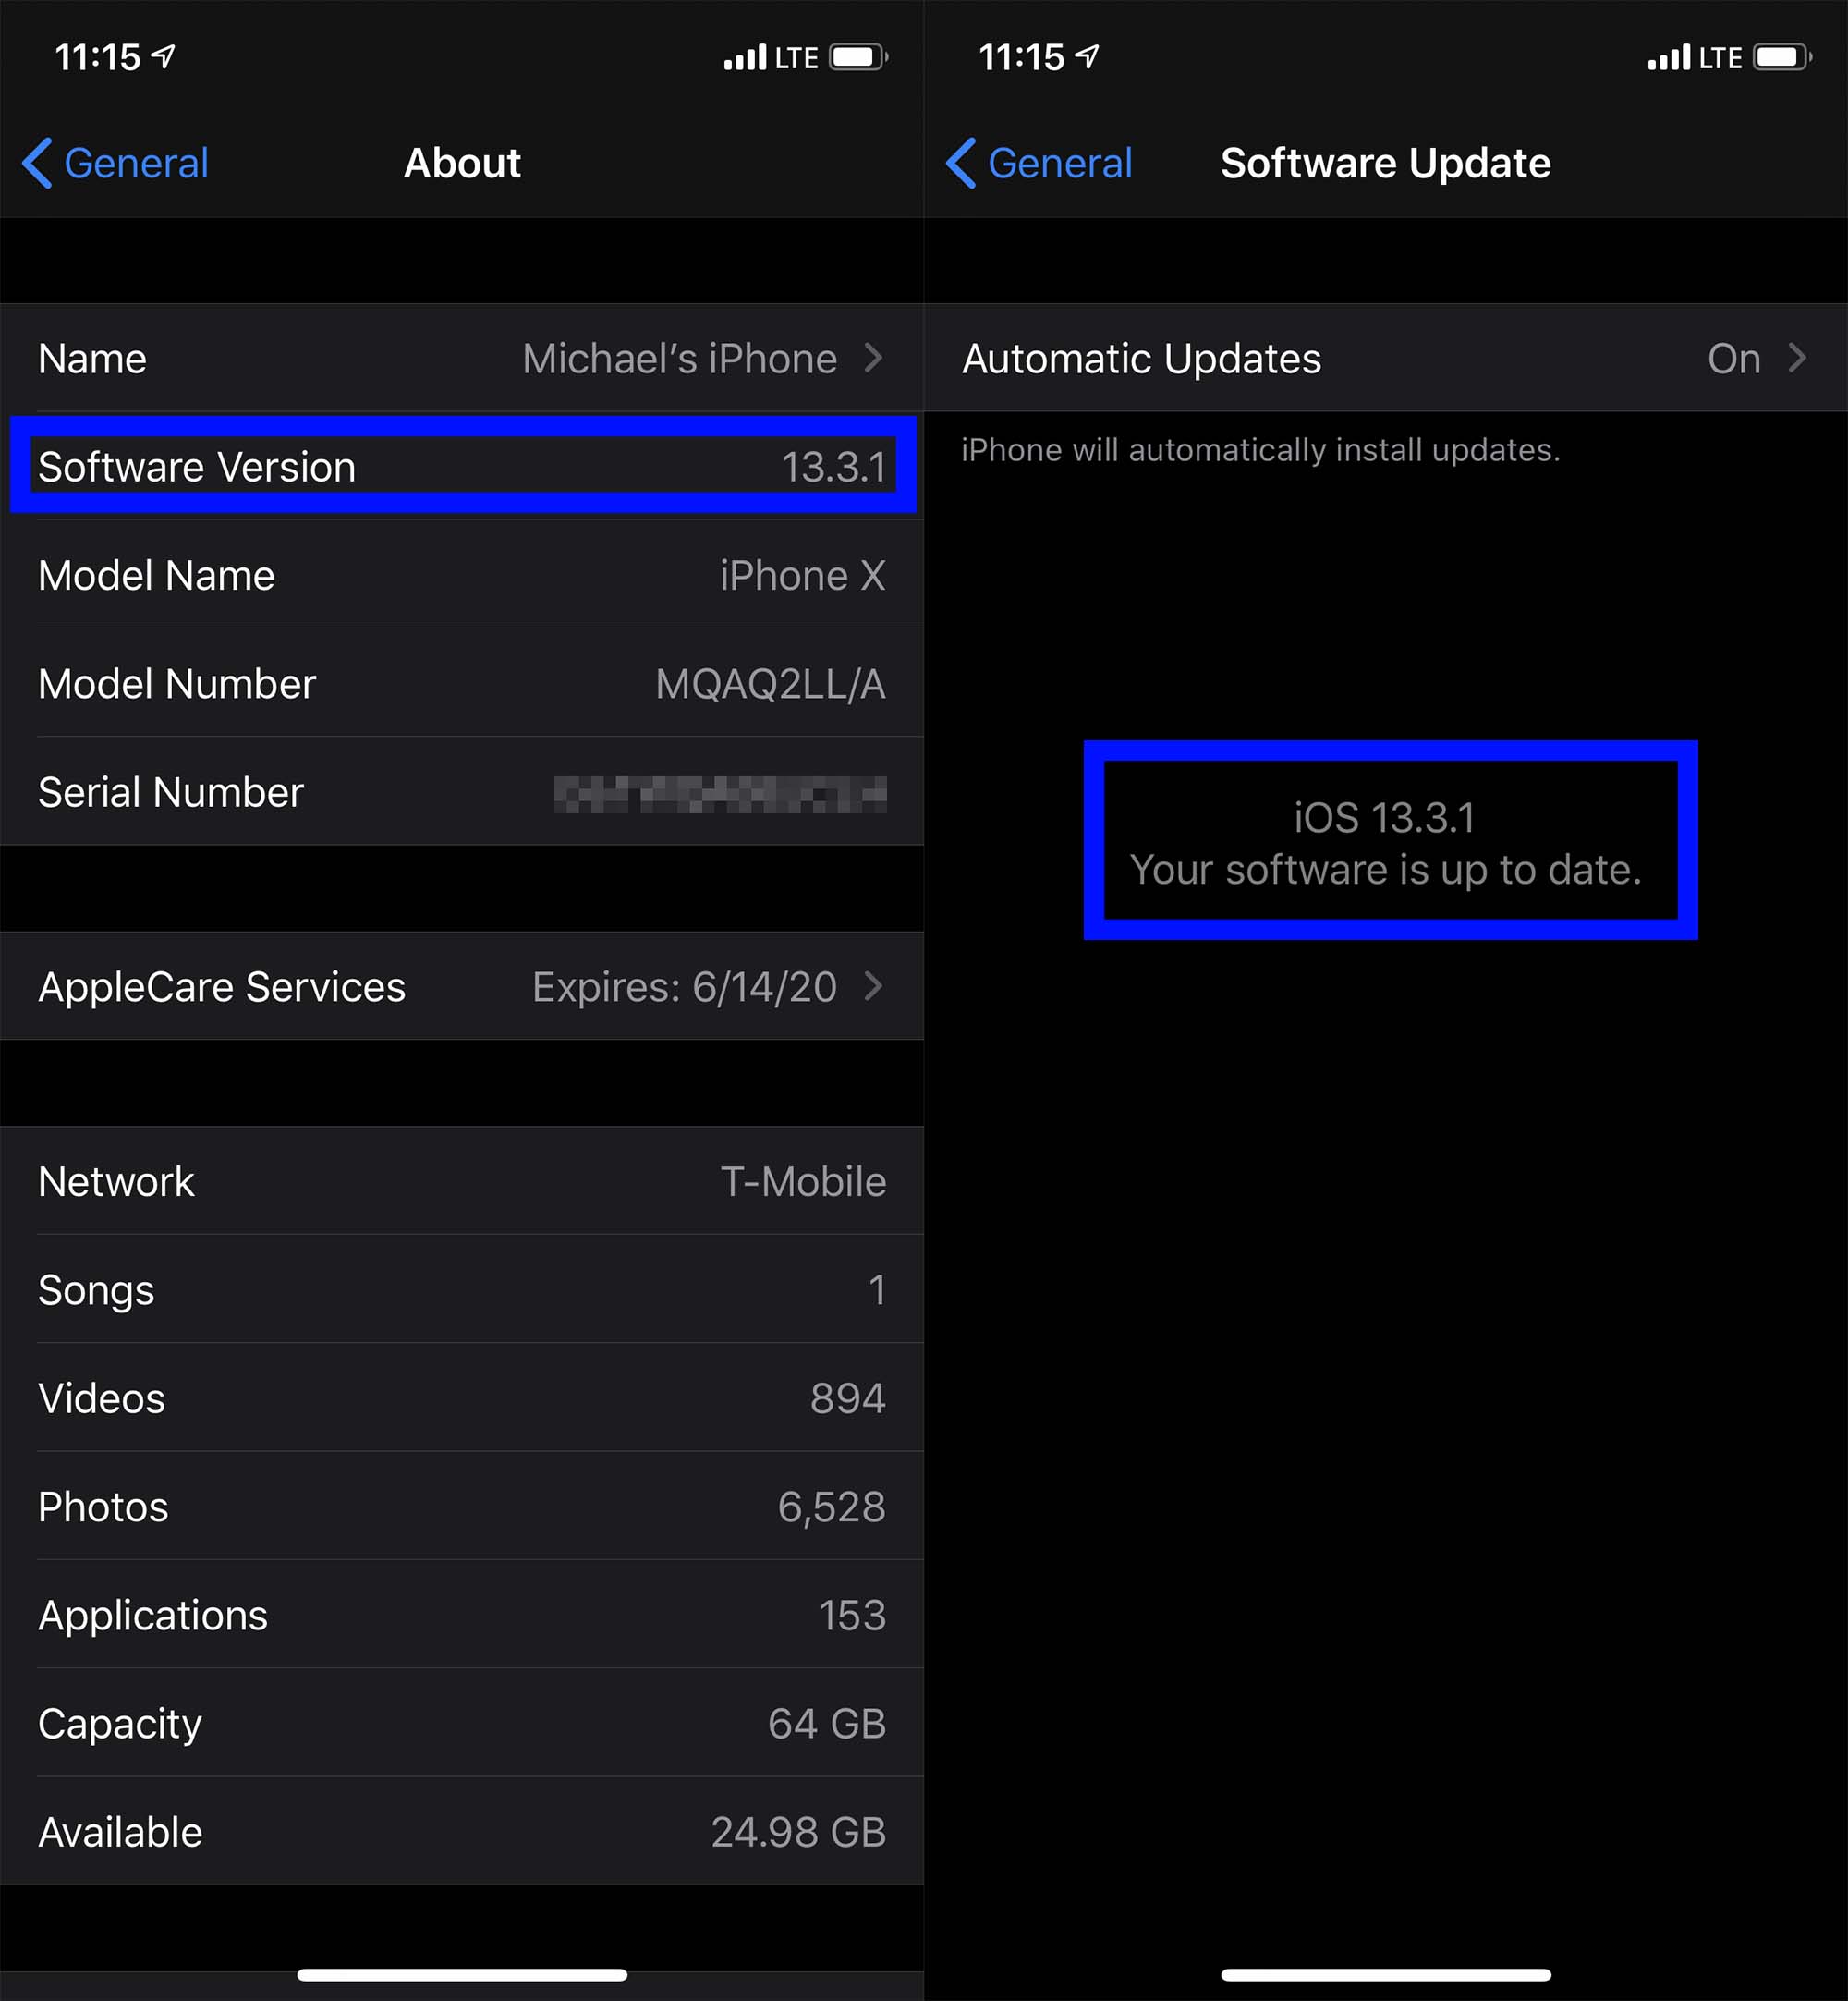
Before proceeding, you will need to ensure that your iPhone, iPad, or iPod Touch is updated to iOS 13.2 or later. To check what version of iOS your device is running, begin by opening the Settings app, selecting the General option, and then selecting About. The software version on your device should be no lower than 13.2. If you need to update your device, follow the provided steps before proceeding.
Please note that to upgrade your device to iOS 13 (or to the more recent iOS 14), it must be either an iPhone 6S, iPad Air 2, iPod Touch seventh generation, or a newer model. For iPad devices, iOS 13 or 14 may also be referred to as iPadOS; however, it will contain the same “13” or “14” version number.
Step 1: To update your supported device, begin by opening the Settings app; next, select the General option, then choose Software Update.
Step 2: If a new update is available for your device, it will notify you and prompt you to download and install it. Otherwise, if your device is already up to date, it will say so and note your current version of iOS.
- 1. Ensure that you are running iOS 13.2 or later on your device
Automatically read incoming messages with Siri
You can easily enable Announce Messages with Siri to have your incoming messages read aloud.
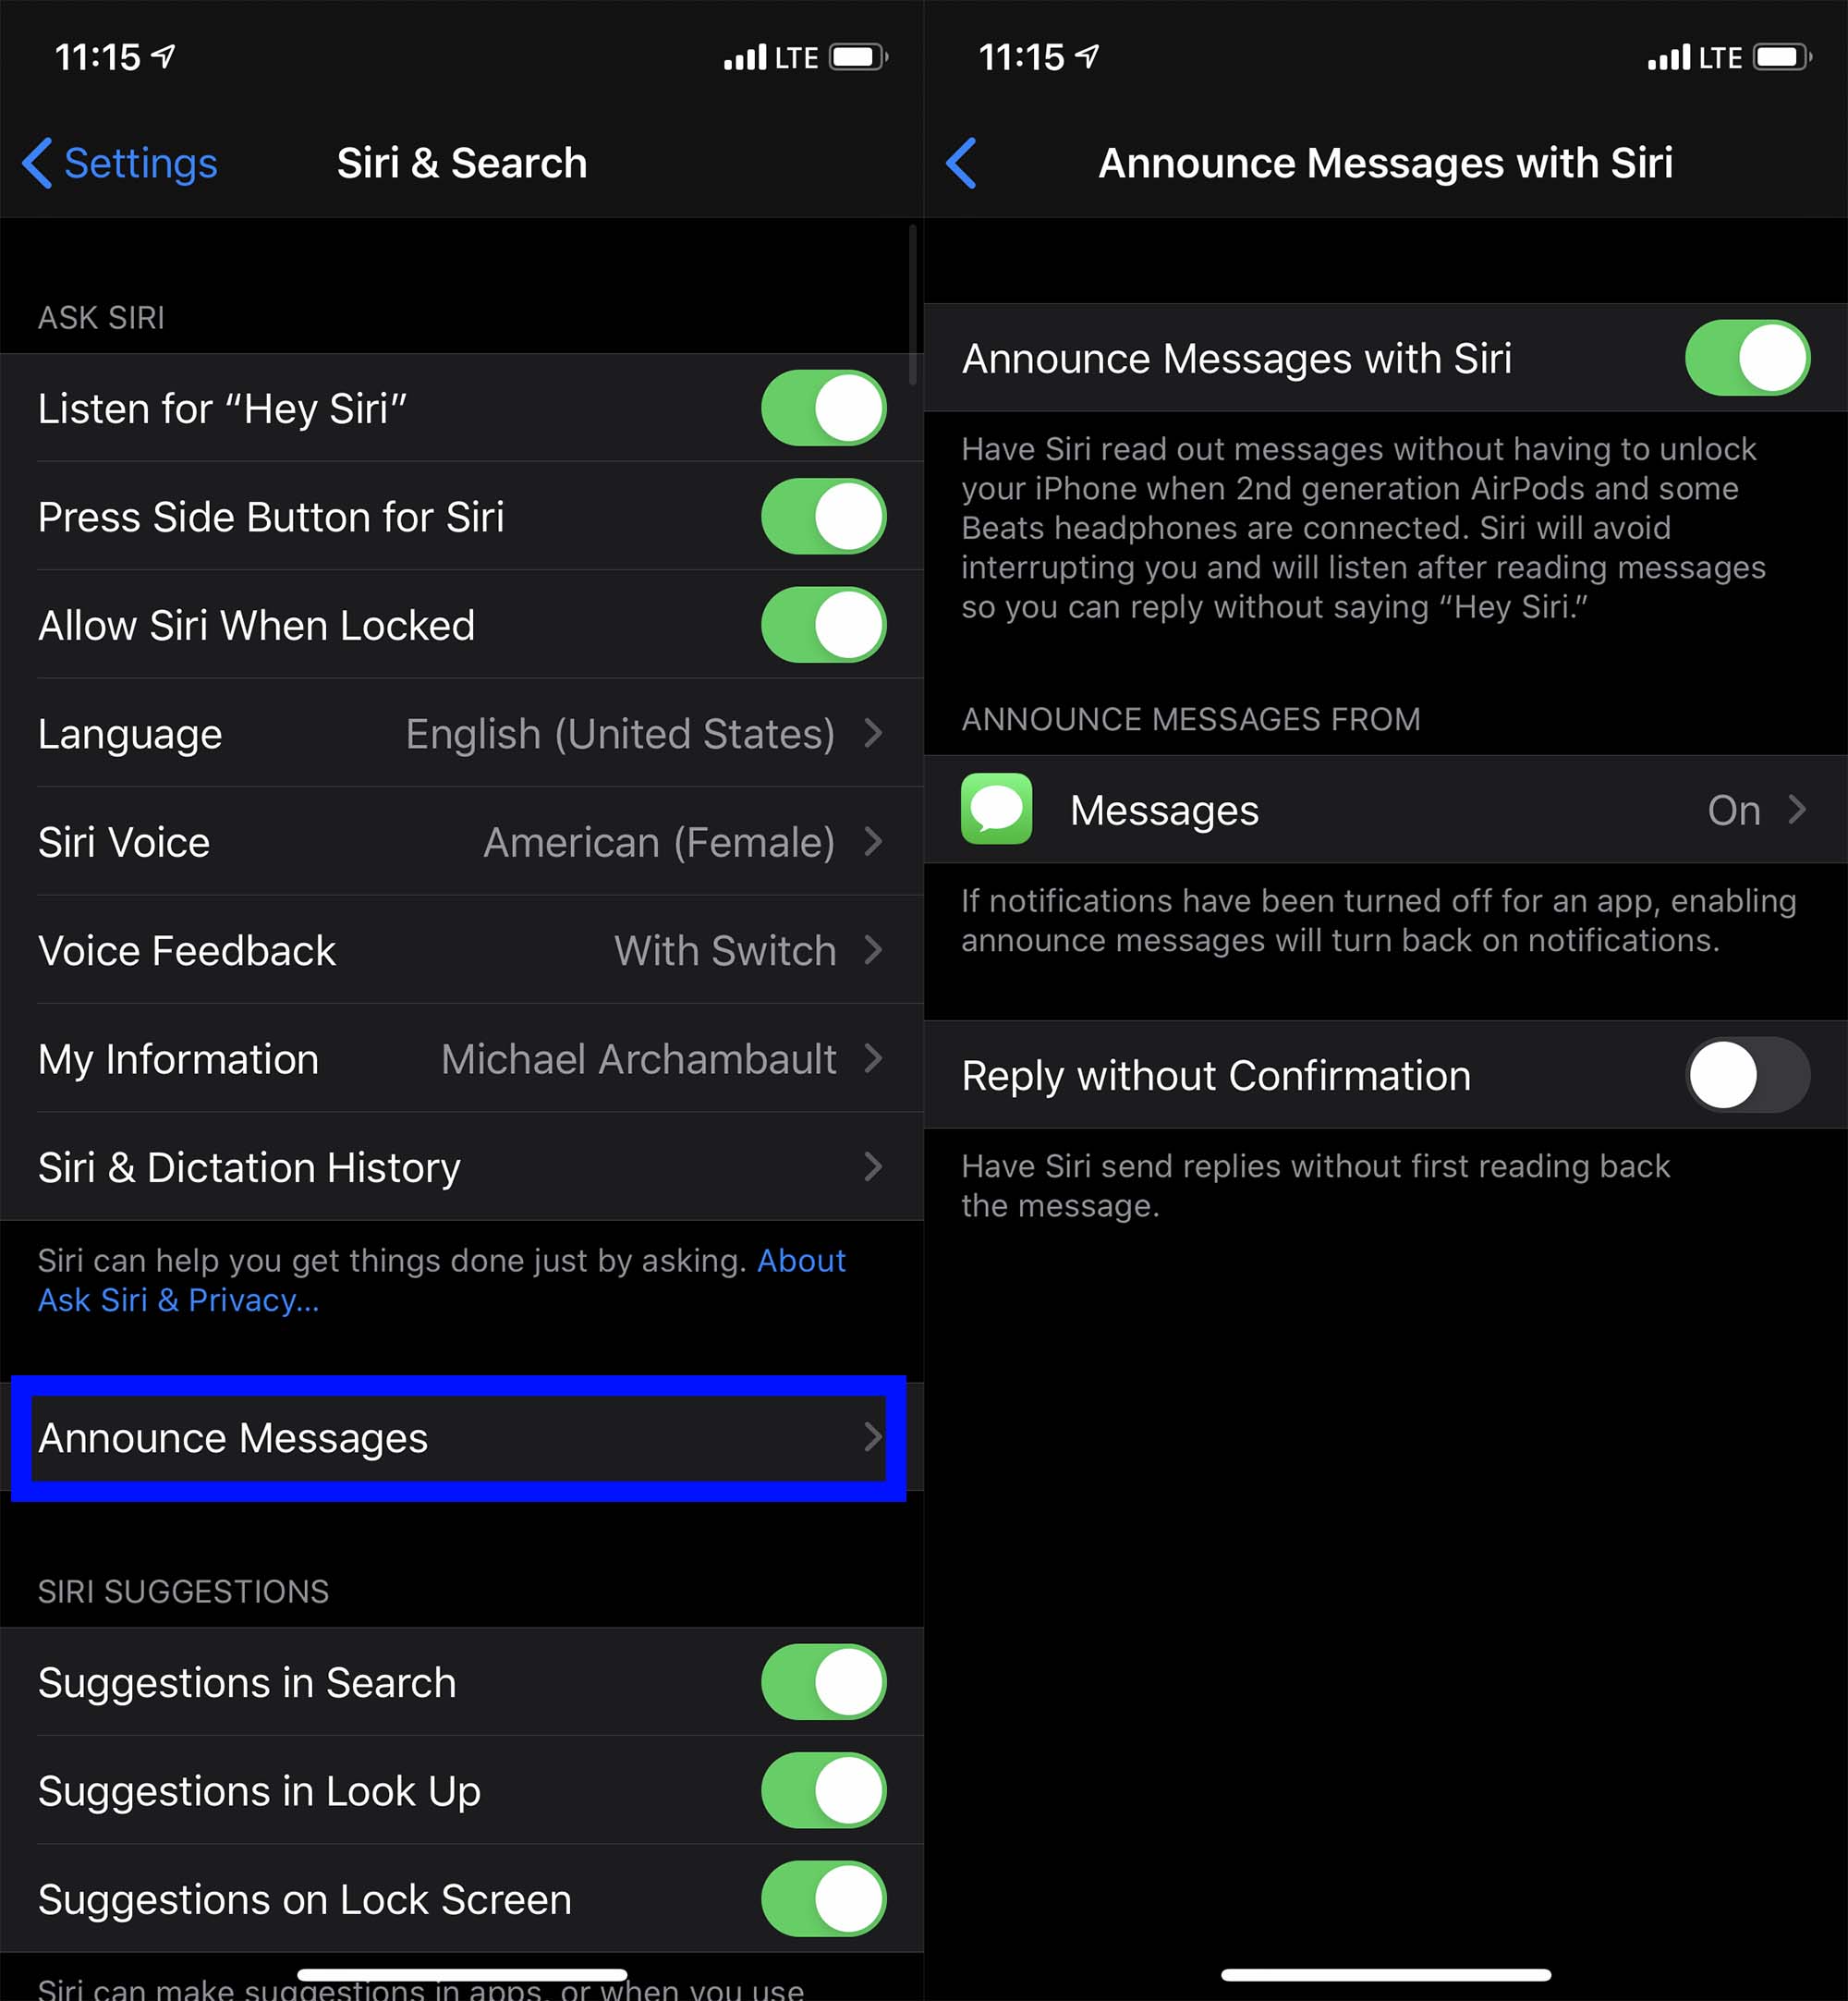
Step 1: To have Siri automatically read your incoming messages, begin by opening the Settings app on your iPhone, iPod Touch, or iPad. If you’re running iOS 14 (or later), go next to Notifications, or go to Siri & Search if you’re running iOS 13.
Step 2: Either way, tap Announce Messages with Siri next. Ensure that the Announce Messages with Siri option is enabled; when enabled, the toggle button will be colored green.
Step 3: From now on, Siri will automatically read incoming messages to your AirPods or supported Beats headphones.
- 1. Enable Announce Messages with Siri to have your incoming messages read aloud
Setup is complete
Siri will automatically send you a notification when you get a new message without you having to say, “Hey Siri.” Once Siri reads the message, you are free to command it to do whatever you please. If you want to reply to a message, you will need to say, “Reply,” and then tell Siri your response. Siri will type your response but will wait for approval before sending your message, so you’ll be able to look it over and revise it if necessary.
Customize Siri announced messages
If you want to work without interruptions, you can change Siri’s settings so it won’t alert you about incoming messages.
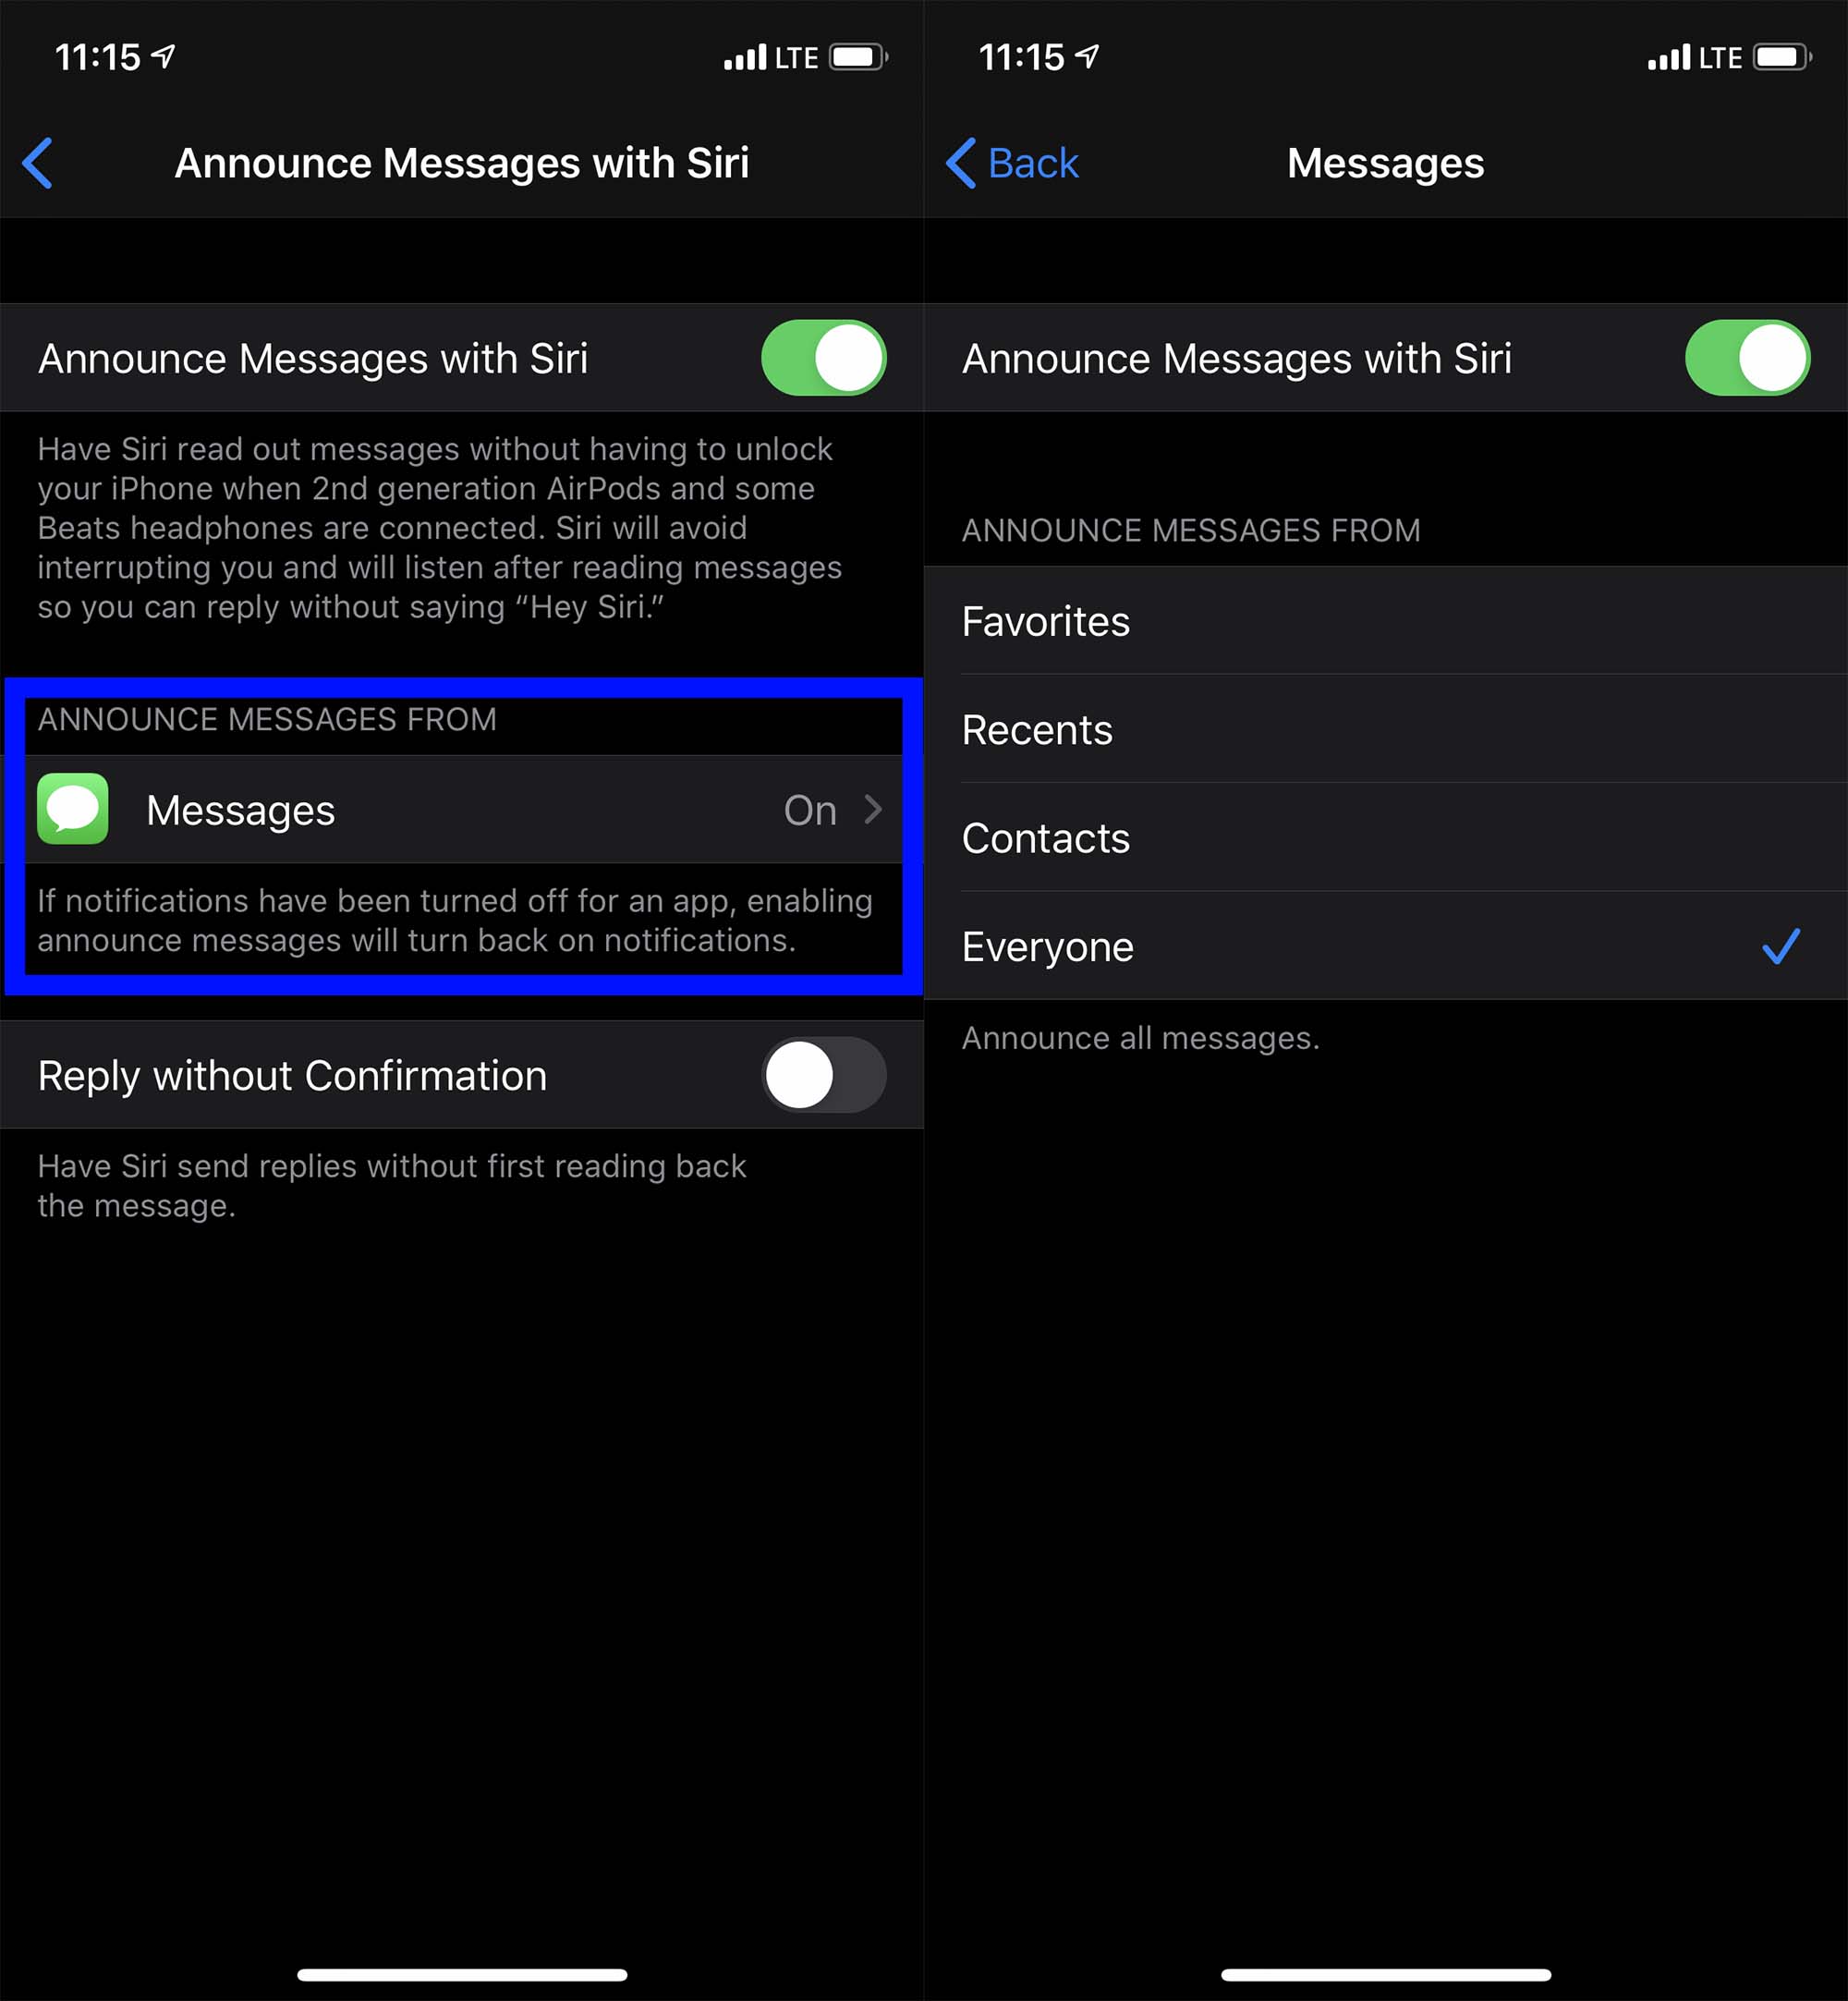
Step 1: Navigate to the Announce Messages with Siri screen and click the Messages option underneath Announce Messages From.
Step 2: Here you can pick whether you want Siri to notify you when you receive a message from anyone (the Everyone option) or only the texts from certain people such as those on your Favorites list, Recents, or people in your Contacts.
- 1. Select from whom Siri will read your new messages
If you want to send replies without taking the time to look them over manually, you can change Siri’s settings so that it will automatically send your response after you speak to it. If you’d like to go with this option, switch on the Reply without Confirmation button on the Announce Messages with Siri page.
Editors' Recommendations
- Here’s how Apple could change your iPhone forever
- How to change your iPhone’s notification sound in iOS 17
- How to use iOS 17 FaceTime gestures (and what they look like)
- How to remove location data from your iPhone photos
- iOS 17: How to show battery percentage on your iPhone