There's no print screen button on your iPhone, but you can take a screenshot on an iPhone with just a couple of button presses. It doesn't matter if you have the iPhone 8, iPhone 15, or any other model of iPhone — they can all do this. Using screenshots is a perfect way to share problems with smartphone updates, funny things you see on websites, or that weird text you just got. All you need to know is what the right buttons are, which we'll cover here, alongside a few techniques to spruce up your iPhone screenshotting game.
Note: Are you a MacOS user? If so, we have also have a comprehensive guide on how to take a screenshot on a Mac.
Taking a screenshot is as simple as pressing two of the physical buttons at the same time, but which two buttons to press depends on which model of iPhone you're using.
Taking a screenshot on newer iPhones
Here are the buttons to press if you have an iPhone without a home button. Which is to say you are using one of the best iPhones of today.
Step 1: The first button you'll need to press is the button located near the top-right corner of your iPhone. This is the same button you normally press to turn your screen off and lock your iPhone.
Step 2: The other button you'll need to press is Volume Up, located on the left side of your iPhone.
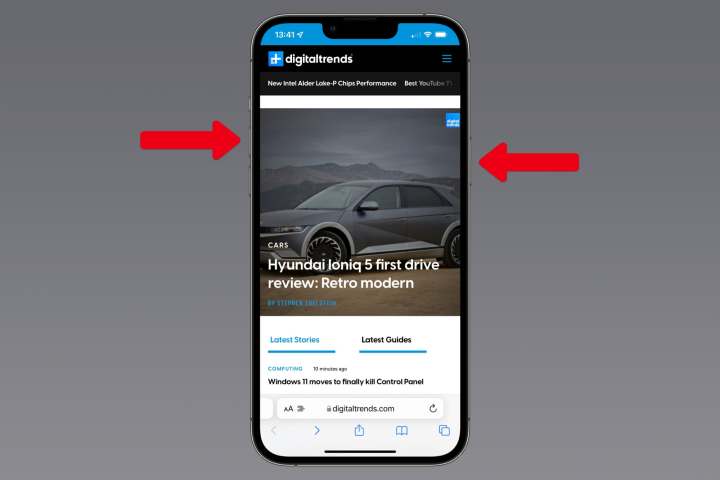
Step 3: To take the screenshot, press the two buttons at the same time.

Taking a screenshot on an iPhone with a "Home" button
If you still have an older iPhone, or just picked up a refurbished iPhone that's on the older side, you will follow the same steps as above, but will press the home button as the second button described above.

Capturing a screenshot using AssistiveTouch
AssistiveTouch allows the user to perform more complex touch-based commands on the iPhone — like pinching, multifinger swiping, or activating 3D Touch — through a simple menu that is just a few taps away. This is useful for a lot of things, but in this case it's an alternative way to get screenshots if one of your buttons isn't working properly of you're unable to press both of them at the same time. Here's how to set this up and use it.
Step 1: Navigate to the Settings app.
Step 2: Tap Accessibility.
Step 3: Tap Touch.
Step 4: Tap AssistiveTouch
Step 5: Toggle AssistiveTouch on. You'll see the AssistiveTouch button appear on your screen, resembling a series of faded, concentric circles.
Step 6: Tap Double-Tap.
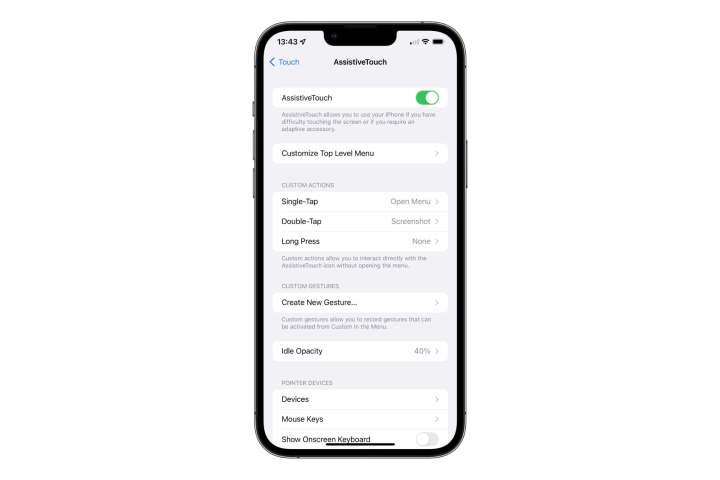
Step 7: Scroll down and tap Screenshot.
Step 8: Swipe up to return to the Home Screen. The AssistiveTouch button should remain on screen.
Step 9: When you find a screen that you want to save an image of, double-tap the AssistiveTouch button. Your iPhone display will briefly flash white and you'll also hear the same shutter noise that you do when taking a picture in the iPhone Camera app, as long as your device isn't in silent mode.
Step 10: A thumbnail of the screenshot will appear in the bottom-left corner of the screen. After a few seconds, this will disappear and the screenshot will be automatically saved to your photo library. You can also swipe it away at any time to save it to your photo library immediately, or tap on it to crop, annotate, or share it using the steps described earlier.
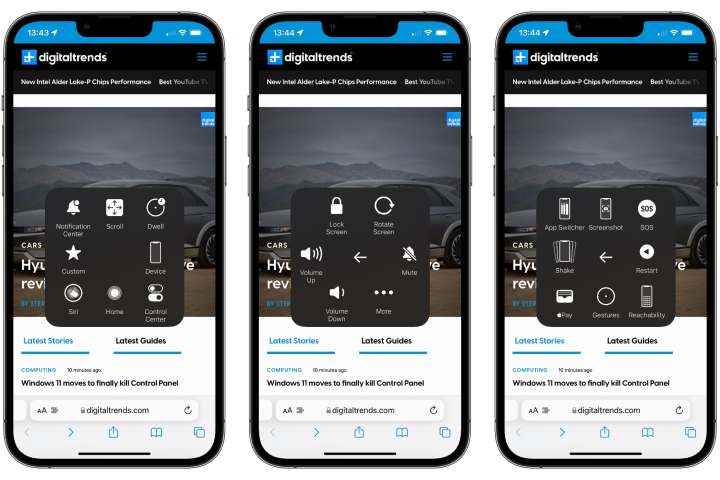
Note that AssistiveTouch offers a number of other ways to do this as well. For example, if you prefer, you can assign the Screenshot shortcut to a Long Press instead of a Double-Tap. You can also single-tap on the AssistiveTouch button to open a menu that includes a wealth of other functions. You can also capture a screenshot from this menu by tapping Device > More > Screenshot, which could be useful if you'd rather assign the Double-Tap and Long Press actions to perform other tasks.
Edit and annotate a captured screenshot
Once you successfully capture a screenshot, you'll see a small preview in the bottom-left corner of your screen. This preview will automatically disappear in a few seconds, but you can also swipe it to the left to dismiss it. In this case, the screenshot gets tucked away safely in your photo library and you can carry on with whatever you were doing before.
However, you can also pull up the screenshot to make some quick edits and annotations before that happens. Here's how.
Step 1: After taking a screenshot, tap on the thumbnail that appears in the bottom-left corner of your screen.
Step 2: Your screenshot will open in a simplified editing window, ready to be cropped or annotated.
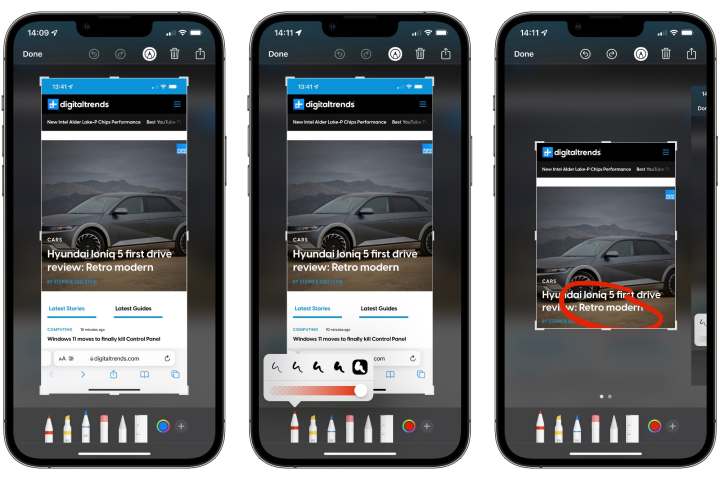
Step 3: If you would prefer to save only a portion of your screenshot, you adjust the cropping handles to draw a box around the portion you want to keep. You can also use the standard pinch-to-zoom gesture to enlarge a portion of your screenshot.
Step 4: You can also add markup and other annotations to your screenshot by drawing with your finger. A variety of different annotation tools can be found at the bottom of the editing screen. You can also find Undo and Redo buttons at the top of the screen so you can walk back any edits you don't like.
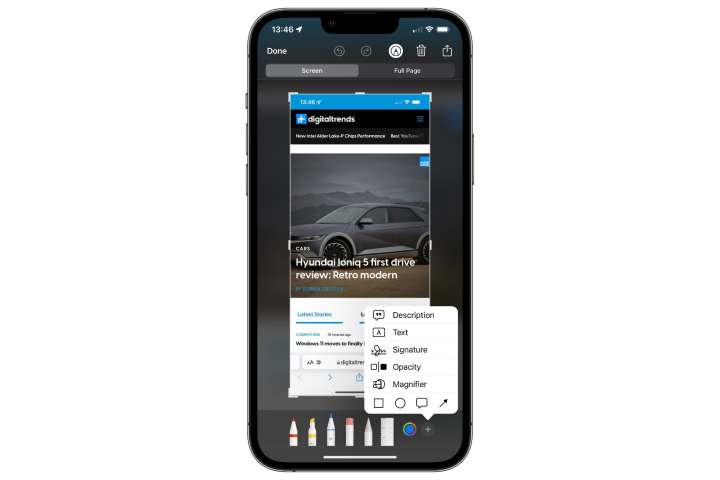
Step 5: To add advanced annotations, such as a text box, magnifier loupe, or your signature, tap the Plus button in the bottom-right corner and choose the appropriate options from the pop-up menu.
Step 6: When you’re finished making edits, tap Done in the upper-left corner.
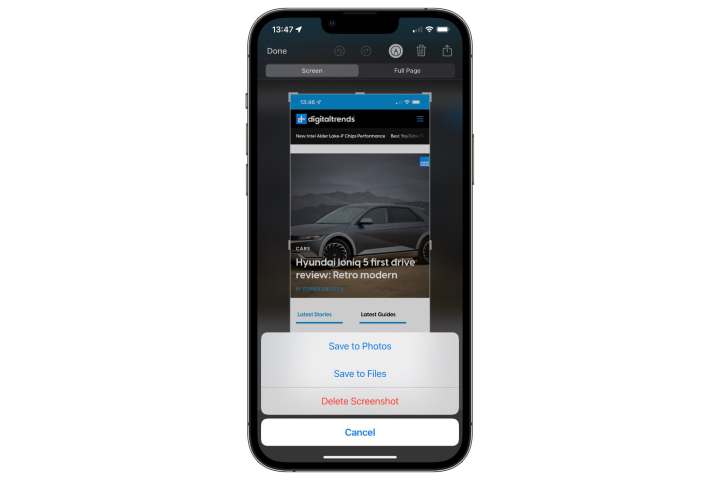
Step 7: Choose Save to Photos or Save to Files to save the resulting image to your photo library or iCloud Drive, respectively. You can also tap Delete Screenshot if you've changed your mind and don't want to save it.
Note that if you take multiple screenshots in succession, they'll all come up in the editing window at the same time. You can swipe left and right to move between them and edit each one individually. You can discard an individual screenshot from this editing view by tapping the Trash can icon at the top of the screen. Tapping Done will prompt you to save or delete the entire set.
Share a screenshot
By default, screenshots are automatically saved to your photo library, where you can share them in the same way as any other photo. However, if you're grabbing a screenshot specifically to share with somebody or post on social media, you can share it right away. This also lets you avoid saving a copy to your photo library if you don't need to keep it around afterward. Here's how.
Step 1: After taking a screenshot, tap on the thumbnail that appears in the bottom-left corner of your screen.
Step 2: Your screenshot will open in the annotation mode described in the last section.
Step 3: If you want to crop or annotate your screenshot before sharing it, go right ahead.
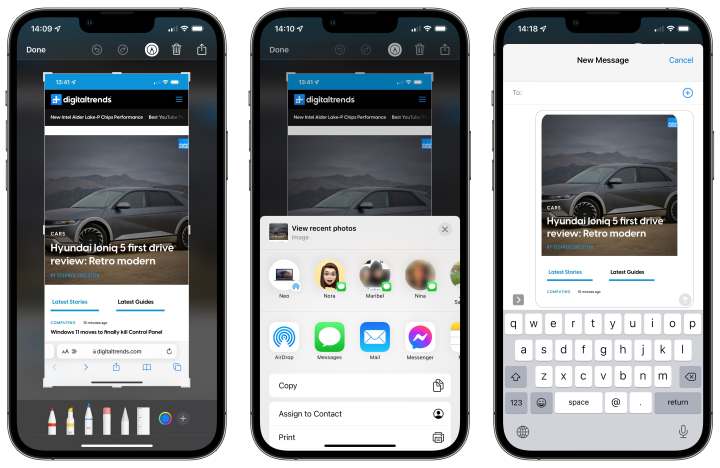
Step 4: When finished, tap the Share button in the top-right corner.
Step 5: The standard iOS Share Sheet will appear, letting you send the image out via text message or email, post it on social media, send it to another Apple device via AirDrop, or even save it somewhere else, like in Apple Notes.
Step 6: If you want to share your screenshot to another service, tap the Share button again. You can repeat these steps as often as you like to share to multiple places.
Step 7: When you’re finished sharing, tap Done in the upper-left corner.
Step 8: Choose Save to Photos or Save to Files if you want to keep a copy of your screenshot; otherwise tap Delete Screenshot. This option only affects whether the screenshot gets saved in your photo library or iCloud Drive —i t will still be sent or saved in all of the other places you've shared it to.
Further reading
- How to record your computer screen
- How to take a screenshot on a Mac
- How to take a screenshot on an iPad
Did you know that you can use button combinations to restore your iPhone? Check out our guide to learn how. If you’re new to iOS, there are even more iOS tips and tricks to help you master your iPhone.
Editors' Recommendations
- Here’s how Apple could change your iPhone forever
- How to connect an iPhone to a Mac with or without a cable
- 10 iPhone productivity apps you need to download right now
- Best phone deals: Save on the iPhone, Galaxy Z Fold 5, and more
- The 10 best photo editing apps for Android and iOS in 2024