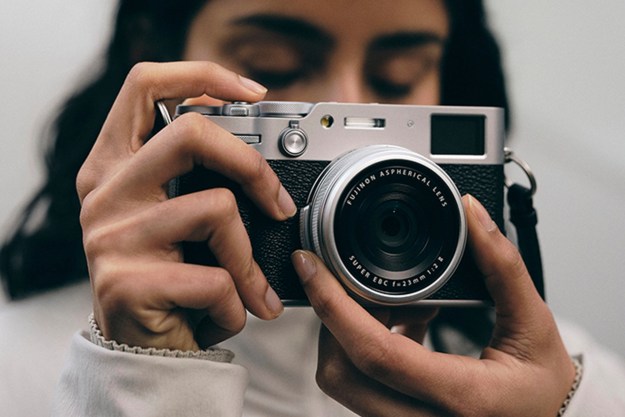
The dual-lens, Leica co-developed cameras on the back of the Huawei P10 and P10 Plus are prime reasons to go out and buy one of these great phones. They take beautiful shots, whether in color, monochrome, a portrait or a photo with a cool, blurred background. Most enticingly, the P10 boosts your confidence as a photographer, and its ability to produce wonderful pictures pushes you to go out and experiment.
If the P10 is in your hand right now, but you’re a newcomer to Huawei’s phones and software, it can be difficult to know where to start. We’ve put together a guide on how to make the most out of the P10’s excellent camera, and its intuitive user interface, that’s applicable to both the P10 and P10 Plus. Use this guide — and our collection of 6 pro photographer tips — to make the most of this great camera.
Getting started
Huawei’s main camera app, like the lenses on the phone, has been co-developed by Leica; mimicking its own user interface. It’s intuitive and attractively laid out, and goes a long way to making the P10 so usable. Open the app and you’re presented with the viewfinder, along with the shutter release below, and a menu above it.
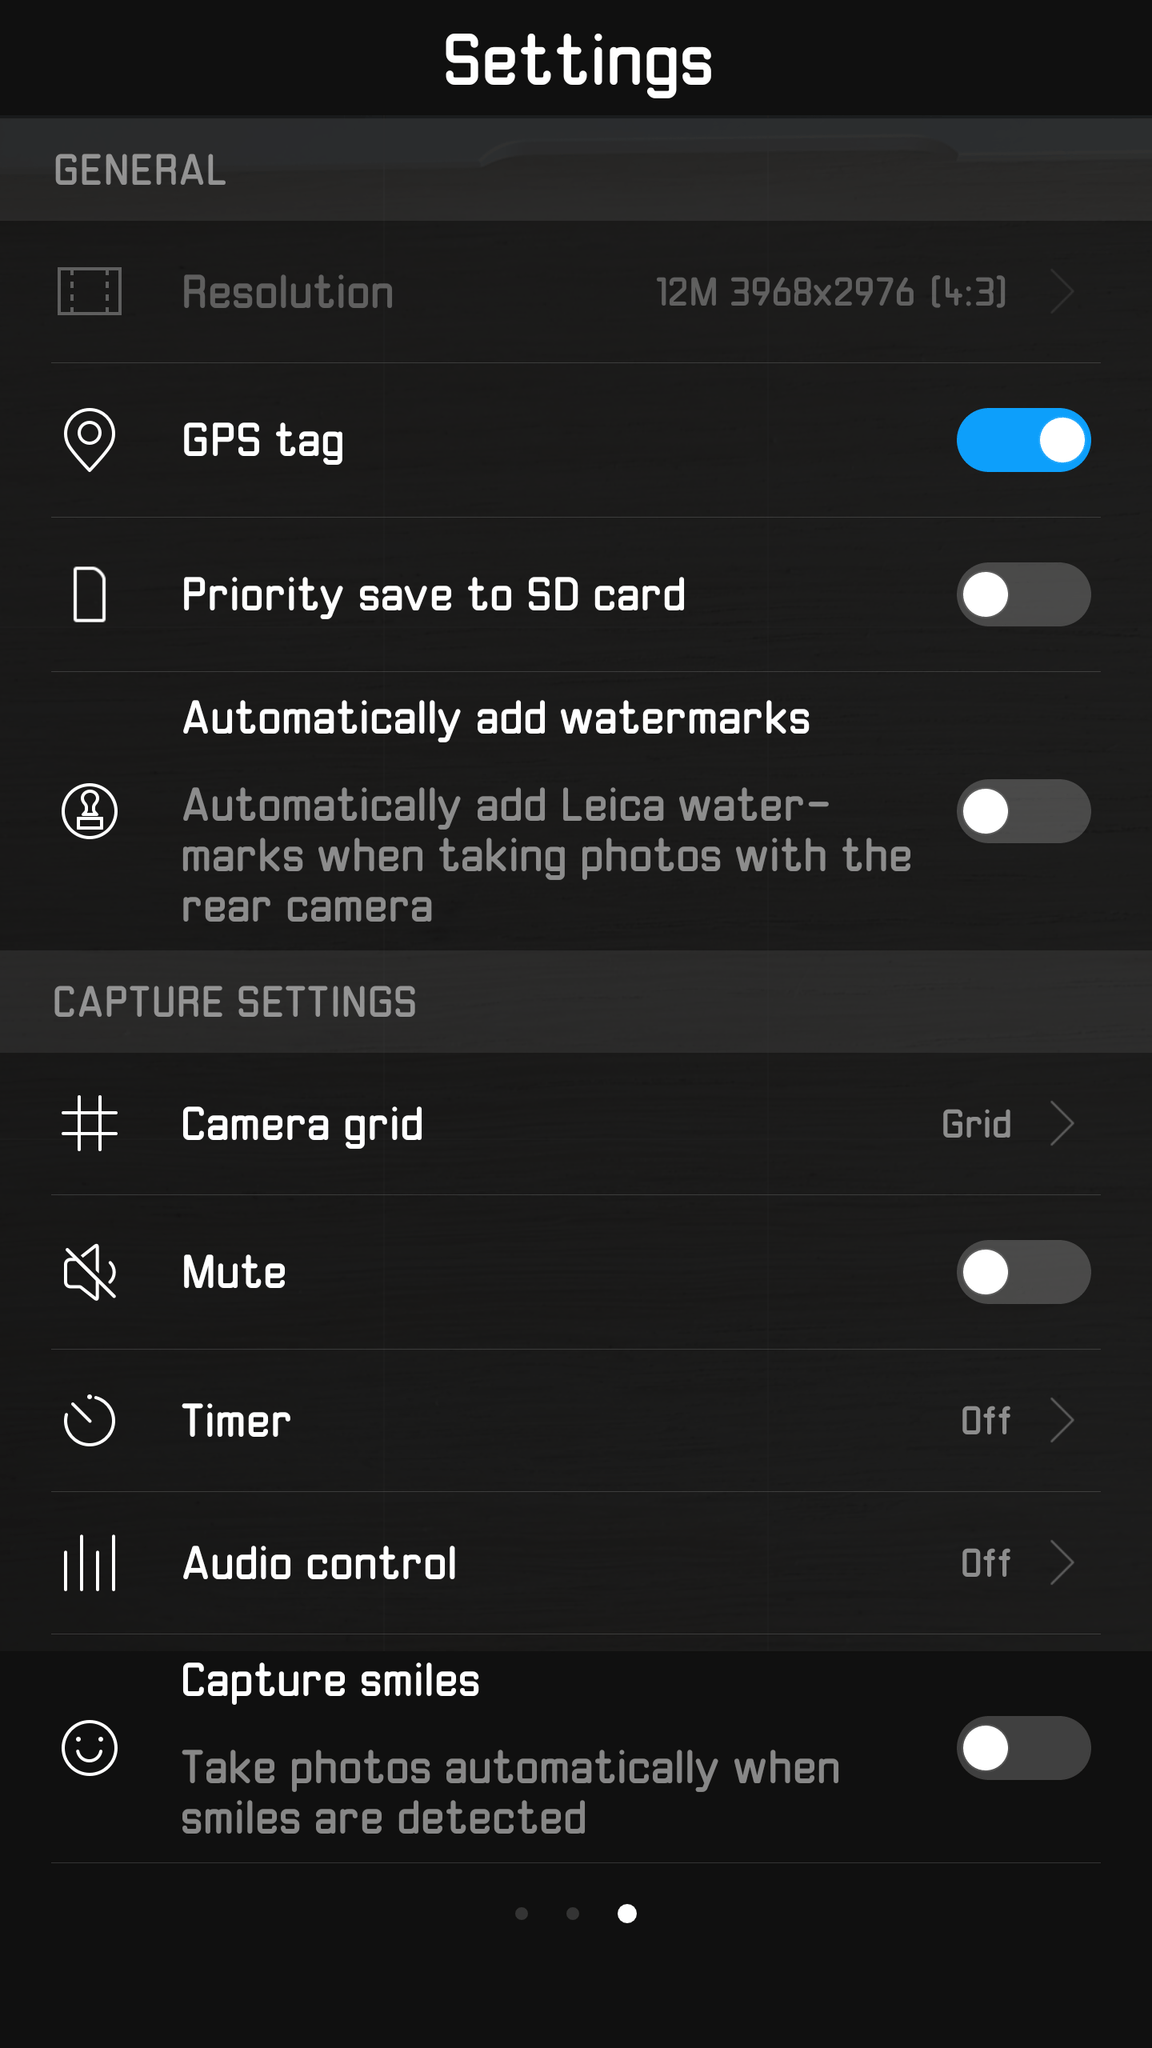
Return to the main viewfinder screen by swiping to the left, then swipe to the left again to reveal another screen, this time filled with settings for the camera. Among features like a watermark, smile capture, and a timer, we do recommend using one of the Grid options. These help frame and compose your photos, and although there are some complex options available, the simple Grid is fine for most people.
Back on the main screen, below the viewfinder is a button to change between stills and video to the right of the shutter release, and a shortcut to the gallery on the left. From here, you can start snapping away, but to get the best from the P10, you’ll want to play around with some of the other modes.
Portrait, wide aperture, and more
Turning our attention to the menu above the viewfinder window, there are two buttons that you’ll end up using most. The first is the Portrait button, which looks like a person’s head and shoulders in a circular window, and the second is Wide Aperture mode, which looks like a camera lens.
Tap Portrait mode, and the camera sets itself up to take pictures of people. The P10 cleverly looks for faces, and, using some complex and detailed face scanning algorithms, tracks 190 points in 3D space, then adjusts the scene to suit the person — including artificial light sources, blurring out the background to give the picture a bokeh-style pop, and enhancing the color in the foreground.
Don’t think this only works with the color lens either. Swap to the monochrome lens — swipe left, and tap Monochrome — to get the same effect, only in striking black and white. It’s not only for use on the rear camera, so tap the button on the top right of the upper menu to swap to the selfie camera, and get the same great features. Huawei enhanced Portrait mode with a beauty effect, which can be adjusted along with the bokeh style, using two buttons overlaid on the viewfinder. The button with the number value tweaks the beauty mode, while the button below it activates the bokeh shot. Play with both to get the right look for your photo.
Wide aperture mode is for activating the bokeh mode, giving the blurred background effect that’s such a trend in mobile photography at the moment. When activated, the mode brings up another button for adjusting the camera lens aperture, and a slider lets you strengthen or lessen the blur. Don’t feel restricted by getting the blur right at the time of taking the picture, as it can be adjusted after the photo has been taken, too.
To do this, open the Gallery app — or tap on the preview image in the camera app — and look for the same camera lens icon used to activate the wide aperture mode initially. Tap this, and then choose the area in the photo you want in focus, or blurred out. A slider at the bottom of the screen widens the aperture, emphasizing the blur. There’s also a filter button to add different effects. Don’t pass these by, as they add really unusual looks to the picture. Try the monochrome filter to see what we mean!
Together, these two modes make the Huawei P10 one of the most versatile, creative, and competent camera phones out there.
Pro mode
Auto mode on the P10 is very useful, and for the majority of people it’ll be the only mode needed. When we took a photo masterclass on portrait photography using the P10, we never took the phone out of auto mode, yet managed to capture some amazing shots. However, certain situations will benefit from using the Pro mode, such as capturing pictures in very low light, or subjects in motion.
Open the camera app, and at the bottom of the viewfinder window you’ll see a single white button above the shutter release. Swipe up on this to enter Pro — or manual — mode. The now-displayed buttons adjust focus, ISO, shutter speed, auto-focus, exposure, and white balance. When you adjust a value and want it to maintain the setting, hold down on it to lock it in place. You’ll know it’s locked because you get a short notification, and an orange dot lights up next to the value. To unlock it, just hold down on it again.
If Pro mode is a little complicated, and you’d rather have a way to adjust the focal point and the exposure separately, here’s a cool tip for you: In either camera mode, instead of tapping to focus, hold down instead. Two separate meters will appear, one for the focus and the other for the exposure. Drag them around the screen to get exactly the right look for your picture.
Activate Pro mode to find a few extra settings too. Swipe left on the screen and new options will be available, including saving your images in RAW format for editing elsewhere, and a horizontal level indicator.
 Don’t forget, Pro mode also works when you’re shooting video.
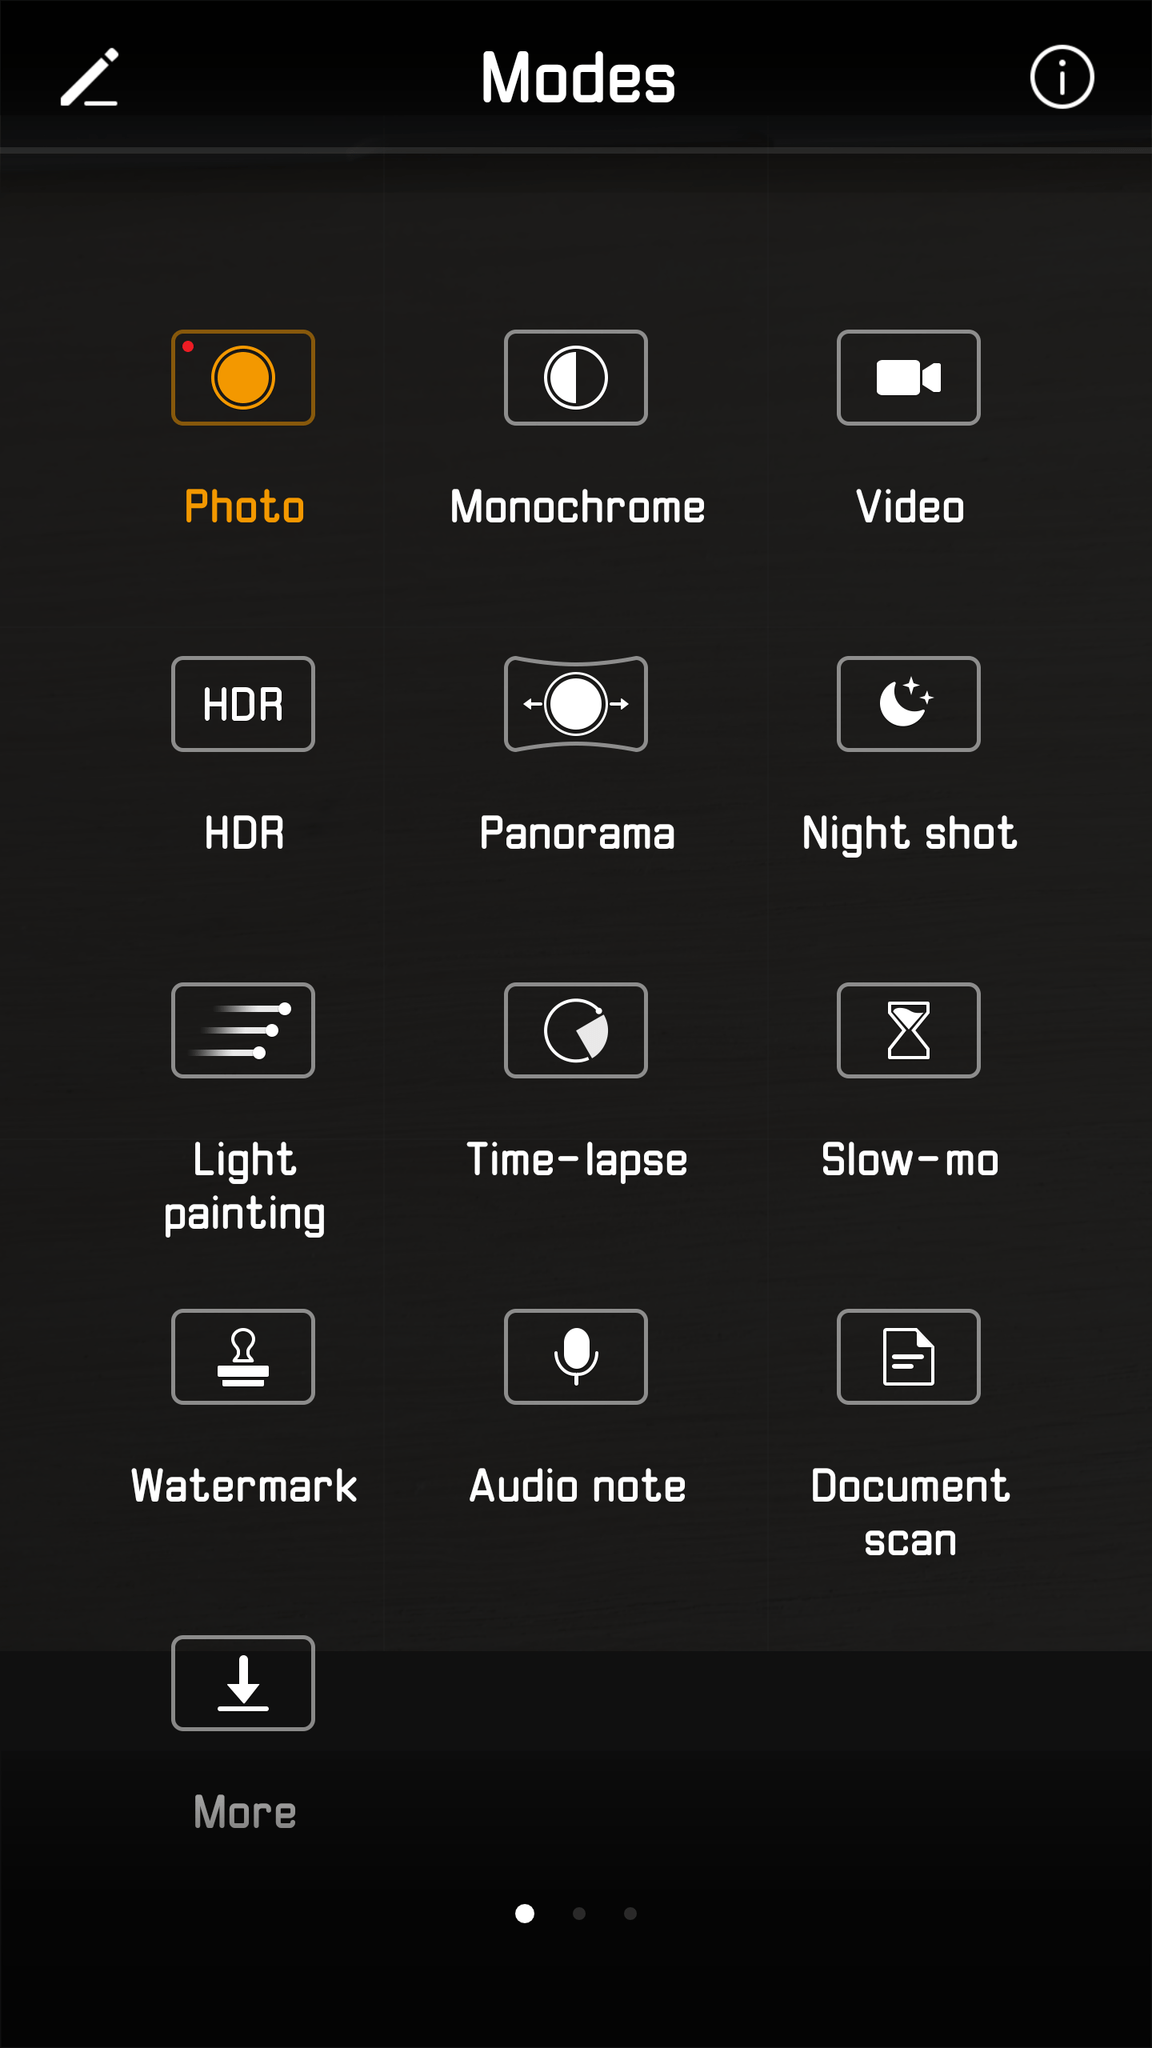
Other modes and effects
In the standard camera view, look for the two buttons in the top menu shaped like a film cell, and three overlaid circles. The film cell is for choosing between three Leica-inspired filters, Standard, Vivid Color, and Smooth Color. The overlaid circles let you add one of eight different live filters — from dawn to halo — to the camera.
Tap the More icon to download some extra modes from Huawei, including a Good Food mode, and an option to add an audio note, or watermark to your photo.
Editing
Not every picture turns out exactly as we’d like, which is where we need a strong editing suite to tweak the end result. While apps like Snapseed work really well, we’ve found Huawei’s own editing tools are very effective. They’re built right into the Gallery app. Enter it, and tap the picture you’d like to alter, then look for the Edit button along the bottom row.
Editing tools available include a crop and rotate, various filters, and a watermark stamp. To play with the overall look of the picture, find the Adjust button and tap it. Brightness, Contrast, Saturation, Sharpness, Highlights, and Shadows can all be changed using a simple slider. Look out for the Compare button in the top right to see the difference your alterations make. When you’ve finished, there’s a Save button in the top right of the screen.
Huawei has also struck a deal to pre-install GoPro’s Quik video creation software. Stills, videos, music, and text can all be used to create a film based on a single event, day out, or family holiday. It’s very easy to use, and if you put in the time, you’ll be surprised by the results.
That’s it for our tips on getting the best photos using the Huawei P10 or P10 Plus. We love the cameras on these phones, and know you will too.
Editors' Recommendations
- The best point-and-shoot cameras
- Camera shootout: Can Huawei’s P40 Pro Plus beat Apple, Samsung, and Google?
- How to get the best from the Galaxy Note 10 Plus camera