Anything can happen. A natural disaster, a car accident, a sudden illness — you name it. Thankfully, Apple’s iPhone provides guardrails that help you get critical information, assist with emergencies, call authorities and first responders, and quickly update friends and family. Features such as Emergency SOS, Emergency Contacts, Location Sharing, Find My, and Do Not Disturb While Driving will keep you prepared for when help is needed.
Here’s how iPhone safety features can help you out in a jam!
Emergency SOS
When you make a call with Emergency SOS, your iPhone automatically dials the emergency services in its current region, such as 911 in North America. Here’s how to do it for both newer and older models.
Enable Auto Call


When Auto Call is on and you attempt an emergency call, your iPhone begins a countdown with an alert signal. After the countdown, your iPhone automatically calls emergency services.
Step 1: Tap to open the Settings app.
Step 2: Scroll down and tap Emergency SOS.
Step 3: Tap the toggle next to Auto Call to turn the feature on or off.
Note: If you turn off this setting, you can still use the Emergency SOS slider to make a call.
iPhone 8 and newer
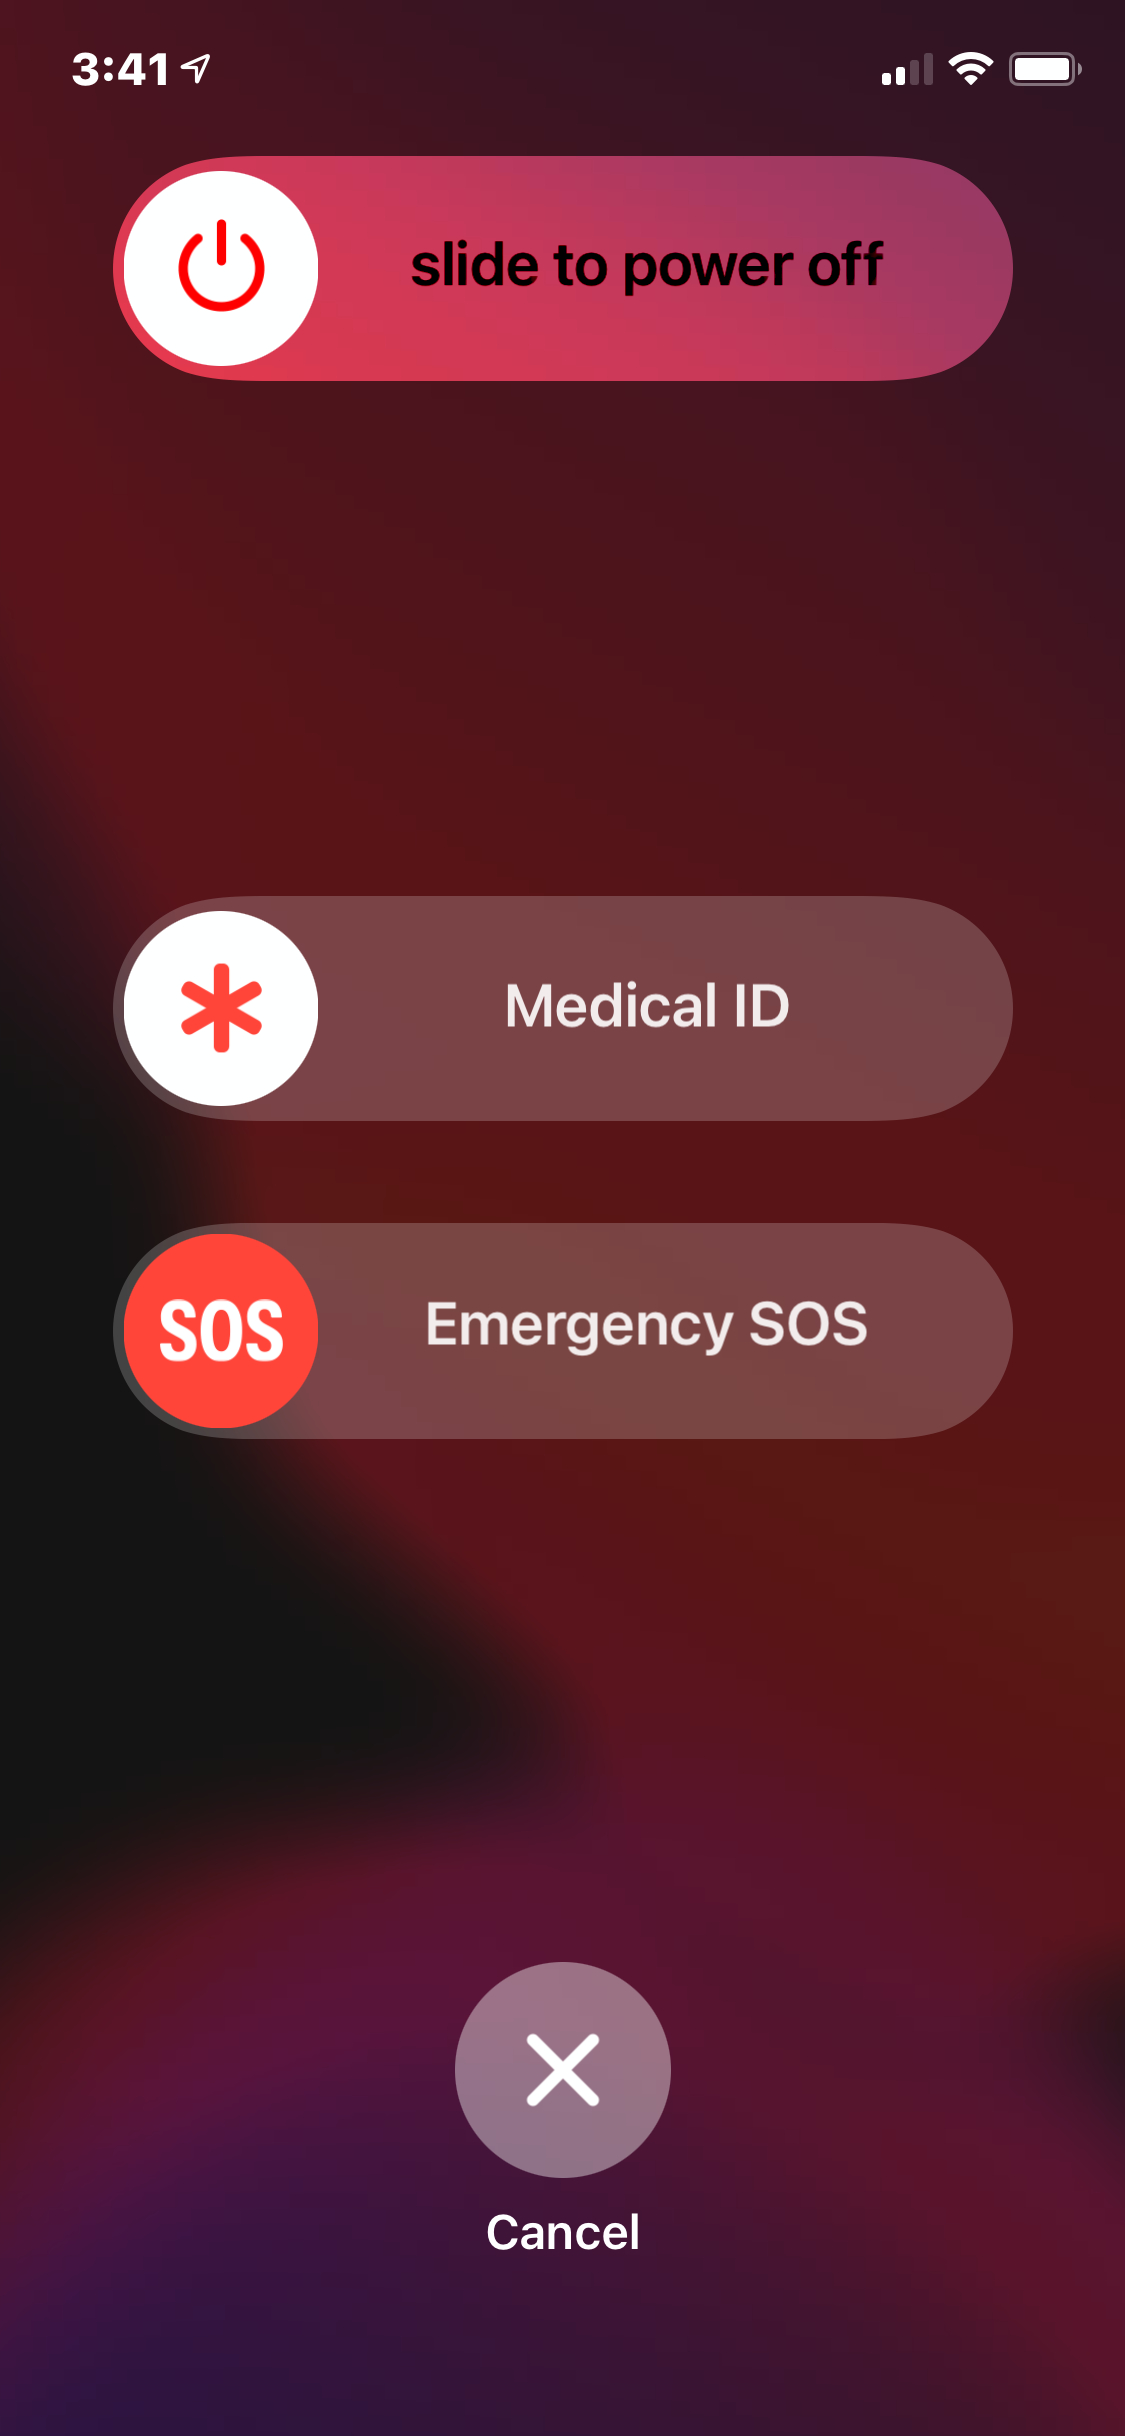
Step 1: Press and hold the Side button and one of the Volume buttons until you see the Emergency SOS slider. Alternatively, press the Side button rapidly five times if the setting is toggled on.
Step 2: Drag the Emergency SOS slider to the on position to call emergency services.
What happens next:
- If you persist in holding down these two buttons without dragging the slider, it starts a countdown with an audible alert sound.
- If you continue to hold down the buttons after the countdown ends, your iPhone will call emergency services.
iPhone 7 and older
Step 1: Press the Side or Top button (depending on your iPhone model) five times in succession to bring up the Emergency SOS slider.
Step 2: Drag the Emergency SOS slider to call emergency services.
What happens next:
- When the emergency call is over, your iPhone sends a text message to your designated emergency contacts alerting them to your current location — unless you cancel.
- If you have Location Services disabled, this action will switch them on automatically so that if you change locations, your contacts can track you.
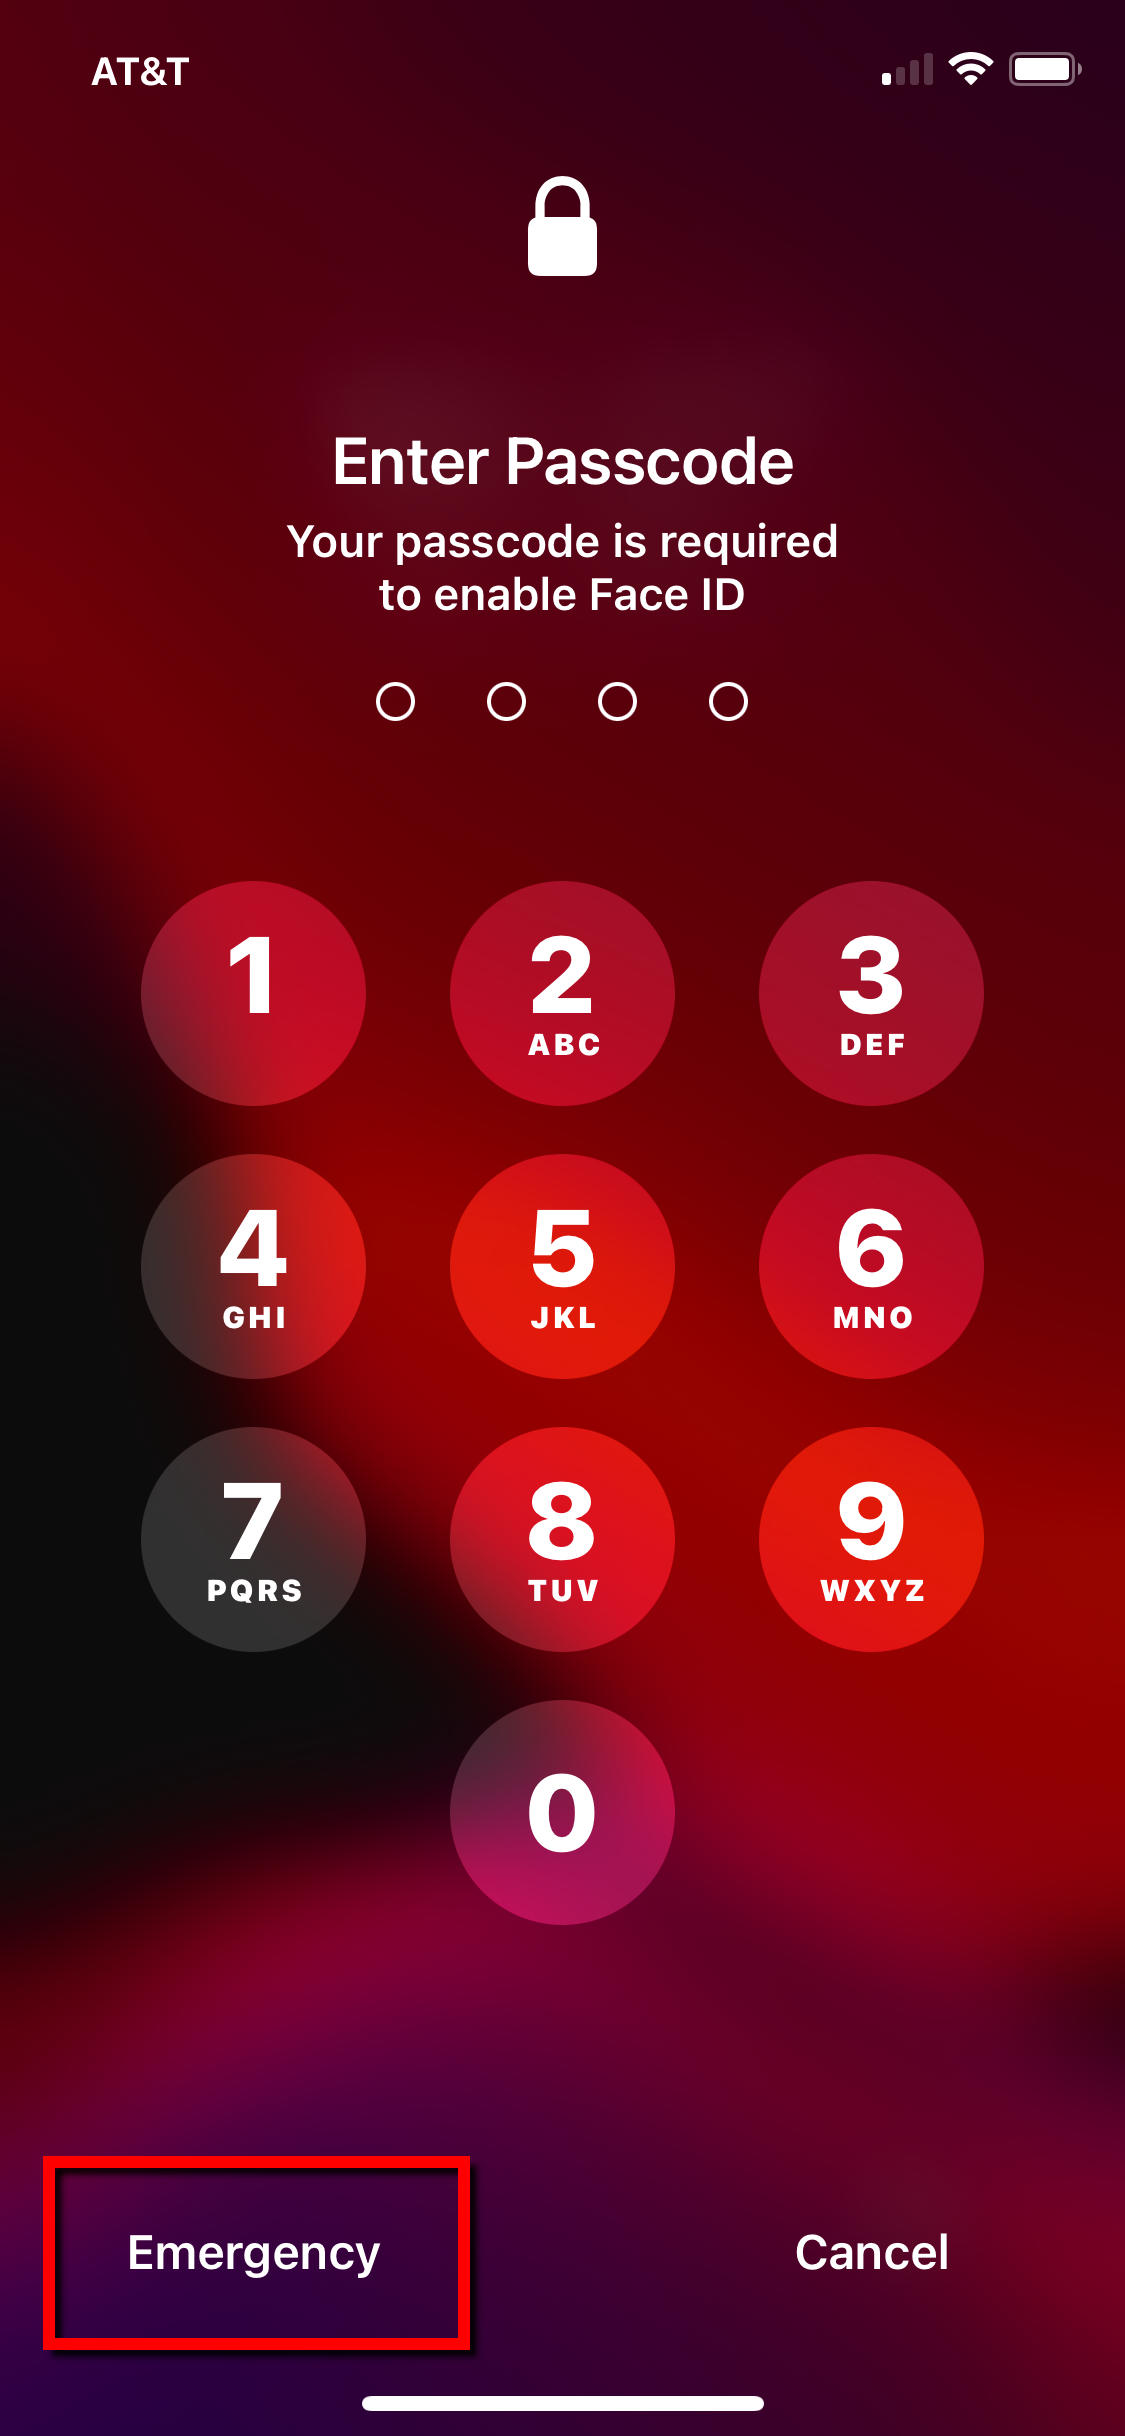
This feature also locks your phone automatically so that you must enter your passcode to use it again. Touch ID and Face ID won’t work until you enter the code. This takes into account that you may be in danger or somebody may take advantage of the situation to try and steal your phone. If that happens, it won’t help them because they can’t use the phone without your passcode.
Emergency contacts
The Emergency SOS feature is only available if you already designated emergency contacts from the Contacts app. After an emergency call, your iPhone sends a text to your emergency contacts that includes your current location — unless you cancel. It also transmits location updates to your emergency contacts if you travel elsewhere.
Here’s how to designate an emergency contact — or more than one:
Add an emergency contact
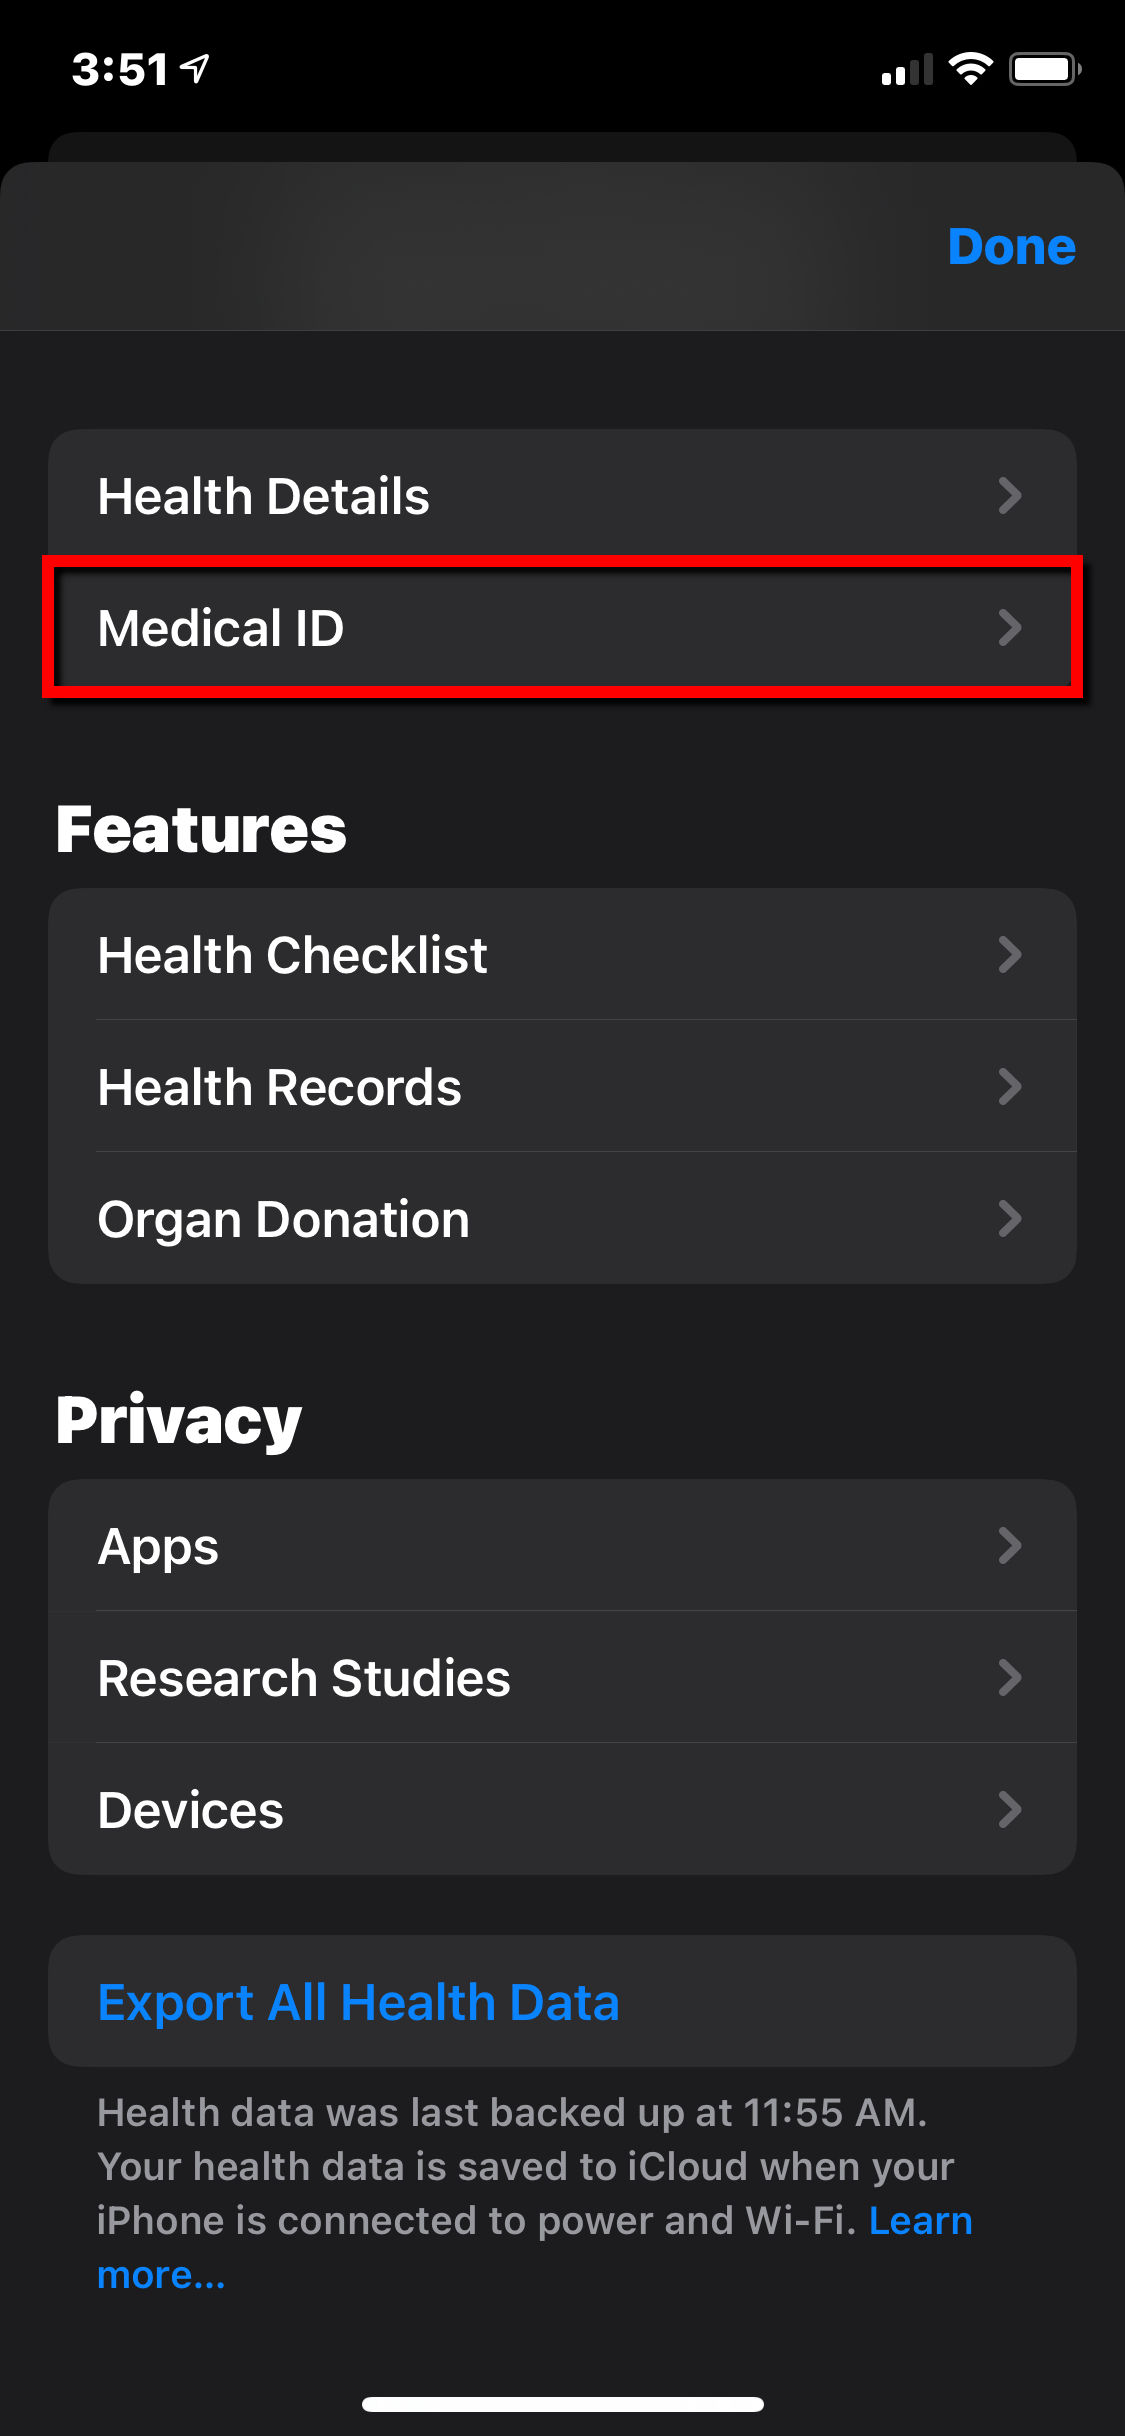
Step 1: Open the Health app and tap your profile picture.
Step 2: Tap Medical ID.
Step 3: Tap Edit in the top-right corner.
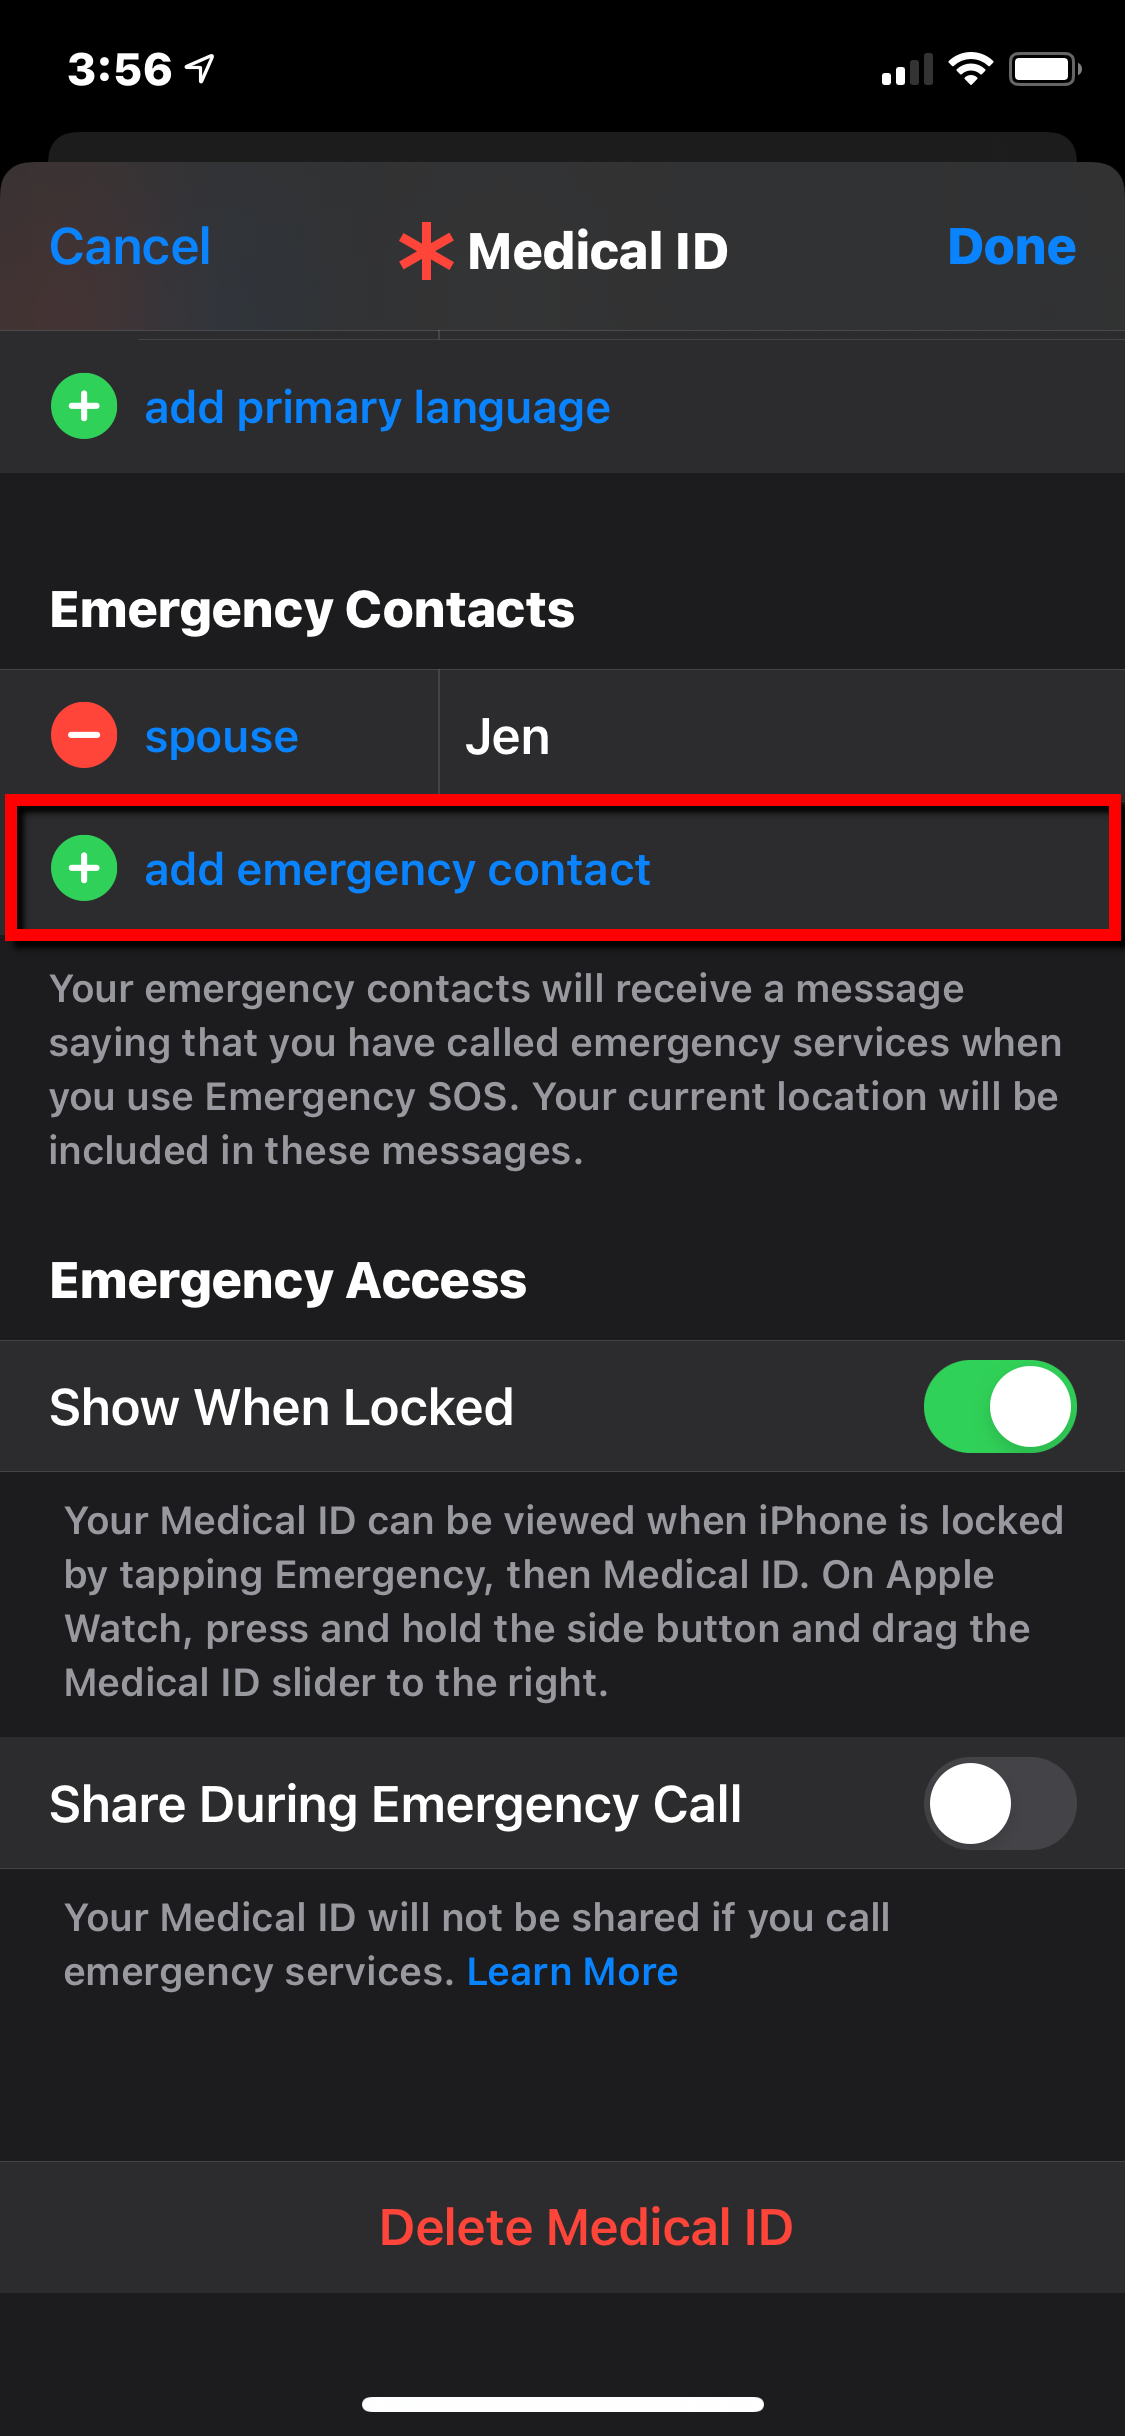
Step 4: Scroll down to Emergency Contacts and tap the green Add Emergency Contact button.
Step 5: Select someone on your contact list.
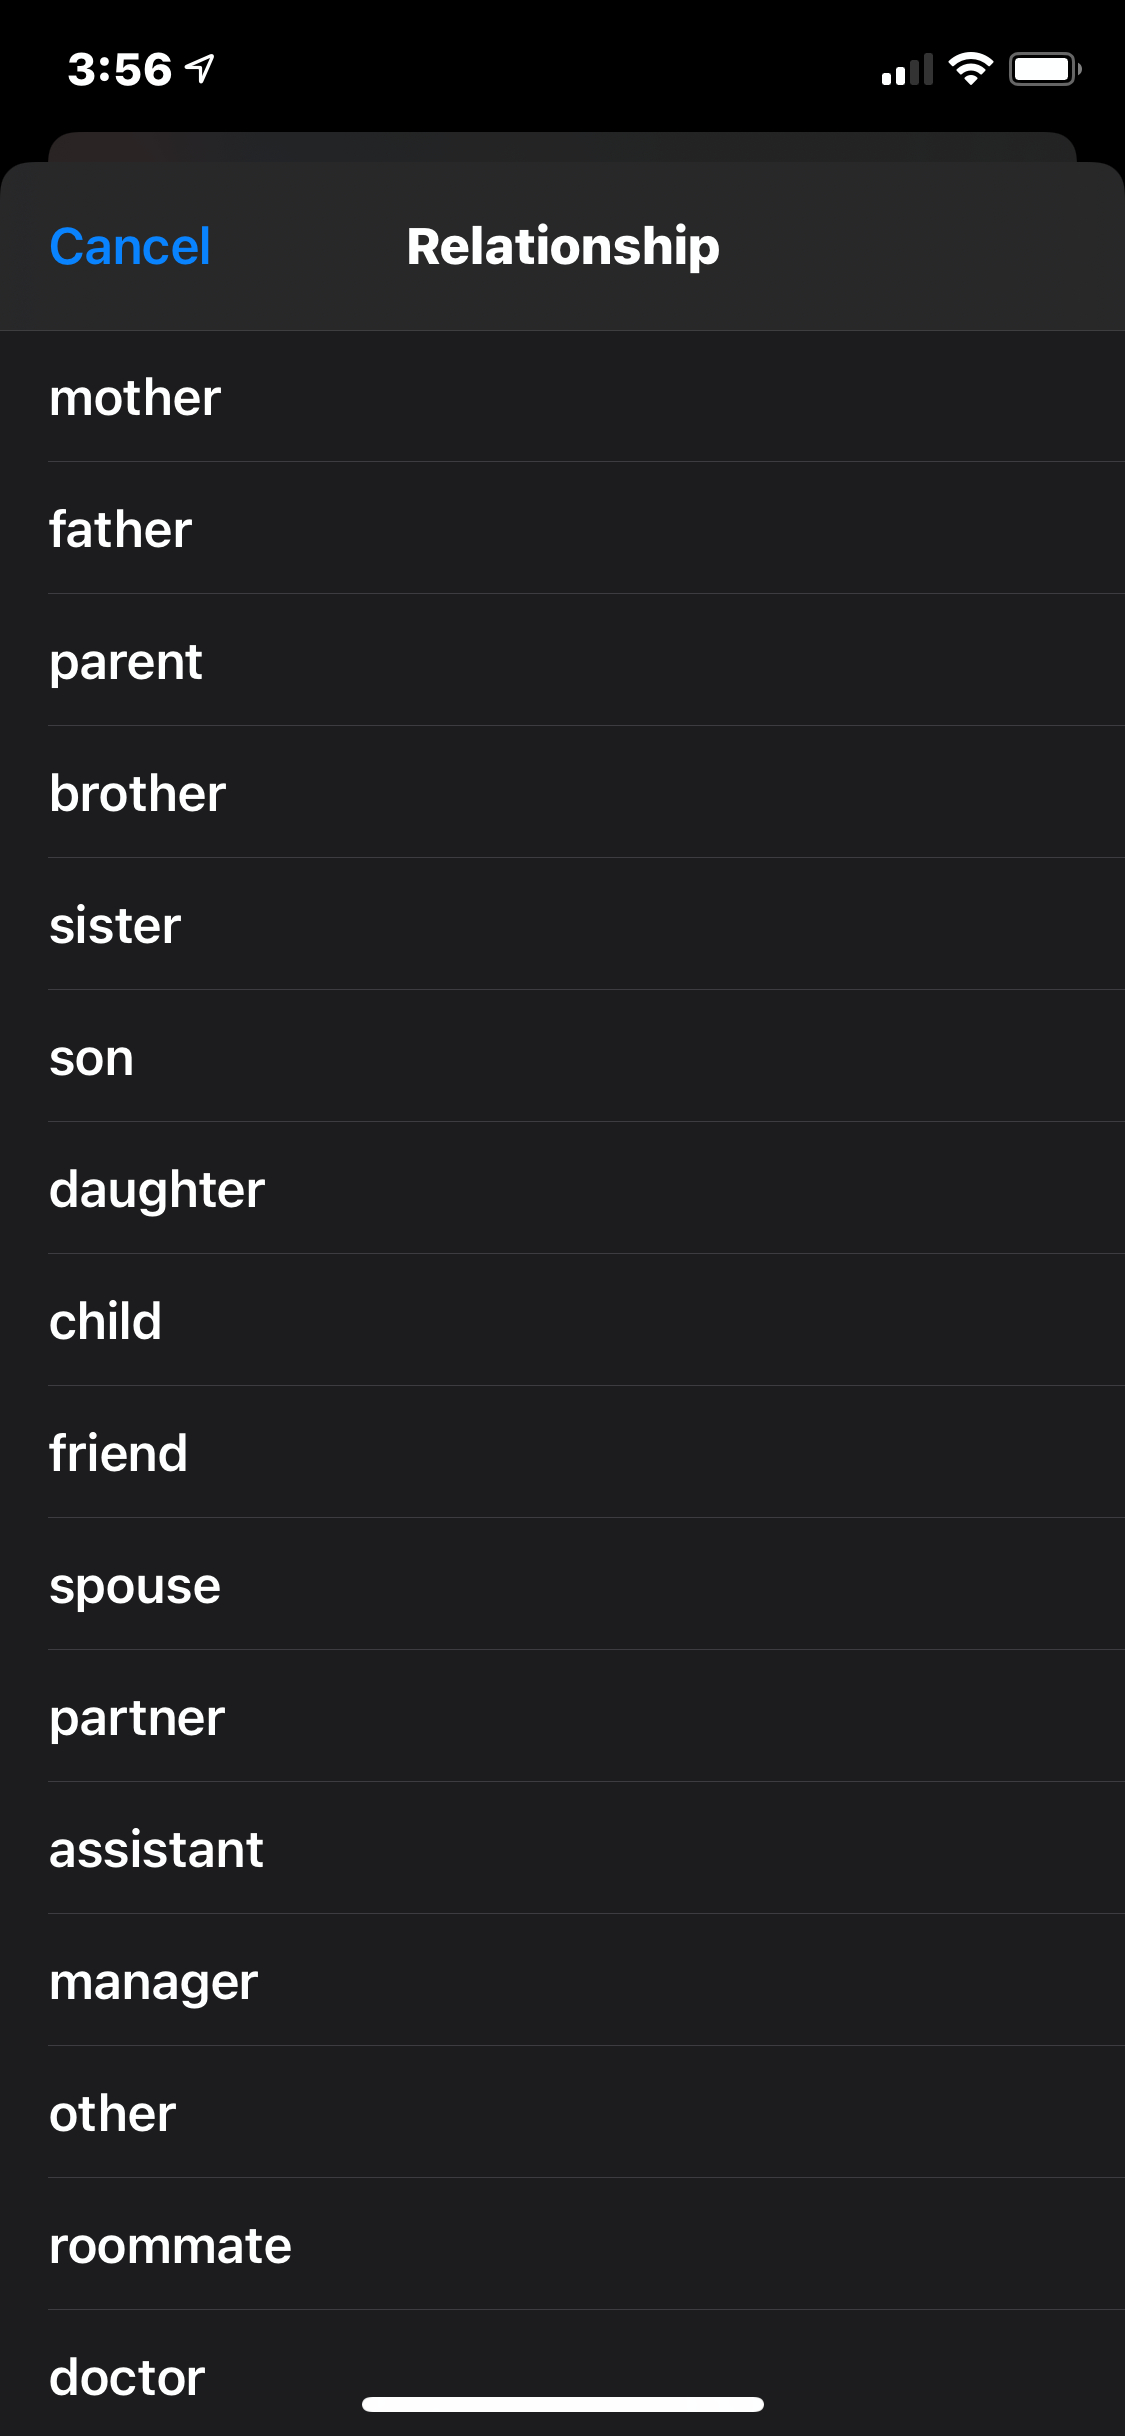
Step 6: Select the relationship.
Step 7: Tap Done in the top-right corner to complete.
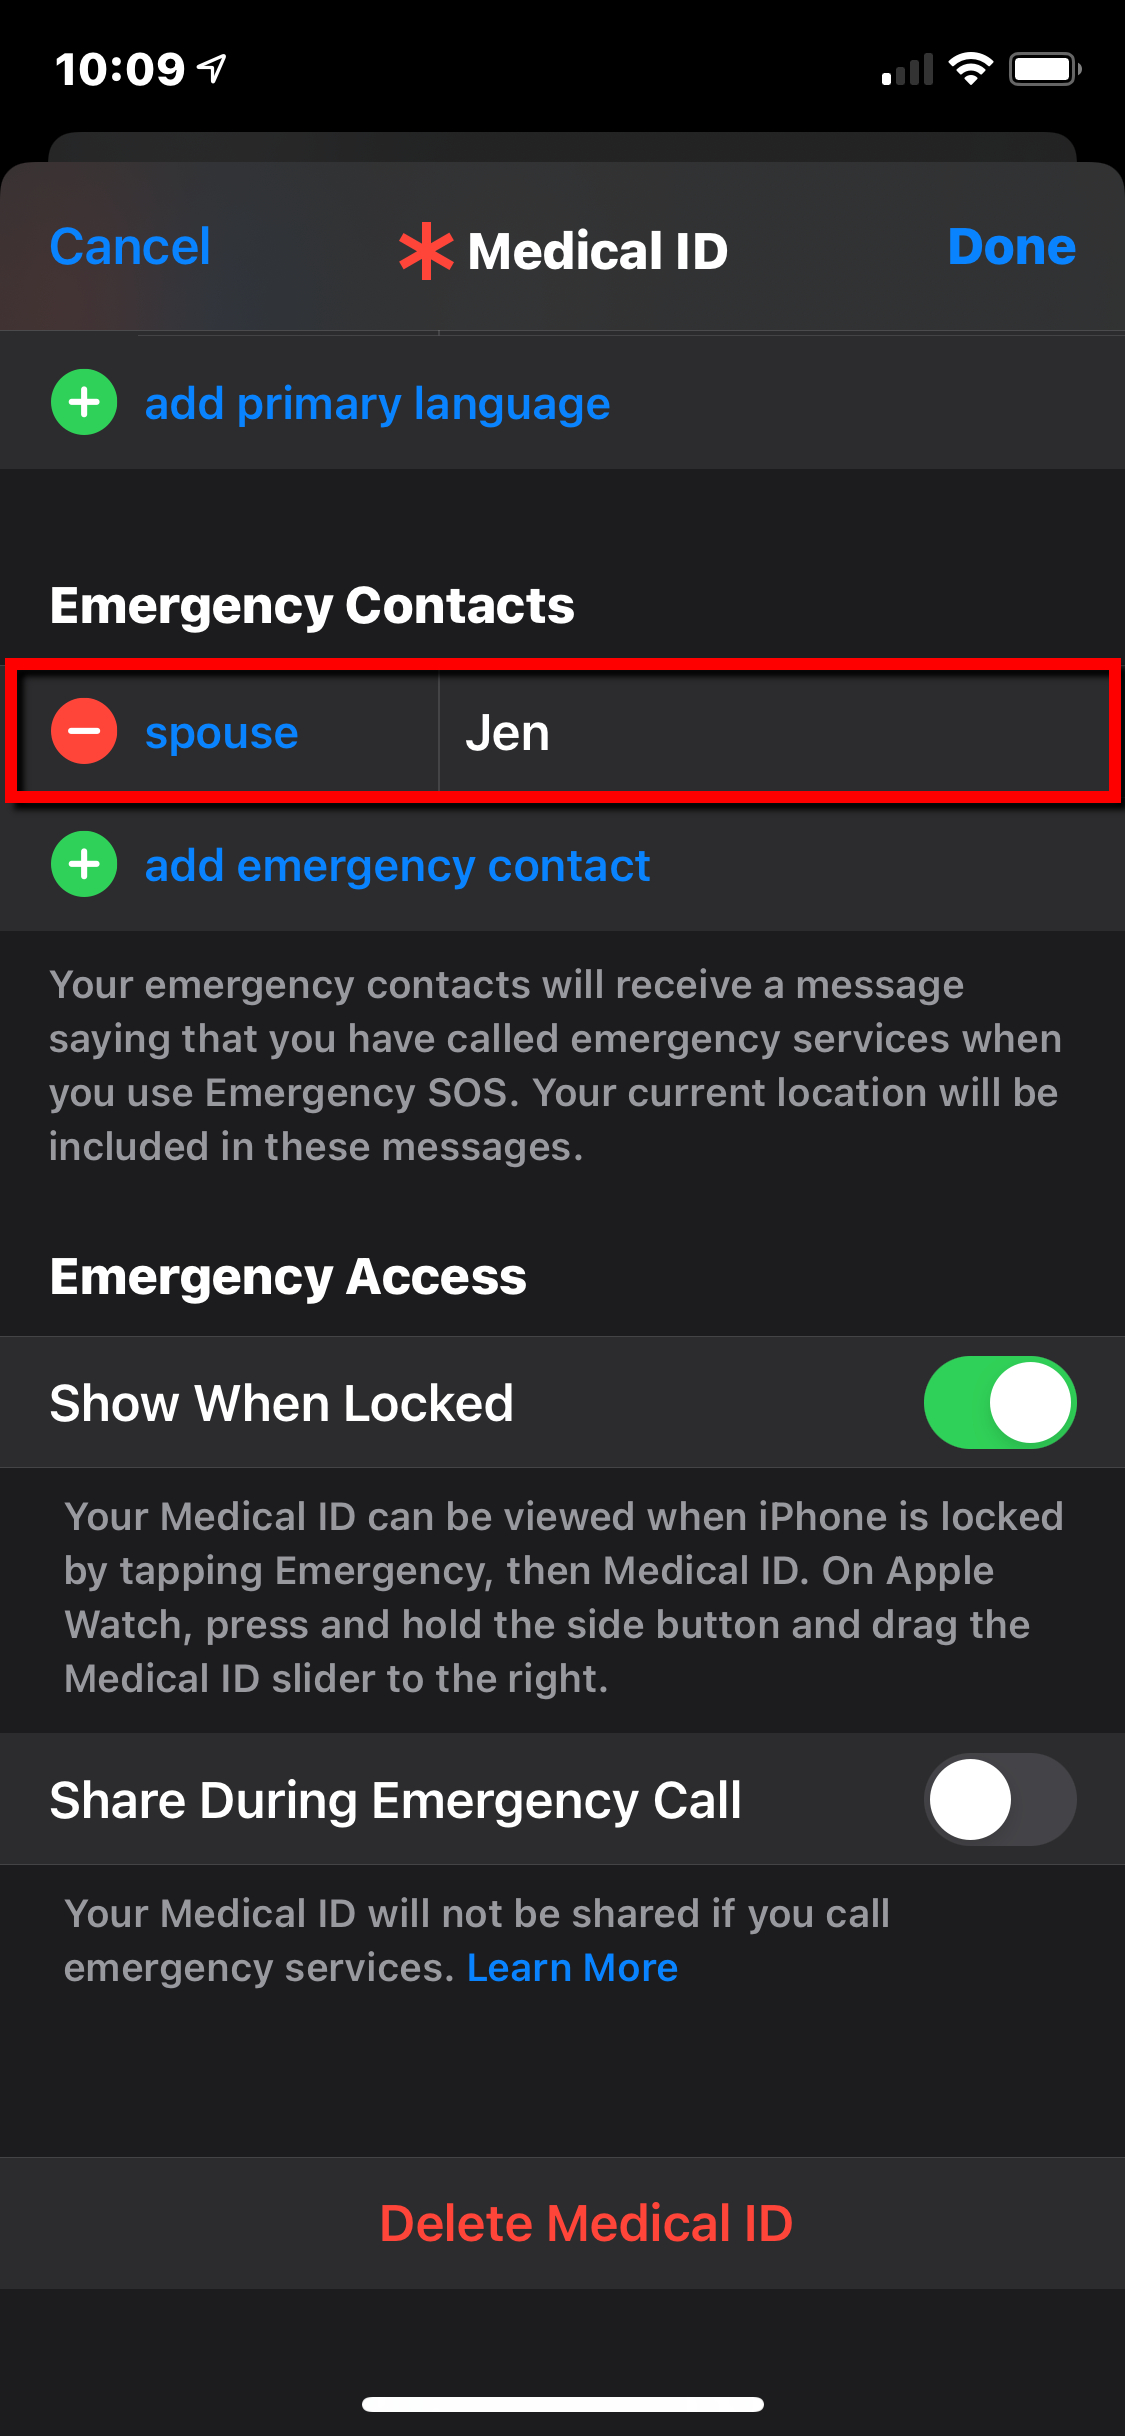
Remove an emergency contact
Step 1: Open the Health app and tap your profile picture.
Step 2: Tap Medical ID.
Step 3: Tap Edit in the top-right corner.
Step 4: Scroll down to Emergency Contacts and tap the red Minus button next to the contact’s name, as shown above.
Step 5: Tap the red Delete button.
Step 6: Tap Done in the top-right corner to complete.
Set up Medical ID
In addition to designating a contact, you can also set up a Medical ID to alert first responders to your medical condition so that they don’t further aggravate a pre-existing condition. Here’s how to make your Medical ID visible on your iPhone’s Lock screen:
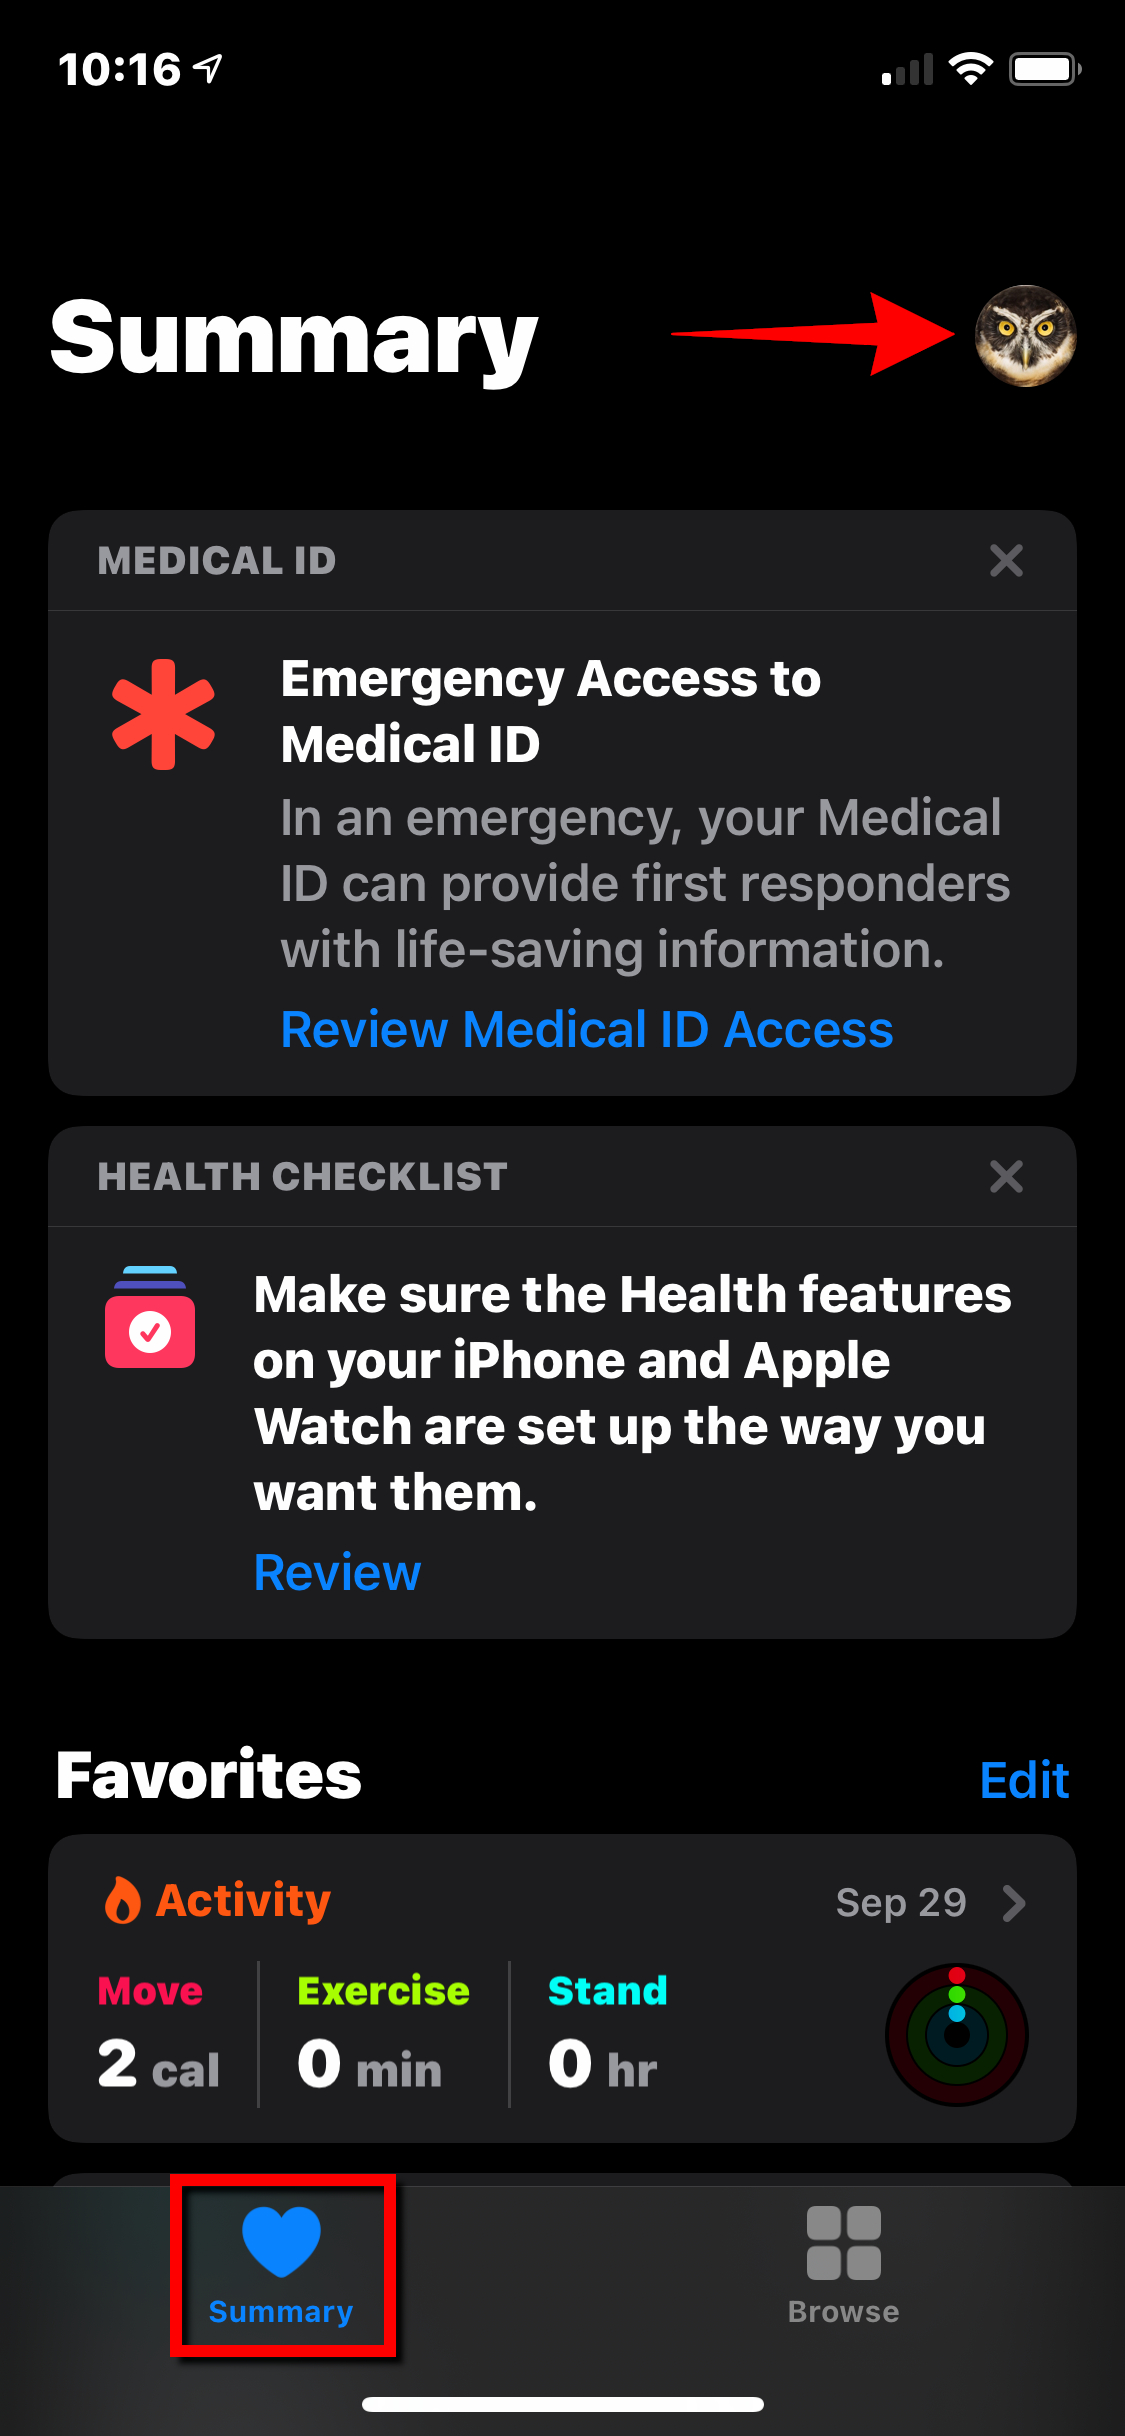
Step 1: Open the Health app and tap the Summary tab.
Step 2: Tap your profile picture located in the top-right corner.
Step 3: Tap Medical ID.
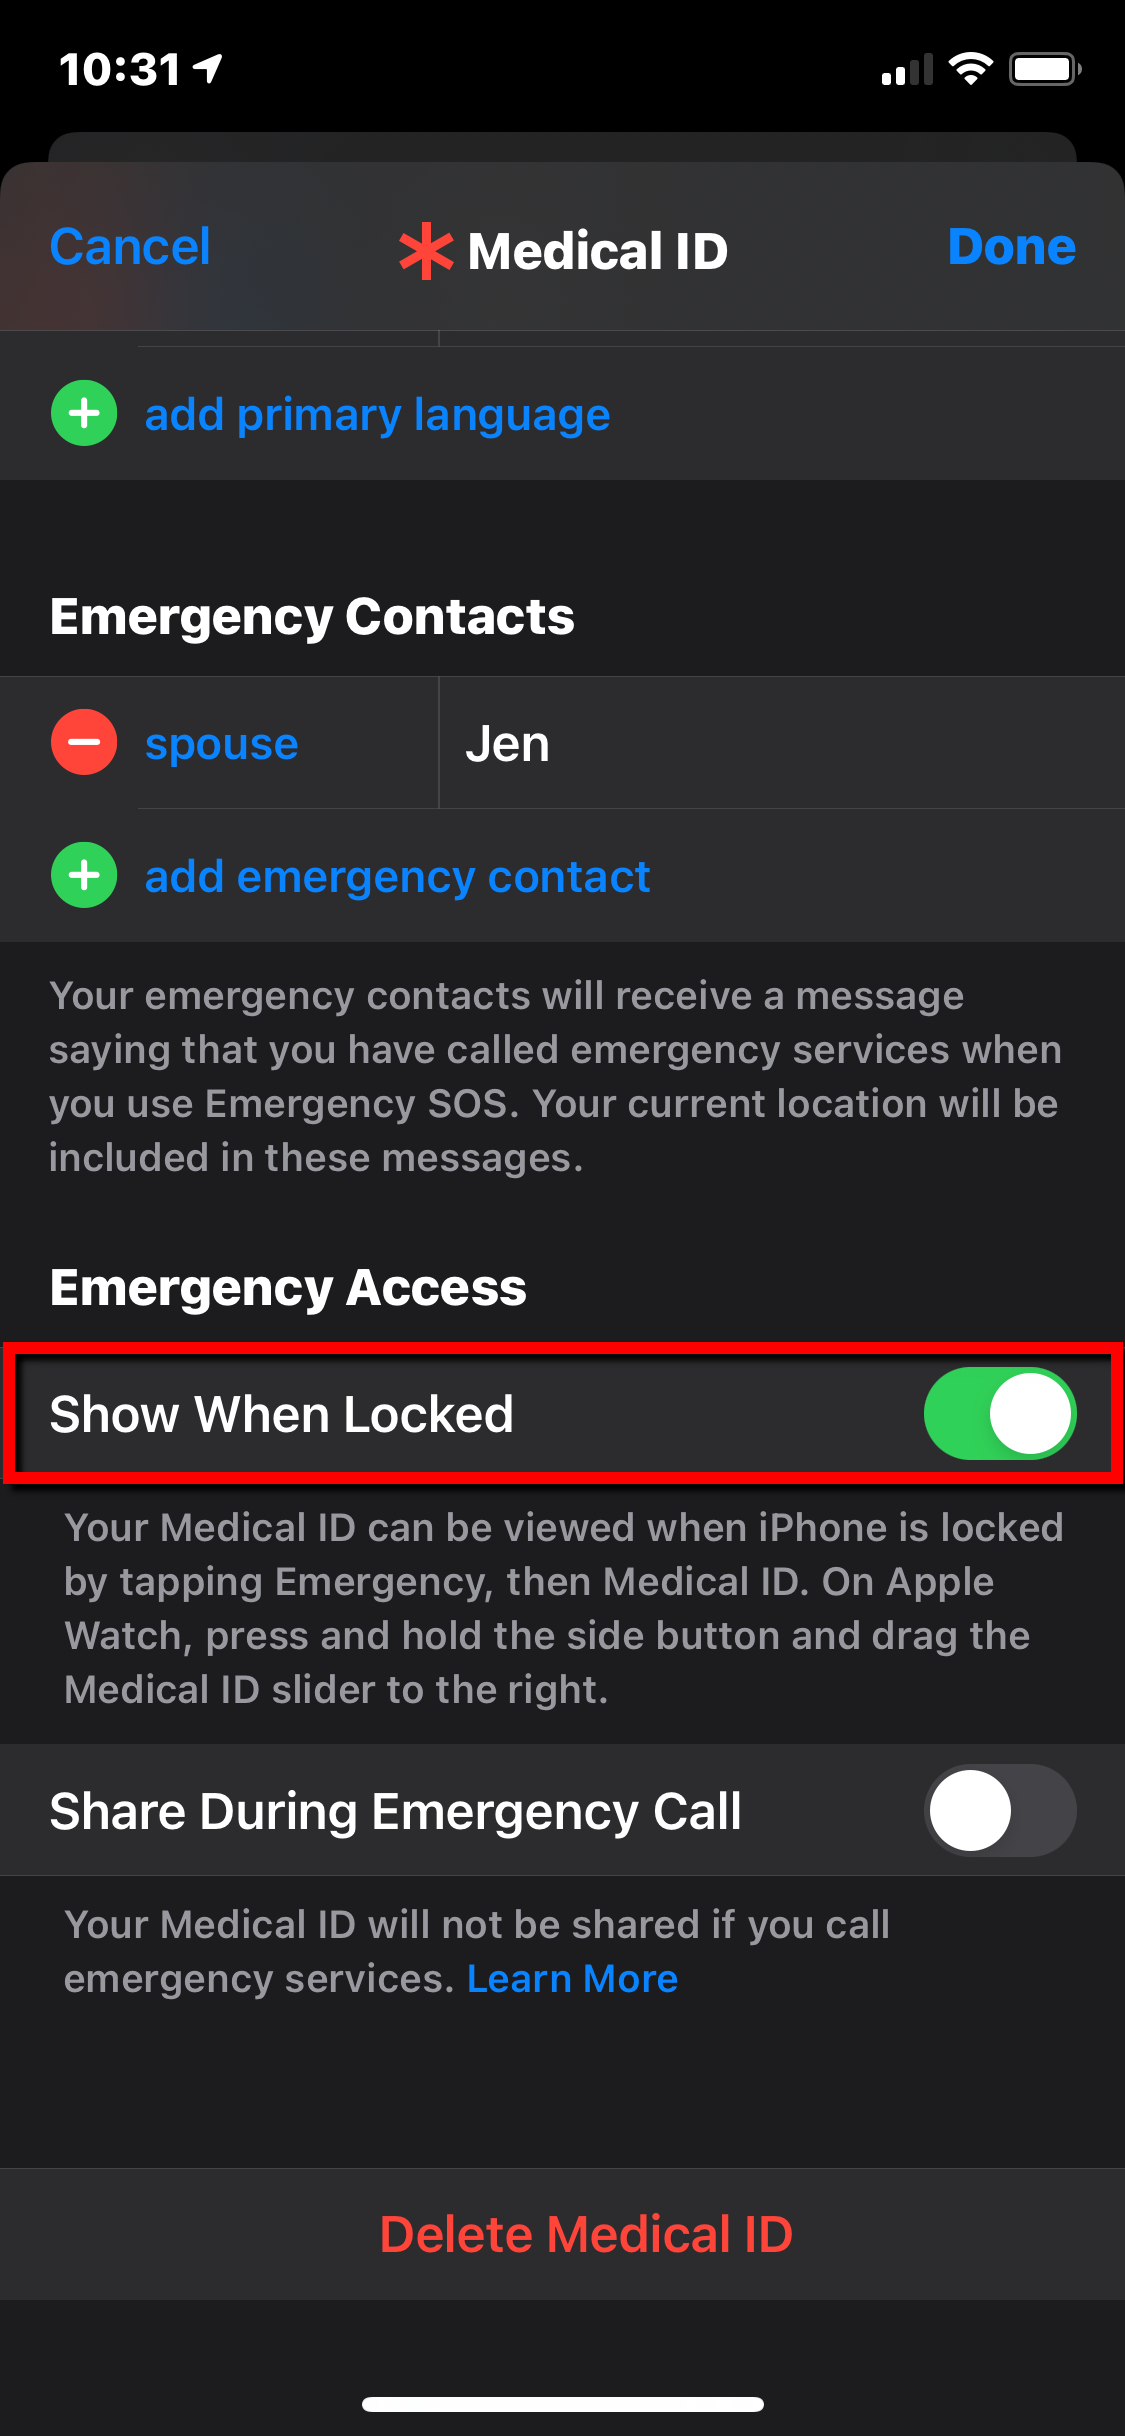
Step 4: Tap Edit in the top-right corner.
Step 5: Enter your health data into all applicable fields.
Step 6: Under Emergency Access, tap the toggle next to Show When Locked to enable (green). Your Medical ID can then be seen by first responders when they tap Emergency followed by Medical ID. This does not unlock your phone, but they can use it to call your emergency contact(s).
Step 7: Tap Done in the top-right corner to complete.
Share my location

The Find My app consolidates features that were once separate, such as Find My iPhone and Find My Friends. Here, we concentrate only on location sharing for friends and family as part of the iPhone’s personal safety features. If you want friends and family to know where you are, do the following:
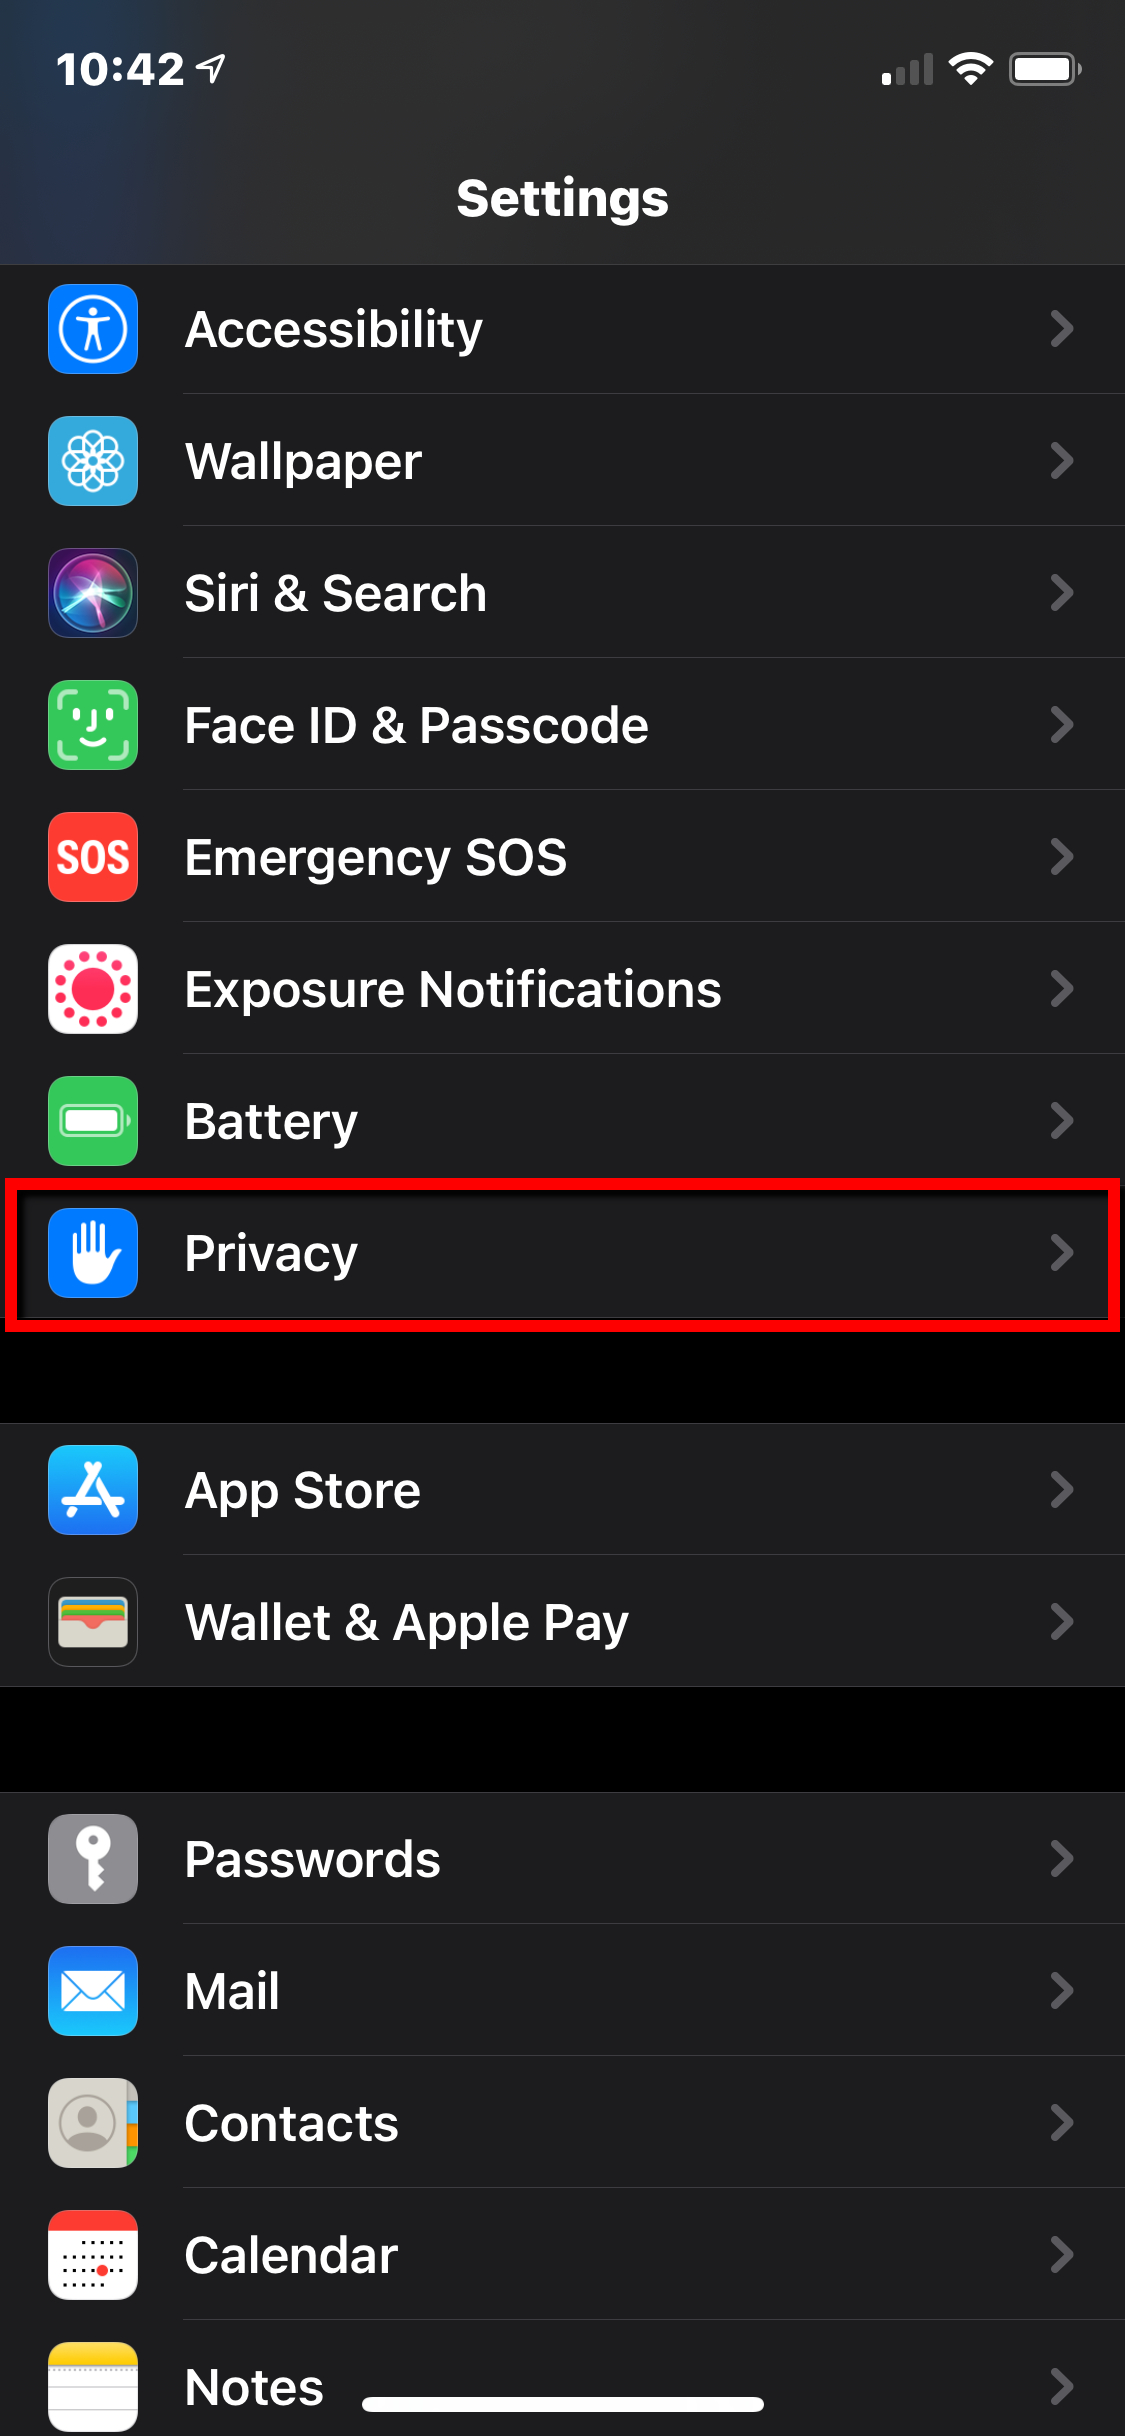
Step 1: Open the Settings app and tap Privacy on the list.
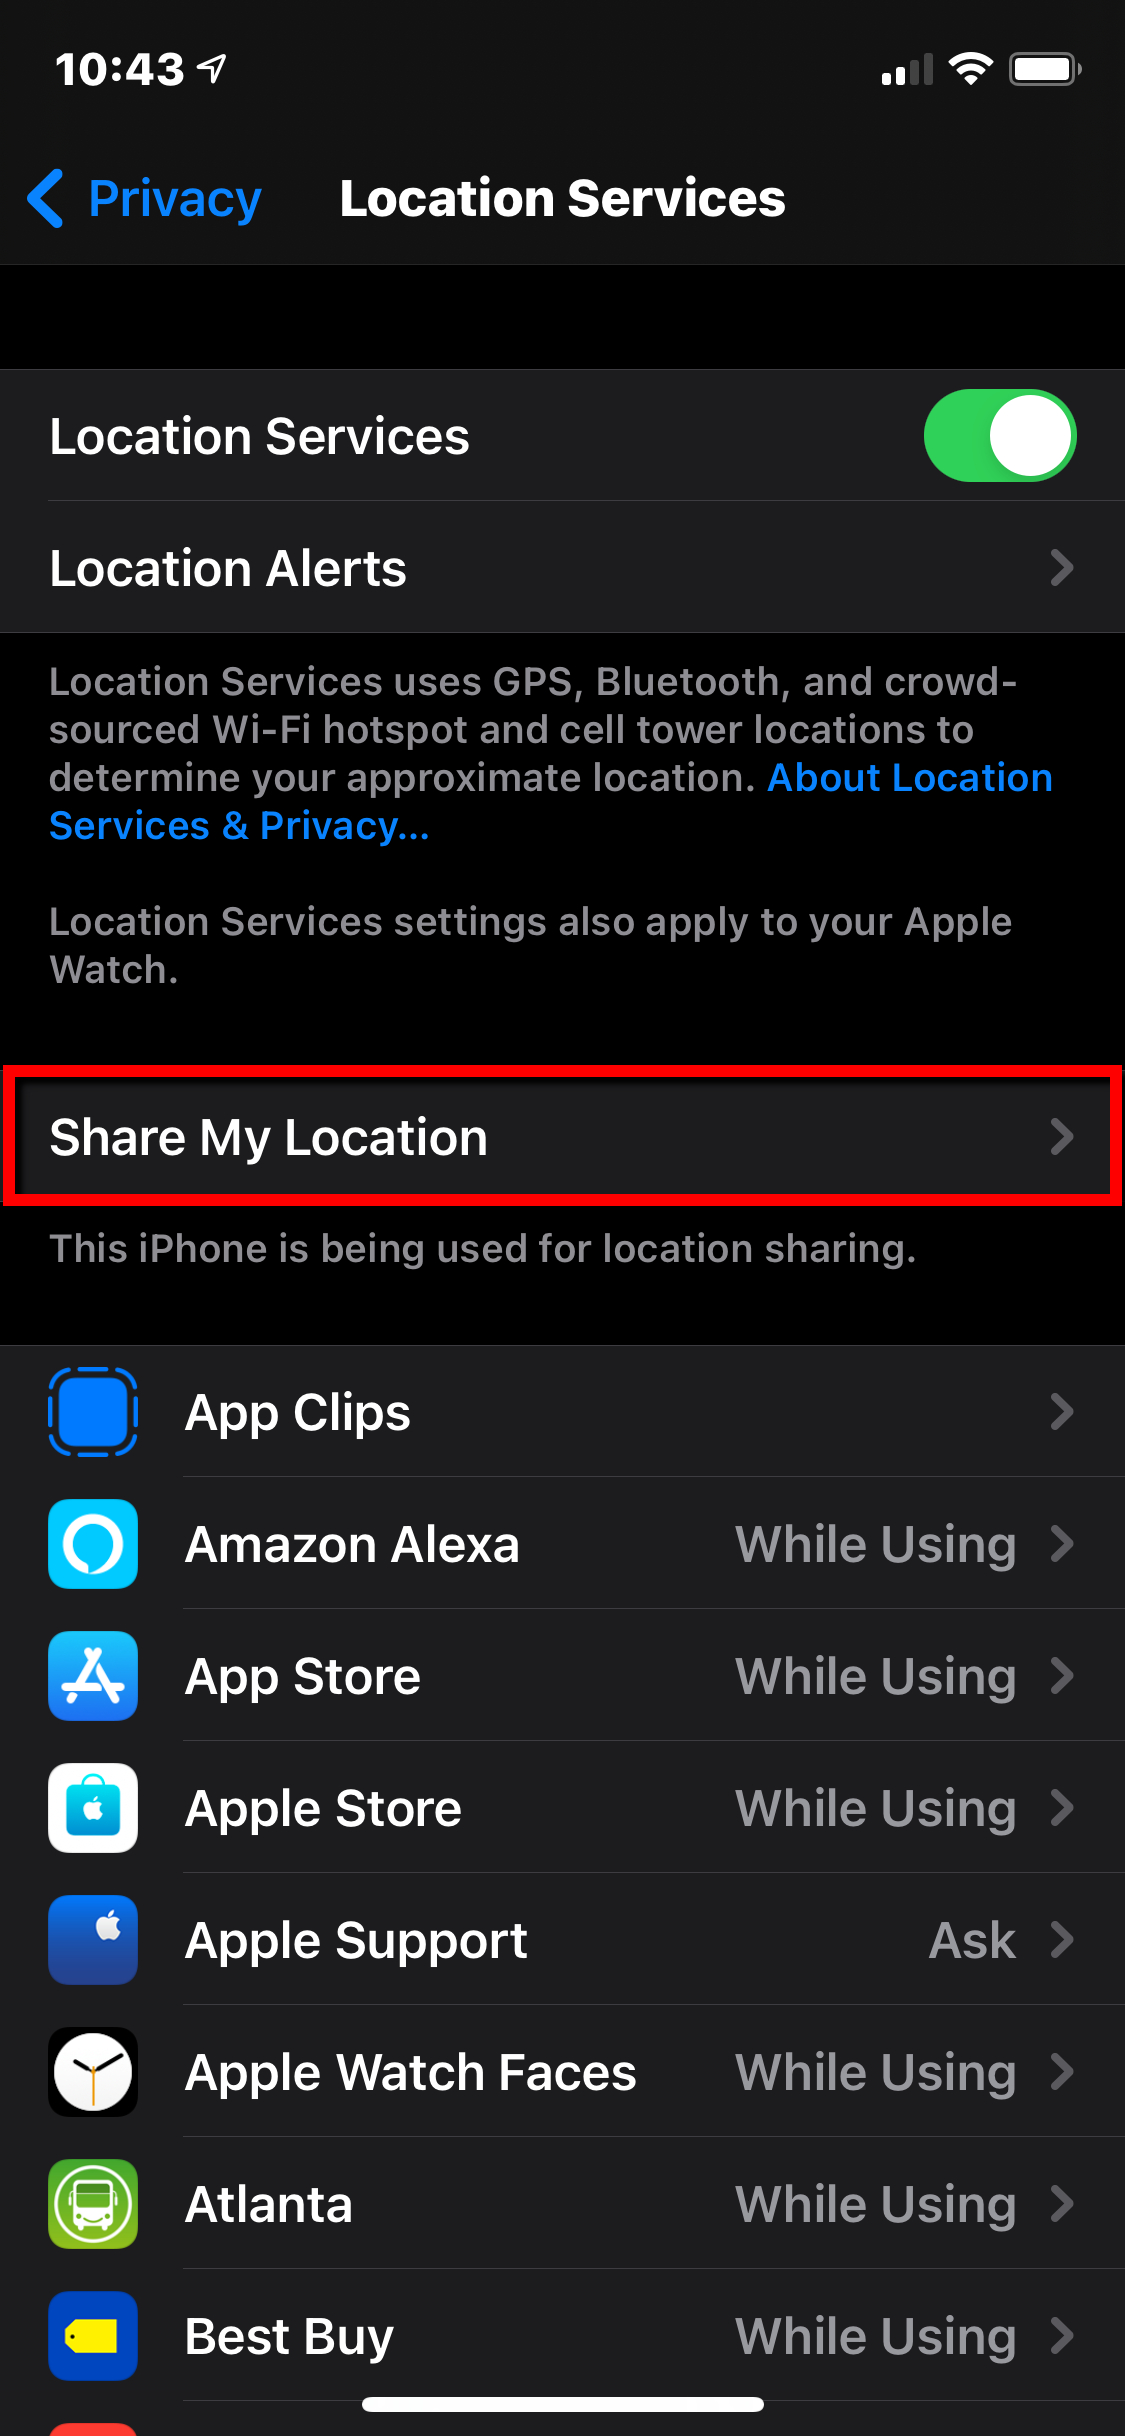
Step 2: Tap Location Services at the top.
Step 3: Tap Share My Location.
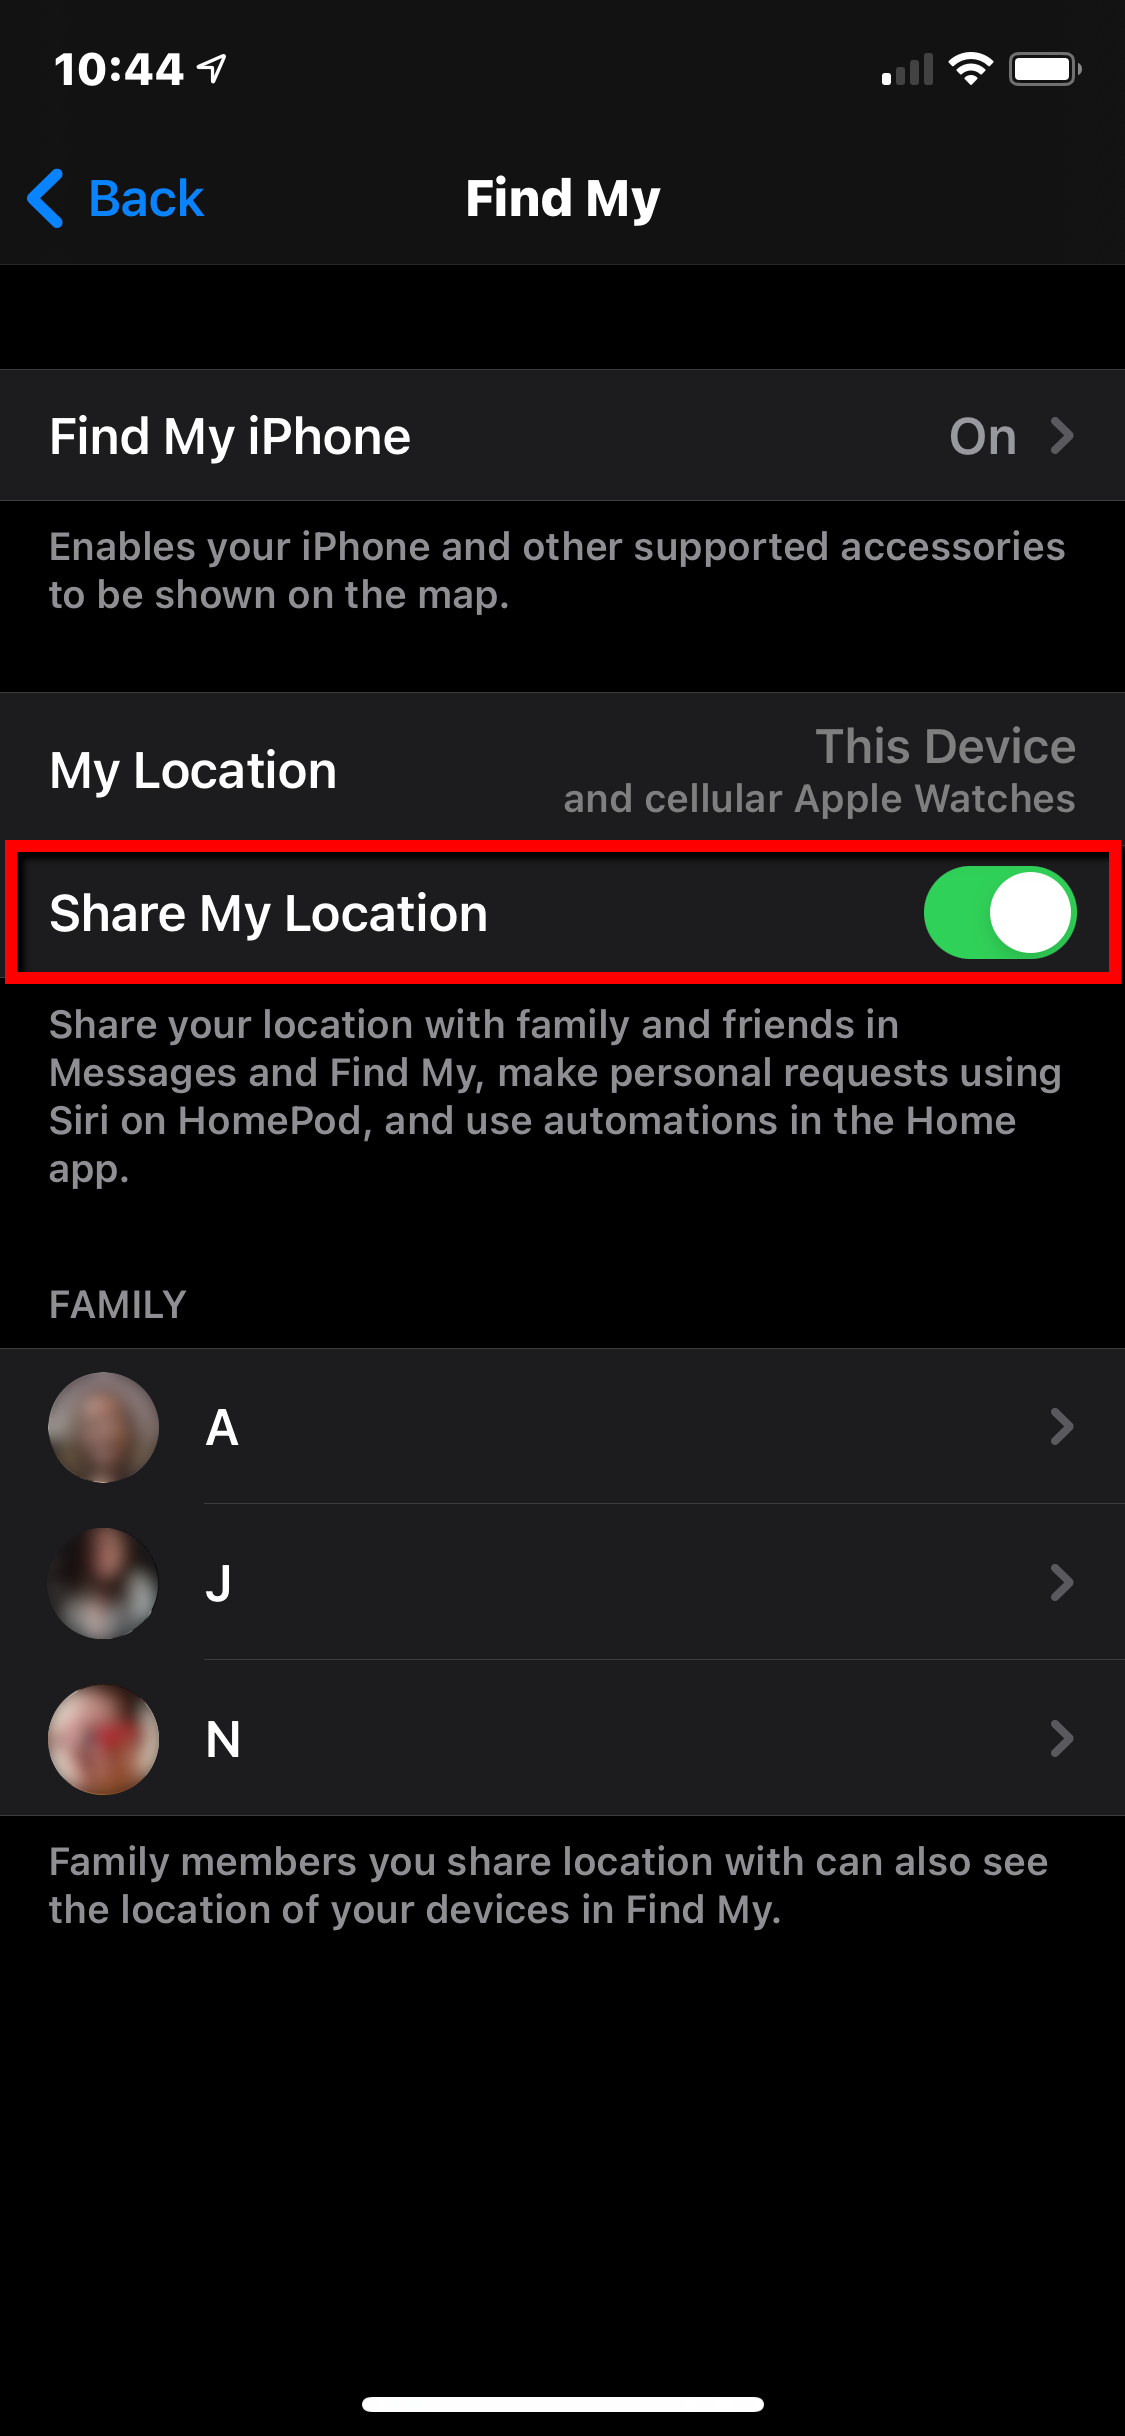
Step 4: Tap the toggle next to Share My Location to turn this feature on (green).
Use Find My


After you enable Share My Location, you can use Find My to share your location with specific people. Here’s how:
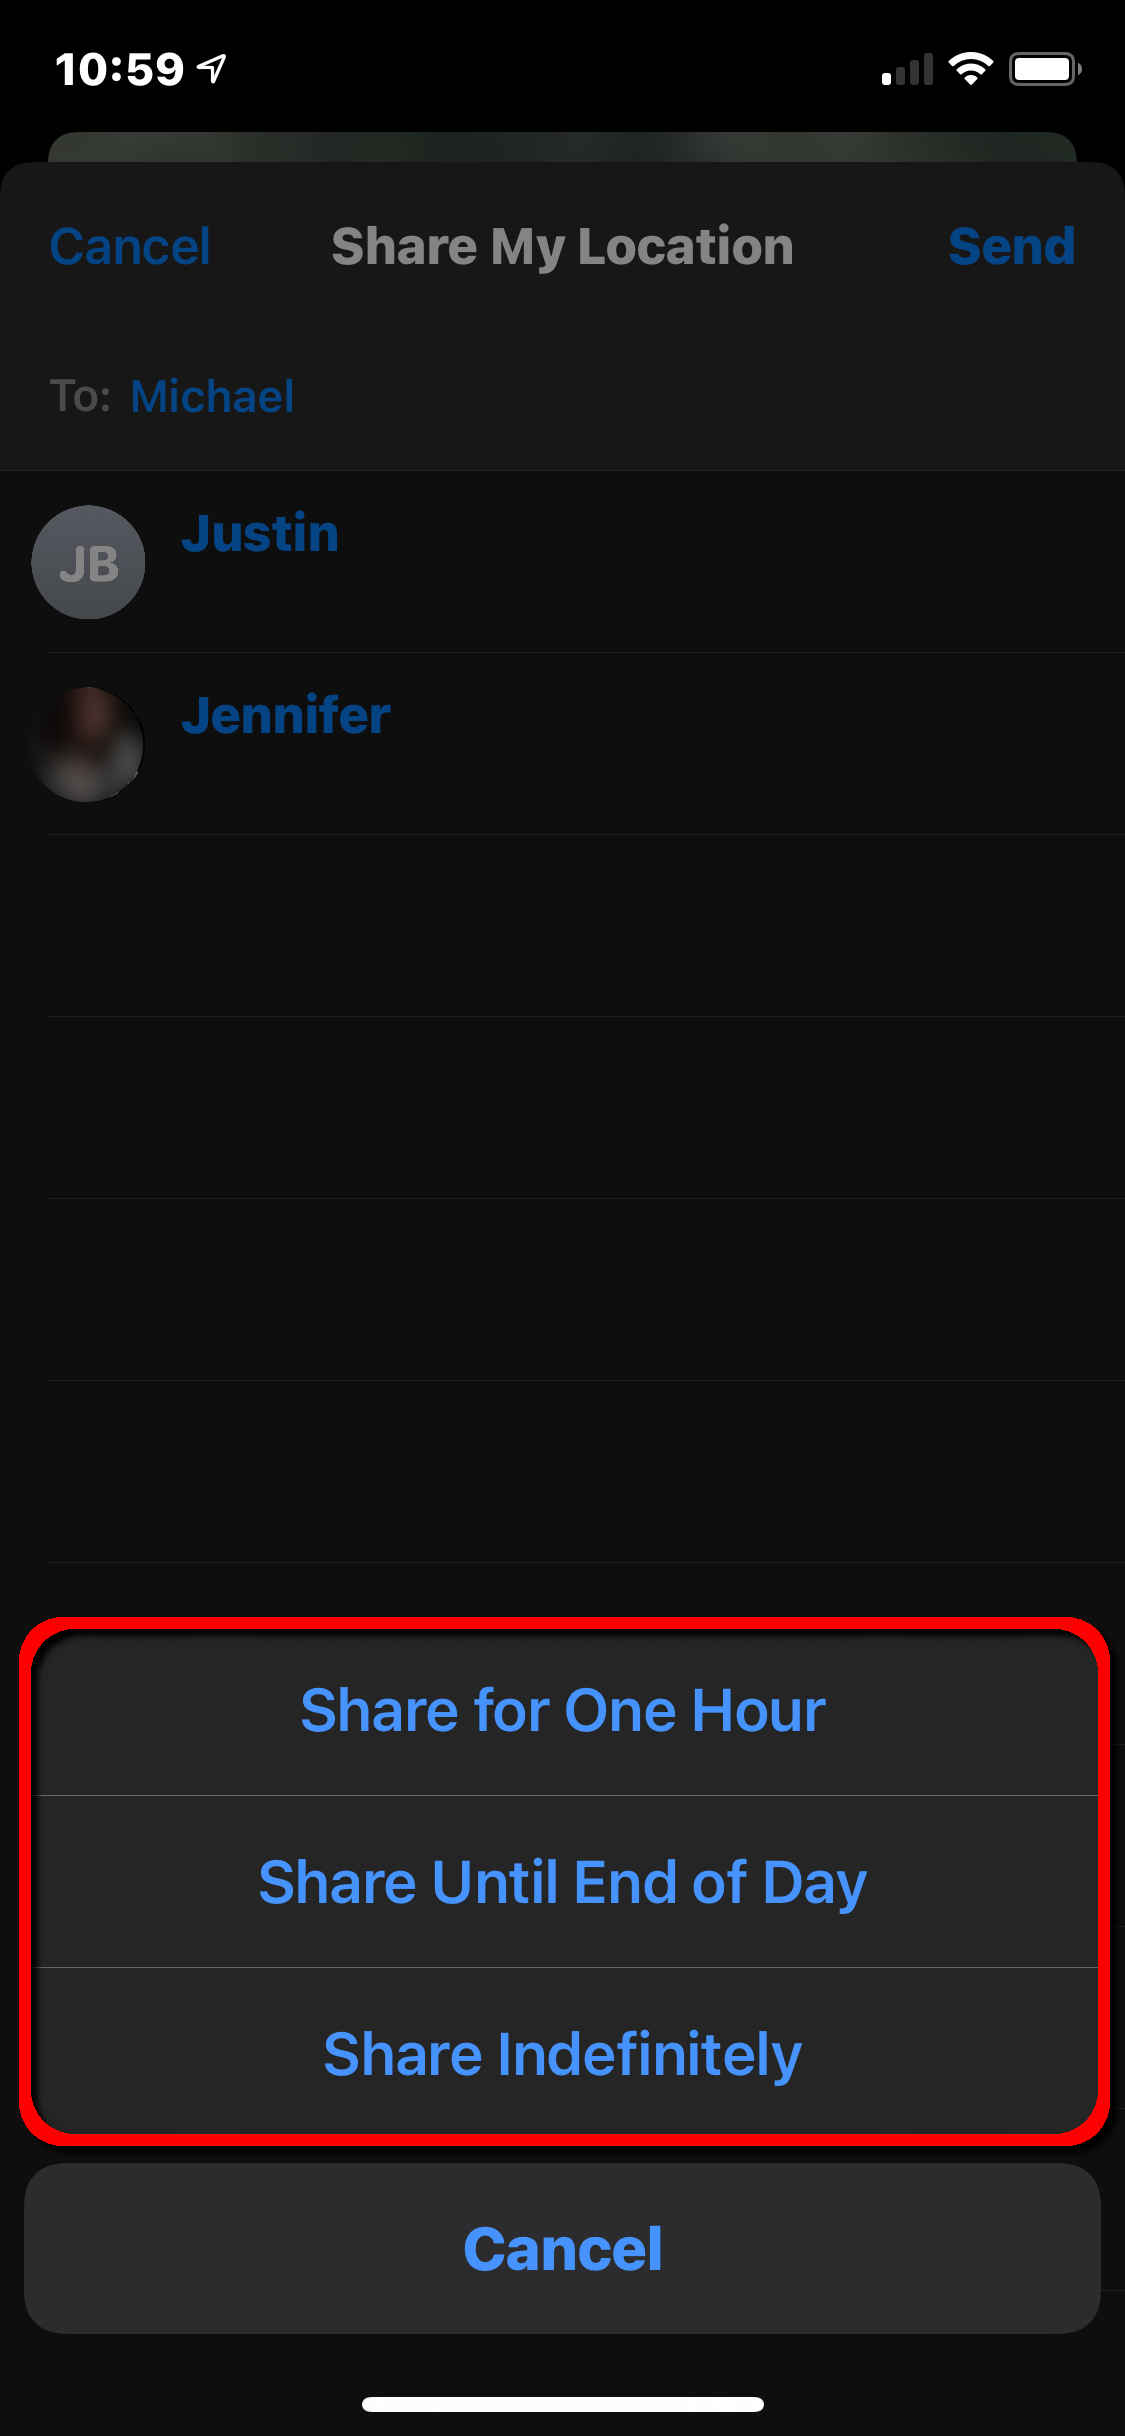
Step 1: Open the Find My app and tap the People tab at the bottom.
Step 2: Tap the Share My Location button.
Step 3: Type the name or phone number of the person you want to share your location with.
Step 4: Tap Send in the top-right corner.
Step 5: Choose to share your location for One Hour, Until End of Day, or Share Indefinitely.
Step 6: Tap OK.
You can even rename the locations that you frequent. Here’s how:
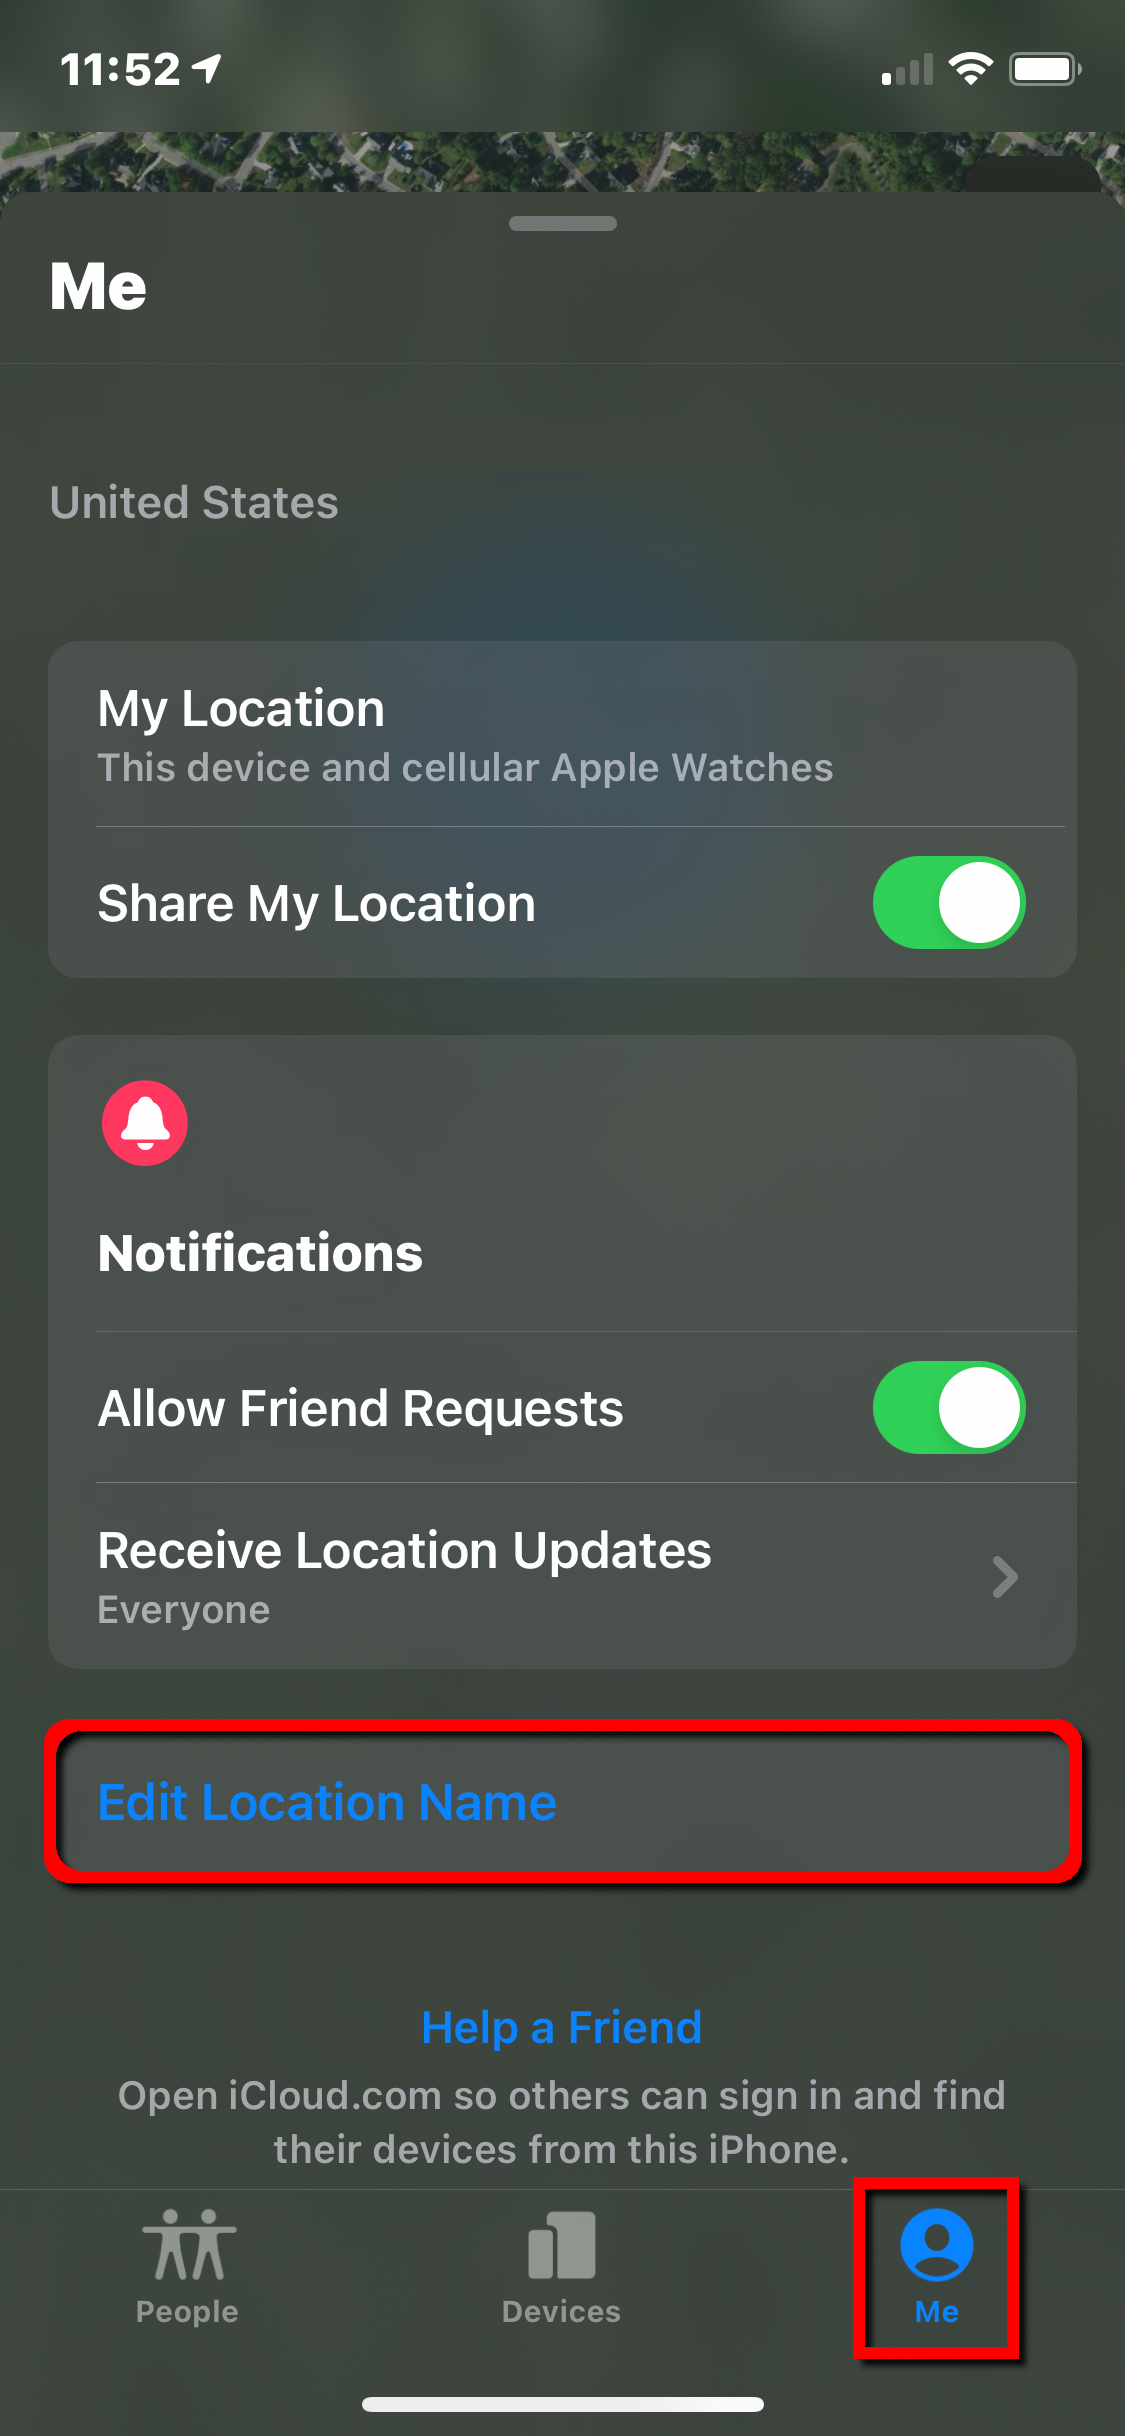
Step 1: Open the Find My app and tap the Me tab at the bottom.
Step 2: Tap Edit Location Name. You may need to expand the Me tab to see this setting.
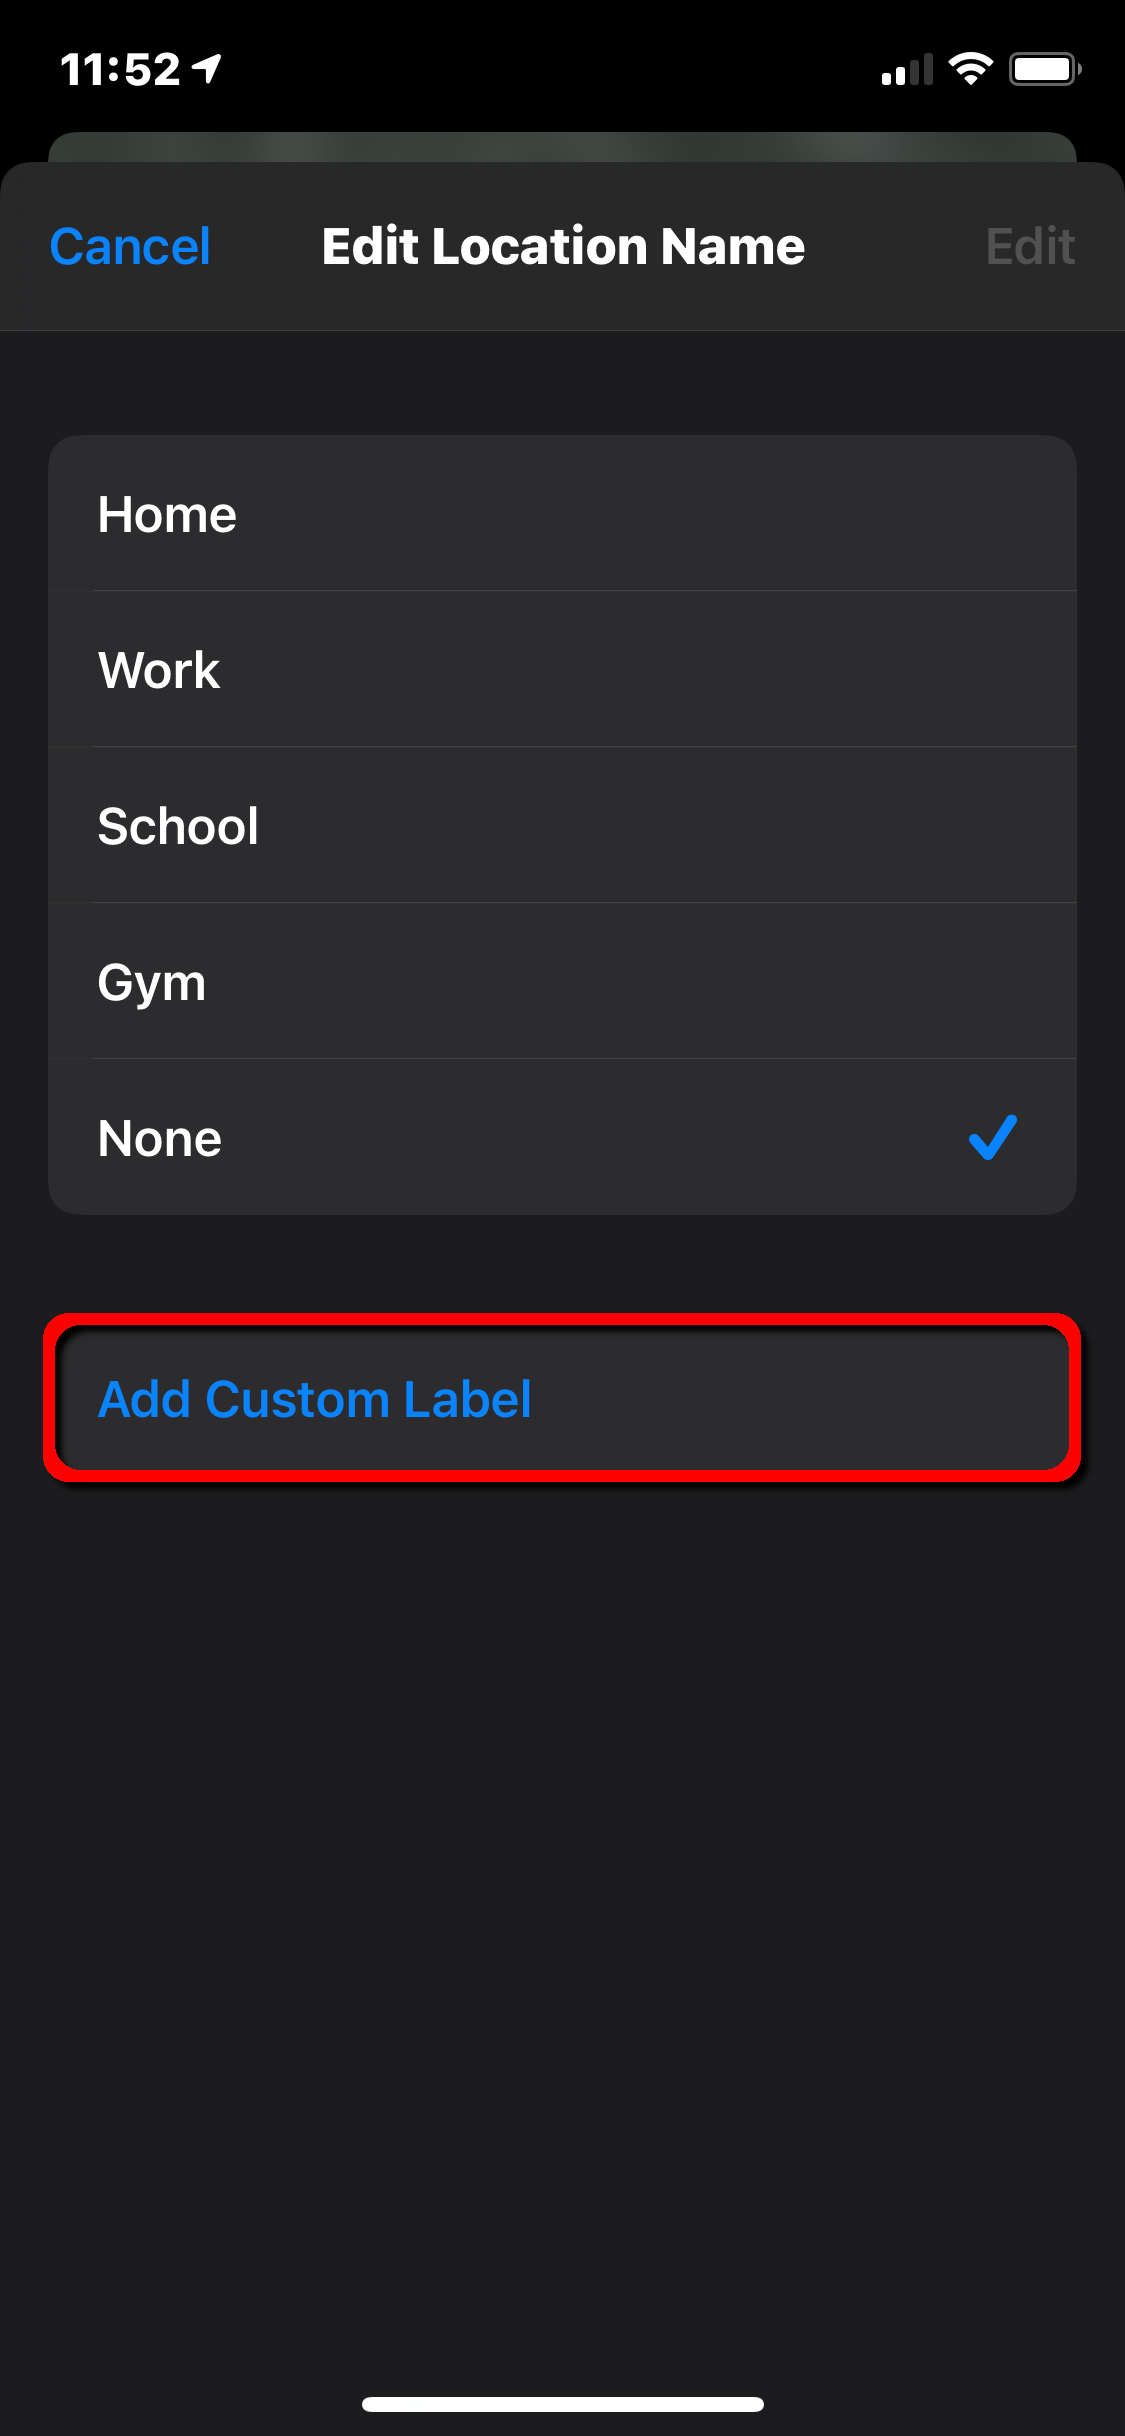
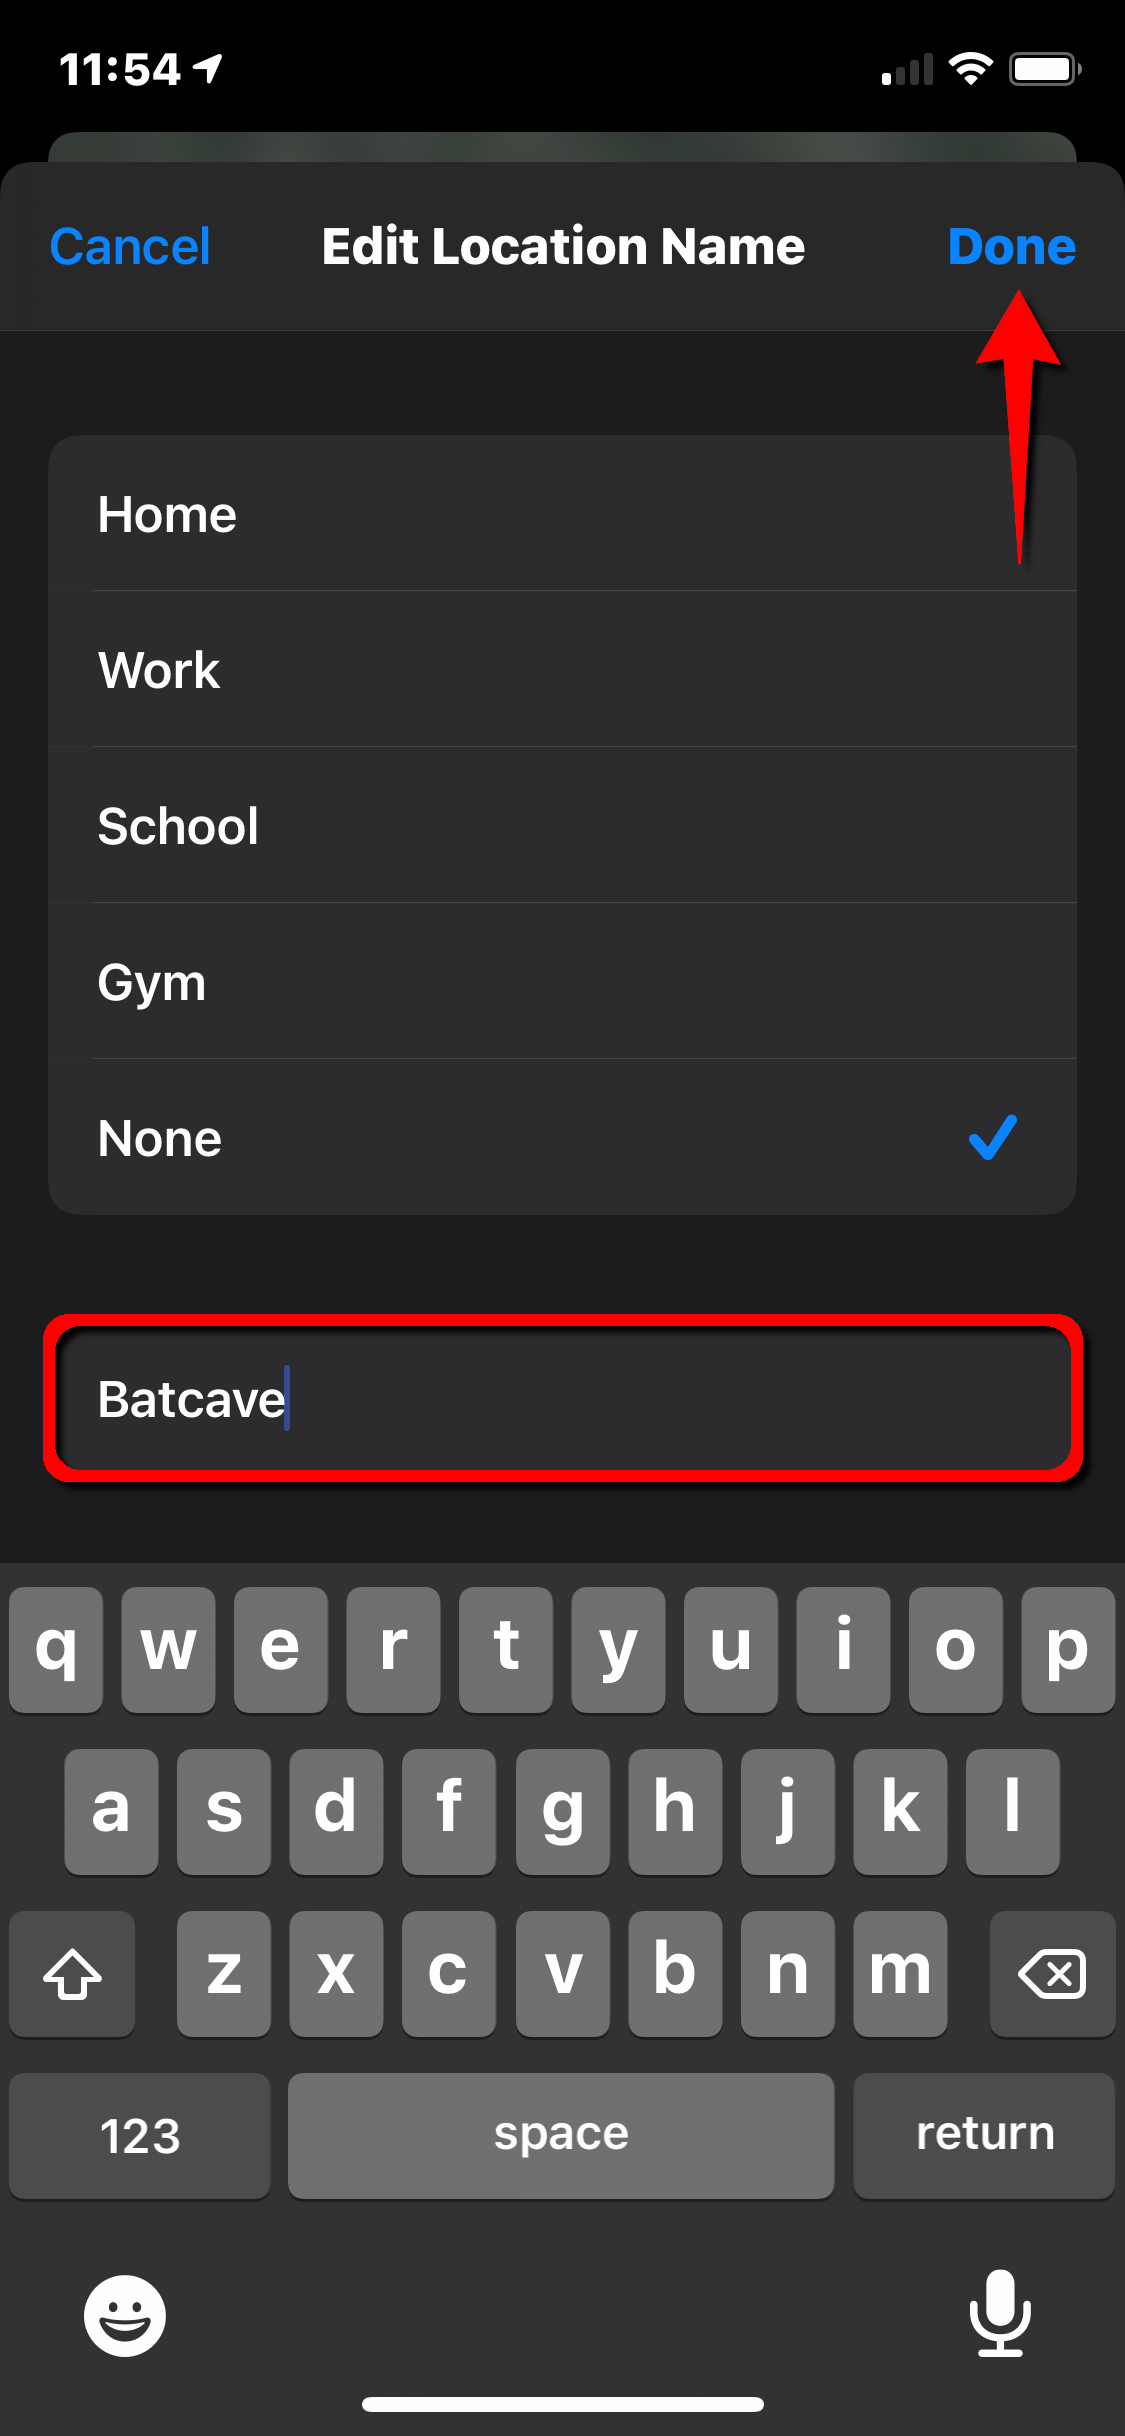
Step 3: Tap Home, Work, School, Gym, or None. Alternatively, you can tap Add Custom Label if the current four don’t correctly describe your location. Just type in the name.
Step 4: Tap Done to finish.
Do Not Disturb While Driving
In many locations, using a cell phone behind the wheel is against the law — and for good reason. There’s nothing like a cell phone call or a text to distract drivers and cause accidents.
Most sensible drivers agree that they should focus their full attention on the road. But when a call or text comes in while they’re en route, it can take Herculean willpower not to glance at the screen. Once they do, that’s two eyeballs not glued to the road.
The iPhone’s Do Not Disturb While Driving feature removes all temptation because it silences all messages while you’re in motion. With iOS 11 and later, your iPhone can sense when you might be driving and prevent notifications. Here’s how to set it up.
Use the Control Center
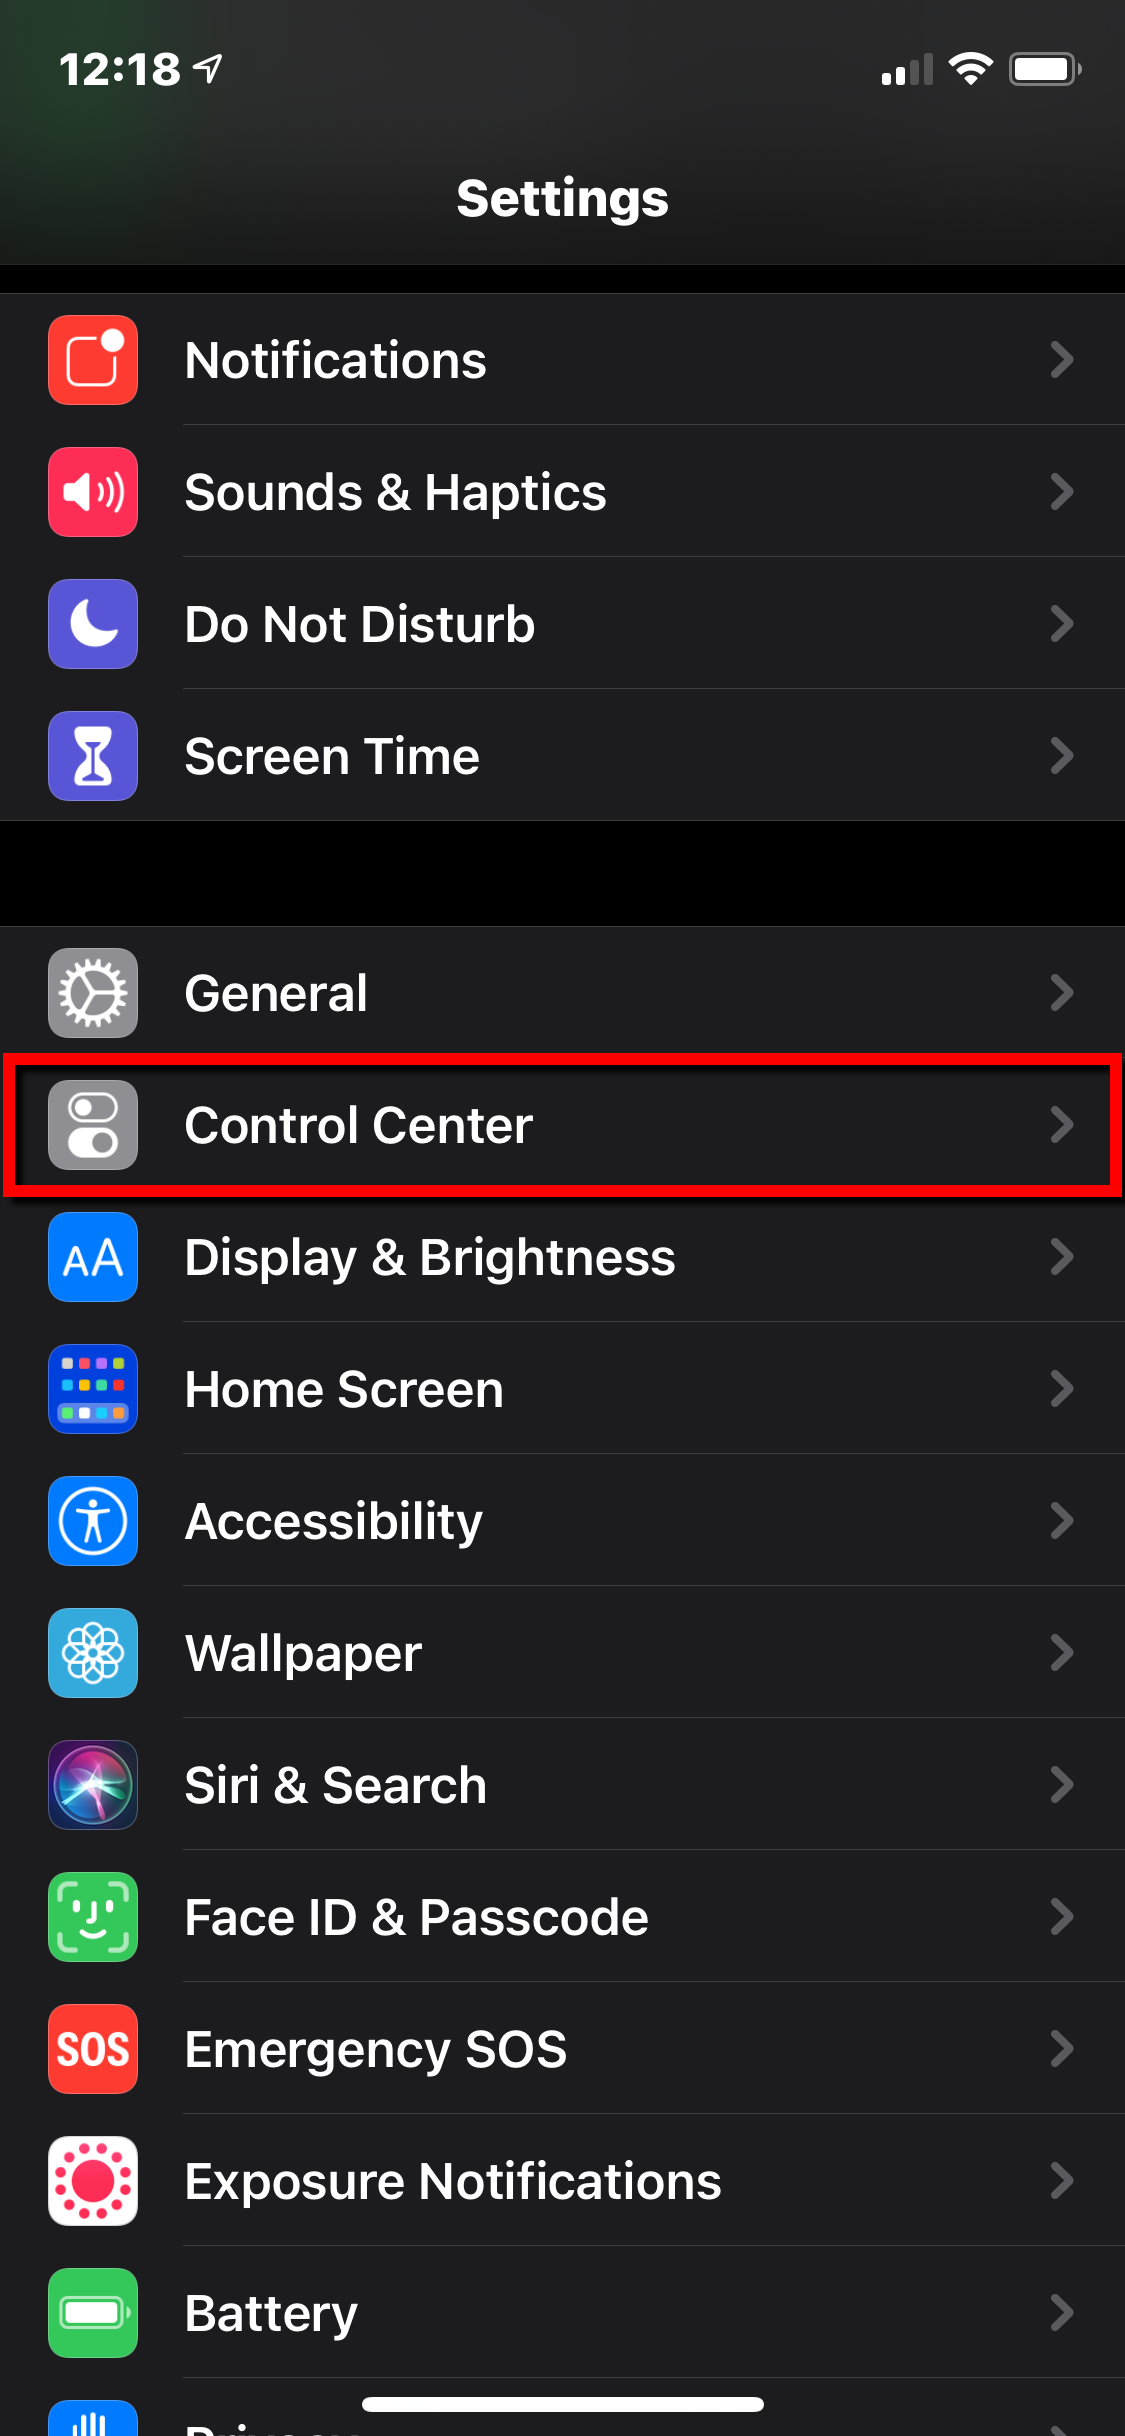


Step 1: Open the Settings app and tap Control Center.
Step 2: Scroll down and tap the green Plus button next to Do Not Disturb While Driving.
For iPhone X and newer:
Step 3: Swipe down from the phone’s top-right corner and tap the Car icon in the Control Center. Tap it again to turn it off.
For iPhone 8 and older:
Step 3: Swipe up from the bottom of the screen and tap to turn it on or off.
When Do Not Disturb is on, you will not see or hear calls or texts — notifications are limited to emergency alerts, timers, and alarms. Senders get an automatic reply informing them that you’re driving. If the message is important, senders have an option to type the word “urgent” to ensure a notification. At that point, you can choose to pull over and read the message or ask Siri to read it to you.
As with standard Do Not Disturb, you can allow calls only from your favorites or if the same person calls twice in a row. If your iPhone connects to your car via Bluetooth, calls will come through, letting you use the vehicle’s buttons, microphones, and speakers. If you use Maps, the iPhone will display lock-screen navigation and give turn-by-turn directions. Passengers must tap I’m Not Driving to turn off the feature if they want to use their phones.
Customize Do Not Disturb While Driving
To set up Do Not Disturb While Driving automatically, manually, or via Bluetooth connection or CarPlay, follow these steps:
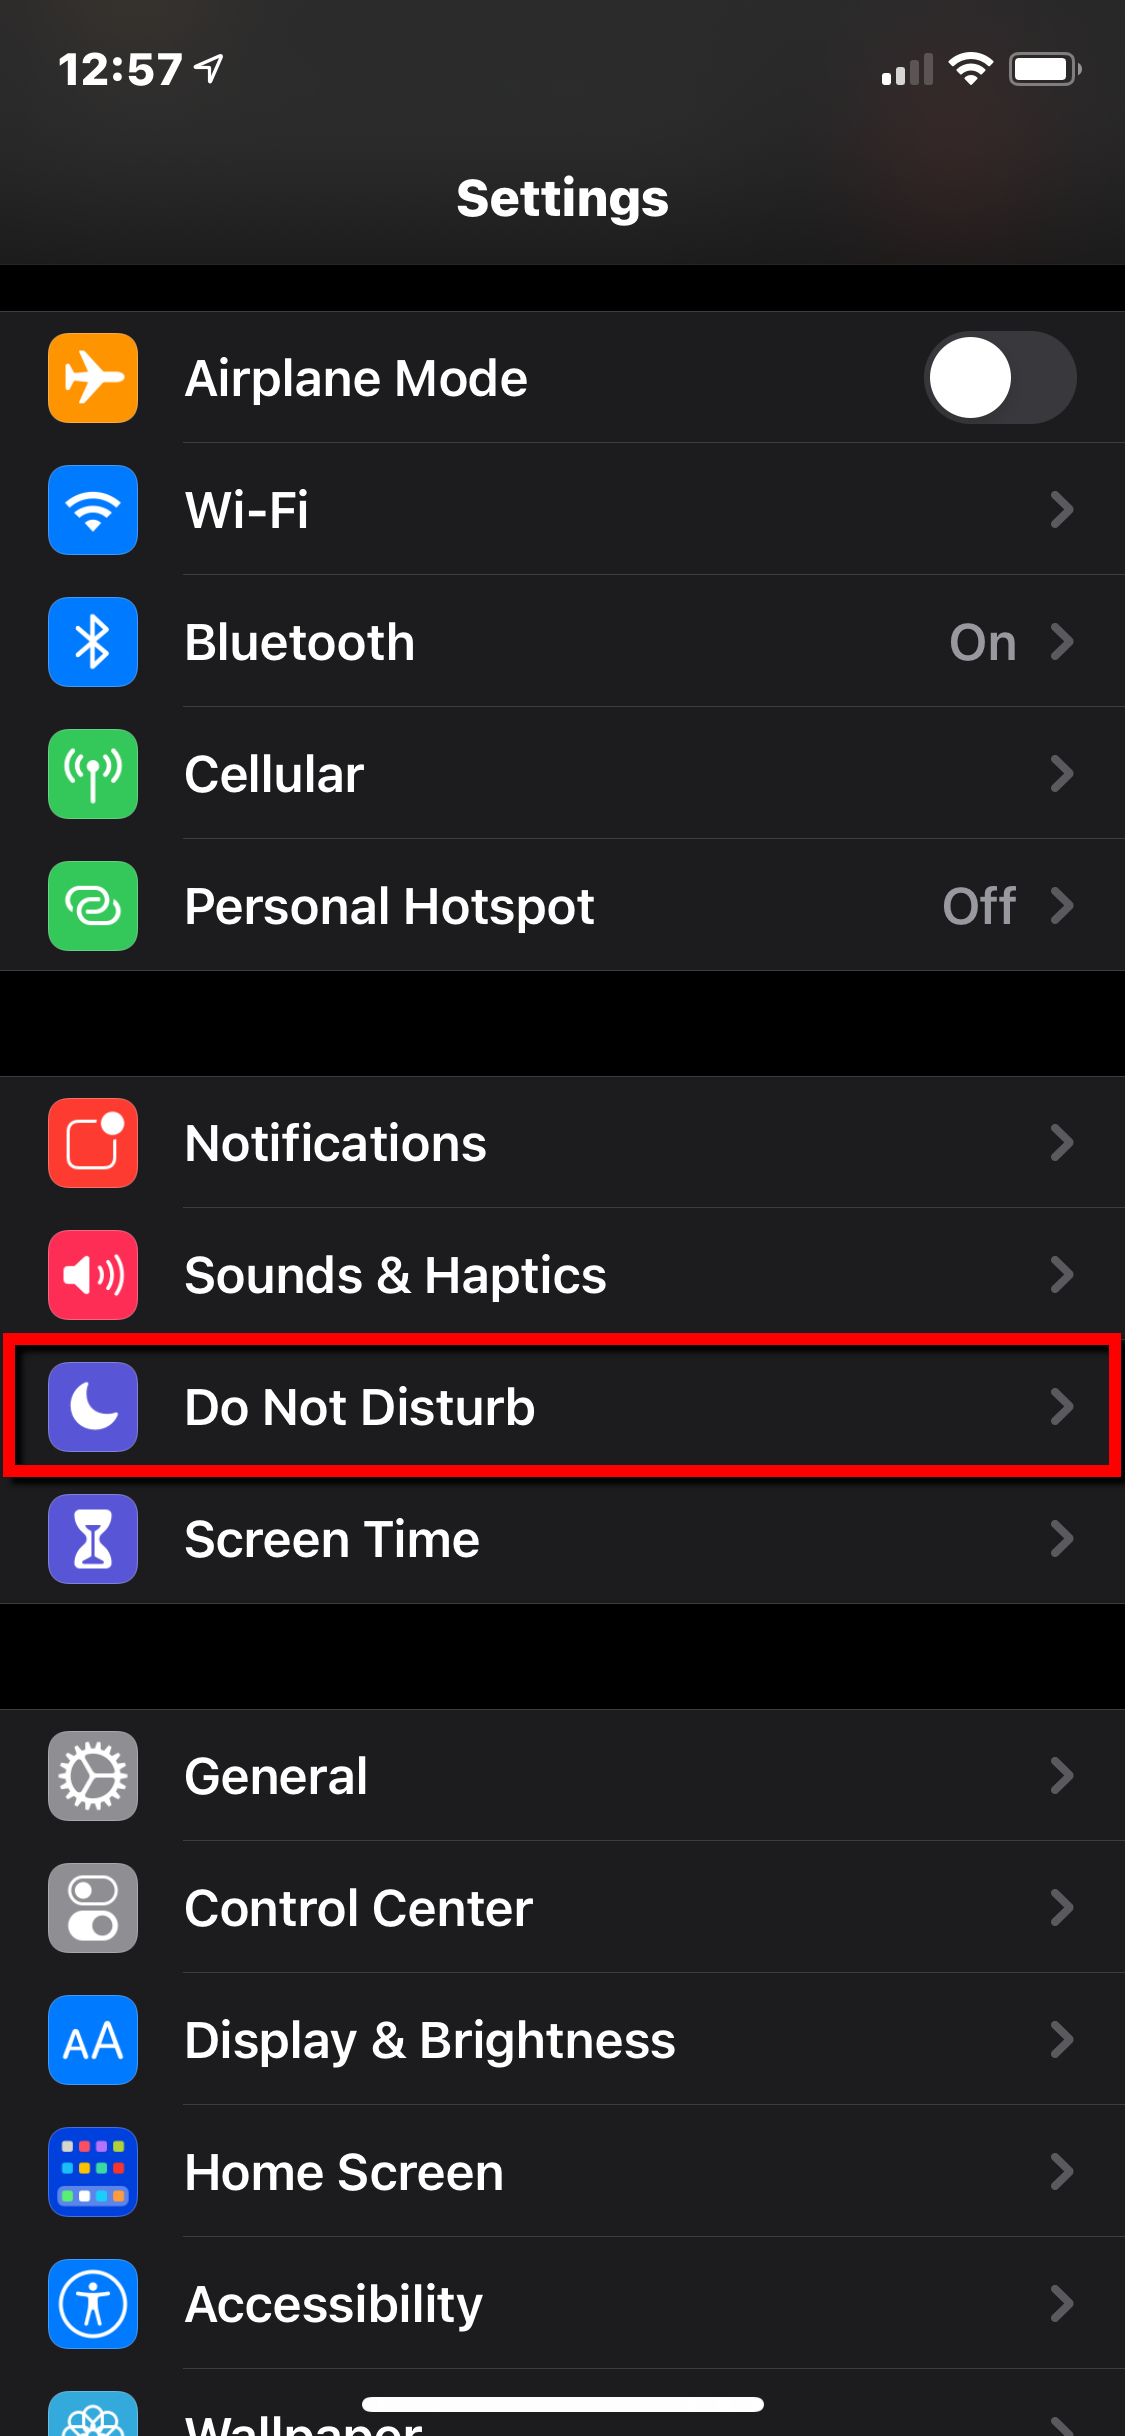
Step 1: Open the Settings app, and tap Do Not Disturb.
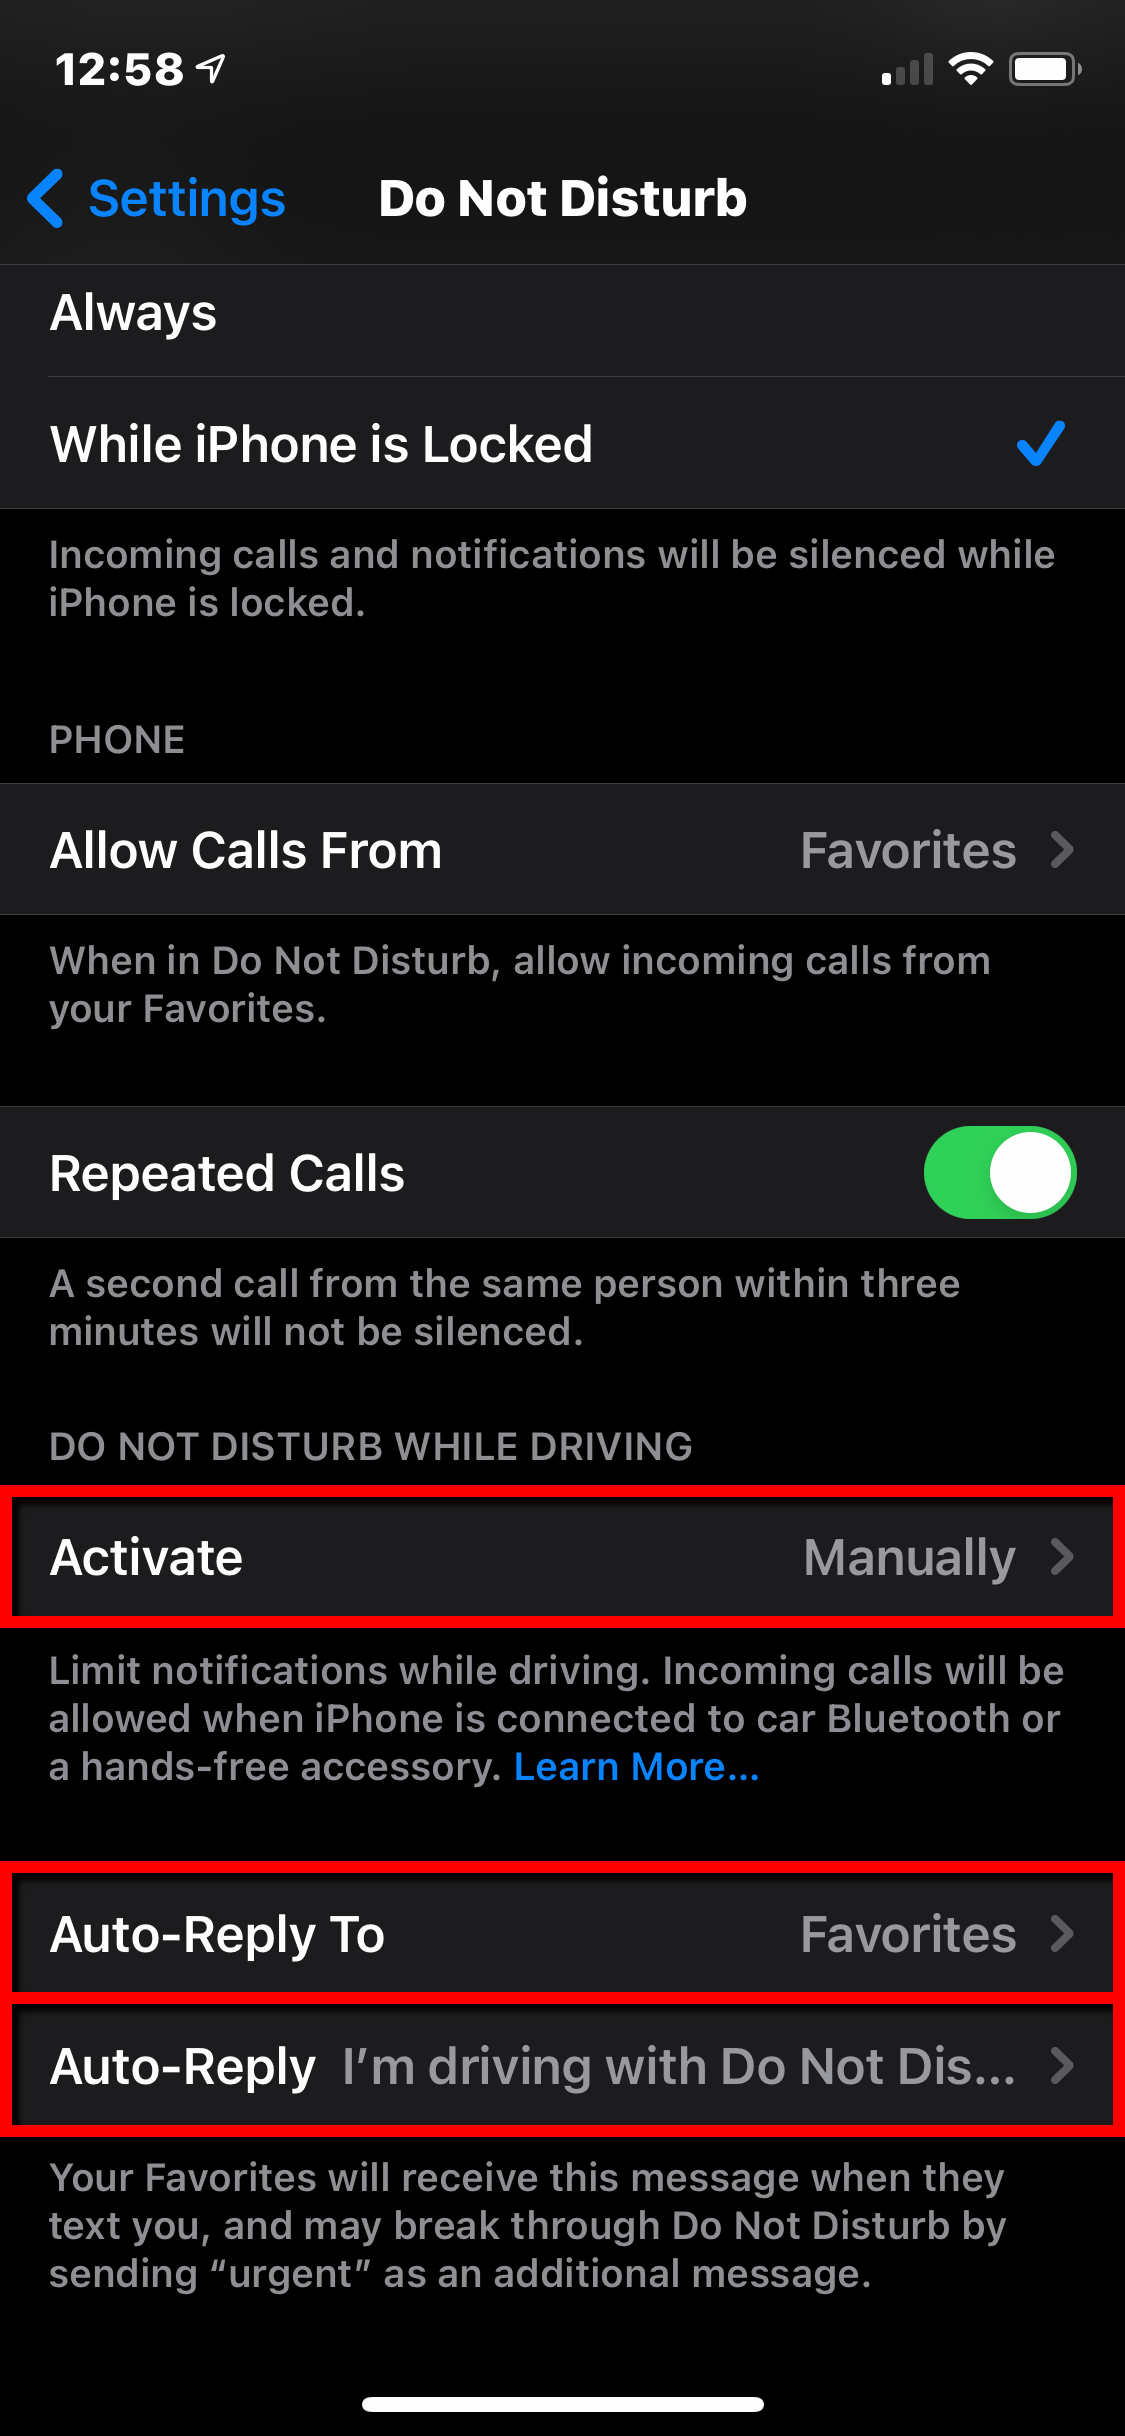
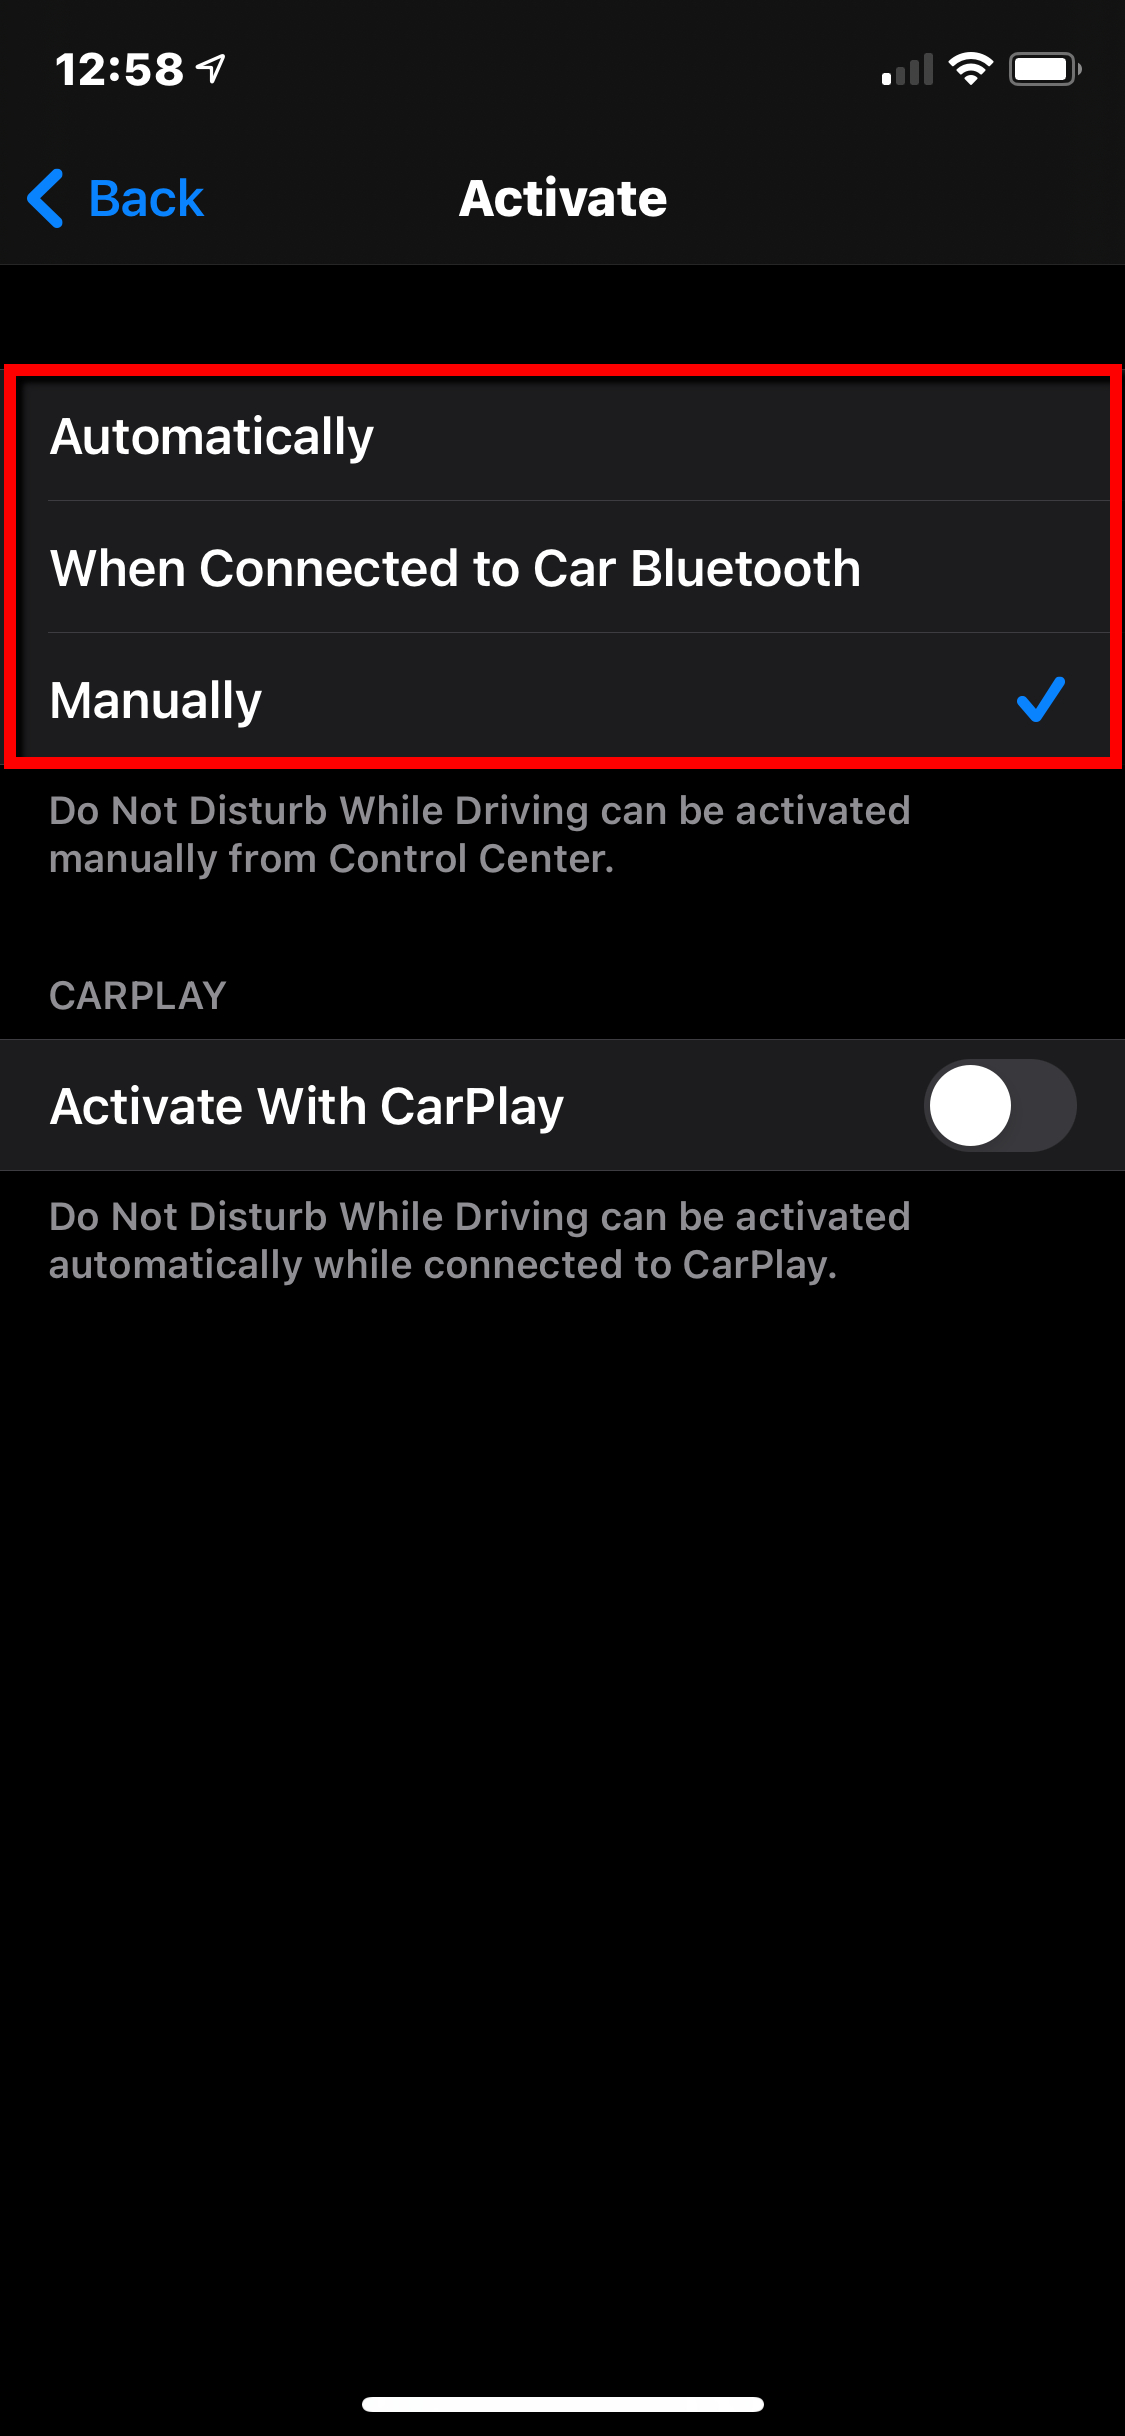
Step 2: Tap Activate and choose a mode:
- Automatically: The iPhone uses motion detection and network connections to sense whether you are driving and turns on the feature.
- When Connected to Car Bluetooth: This feature starts when your phone connects to your vehicle’s hands-free system.
- Manually: Use the Control Center to enable Do Not Disturb While Driving before you start your trip.
Step 3: Tap the toggle next to Activate With CarPlay if your vehicle supports CarPlay.
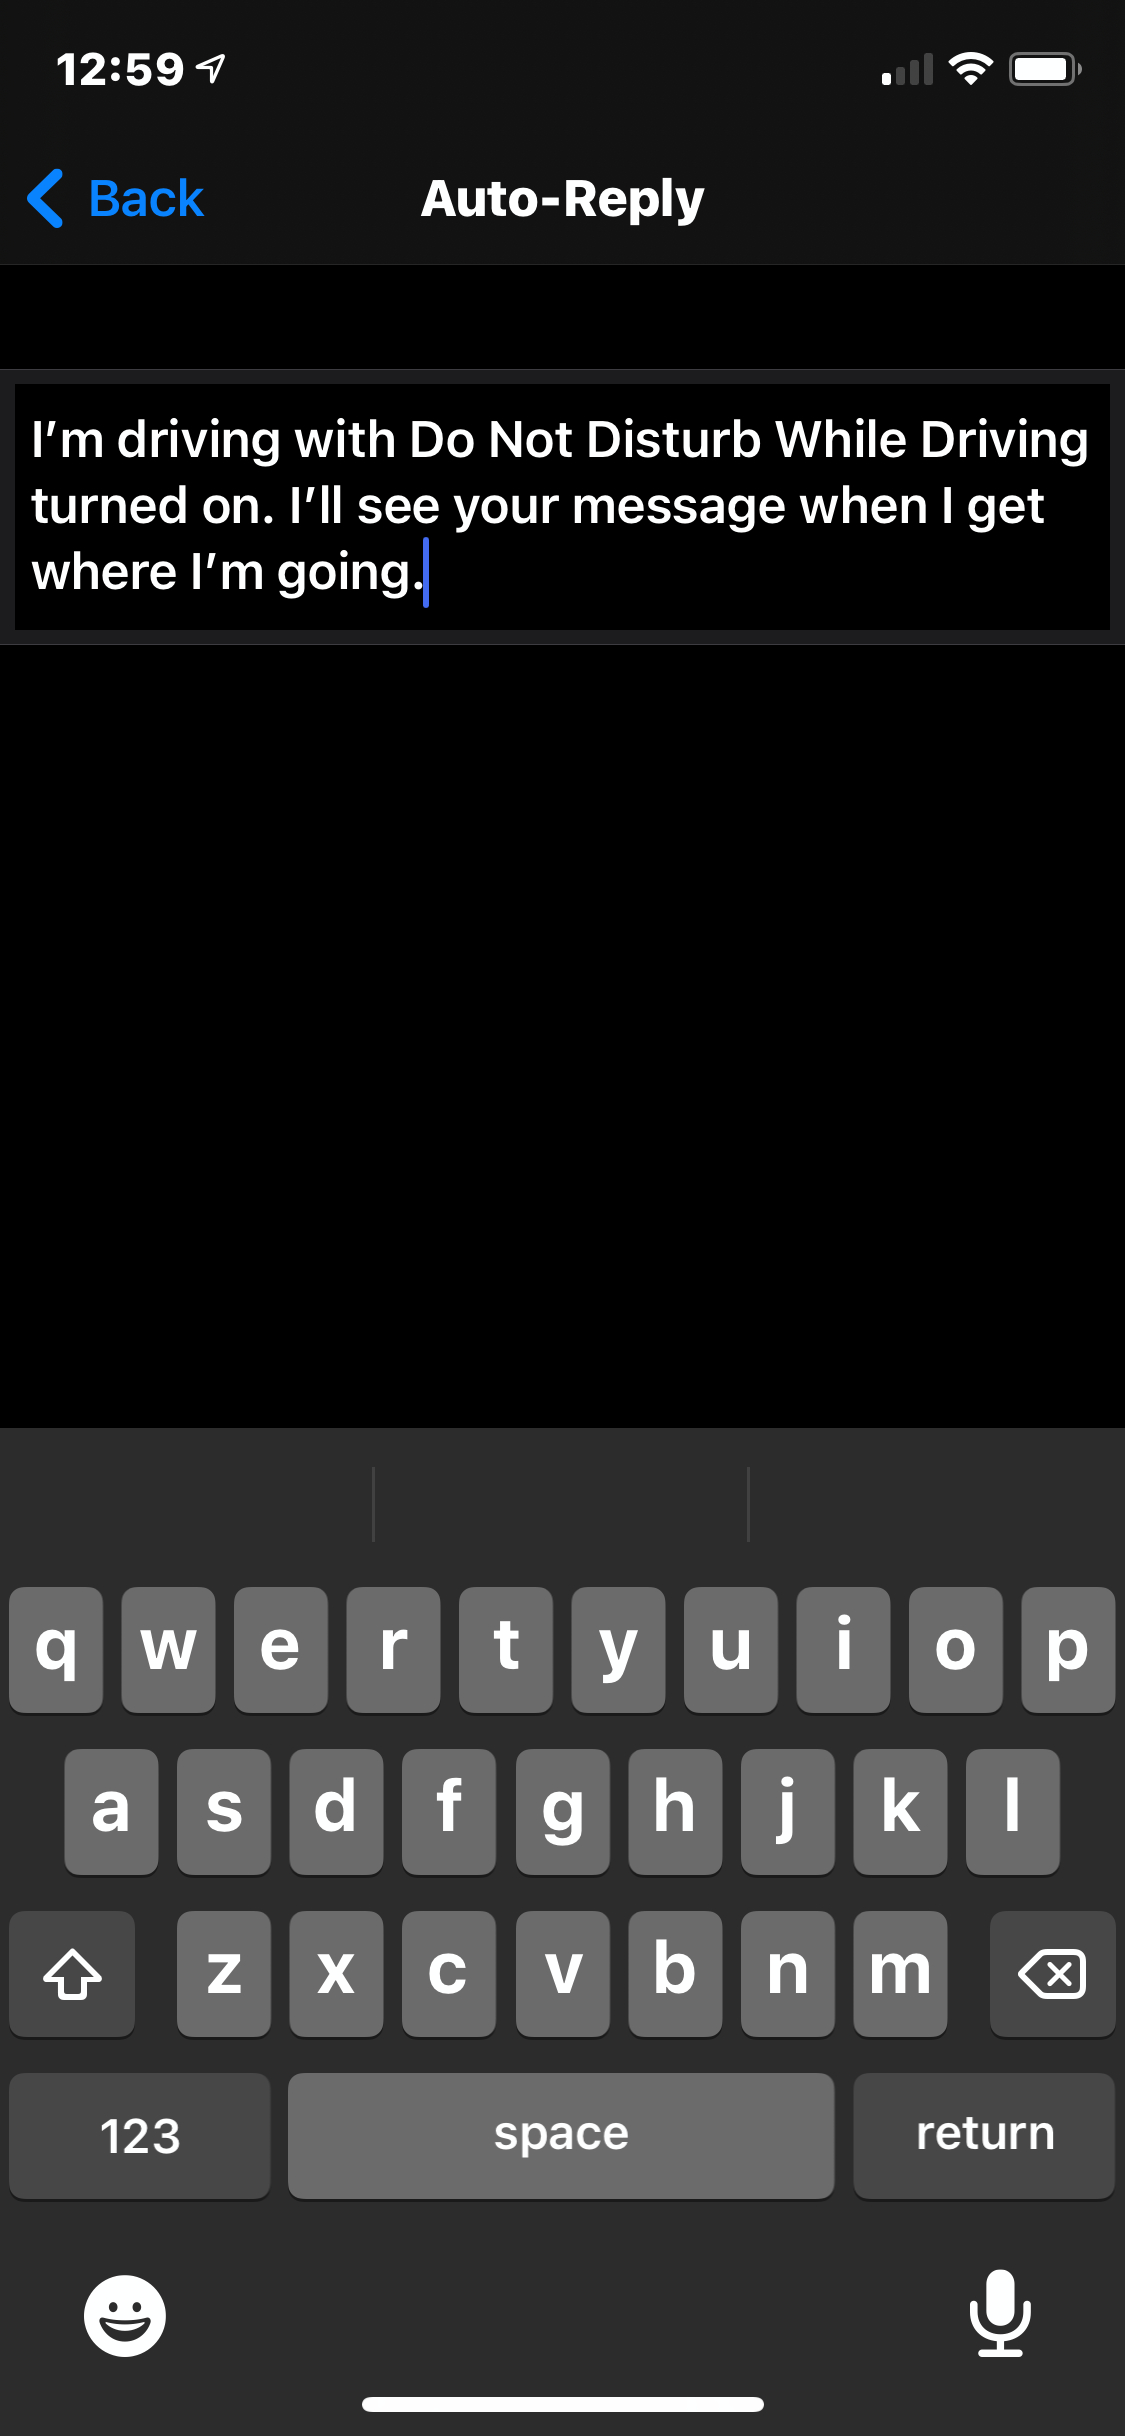
Step 4: Tap Back located in the top-left corner and then tap Auto-Reply To.
Step 5: Select one of four options: No One, Recents, Favorites, or All Contacts.
Step 6: Tap Back located in the top-left corner and tap Auto-Reply — this is optional if you want a custom response.
Step 7: Type a custom message.
Do Not Disturb While Driving isn’t available in all countries or regions.
Editors' Recommendations
- The best iPads in 2024: the 5 best ones you should buy
- AirTags range: here’s how far the tracker can reach
- Best iPhone deals: Save on iPhone 15, iPhone 15 Pro Max and more
- iPhone 16: news, rumored price, release date, and more
- iPhone SE 4: news, rumored price, release date, and more