Here’s an unfun scenario: You’ve got one of the best Android phones or tablets, but things aren’t working right. Typical virus scans and other troubleshooting fixes aren’t working. It is time to use recovery mode. This mode allows you to reboot your system and get a fresh start without any viruses or other issues that were potentially causing you trouble.
Unfortunately, there’s no one standard way to get into Recovery Mode. In other words, Samsung Galaxy phones and HTC phones have different pathways into the modes. Luckily for you, however, we have the most complete guide to entering Recovery Mode and you should be able to figure out how to get in on just about any device using the steps below.
Then, once you’re in, we have a mini guide about what options are available to you and a little bit about what they do, so you can make educated choices while you’re in Recovery Mode and rooting around.
How to enter Recovery Mode
Getting into your Android phone’s recovery mode is a bit different for each model. Look for the brand and style of device you’re using below for the appropriate guidance.
On a Google Pixel or Nexus device
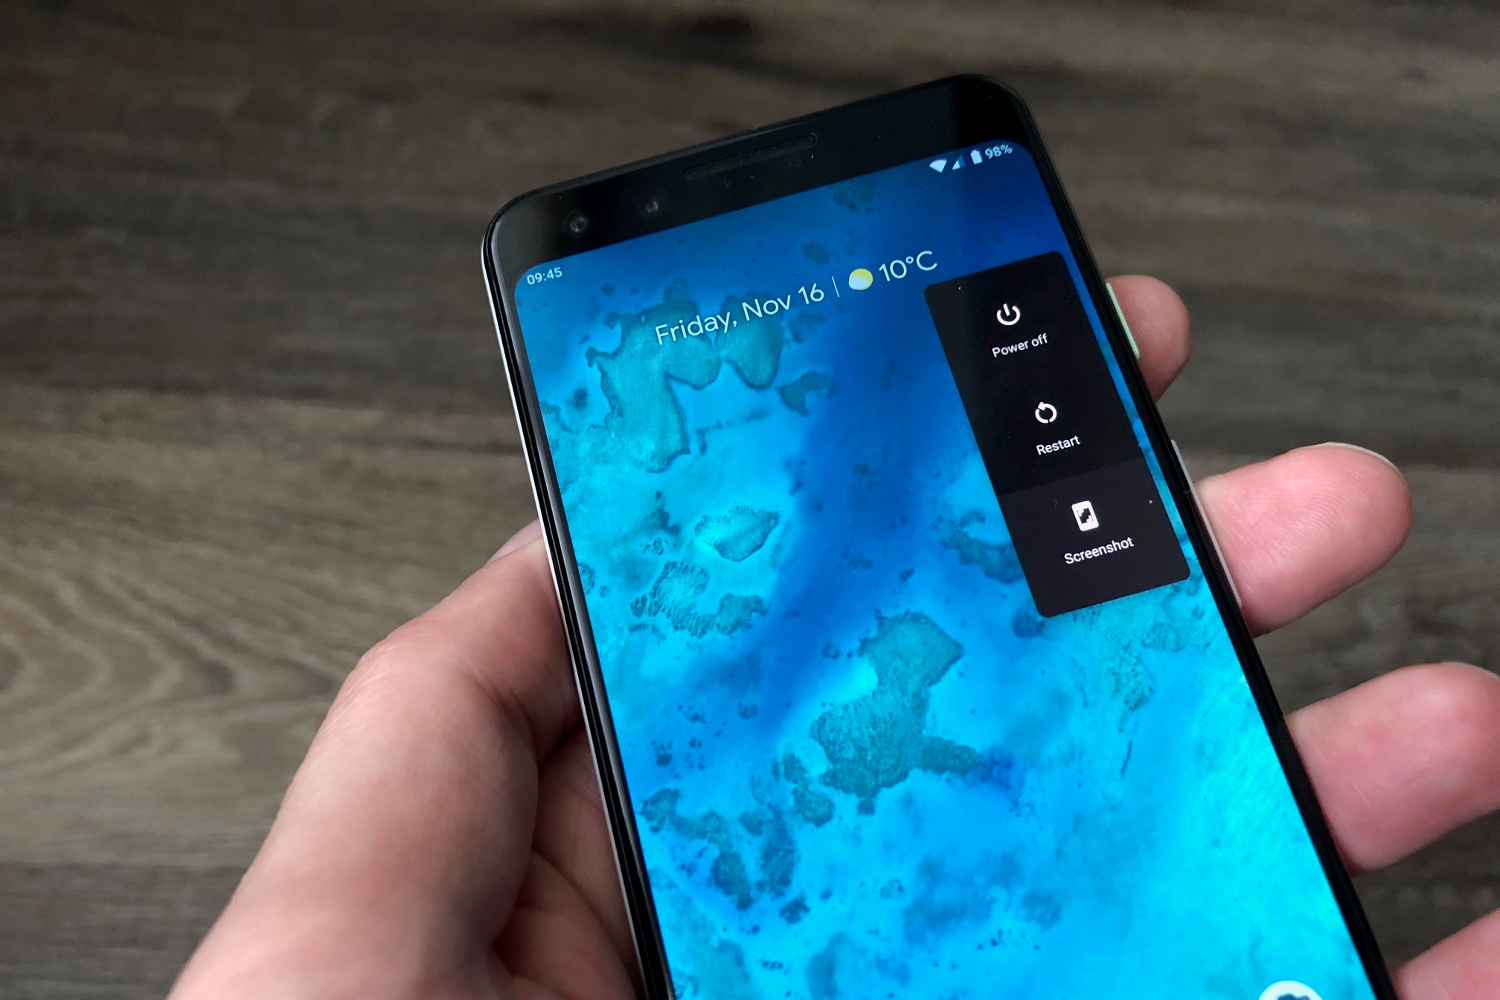
- Hold down the Power key and select Power off. If the touchscreen is unresponsive, then you can simply keep holding down the Power key for several seconds until the device turns off.
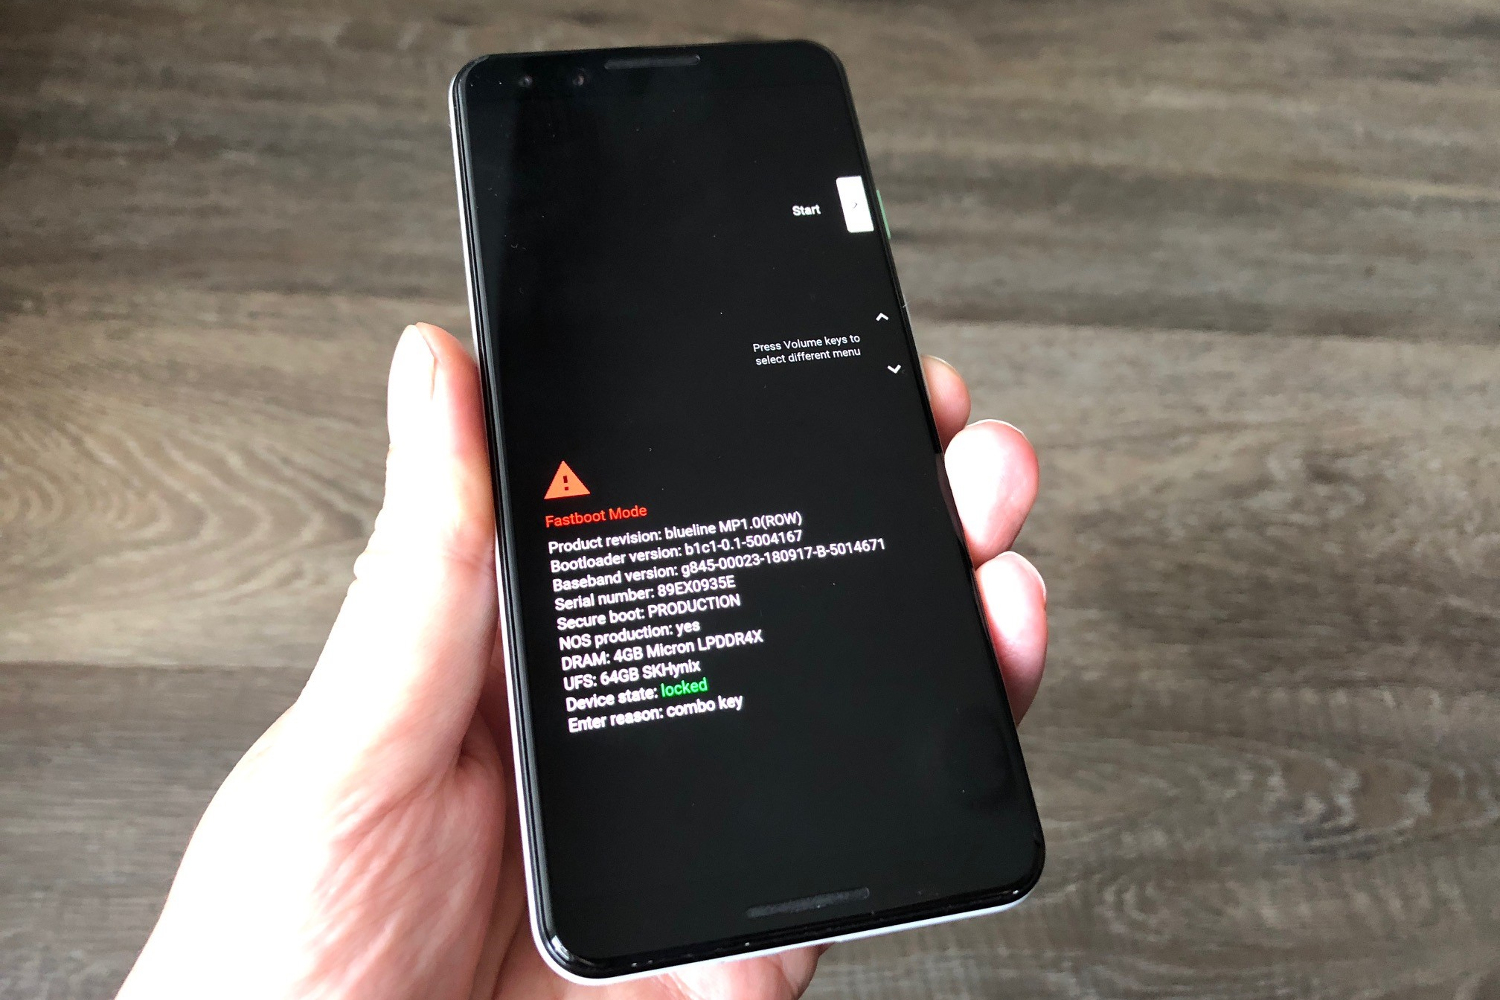
- Press and hold the Power key and the Volume down key. You should see a bunch of information about your device, and Start at the top of the screen.
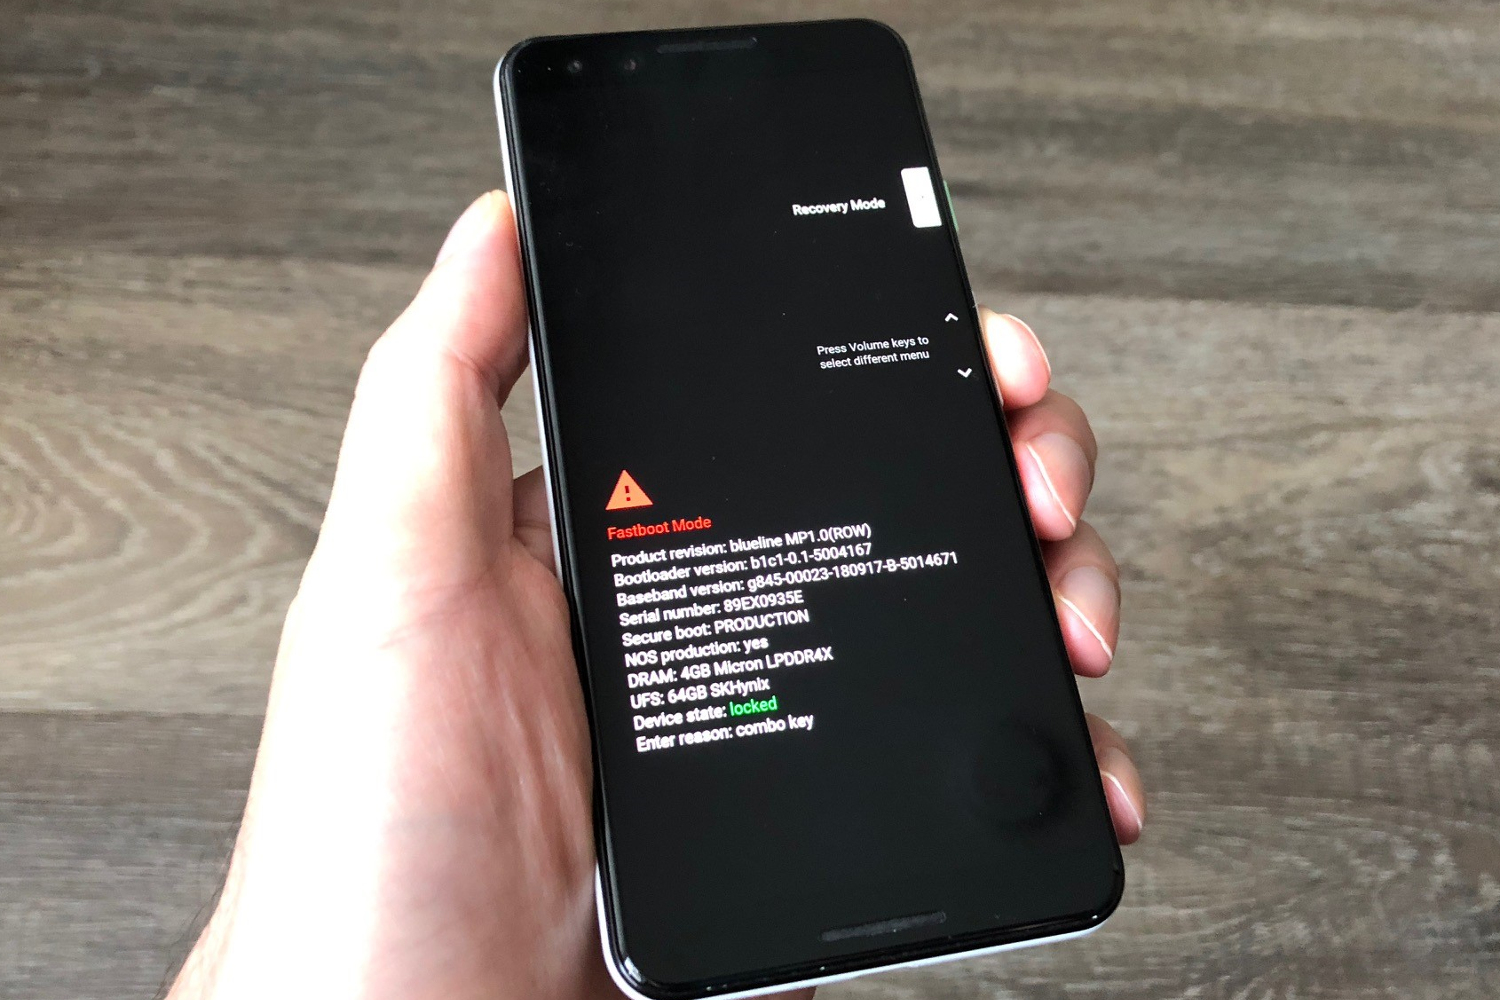
- To navigate through the menu options, you use the Volume up and Volume down keys. The Power key is used to make a selection. Press Volume down two or three times and you should see Recovery mode at the top right. Press the Power key to select it.
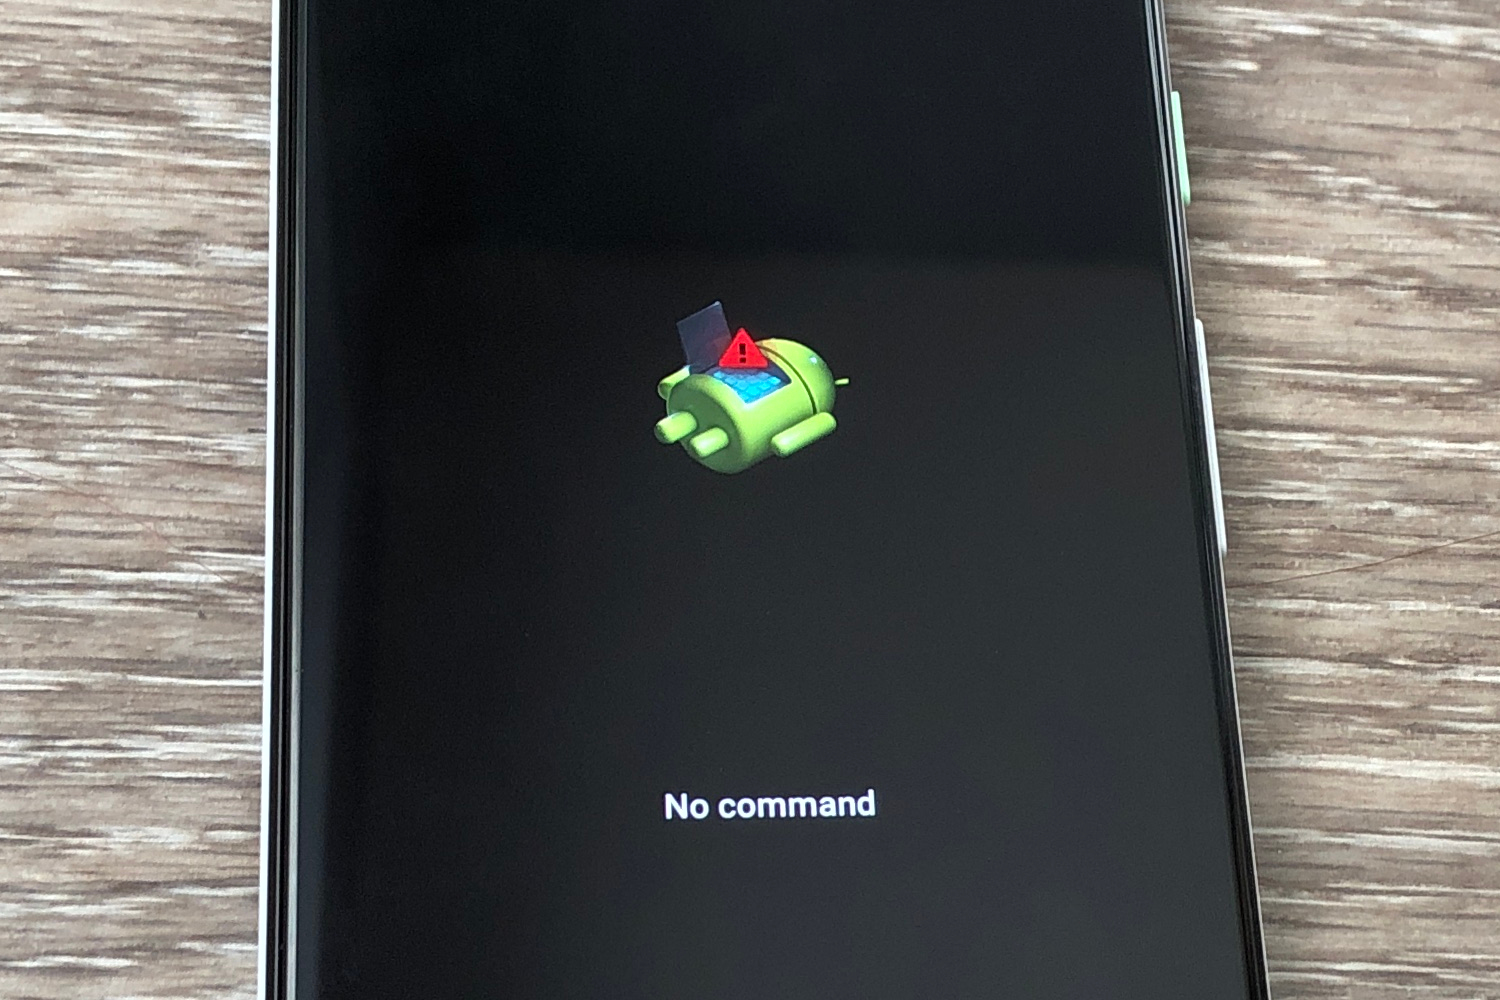
- The white Google logo will pop up, followed by the Android mascot on his back again with the words No command underneath.
- Press and hold the Power key and then press the Volume up key once while still holding down the Power key.
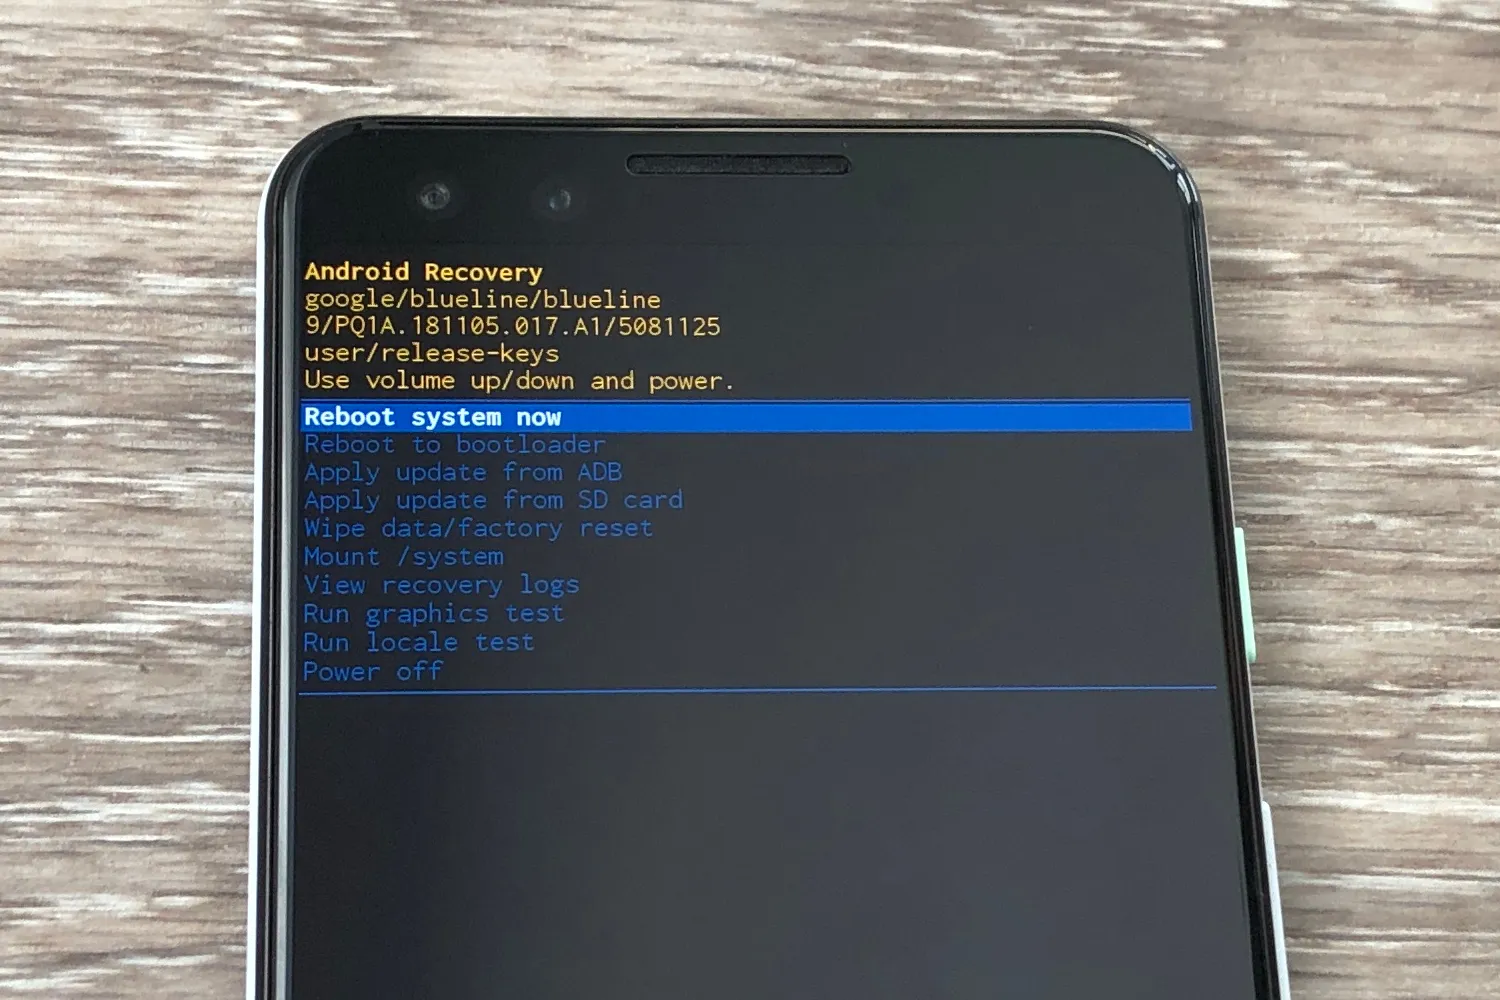
- You should see the Android system recovery options pop up at the top of the screen. Use the Volume keys to highlight the options and the Power key to select the one you want.
On Samsung Galaxy devices
- Hold down the Power key and select the Power Off option. If the screen is frozen or unresponsive, you can hold down the Power key for several seconds until the device switches off.
- If you have a Galaxy S20 or Note 20, press and hold the Power and Volume Up buttons. Release them when you see the Samsung logo. You can select the option you want from the menu using the Volume keys to highlight and the Power key to select.
- With the Galaxy S10 and Note 10 or earlier, press and hold the Power key, the Volume Up key, and the Home or Bixby button together. Release when you see the Samsung logo.
On Motorola devices
- Hold down the Power button and turn your phone off.
- Press and hold the Volume Down and Power buttons simultaneously until the device turns on.
- You can use Volume Down to highlight Recovery Mode and the Power button to select it. Depending on your model, you may then have to enter your password and choose a language to enter recovery mode.
On OnePlus devices
- Hold down the Power button and select Power Off to turn your OnePlus off.
- Press and hold the Power and Volume Down buttons together.
- You can use the Volume buttons to highlight an option and the Power key to select it.
On HTC devices
- Go to Settings > Battery and uncheck Fastboot.
- Turn the device off by holding the Power key.
- Press and hold the Volume Down key and the Power key.
- On the U11, you’ll need to highlight Reboot to Bootloader, and then press Power to select it.
- You should see a bootloader screen where you can use Volume Down to highlight Recovery, and then the Power key to select it.
On LG devices
- Press and hold the Power key, and turn the phone off.
- Press and hold the Power key and the Volume Down key together.
- When you see the LG logo, let go of both keys. Scroll with either the Volume Down or Volume Up keys to reach Recovery Mode, and then select it with the Power key.
- The menu will appear, and you can use the Volume keys to highlight an option and the Power key to select it.
Recovery mode options
Depending on what type or model of device you have, you will see different options for recovery mode. However, all devices will have the following standard options:
- Reboot system now: This will restart the device normally.
- Apply update from ADB: The Android Debug Bridge allows you to plug your device into your PC and issue commands from there. It’s designed for developers and requires you to install the Android SDK (software development kit). If you’re interested, you can find out more at the Android developer website.
- Wipe data/factory reset: This will wipe all of your data — photos, videos, music, apps, everything — and return your phone to its original factory condition. This will also wipe the cache partition.
- Wipe cache partition: Data related to app installations is kept in your cache partition, so you can delete these files without changing your overall settings or personal customizations. Wiping the cache partition can solve a host of issues, and you won’t lose any data or settings, so there’s no real risk involved. We recommend this as a fix for a lot of common Android problems. NOTE: Since it released Android 7.1, Google has removed the wipe cache partition option for devices that get seamless updates. You should be able to do the same thing by going to Settings > Storage and tapping on Cached data.
A word of warning about Factory Reset Protection
If your device runs Android 5.0 Lollipop or later, Factory Reset Protection (FRP) will automatically be switched on. All that means is that after resetting your device, you’ll need to log back into your Google account.
This might frustrate you, but it’s in place as a security measure. By requiring your username and password before letting you access the device, FRP acts as a deterrent for theft. If anyone steals your phone, they can perform a factory reset, but they still won’t be able to gain access to the data stored on it. However, it’s worth keeping in mind if you plan on wiping your phone before selling it or passing it on to someone else. To avoid FRP, make sure that you go to Settings > Accounts and remove your Google account before performing a factory reset.
Editors' Recommendations
- iPhone not holding charge? How to replace an iPhone battery
- The 10 best apps for a second phone number in 2024
- If you really want to, here’s how to cheat in Words With Friends
- How to save text messages on iPhone and Android
- How to turn your old phone into a security camera

