

There’s no avoiding it. No matter how well you take care of your DSLR or mirrorless camera, at some point or another, there will come a time when dust and dirt accumulate on your sensor. While a single piece here or there won’t necessarily harm your camera or even affect your images, it’s still good practice to clean off your sensor every once in a while.
It might seem risky and downright challenging, but in all reality, so long as you go about the process responsibly, cleaning your sensor should be relatively easy, and quite safe. Your camera’s sensor is covered by a clear filter, so while the process is called “sensor cleaning,” you won’t actually be making contact with the sensor at all. It’s still important to be careful, as you don’t want to risk damage to the filter, and going about it the wrong way could make it even dirtier. But with the right tools, a clean space to work, and a little bit of patience, sensor cleaning is a job anyone can do at home.
Sensor dust and how it affects your photos
What is sensor dust? Every time you swap lenses, you’re presenting a small window of opportunity for stray particles to find their way onto your camera’s sensor. No matter how quickly you manage to get the job done, at some point, the dust will win. When it does win, it’s up to you to figure out how much it’s affecting your images and when you should clean it.

Sensor dust most often shows up in photos as small black spots or squiggles in your images. In busy images, where there’s a lot of different colors and textures, it might not be noticeable. But when there’s a large area of a single color, such as a blue sky, the spots will become clearly visible. Take a look at just how many specks of dust are in a small section of the image seen above.
A good way to see how much dust is on your sensor is to take a properly exposed photo of the sky or even a white wall. Any specks of dust should show up, especially when you’re zoomed in after offloading the image.
Once you’ve diagnosed the dust on your sensor, the next step is to get it off. Many cameras have a built-in sensor cleaning option, so give that a shot first (most cameras with this option can also be programmed to do it automatically at startup or shutdown). If that doesn’t work, or your camera lacks that ability, you’re left with two options: dry cleaning and wet cleaning.
Dry sensor cleaning
Before you try any sort of wet cleaning, give dry cleaning a shot. The most basic means of dry cleaning your sensor off is to use what’s referred to as a blower. A popular one, seen in the image below, is Giottos Rocket, which will only set you back $10 or so.
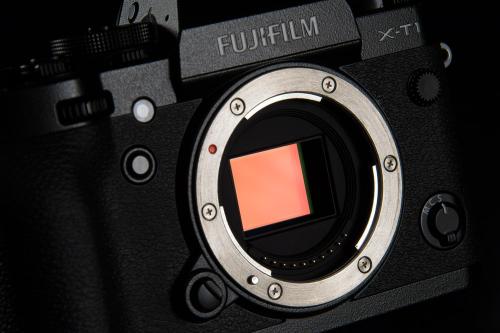
Using it is fairly straightforward. On a mirrorless camera, simply remove the lens to reveal the sensor. On a DSLR, you’ll still have the mirror box and shutter in the way, so you’ll need to find the option in you camera’s menu to lock the mirror up for sensor cleaning (this may require a fully-charged battery). Next, rotate the camera so the sensor is facing the ground, point the blower up into the camera, and give it a few squeezes. Keep in mind, the tip of the blower doesn’t need to be inside the camera itself, so don’t risk getting it too close.
Take a few test shots and see if that did the trick. If not, repeat it maybe one more time. If there are still specs, then you might have to move onto using a sensor cleaning brush.
These specialized brushes hold an electrostatic charge and gently attract dust to the bristles when very lightly swept across the sensor. Options range from Movo Photo’s $20 brush to VisibleDust’s Arctic Butterfly, which has built-in LEDs to help illuminate the surface of your sensor.
Like you did with the blower, make sure your camera’s sensor is exposed. Then, carefully charge the brush, and very lightly sweep it across the length of the sensor. Doing this should pick up any stubborn bits of dust the blower may have missed.
If, after all of that, you still notice spots on your sensor, you might be left with the final option — wet cleaning.
Wet sensor cleaning
Wet cleaning is the most challenging, but also the most effective in removing determined dirt from your sensor.
There are plenty of wet cleaning kits to choose from, and while the individual kits may vary slightly, most will include two basic components: cleaning swabs and solution.
One of the more popular options is VisibleDust’s sensor cleaning kit. This $30 kit includes five swabs and two sets of solution, which should last you five cleanings (you need to use a new swab every time to prevent dust collection during previous cleanings from damaging the sensor).
Whatever cleaning kit you get, be sure to follow the instructions. Due to variations in tools, instructions aren’t consistent across the board. That said, the best practice is to wet the swab, not your sensor, before wiping your sensor off. If you put the cleaning solution directly on your sensor, there’s a chance it could leak through the filters and end up damaging your camera.
When all is said and done, your sensor should be looking good as new. To perform the final check, take a photo of the sky or a white wall, and zoom around the image to see if you notice any specks. Repeat the wet cleaning process until you’re happy with the results.
Editors' Recommendations
- Watch how this 2001 news item reported the first (super basic) camera phone
- How to delete and recover photos from your iPhone
- Wristcam brings two cameras to your Apple Watch — again — for $299
- How Fujifilm instant cameras are helping patients and nurses to connect
- How to use exposure compensation for perfect pictures with your camera or phone
