
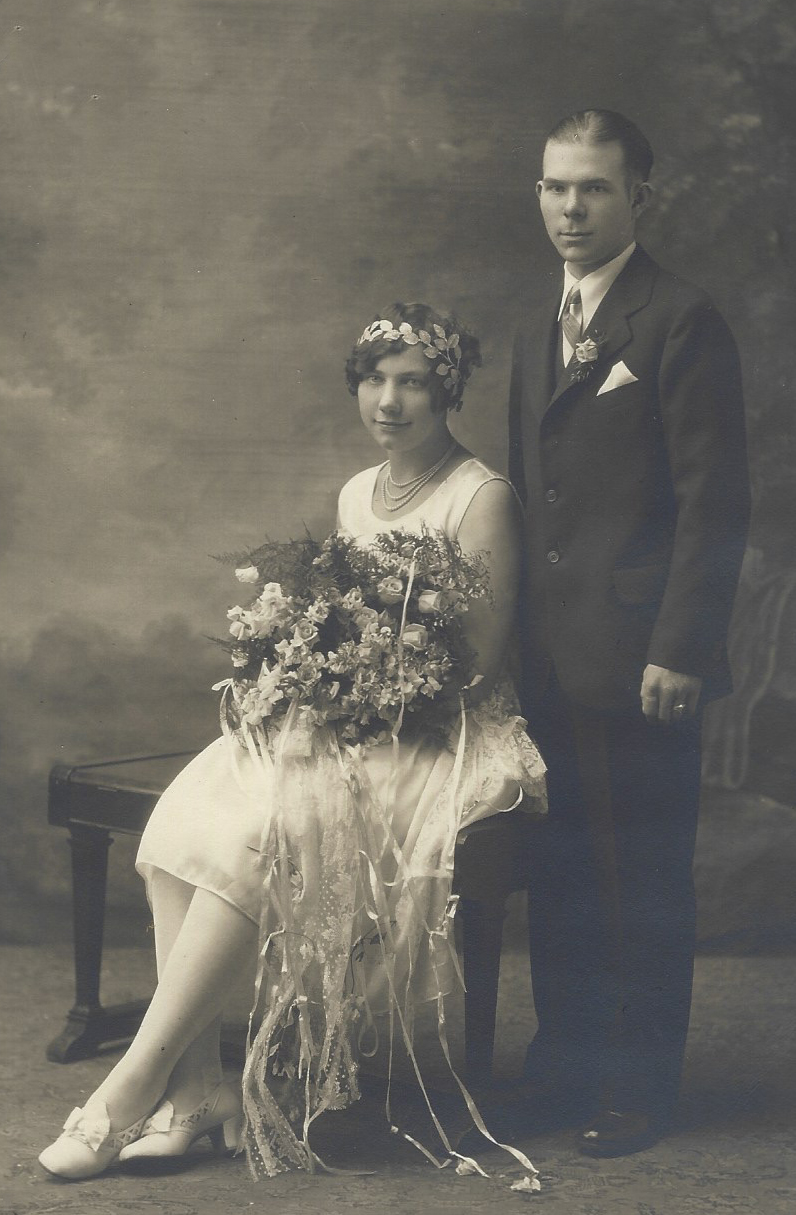
- 1. Before
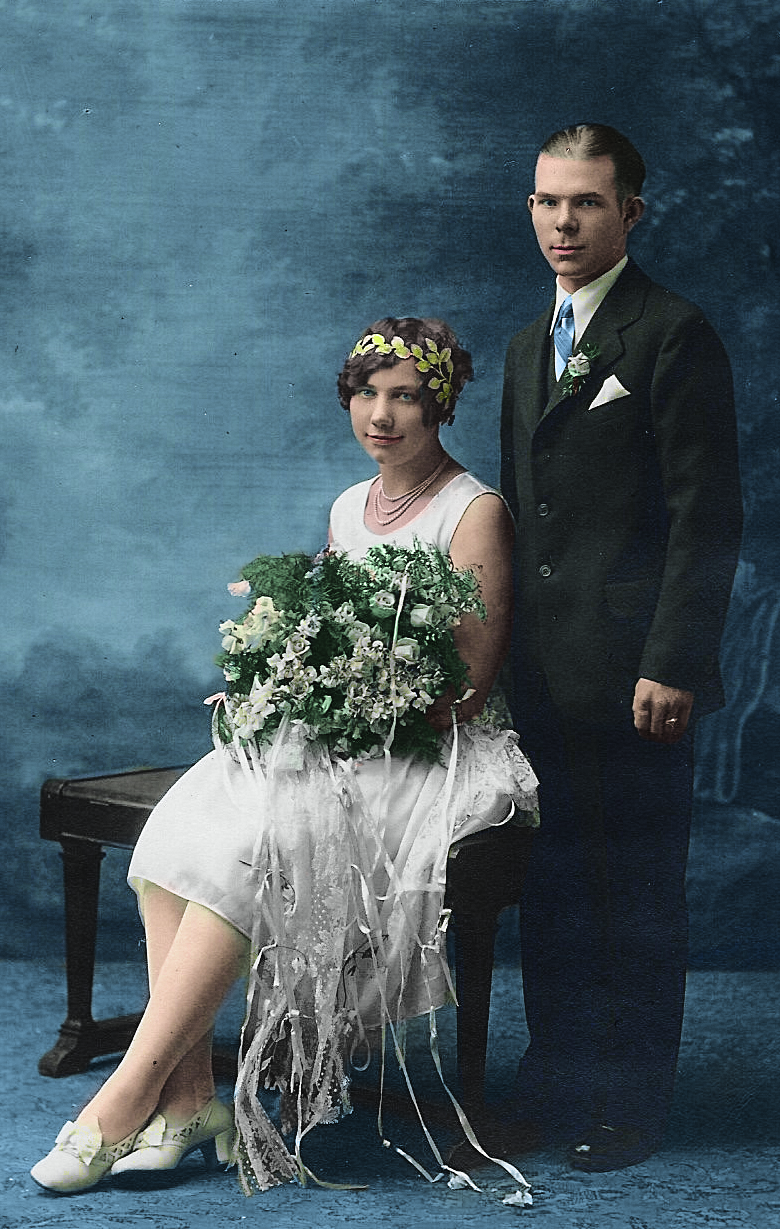
- 2. After
History is recorded in black and white, but digital photo editing techniques make it easier to imagine the past in color. And with a bit of artificial intelligence or some Photoshop finesse, you don’t have to be Peter Jackson to recolor your own history.
Recoloring an old photo in Photoshop offers the most control over what objects become what color, but apps like Colorize and Photoshop Elements offer coloring options when you don’t have a few hours or the Photoshop skills required.
The quick and dirty way to colorize a black and white photo
Thanks to artificial intelligence, manually colorizing a photo isn’t the only option. As the technology improves, more apps, both mobile and desktop, are integrating the option to recolor an old photo. Colorize (iOS), Colorize Images (Android), and Photoshop Elements are among the top-rated apps for doing this.
Colorize is an iOS app that uses A.I. to recolor photos. After importing photos, one tap converts the image to color. The app is free to download and try, but requires either a subscription or per-image fee to download the new version of the photo.
Colorize Images is a similar app by another developer for Android users. The download is free, but the app requires a per-image fee or subscription to save the recolored photos.
For recoloring photos on a desktop, Photoshop Elements added a new recolor tool powered by A.I. that works in a few clicks. Besides just recoloring the photo, Elements offers a handful of different options, so you can choose the result that looks the best.
Google Photos has also teased a colorize tool, but it hasn’t launched outside of beta yet.
How to colorize a black and white photo in Adobe Photoshop
Need more control over the process? Recoloring photos in Photoshop offers more control. Adding color to this wedding photo of my great grandparents took a few hours, but was admittedly pretty fun to do.
1. Make sure the image is in CMYK.
To start, make sure your photo is in CMYK and not grayscale mode. Head to Image > Mode and check CMYK color.
2. Select a single colored object.
To recolor an old photo, you need to make selections, one for each color that you wish to add.
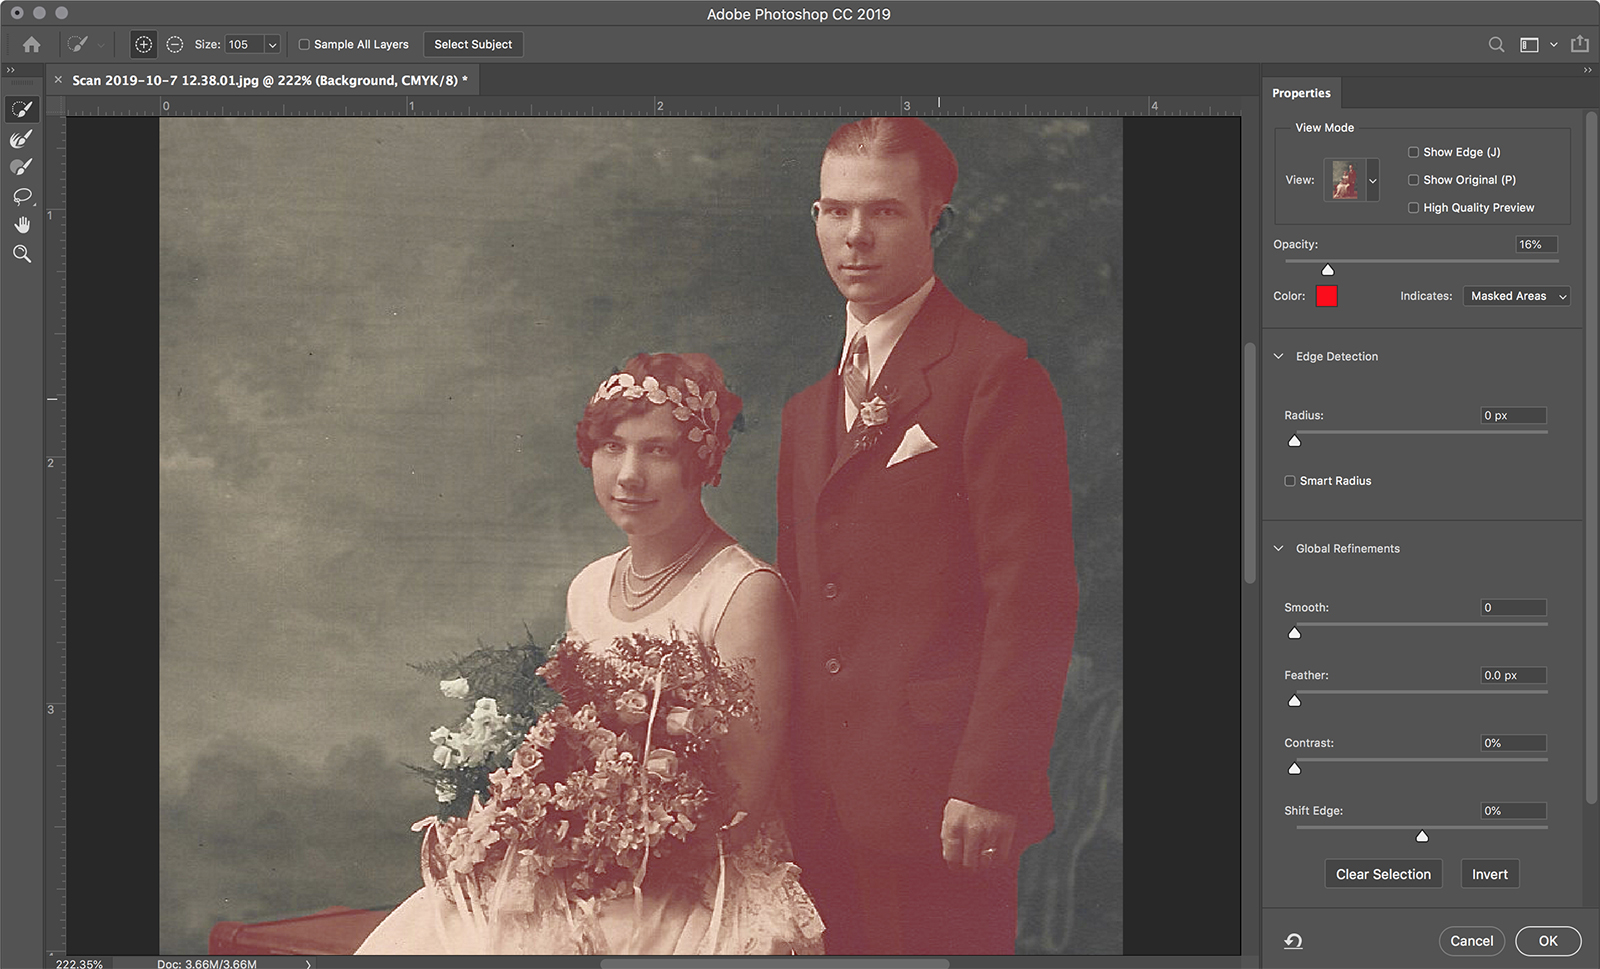
Photoshop has a dozen different ways to make a selection — there’s no wrong way, but some options will be easier than others. I found the fastest way to make selections to recolor a photo is the Select and Mask tool, accessible by going to Select > Select and Mask.
Inside the Select and Mask window, make your selection using the brush tool, the first tool in the toolbox on the left. Then, refine that selection using the Refine brush, or the second brush in that toolbox. Use the plus and minus icons at the top to determine whether you want the area to be added or removed from the selection, and adjust the brush tool size as needed. On the right, use the smooth and feature sliders to prevent rough edges on the selection.
Once you are happy with the selection, click OK.
3. Create a solid color adjustment layer.

With the selection still active, create a solid color adjustment layer for the selection. Go to Layer > New Fill Layer > Solid Color, or in the layers panel, click on the adjustment layer icon and choose Solid Color. Select the color that you’d like for that object and click OK. Your selection should now look like a horribly recolored object that’s just one solid color.
Next, in the layers panel choose the color blend mode — click on the dropdown menu that says “normal” by default, and choose “color” from the list of options. With the color mode selected, you should see the gradations of the original photo and the selection should no longer look like you just filled it in with the paint bucket tool.
To get the color just right, use the opacity option in the layers panel. You can also double click on the solid color box that’s on the adjustment layer inside the layers panel to choose a new color for the layer.
Tip: If you are having trouble getting the color just right, open an inspiration photo with similar colors and use the eyedropper tool to grab that color. I couldn’t quite get the skin tones right in the sample image until I tried grabbing the skin color from another photo.
4. Refine the selection.
Once the object is recolored, it’s often easier to see any errors that you made when making the original selection. Since you are using adjustment layers and not editing the background layer itself, those errors are easy to adjust. With the adjustment layer selected, go back to the Select and Mask option to make more refinements. Alternately, you can also click on the layer mask in the layers panel (the black and white version of the layer) and use a white paint brush to add to the selection and a black paint brush to subtract. For semi-transparent objects, reduce the opacity of the brush.
5. Repeat steps 2-4 for each color in the photo.
The process needs to be repeated for each color that you’d like to add to the photo. If two objects are the same color — such as the leaves on the bouquet and boutonnière in the sample photo — you can add them to the same selection and the same adjustment layer.
6. Adjust the blacks.
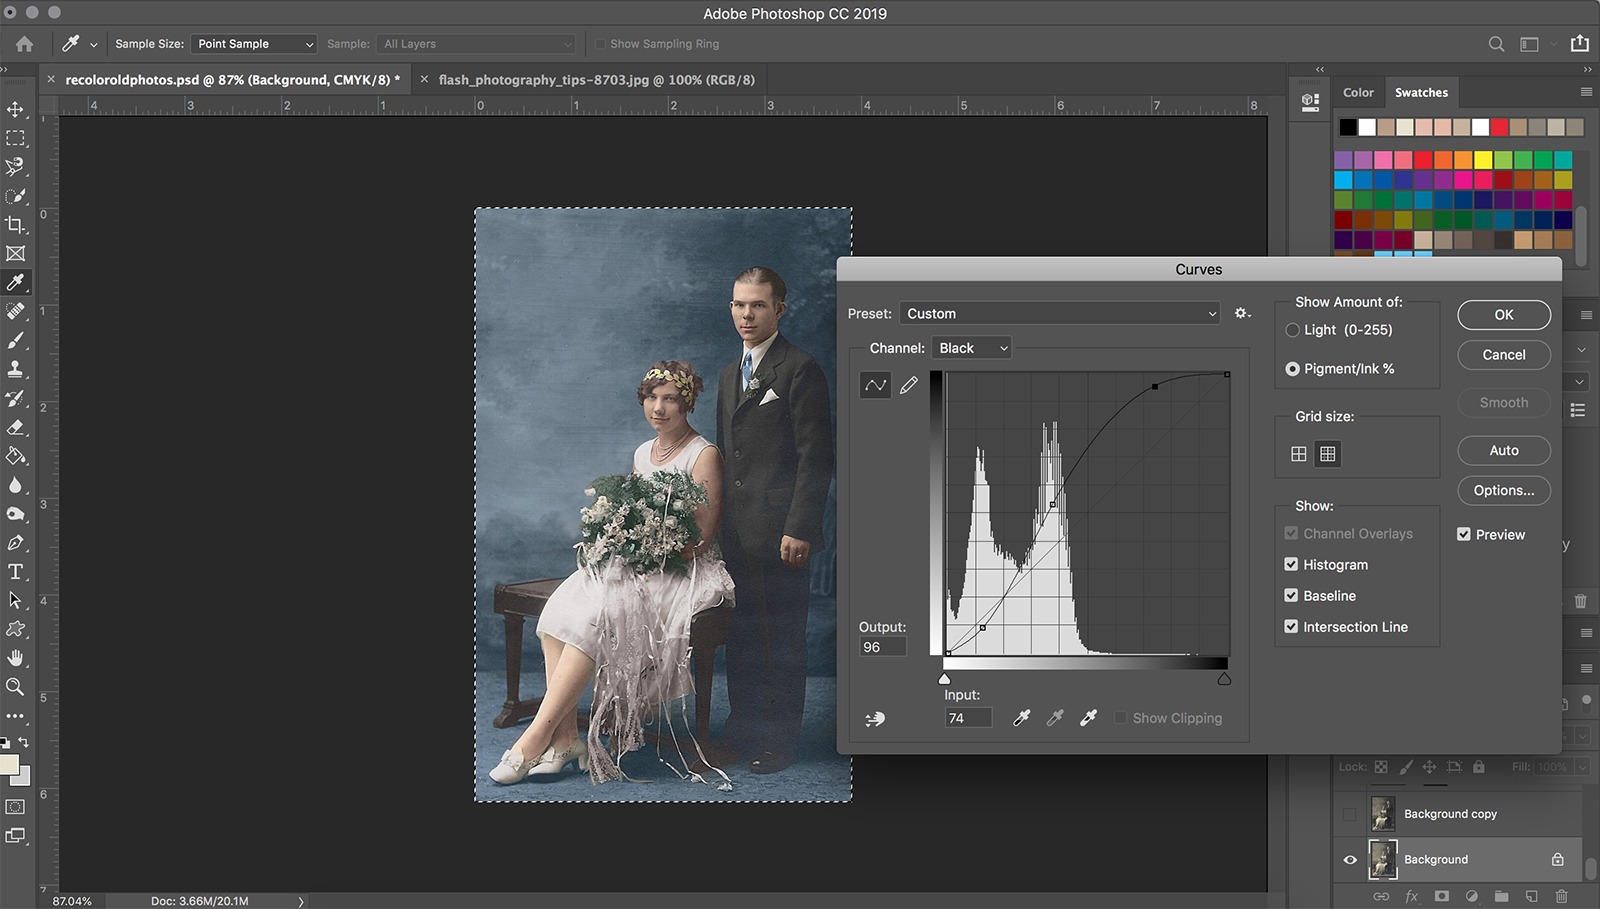
Once recolored, you may need to add some contrast to the image, especially if it’s an old photo. Black areas in the photo do not need to be selected and recolored because, by definition, black lacks color — but if it’s an old or scanned photo, the blacks may not look quite right.
Select the background layer, then go to Image > Adjustments > Curves. Choose the blacks from the channel dropdown menu to adjust only the blacks. Adjust the curve as fit for your image — in our sample image, we lightened the whites and darkened the mid-tones and blacks.
Once you are happy with your adjustments, save the image as a JPEG to share or print. You may also wish to save the image as a PSD file, in case you want to go back and make further adjustments. A PSD file will keep those adjustment layers intact.
Editors' Recommendations
- How to delete and recover photos in Android
- How to take a 3D photo from almost any smartphone
- What is Photoshop Camera? How Adobe’s new A.I. app edits photos before you take them
- Image Editing 101: How to crop and straighten an image in Photoshop
- How to print Instagram photos, from mobile printers to online photo labs


