You don’t have to spend an arm and a leg to take great pictures of the night sky. Yes, you’ll get cleaner and sharper images using the best mirrorlerss cameras or DSLRs, but you don’t need professional equipment to get good results — heck, even some phones can shoot astrophotography. Whatever camera you’re using, learning how to photograph stars is all about technique, and beyond changing a few settings in your camera, it’s not too difficult.
But since cameras are at their worst in the dark, photographing the night sky does require some patience and practice. Autofocus, while sometimes possible, is best avoided, while a tripod is a must. The best star photos also require quite a bit of postproduction work to really make them stand out, but there are some simple adjustments that will help make your photos pop. From set-up to edit, here’s how to photograph the night sky, from capturing dreamy star trails to revealing detail in the Milky Way.
Step 1: Get the gear
Star photography doesn’t require the $5,000 camera body that NASA uses, but there are a few items that are musts when it comes to the night sky, starting with a tripod. A tripod stabilizes your camera so that you don’t get a blurry image during a long-exposure shot (more on this later). Even a small table-top tripod can do the trick, although a full-size model will offer more flexibility.
While the camera you use isn’t the most important part of the equation, cameras with larger sensors will have more potential. The best full-frame cameras are known for their high signal-to-noise ratios and great low light performance which will help capture cleaner images in any dark environment, including star photography. There are even cameras designed specifically for astrophotography. Your lens also plays a role, with large-aperture lenses gathering more light for cleaner results — Nikon’s $8,000 Nikkor Z 58mm Noct lens, with it’s massive f/0.95 aperture, is built with star photography in mind.
But even if what you have is an entry-level, crop-sensor DSLR with a kit lens, you can still make it work.
Since you’re shooting in the dark, make sure your phone is charged to use it as a light, or grab an LED flashlight so you can see your camera while you’re setting up. It’s also a good idea to make sure your are familiar with the camera controls before you go out. A camera remote is also helpful, but not necessary (most modern cameras can also be controlled remotely from a smartphone app; check your camera’s manual for the specifics).

Step 2: Plan around the weather
Perhaps it goes without saying, but you can’t shoot stars with a cloudy sky. A less obvious thing to watch out for, however, is the phase of the moon. The light from the full moon can drown out the stars. For best results, plan around the new moon, or simply shoot in the opposite direction of the moon to capture the darkest part of the sky possible.
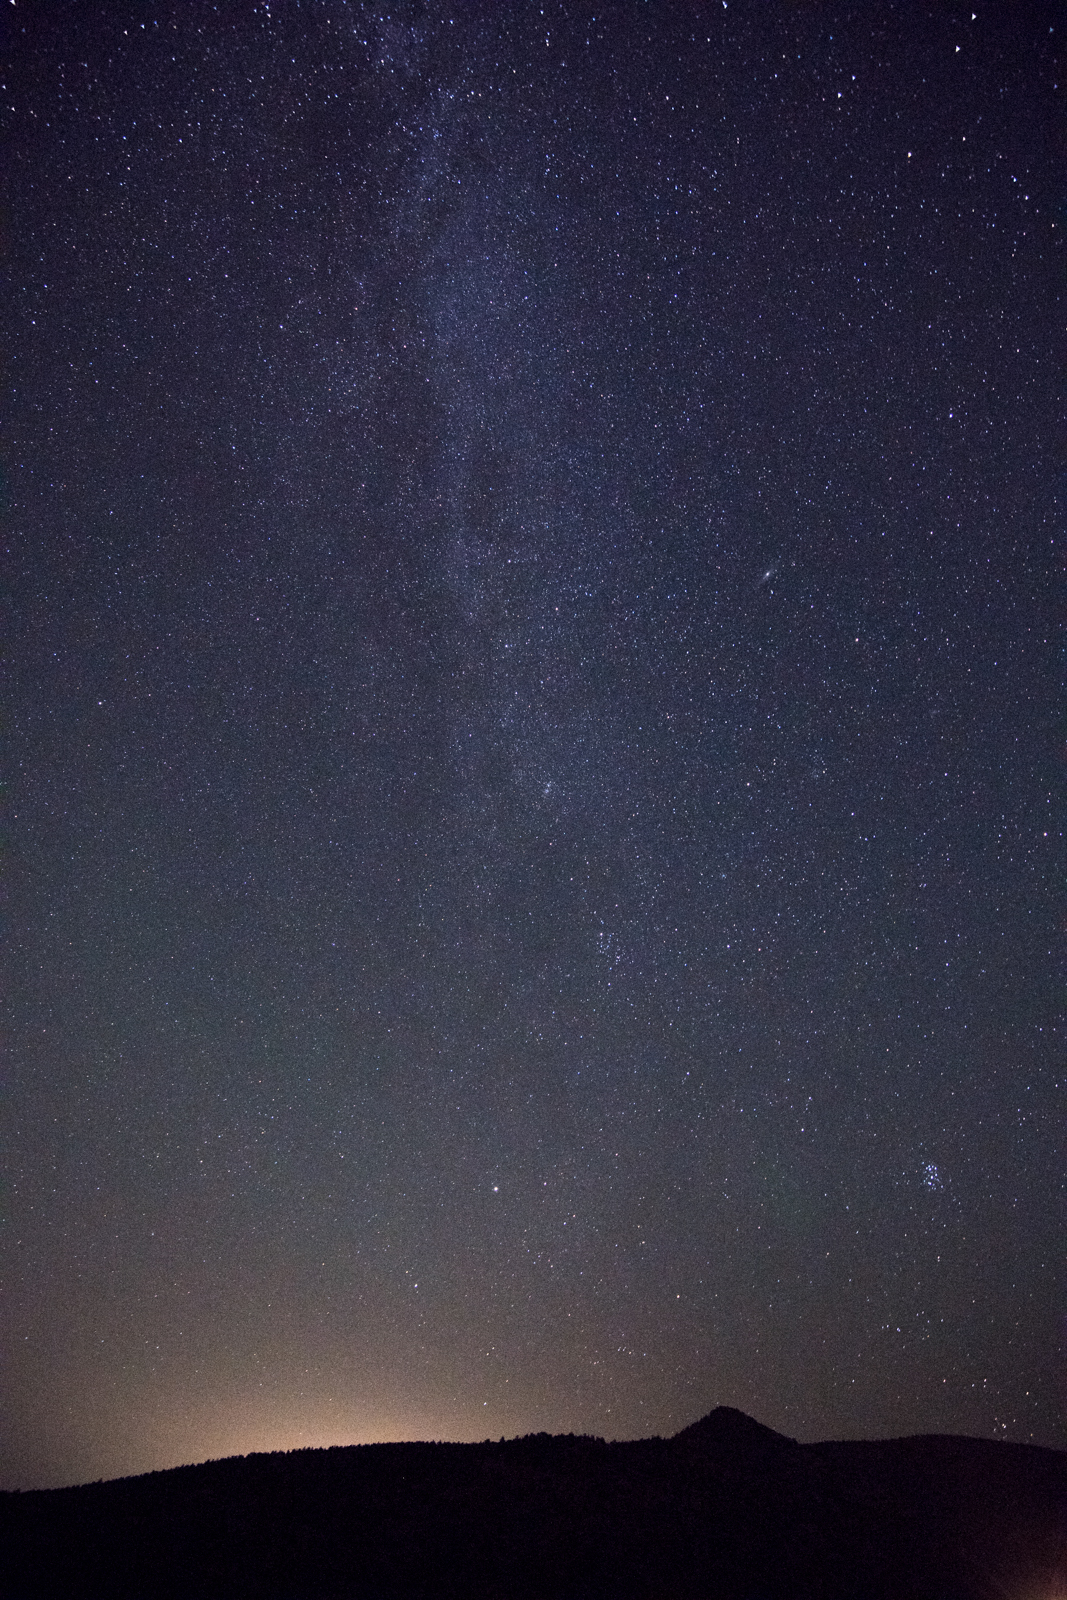
If you’re imagining a specific landmark with the Milky Way in the background, you’ll also need to plan the shoot around where those stars are at any certain time. This isn’t necessary if you have a location with a good view in every direction (the samples shown here, for example, were all a result of shooting a few test shots, and then finding the largest concentration of stars to find the Milky Way). But, if you’re dreaming up a shot that requires the Milky Way to line up perfectly, an app like PhotoPills can save a lot of hassle.
Step 3: Get out of town
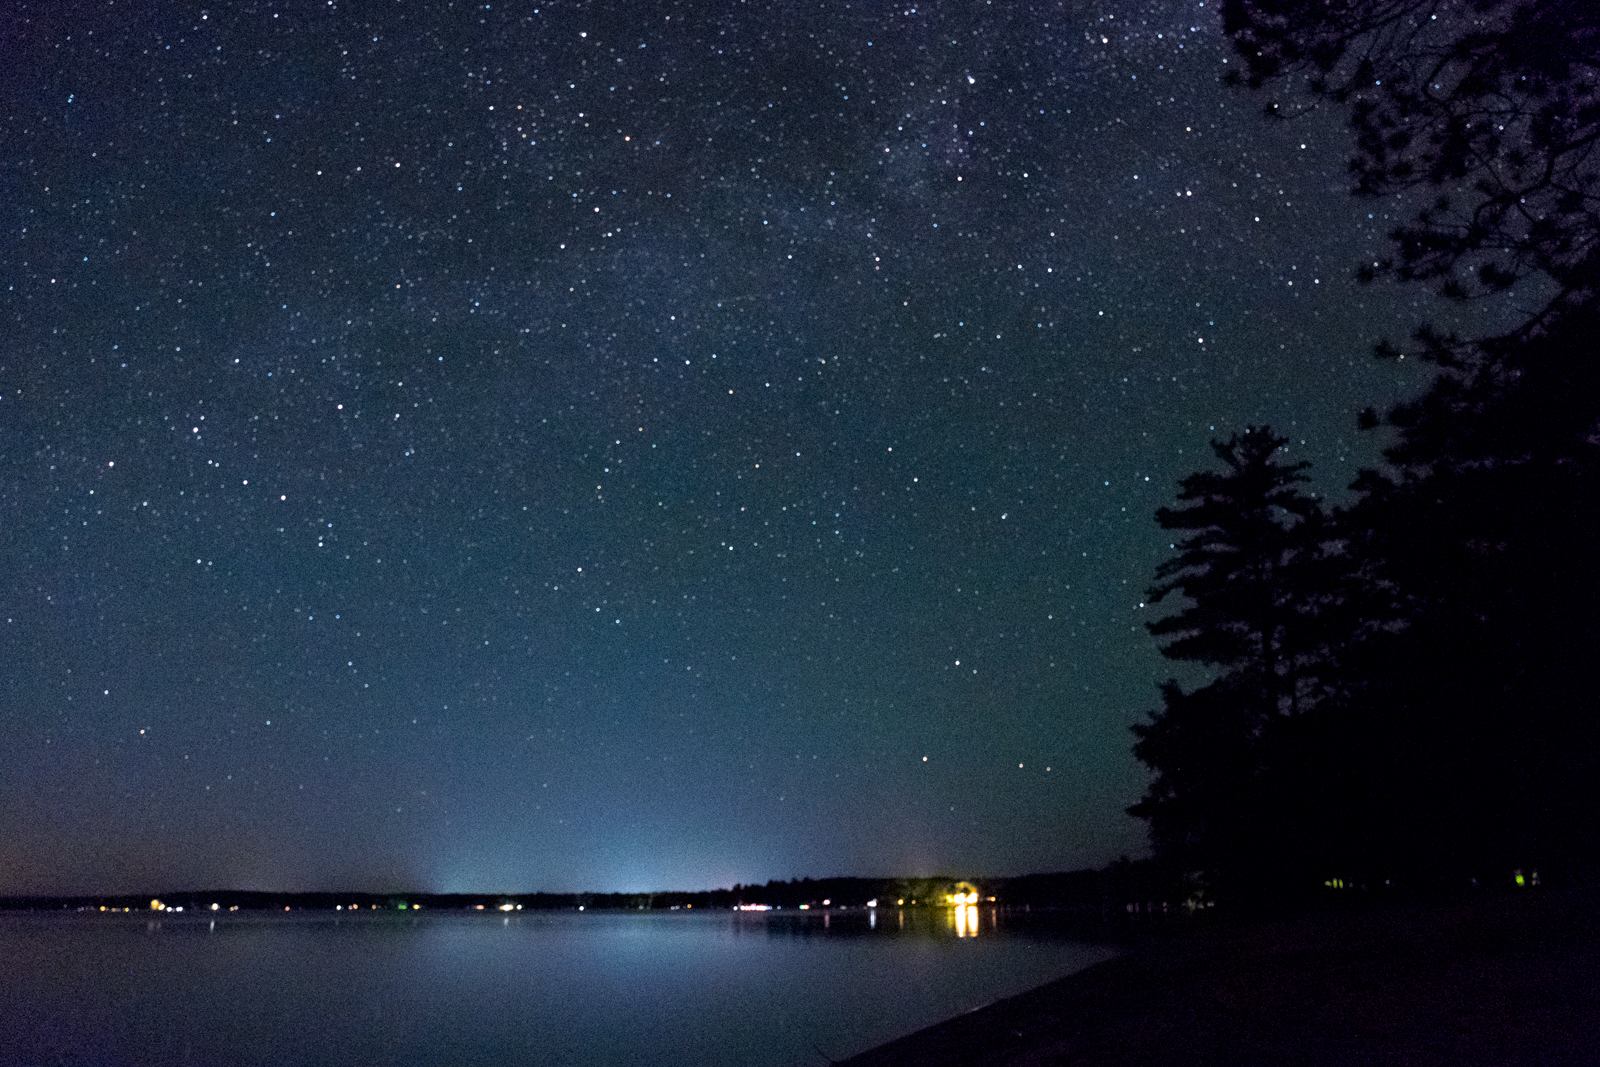
Light pollution from populated areas will wreak havoc on star photography. In dense cities, you might not be able to see the stars at all at night, and that means your camera won’t, either. Even in rural areas, watch out for things like street lights; if you’re too close, the light they cast could show up in your photo.
Below, you can see an example of light pollution affecting the visibility of stars along the horizon.

Step 4: Don’t just look at the sky
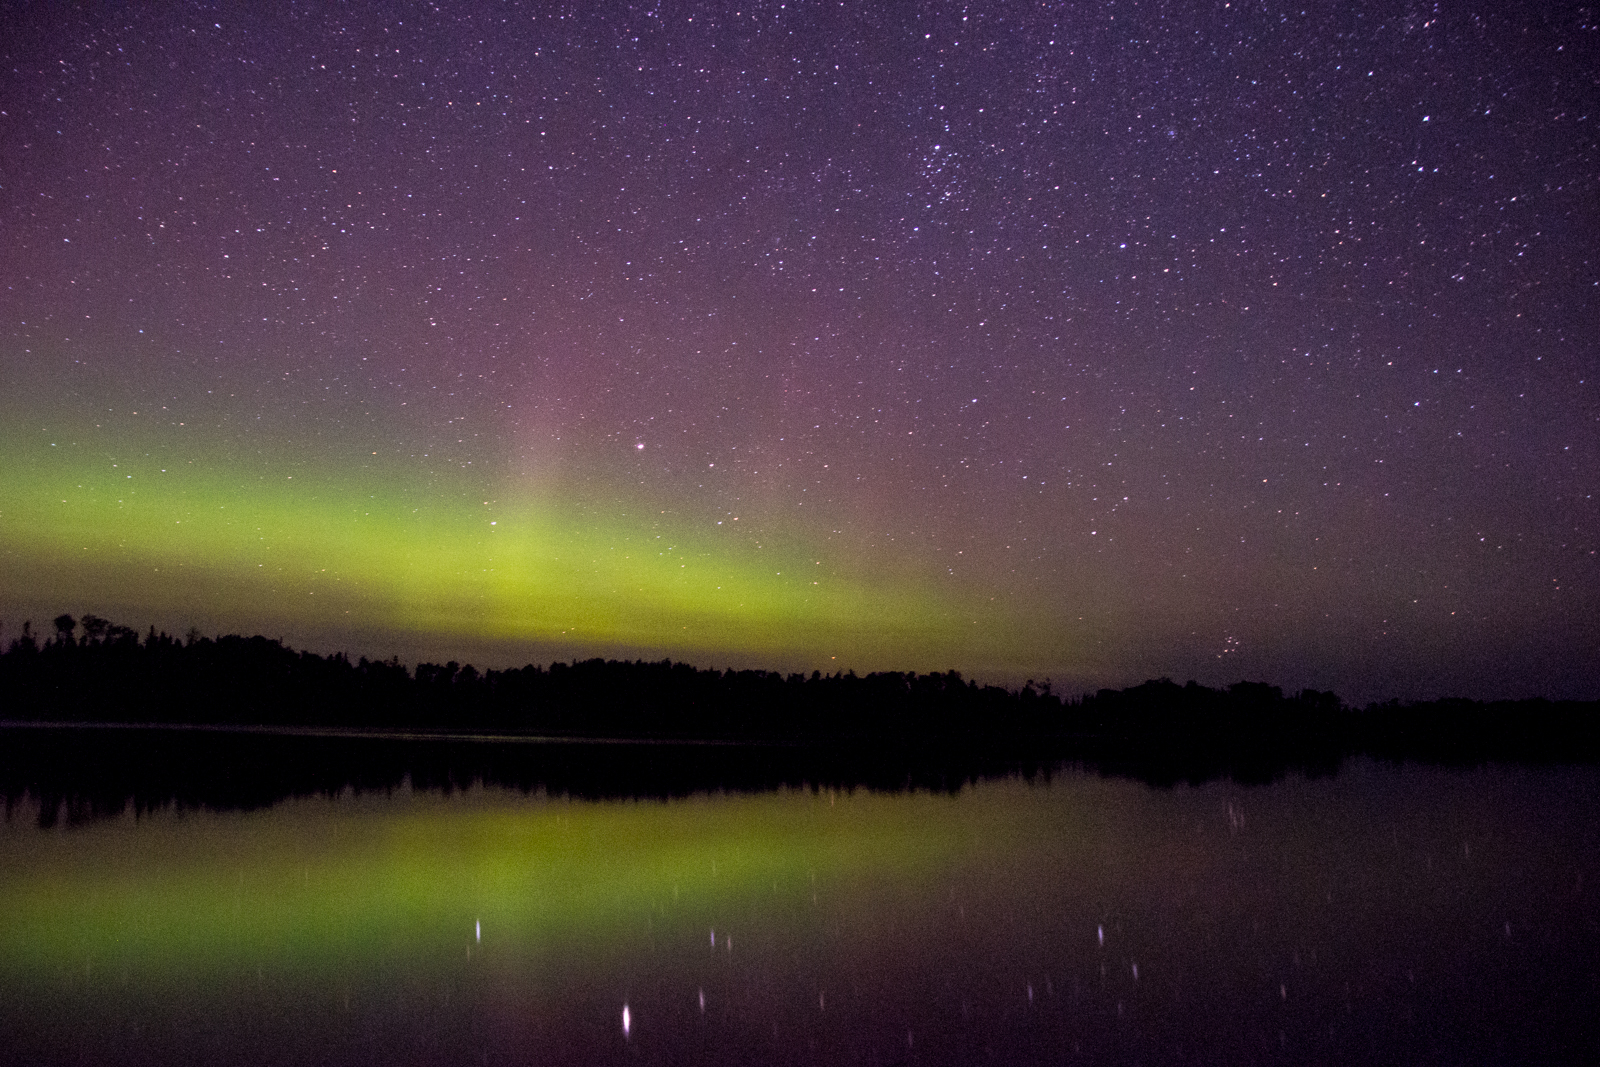
You can photograph nothing but the night sky, but including the surrounding landscape creates a sense of just how vast and impressive that sky is. Scout out your location for elements that will ground your shot. Anything from a tree in the foreground to a distant mountain will lend a sense of place and make the photo more intriguing.
There are two different ways to incorporate the landscape into your shot. You can leave the ground as is and expose for the sky, which turns everything into a silhouette. Or, you can use a flashlight or another continuous light source to paint some light onto those foreground elements so they appear in full color with the sky. Again, this is a creative choice, so there’s no right or wrong answer, though light painting might be the more difficult one to master.
Step 5: Set your exposure
Firstly, if you’re using a camera that can shoot RAW images, make sure it’s set to RAW. A RAW file will be much easier to work with compared to a JPEG when we get to the editing step later. Also, if you’re not familiar with manual settings and the exposure triangle, now is a good time to familiarize yourself with aperture, shutter speed, and ISO. You’re going to need to know how to adjust these settings for the best results.
Night sky photography is long-exposure photography — but only to a point. As the stars move across the night sky, an exposure time that’s too long will cause them to blur. To freeze the stars as points of light, keep your shutter speed to no longer than 20 seconds. Use a wide aperture to let in as much light as possible, then increase your ISO only as far as it needs to go. This will probably be in the range of ISO 1,600 to ISO 6,400, depending on your lens.
For revealing detail in the Milky Way, keeping your shutter speed at or below that 20 second mark is key. Go much longer, and you’ll get too much blur.

But that’s not the only way to image the stars. Photographing star trails, where you purposefully blur the stars to see the paths they take across the sky, is another option — and this is where your patience really comes in to play. If you thought waiting around for a 20-second exposure was tough, try waiting for 20 minutes. Here, the longer the exposure time the better. You can get away with 15 minutes, but if you really want to show how the stars move across the sky, set your camera to “bulb” mode and leave the shutter open for a couple of hours (it helps to have a remote for this, otherwise you’d have to physically keep the shutter button depressed for the entire length of the exposure). Keep in mind, some entry-level cameras may not have this feature.

Another option is to blend multiple shorter exposures together to create the star trails effect. This is an option even if you don’t have a bulb mode on your camera, but it will require some serious work in Photoshop or another image compositing program.
Step 6: Set your focus
For the best results, set your camera to manual focus. The stars are very far away, which makes it easier to get a sharp focus manually. Start by turning the focus dial all the to infinity, then fine-tune from there. On a mirrorless camera, or a DSLR in live view mode, you can magnify the preview image as you focus. Focus peaking can also be helpful, so if your camera model offers that feature, turn it on and experiment. You can also take shoot some test photos using a higher ISO and faster shutter speed to save time, review them for critical focus, then reset your ISO and shutter speed to their desired settings before taking the actual photo.
Step 7: Use the self-timer or a camera remote to shoot
Touching the camera during any long-exposure can sometimes add camera shake, even with a tripod. With the composition, exposure, and focus set, you’re ready to shoot, but shoot hands-free for the best results. If you have a remote or a Wi-Fi enabled camera with a smartphone app, use that, but if you don’t have a remote available, you can use the self-timer to delay the shot by a couple of seconds, enough time to get your hands off the camera.

Step 8: Review and adjust
After waiting for that long-exposure to finish, check the shot on the LCD before moving on to the next one. Make sure that focus is tack-sharp by zooming in. If the image is too dark, try slowing down the shutter speed a bit more or raising the ISO. Check the composition for any potential improvements — sometimes, spotting the view with the most stars is easier to do after you’ve taken a few shots.
Step 9: Edit
The truth about any great night sky image you’ve seen is that a lot of post-processing went into it. What the camera captures tends to be much more boring than the look we want, and that’s where editing comes in. There are a lot of apps out there for editing photos, but for the best results we recommend using a desktop-based RAW processor like Adobe Lightroom, Capture One, or Skylum Luminar.
Start by fine-tuning the exposure to make the stars brighter, but don’t get too extreme or you’ll notice a lot more noise. White balance can come in handy when editing star shots, as well. You may want the sky to look bluer, or even purple, more than black or gray, and white balance is the easiest way to do that.
Contrast can also help those stars pop a bit more, but instead of just using the contrast slider, individually adjust the highlights, whites, shadows, and blacks. Generally, you’ll want to increase highlights while decreasing shadows, and doing it this way gives you much more granular control than what you get with contrast slider alone.
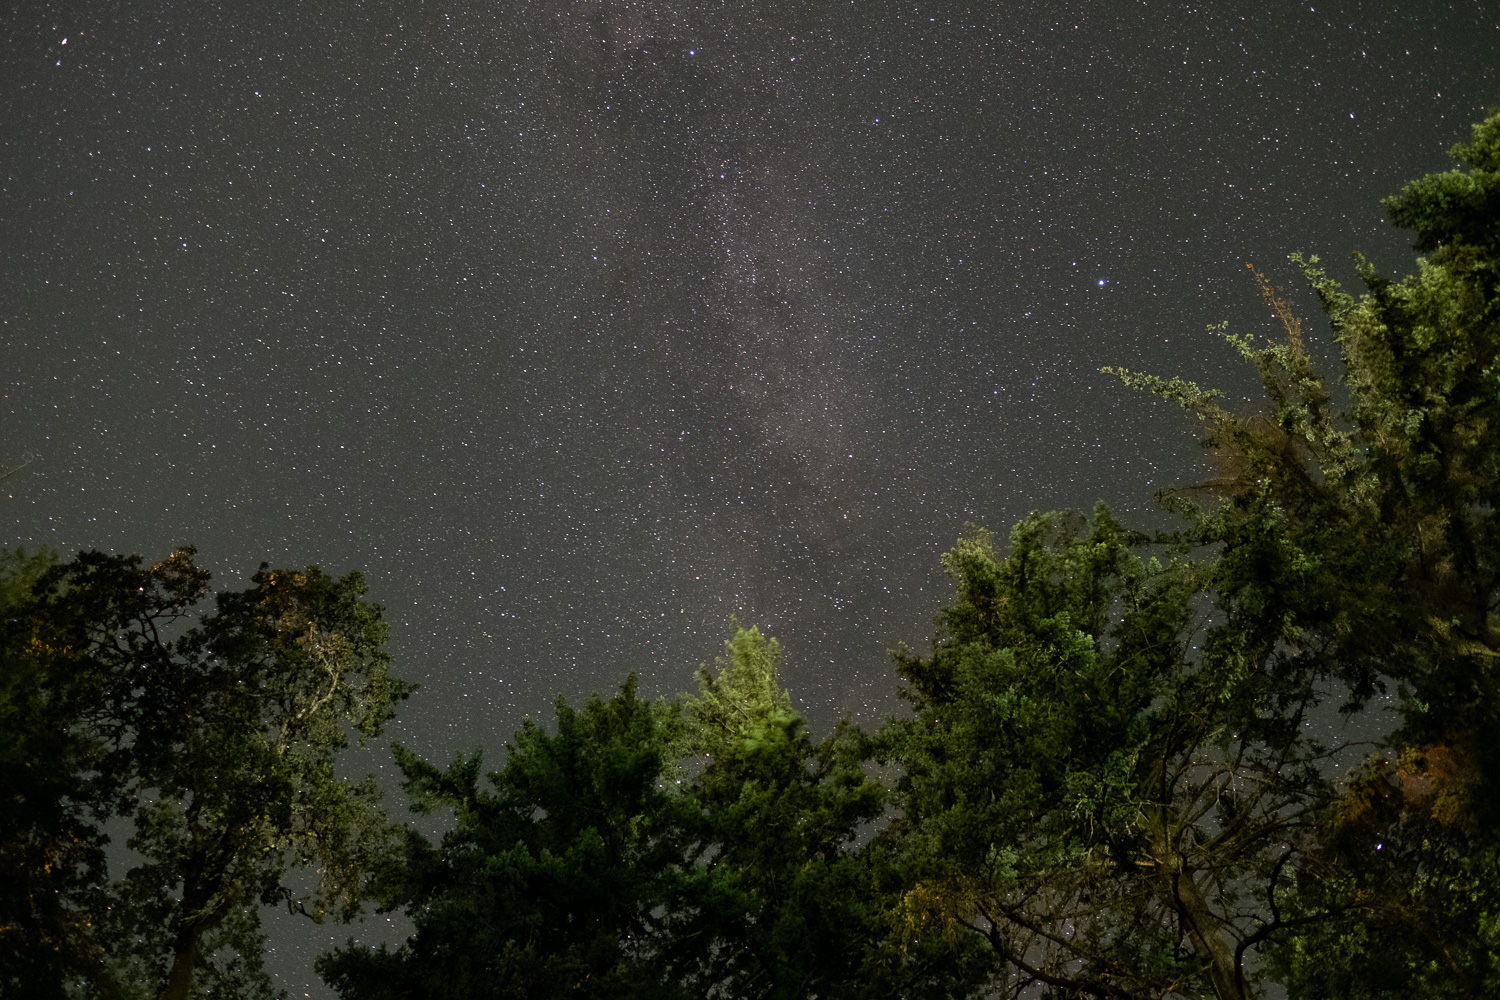
- 1. Image straight from the camera.
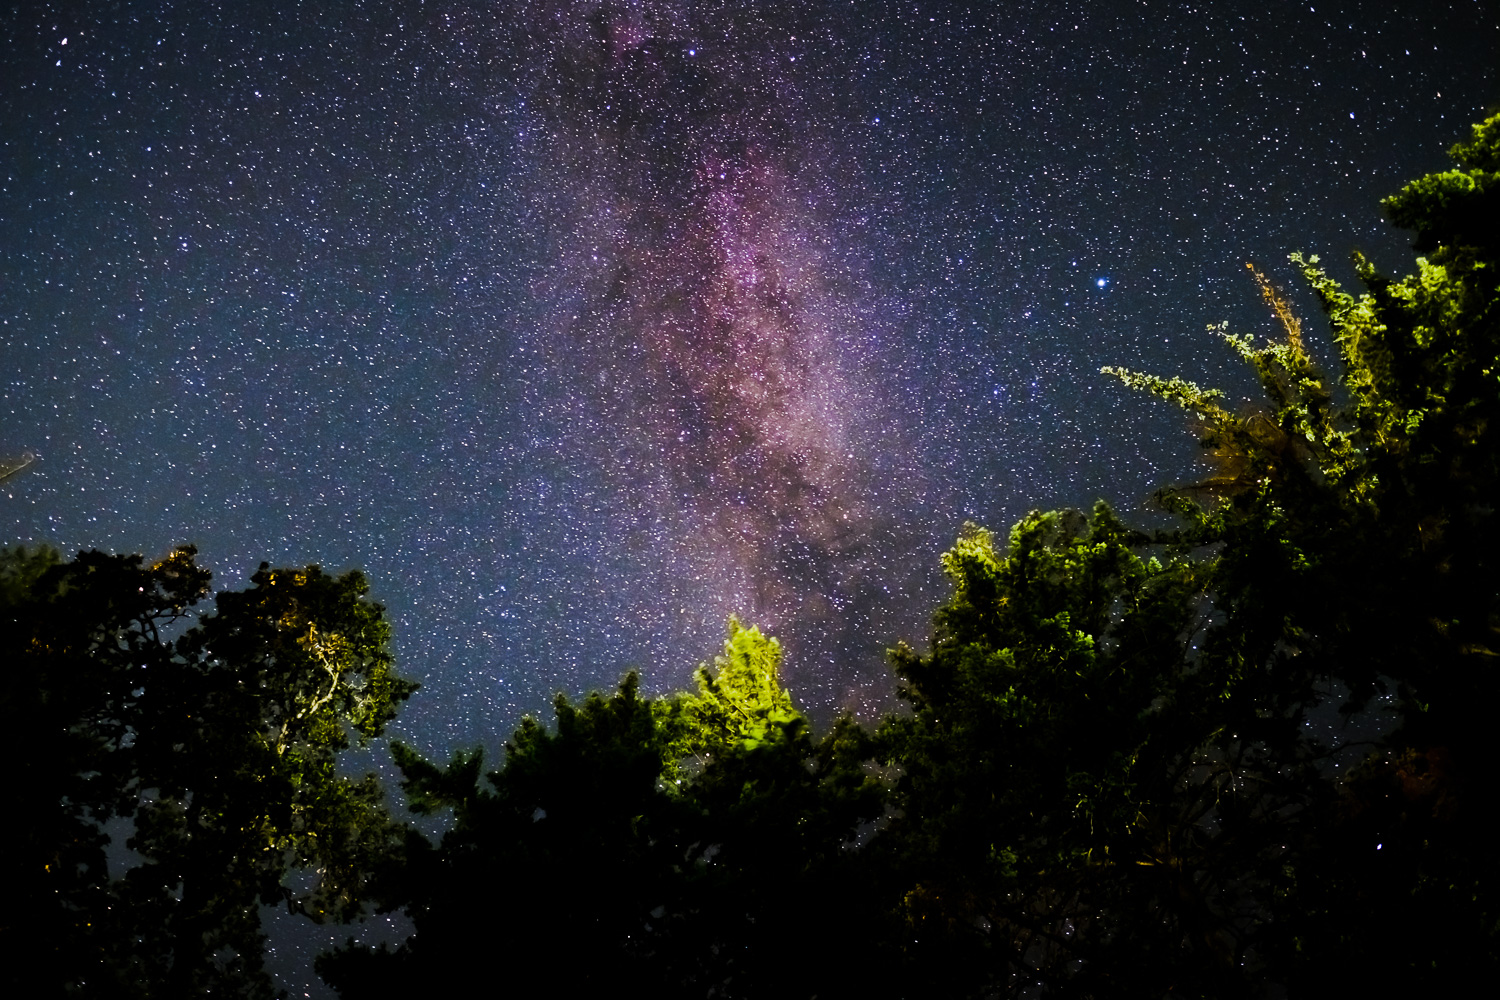
- 2. Image after editing in Adobe Lightroom CC.
For the Milky Way, clarity and vibrance adjustments can help bring out the gas and dust, while localized white balance adjustments can shift its color so that it stands out more from the rest of the night sky. You may also want to selectively dodge and burn (lighten and darken) areas within the Milky Way to add contrast and make it pop.
And while it’s not a requirement, experienced astrophotographers will always remove planes and satellites from their images. You’ll see these as streaks of light going straight across the sky, as opposed to the circular star trails. It takes a lot of time to remove these things using either a healing brush or clone stamp tool, but the end result is usually worth it.
Learning how to photograph stars isn’t just about great images — it’s getting away from the city lights, staying outside when most retreat to their beds, and standing under a view that’s stunning from nearly anywhere in the world. The limited light may make photographing the stars tricky, but both the experience and the final images make it a challenge worth mastering. Even if you’re not an experienced photographer, experimenting with astrophotography is both fun and rewarding and a great way to learn more about image editing.