You can change your mouse DPI, or its sensitivity, pretty quickly in both Windows and macOS -- and many top gaming mice can do it with a simple press of a button. This can be a great way to boost accuracy in some games, to make you more productive at work, or just to give you greater control and accuracy of your mouse pointer.
Whatever your reason, though, here's how to change your mouse DPI.

How to change mouse DPI in Windows 11
Changing your mouse DPI natively in Windows 11 is similar to changing it in Windows 10. Here's how.
Step 1: Open the Windows 11 settings app with Windows Key + I.
Step 2: Navigate to Bluetooth and devices in the sidebar. From there, click the Mouse option.
Step 3: In the new page that opens up, select the Mouse pointer speed option. Drag the slider around. If the slider is closer to the left, your mouse will move slower. If the slider is closer to the right, it will move faster. The default value in the middle will strike a good balance. Note down the numbers, too. Default will be 10, slow is 1, and faster is 20.
How to change mouse DPI on PC on Windows 10
Regardless of whether you have a mouse or you’re using a laptop’s trackpad, the DPI can be changed through the Windows 10 settings.
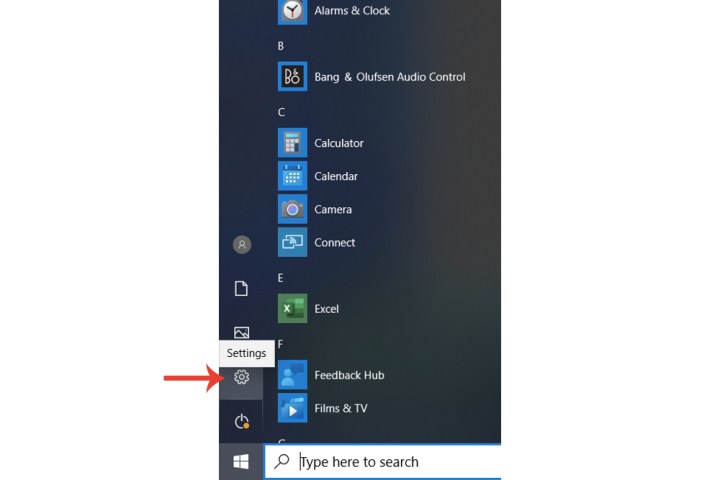
Step 1: In the Start menu on Windows 10, select Settings.
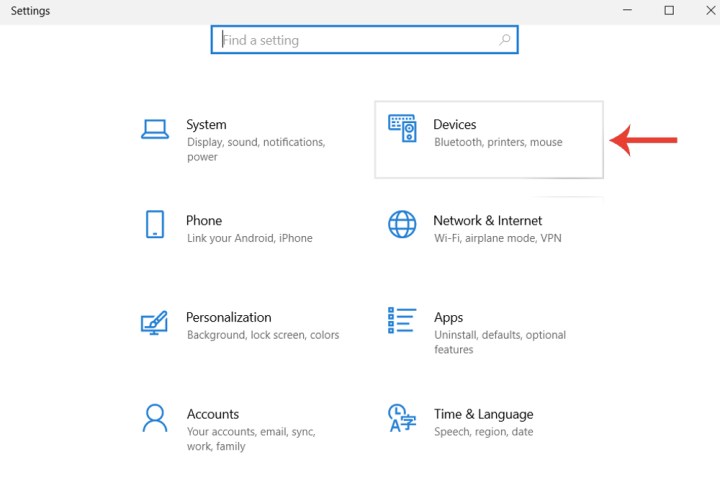
Step 2: Select Devices, which is where your mouse settings can be adjusted.
Step 3: On the side panel, select Mouse, and then choose Additional mouse options.

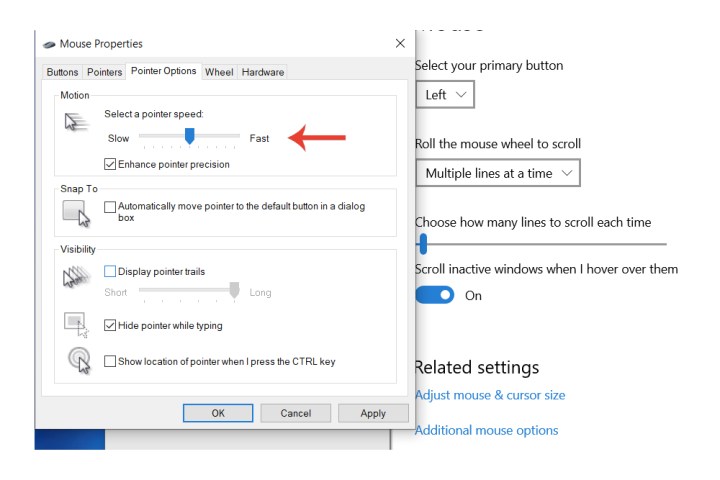
Step 4: Now click Pointer options.
Step 5: Within the Motion section below Select a pointer speed, adjust the slider to your liking. Dragging it left will reduce the mouse DPI, making your cursor move slower. This is useful for, say, anything that requires extra attention for accuracy. Select the Apply and OK buttons to confirm the change.
Moving the slider to the right will make your mouse movement faster, which will come in handy for gaming. Simply put, you’ll be able to react quicker, which is especially helpful for fast-paced online titles. Alternatively, you could just be looking to increase the DPI in general for your everyday computing use as you find the default setting too slow.
How to change mouse DPI on PC on Windows 7
Step 1: In order to change the mouse DPI if you have earlier versions of Windows like Windows 7, open the Control panel.
Step 2: Now select Hardware and sound > Devices and printers > Mouse > Pointer options. Change the DPI under the Motion section, and then select Apply and OK.

How to change mouse DPI on Mac
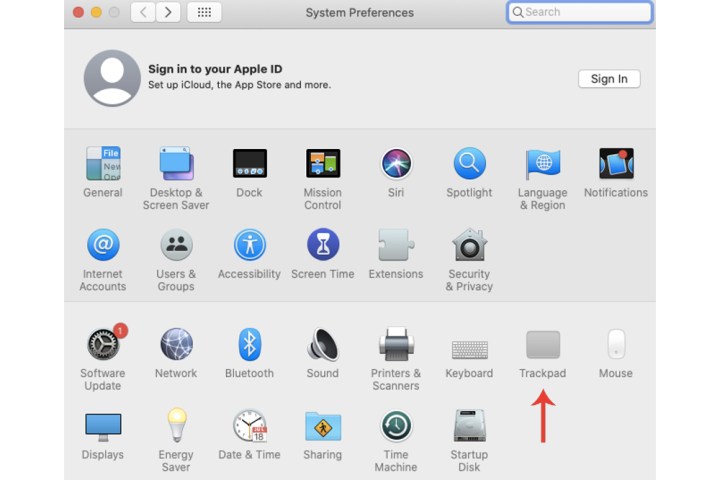
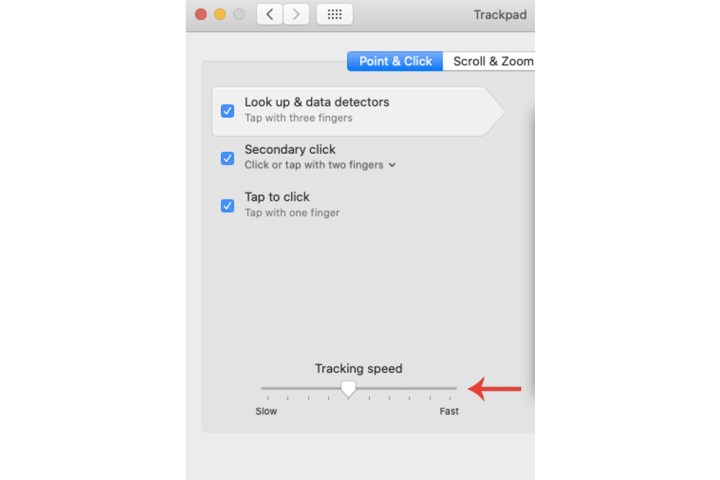
Step 1: Open System preferences and then select Trackpad (for MacBooks) or Mouse if you have one connected.
Step 2: In the Tracking speed section, adjust the slider to make your mouse or trackpad move slower of faster.
How to change Logitech mouse DPI
If you have a wireless Logitech mouse and have it connected to a PC or laptop, then follow the same steps as we explained above to change the DPI. You can plug in the USB dongle for a standard Logitech mouse to a Windows 10 or 11 laptop, which should be viewable as a USB device within the mouse settings page.
Alternatively, you can make use of the Logitech G-Hub software. Download it from the Logitech website and you can fine tune your DPI profiles, adjust the live DPI, and make changes to the key mapping and RGB lighting of your mouse (if it supports it).

Can you change the DPI with a button on a mouse?
Depending on your mouse, the DPI may be adjusted directly via the mouse itself, saving you time from continually changing it around through settings. Some gaming mice, especially the more premium versions, come with their own software, which gives you access to a more detailed DPI hub compared to Windows's default mouse settings. You can even assign your mouse different DPI profiles that can be switched between with the click of a button.
Either way, many gaming mice these days generally feature an actual physical button, which is typically situated near the scroller. Read the instructions manual that came with your mouse to see exactly how to adjust the DPI via the mouse and any applicable program, driver, etc.
If you have an older mouse, say, a standard Logitech device, then chances are you won't have a specific DPI button situated on it.
How to change mouse DPI to 800
With Windows 10’s default mouse settings, it’s not possible to find out the exact DPI associated with your mouse. Certain amounts, like 800, are usually helpful for a certain audience, such as gamers. If you have a gaming mouse, then you should be able to set a specific DPI via the device’s program.
For non-gaming mice, it’s a bit more difficult to find out or adjust the actual figure, but there are workarounds. For example, Logitech’s G Hub app can synchronize itself with a compatible mouse and you can change the DPI via the program itself.
Editors' Recommendations
- How to change the login picture on a Mac
- How to change your MAC address on Windows and Mac
- How to create a bibliography in Word on Windows and Mac
- How to connect a keyboard and mouse to the Steam Deck
- You’re going to hate the latest change to Windows 11