Make sure to check out our Giveaway for a chance to win our Steam Box build.
The Steam Box is now a tangible possibility. Though no release date or final design has been released, Xi3 touted its Piston reference platform at CES while other hardware was examined behind closed doors. Meanwhile, Valve is preparing Steam for an eventual hardware release with the new Big Picture interface and Linux support. All of the pieces are coming into place.
Gamers itching for an innovative, open platform can hardly wait for release, yet details remain vague. Valve might launch tomorrow, next month, or next year. Details on specifications, price and capability remain unknown.
We do know that Valve’s console will be built with PC hardware, use Steam to access games, and probably run Linux. So why wait? You can build your own Steam Box today for less than $500. Here’s how.
The target build
We’re not the first to publish a do-it-yourself Steam Box guide. Others have already explored the idea in some depth. Yet, we have a problem with what we’ve seen so far: Price.
Gaming PCs have existed for years; putting one together is hardly a new idea. What makes the Steam Box original is its combination of size, price, and capability. The Steam Box is both a PC and a console competitor, and that means it can’t be too expensive. That’s why we’ve limited our build to a $500 budget.
Don’t think we’re sacrificing grunt, however. This system is capable of an acceptable framerate in any modern title at 1080p and medium detail – and most games will be playable at high or maximum detail. This inexpensive PC can dish out serious eye-candy.
There is one notable sacrifice that had to be made to keep within our budget: Windows. We were forced to drop it for the same reason that Valve launched Steam for Linux. Windows is expensive. Even an OEM copy of Windows 8 sells for $99, which is 20 percent of this build’s total budget. There’s no reason you can’t install Windows on our build – but we went with Ubuntu instead.
The components
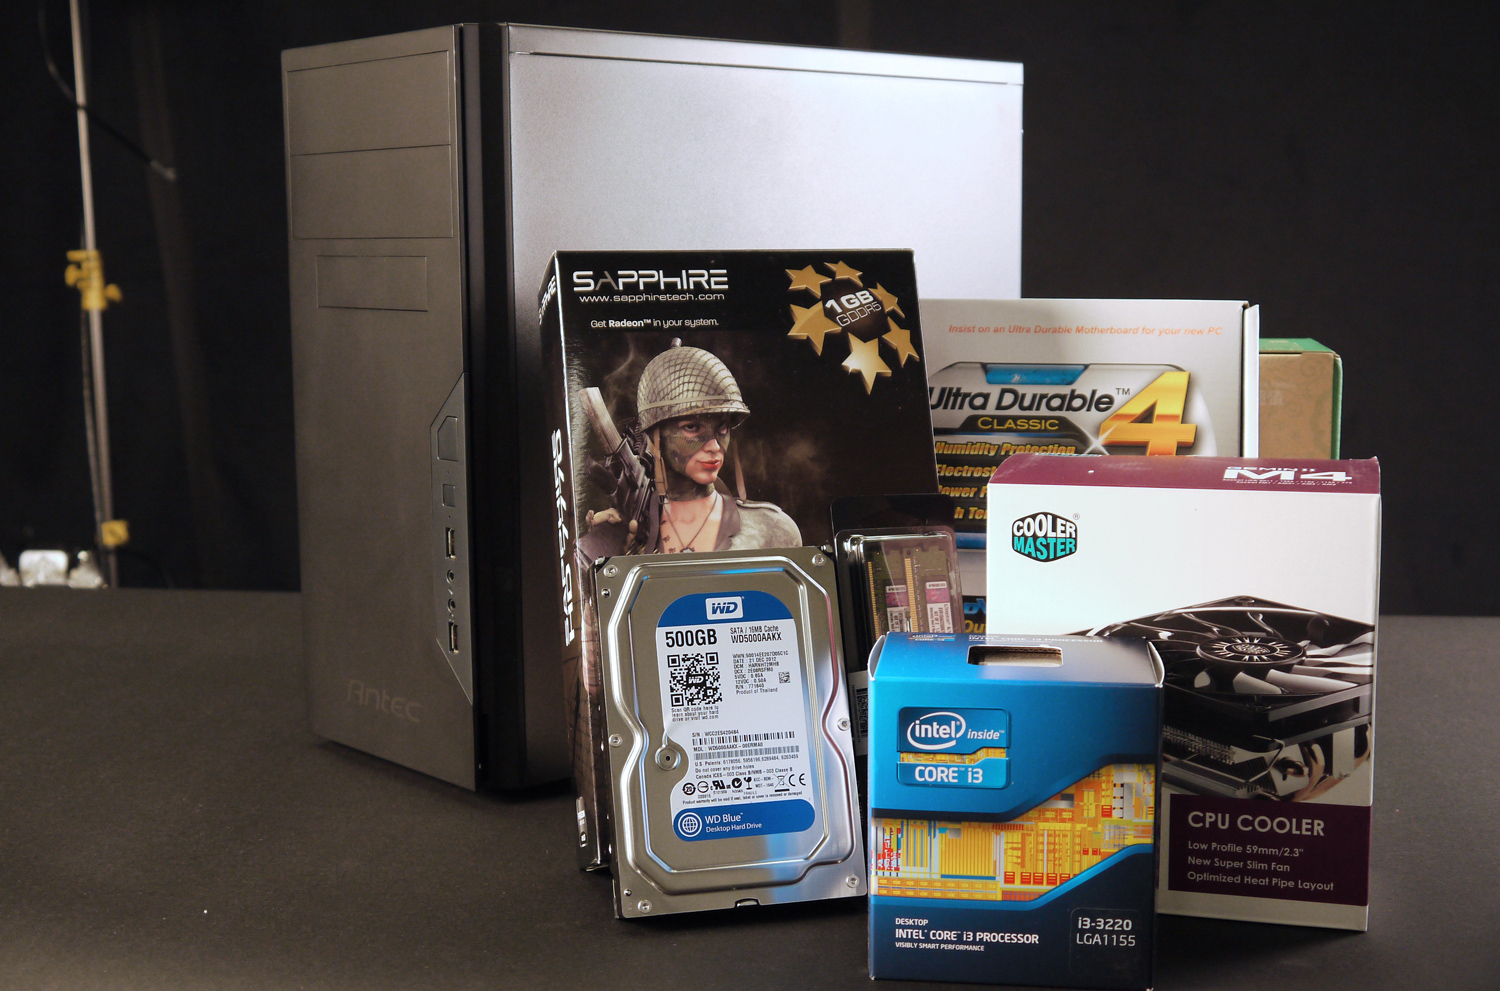
Out of the endless number of combinations we could have chosen, here’s the components we settled on.
- Processor: Intel Core i3-3220 ($130)
- Motherboard: Gigabyte GA-H61M-HD2 Micro-ATX ($55)
- RAM: Kingston Value 4GB DDR3 1066 Low-Profile ($30)
- Video Card: AMD Radeon HD 7770 1GHz Edition ($115)
- Hard Drive: Western Digital Blue 500GB 7200RPM ($60)
- Power Supply: Antec NEO ECO 400-Watt ($40)
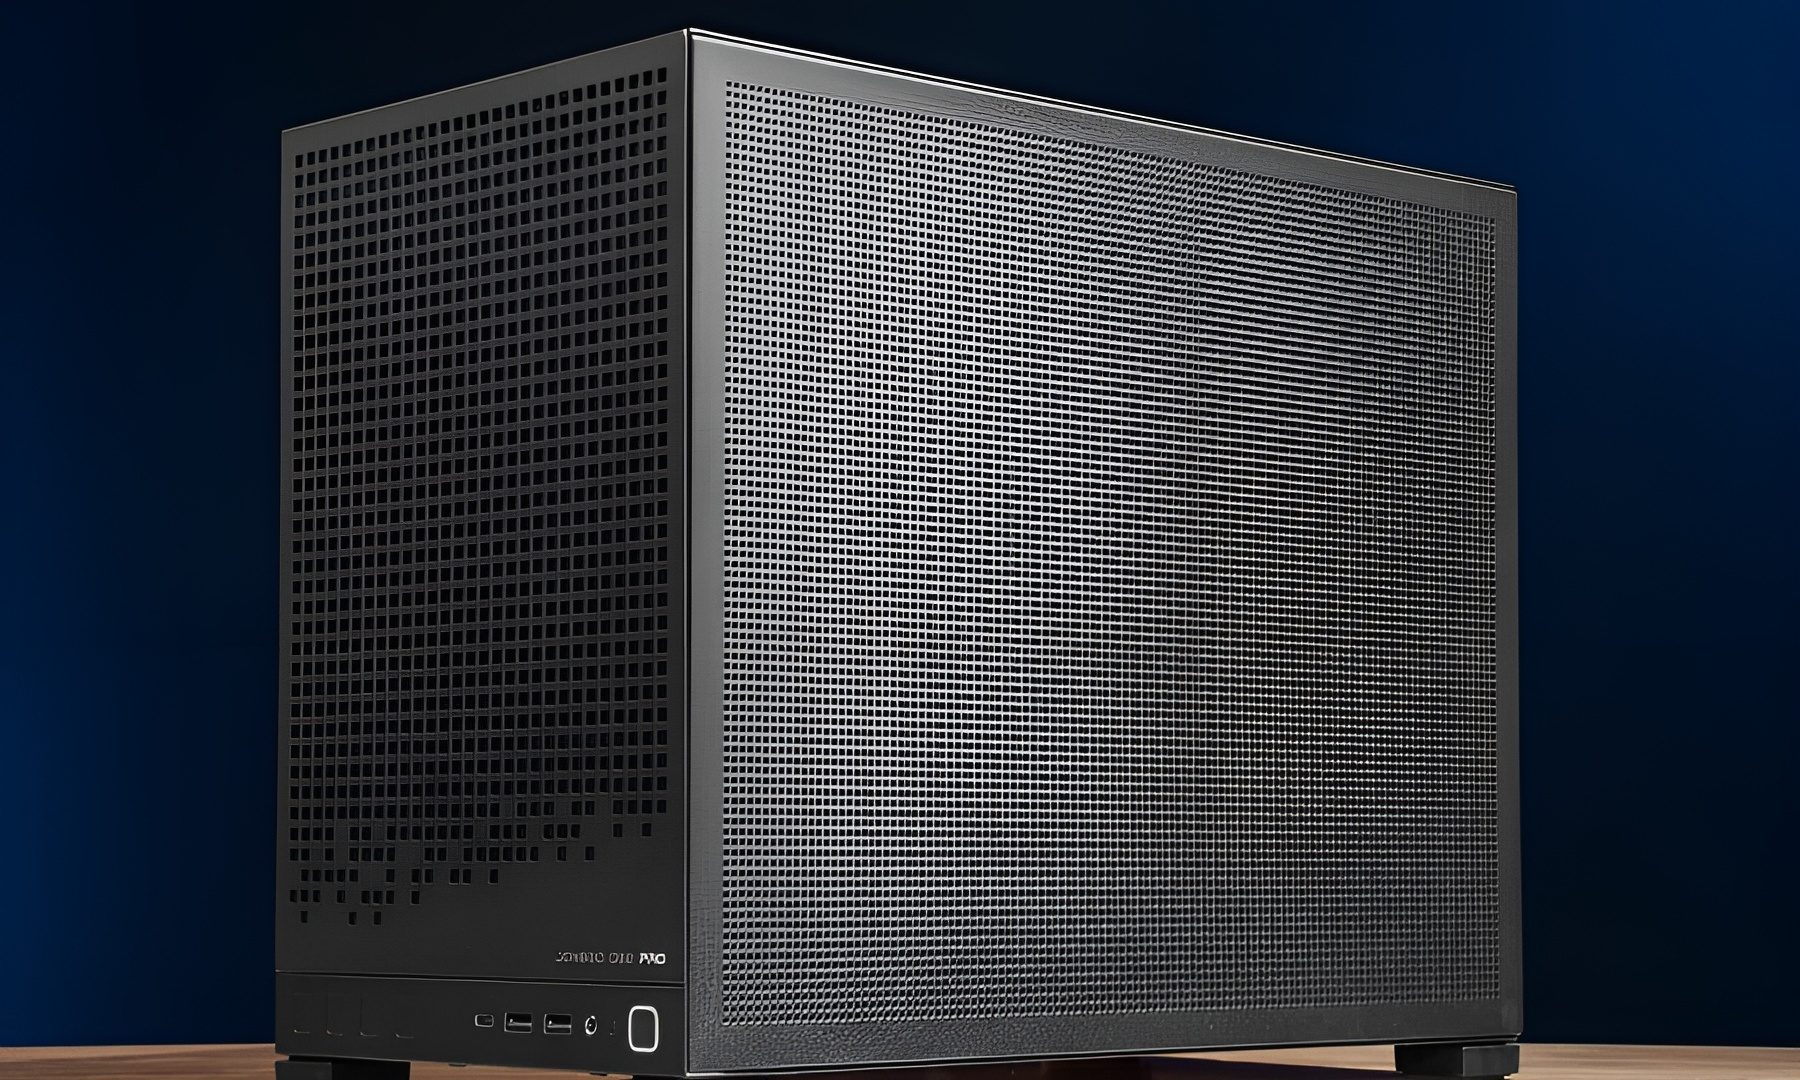
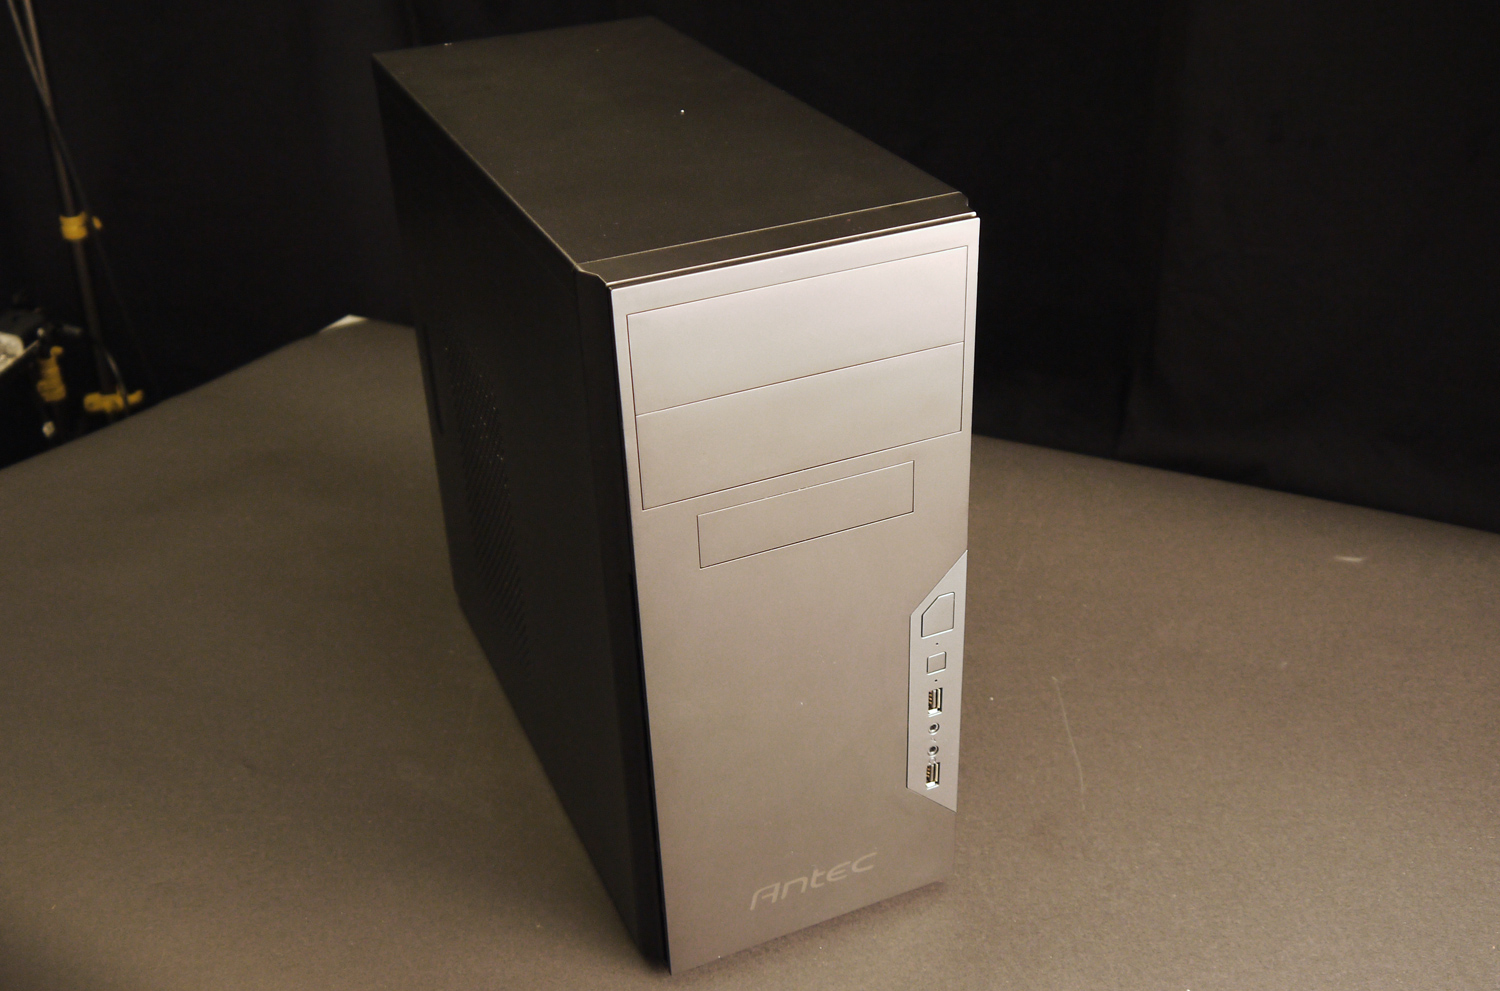
- Case: Antec New Solution VSK-3000 ($30)
- Cooler: Cooler Master GeminII M4 ($30)
Approximate Total Cost: $490
The Intel Core i3-3220 dual-core and AMD Radeon graphics card provide the best overall performance within the budget. AMD’s Fusion processors, which include Radeon graphics as part of the package, simply aren’t quick enough to handle many games at 1080p.
A good portion of our cash was spent on a respectable power supply and cooler. The processor does ship with its own cooler, and many enclosures can be had with a power supply, but we upgraded both to ensure this build is reliable, cool, and quiet. If you follow our build, you’ll find that the resulting system is quieter than an Xbox 360 or PlayStation 3.
We decided on Micro-ATX as the form factor for our build. This means the system is small, though not slim enough to fit in most media cabinets. Going smaller would have forced us to increase our budget or settle for lower performance. Both trade-offs seemed a poor choice.
This build doesn’t include an optical drive. We’re making a Steam Box, and Steam is all about digital distribution. We think most gamers will never need to insert a disc, and cutting out the optical drive frees up $25 that can be spent elsewhere.
Some users might want a smaller or larger case, have a preference for different hardware vendors, or want to go with an AMD processor instead of Intel. Customization is fine, but don’t stray too far. We put this build together to offer maximum performance at minimum price. Different hardware could make your Steam Box slower or more expensive.
Building your Steam Box
You’ll want to grab the following tools before you start building your system.
- Small Phillips-head screwdriver
- Flashlight
- Tweezers
- Ziploc bag (to keep track of screws you’ve removed)
Besides these three items, you should also find a large, well-lit surface to work on. You’ll need room to place components you haven’t installed yet as well as room to place the PC itself.
Settled and equipped? Good. Let’s begin. (Don’t want to build your own? Check out the bottom of the post for info on how to win this very Steam Box!)
Step 1: Open the case

The Antec VSK-3000 can be opened from either side, but you’ll want to open the left panel side panel. At the back of the enclosure you’ll find two screws attaching the panel. Remove them and put them in the Ziploc bag to make sure they’re not lost; then remove the panel by pulling gently towards the rear of the case. There’s an indentation in the panel that will help you find a grip.
Once the case is open, place it somewhere out of the way – it’s not needed again until several steps later. Place the side panel on the table you’re working on. It will act as a working surface while you install components on the motherboard.
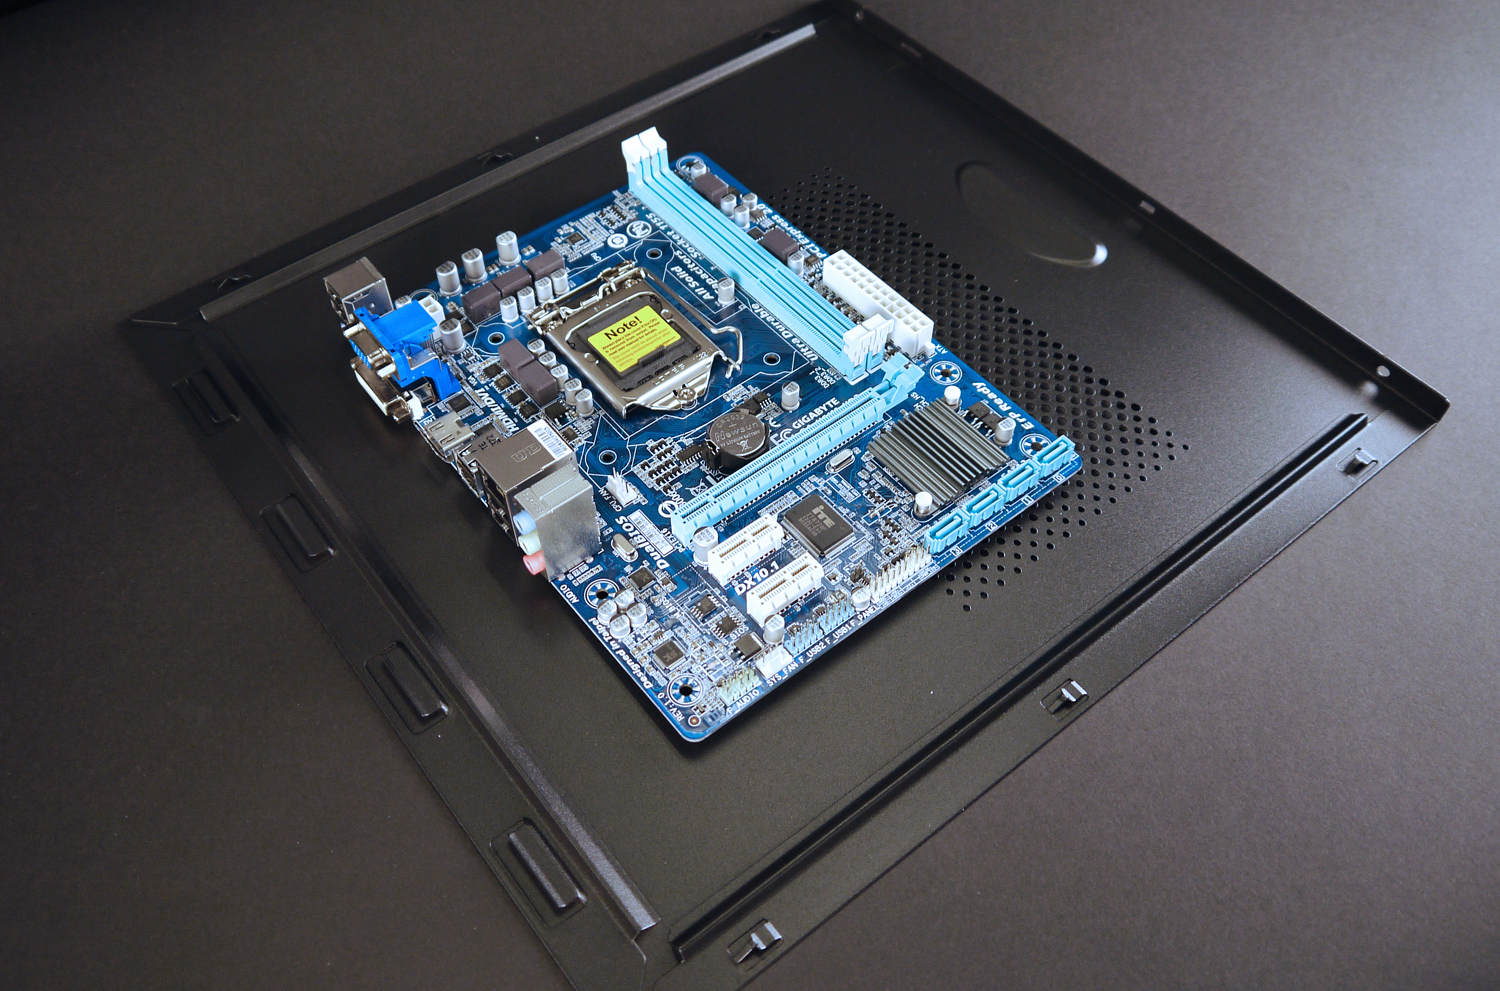
Step 2: Install the RAM
Remove the motherboard from its box and various wrappings (it will usually be enclosed by at least one anti-static bag). Place the motherboard flat on the case panel.
Take the RAM out of its packaging and install it by lining it up with the RAM slots on the motherboard located to the right of the processor socket. RAM can only be installed in one direction because of the notch in the DIMM, so make sure that you’ve properly lined up the RAM with the slot.

Once the RAM is in place and properly aligned, apply moderate pressure to each end until the tabs on both sides of the socket lock in place over each end.
Repeat for the second stick of memory.
Step 3: Install the processor
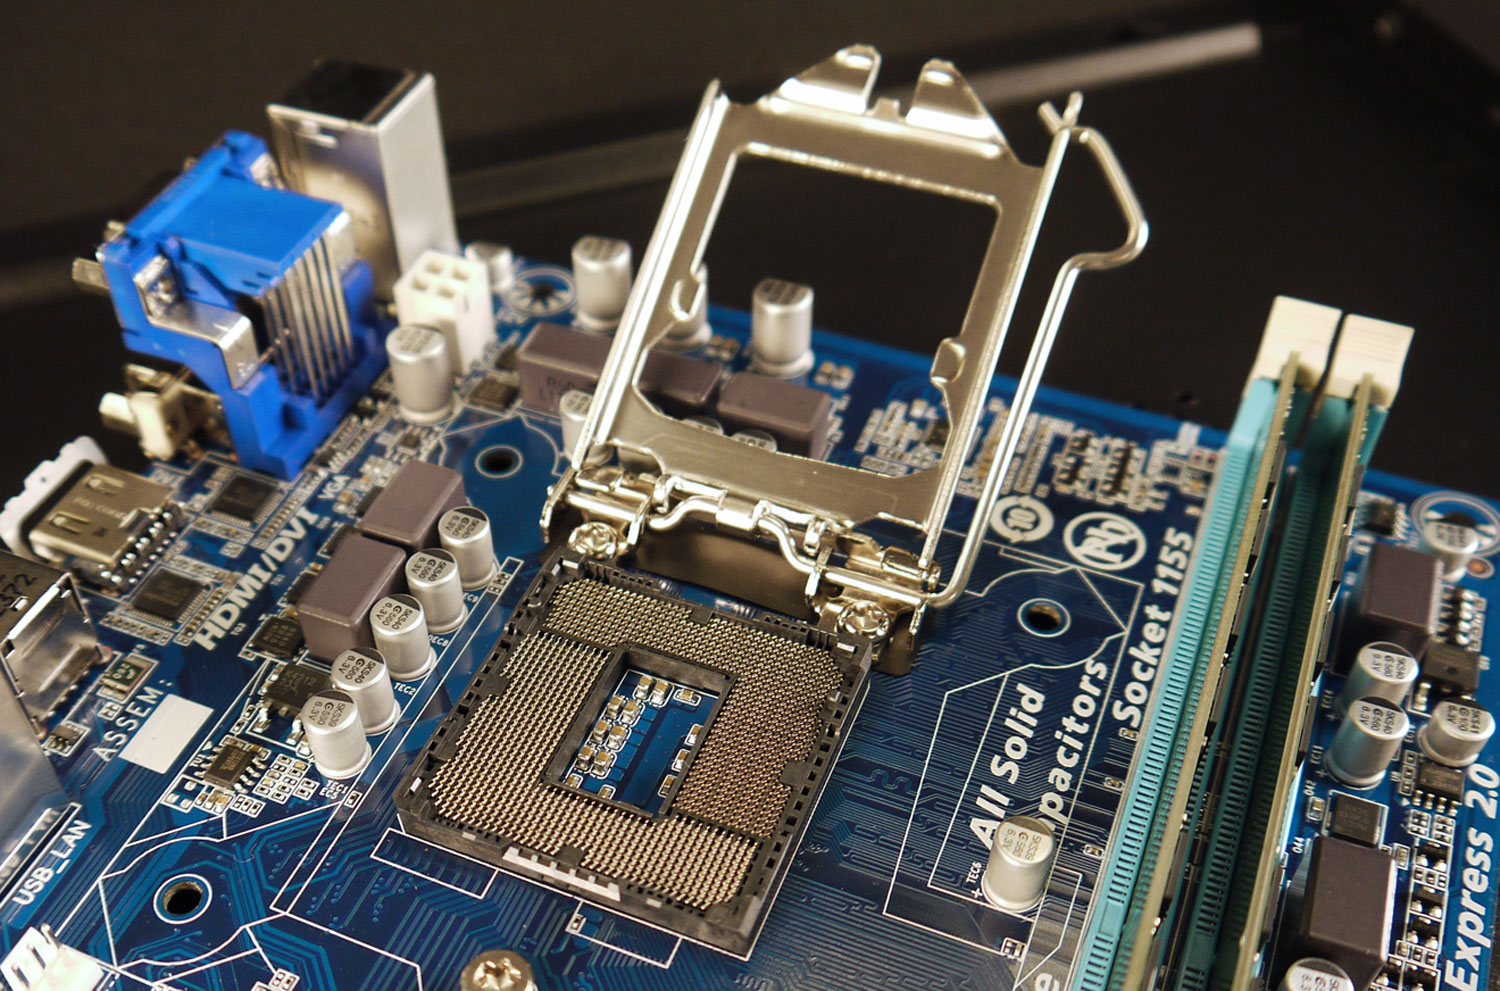
Motherboards ship from the factory with a plastic guard in the processor socket. Remove the guard by pressing outwards on the metal bar that is attached to the socket. This un-latches it, letting you flip up the metal guard and remove the protector. The pins in the socket will now be visible.
Un-package the processor and take a close look at it. You’ll notice that it has a notch on opposite sides. These must be aligned with the notches on the motherboard socket. Once you’ve lined them up, simply drop the processor into place. The borders of the processor will be flush with the surrounding socket.
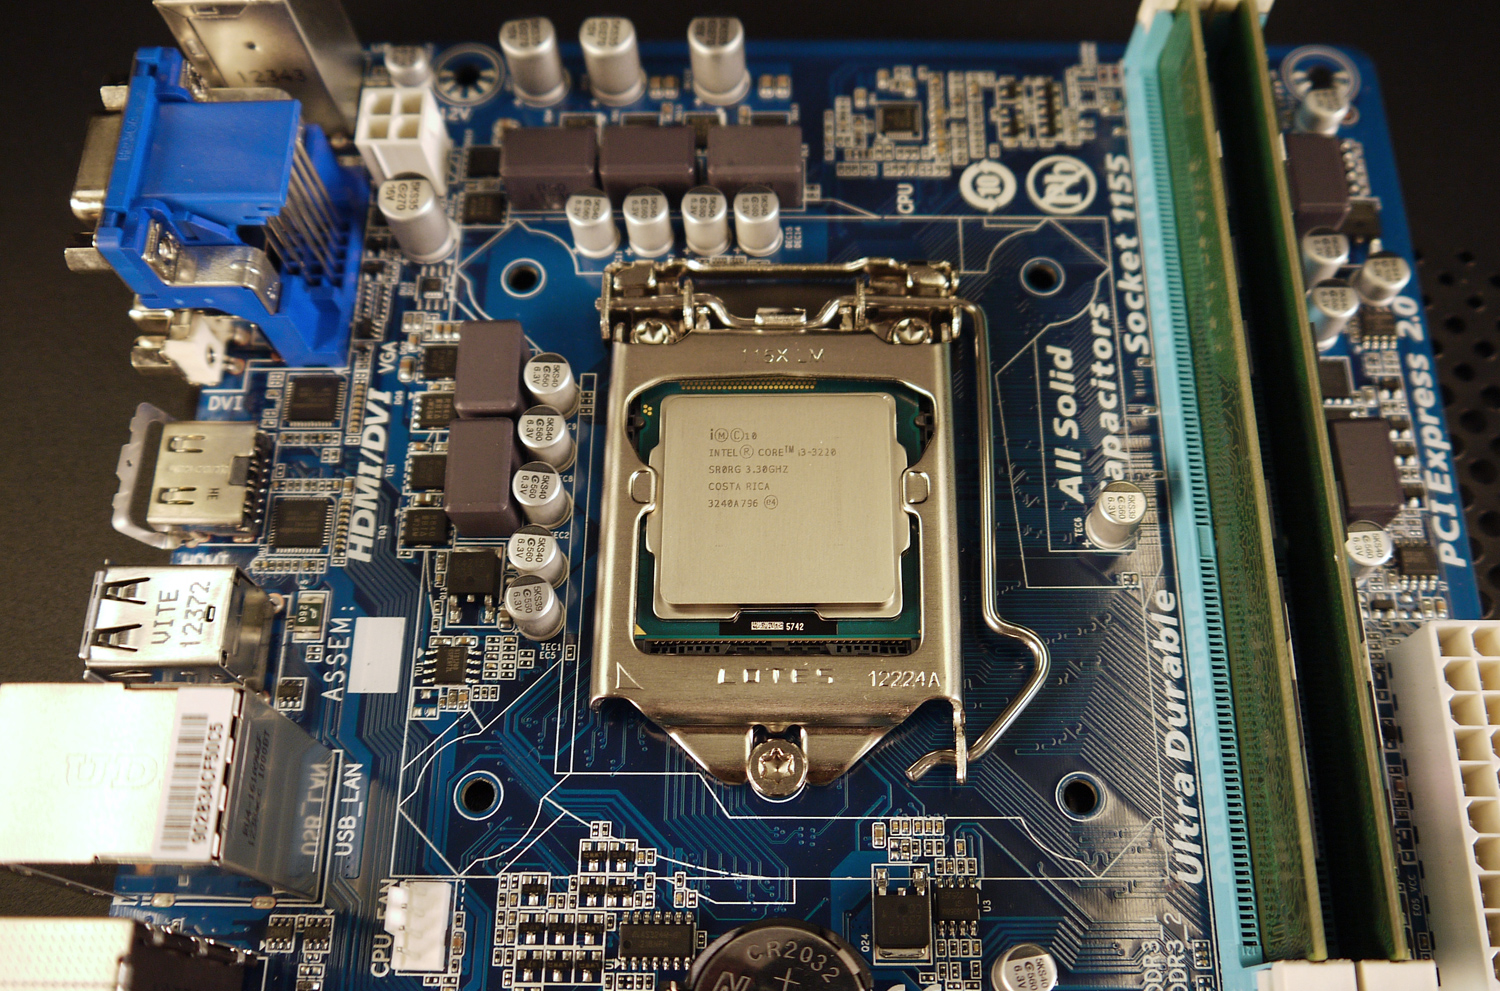
All you need to do now is secure the socket. Push down on the metal latch so that it’s back in its original position. This will require some effort, so don’t be afraid if the latch seems reluctant to close.
Step 4: Install the cooler
This may be the most challenging portion of the installation. Most people will need twenty to thirty minutes to complete this step.
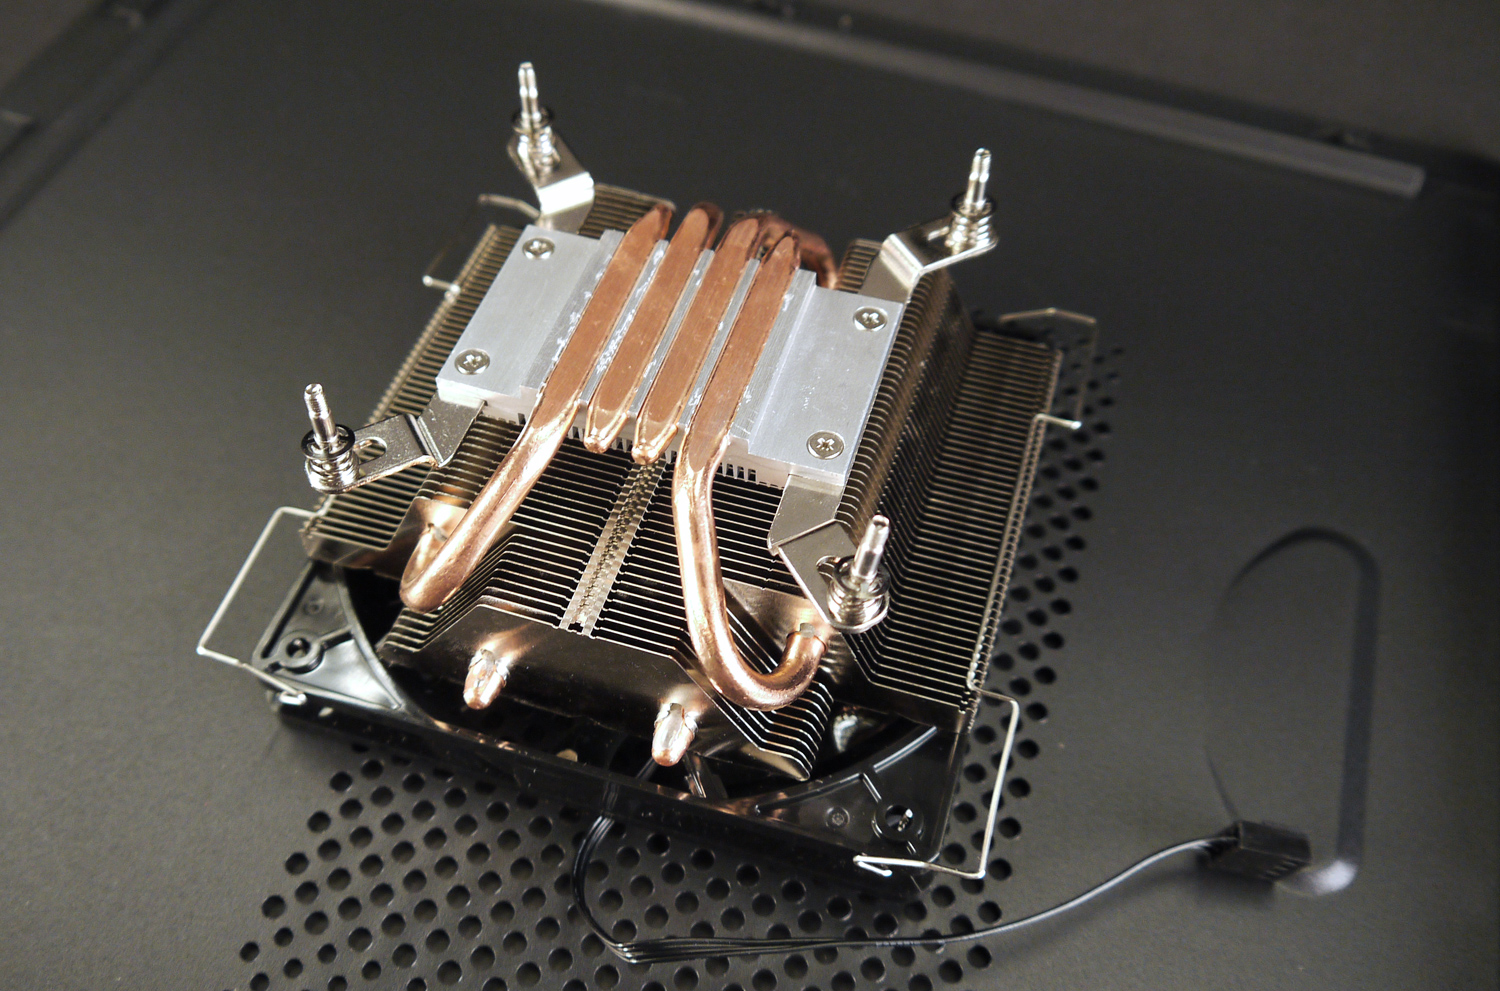
Start by removing all of the cooler components and identifying those needed to install the cooler on an LGA 1155 motherboard (which is in our Steam Box). The cooler’s instruction guide can help you with this. You should end up with two silver retention brackets, a large metal backplate, four small screws, and four washers.
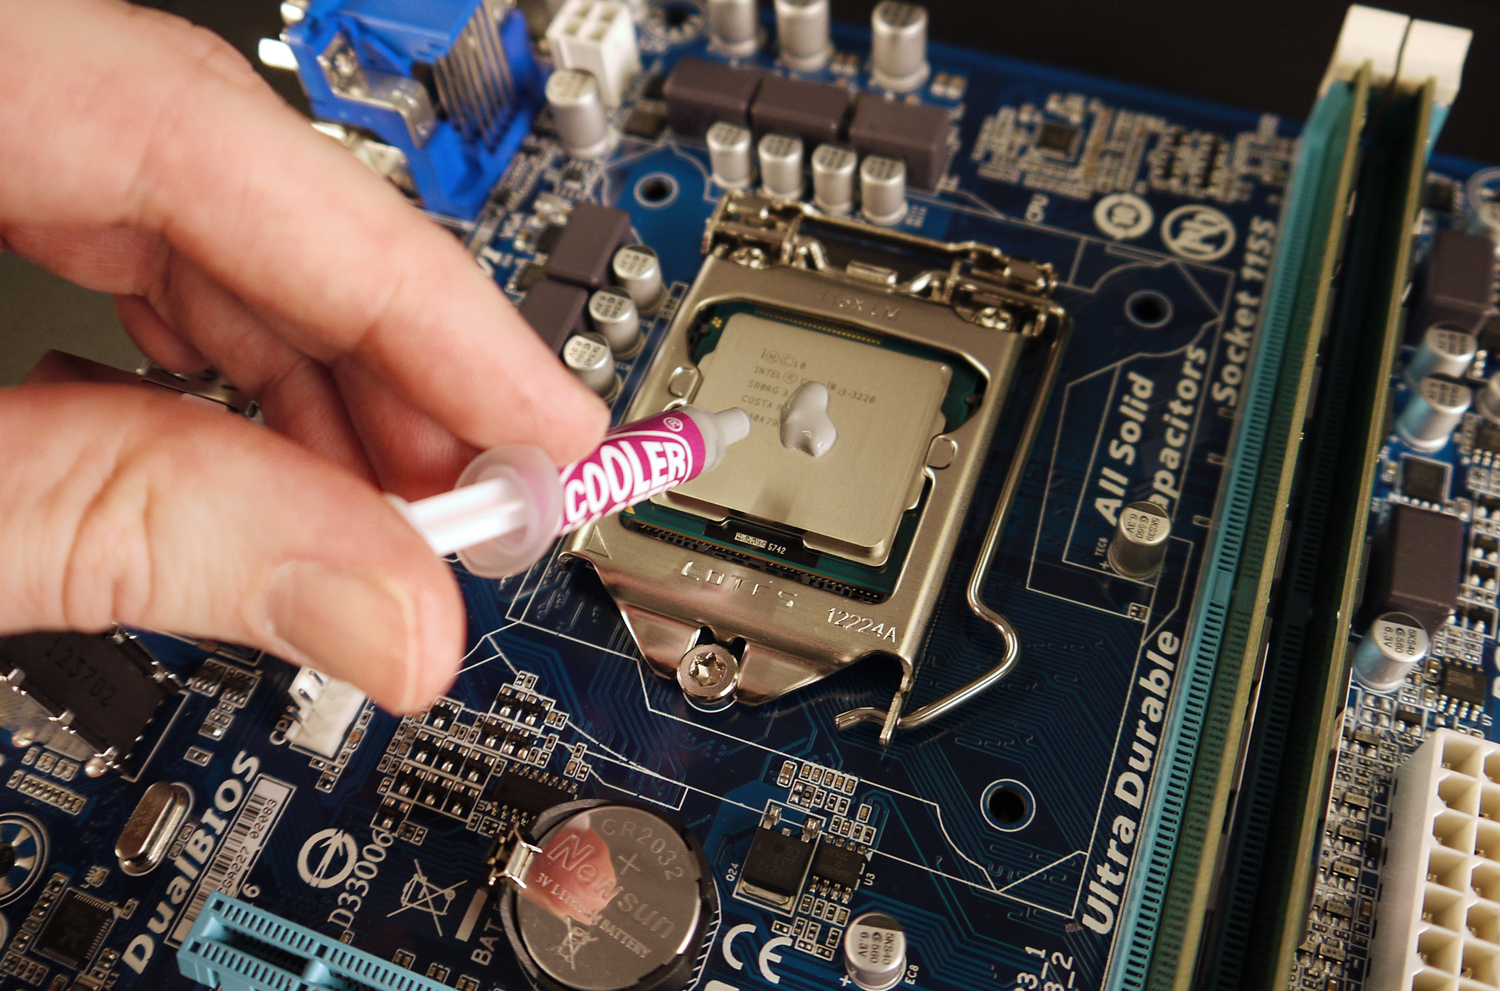
Now find the thermal solution. This is a grey jelly contained in a small plastic syringe. Uncap it and then place a small blot about the size of a pencil eraser in the middle of the processor. This thermal solution will help conduct heat between the processor and the cooler.
Attach the retention brackets to the cooler itself using the small screws supplied and then place the cooler on top of the processor. Line up the screws built into the retention brackets with the four holes in the motherboard that surround the processor. You’ll notice the screws don’t line up perfectly with the holes – that’s to be expected.
Now turn the motherboard, with cooler attached, upside-down so that the motherboard is actually resting on the cooler. Place the backplate around the back of the processor socket and line up its arms with the holes.
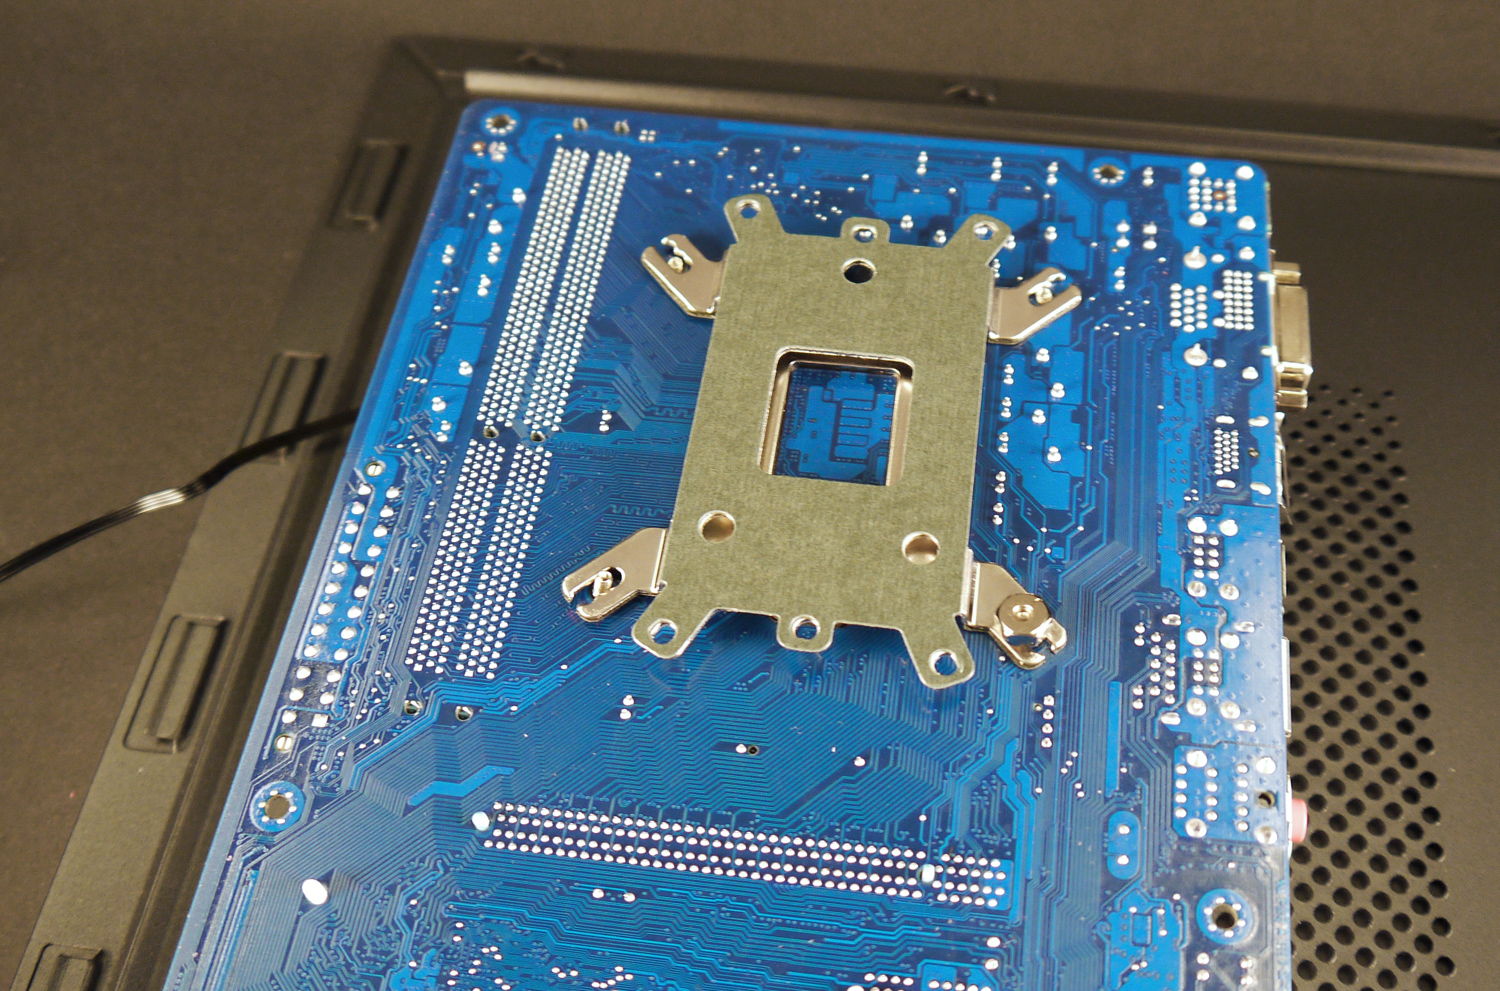
Gently prod the retention bracket screws until all four are through the mounting holes in the motherboard. Now place a washer on one of the bracket’s screws and gently tighten it. Do this again for the screw diagonally opposite to the first, then attach the final two washers in any order you choose.
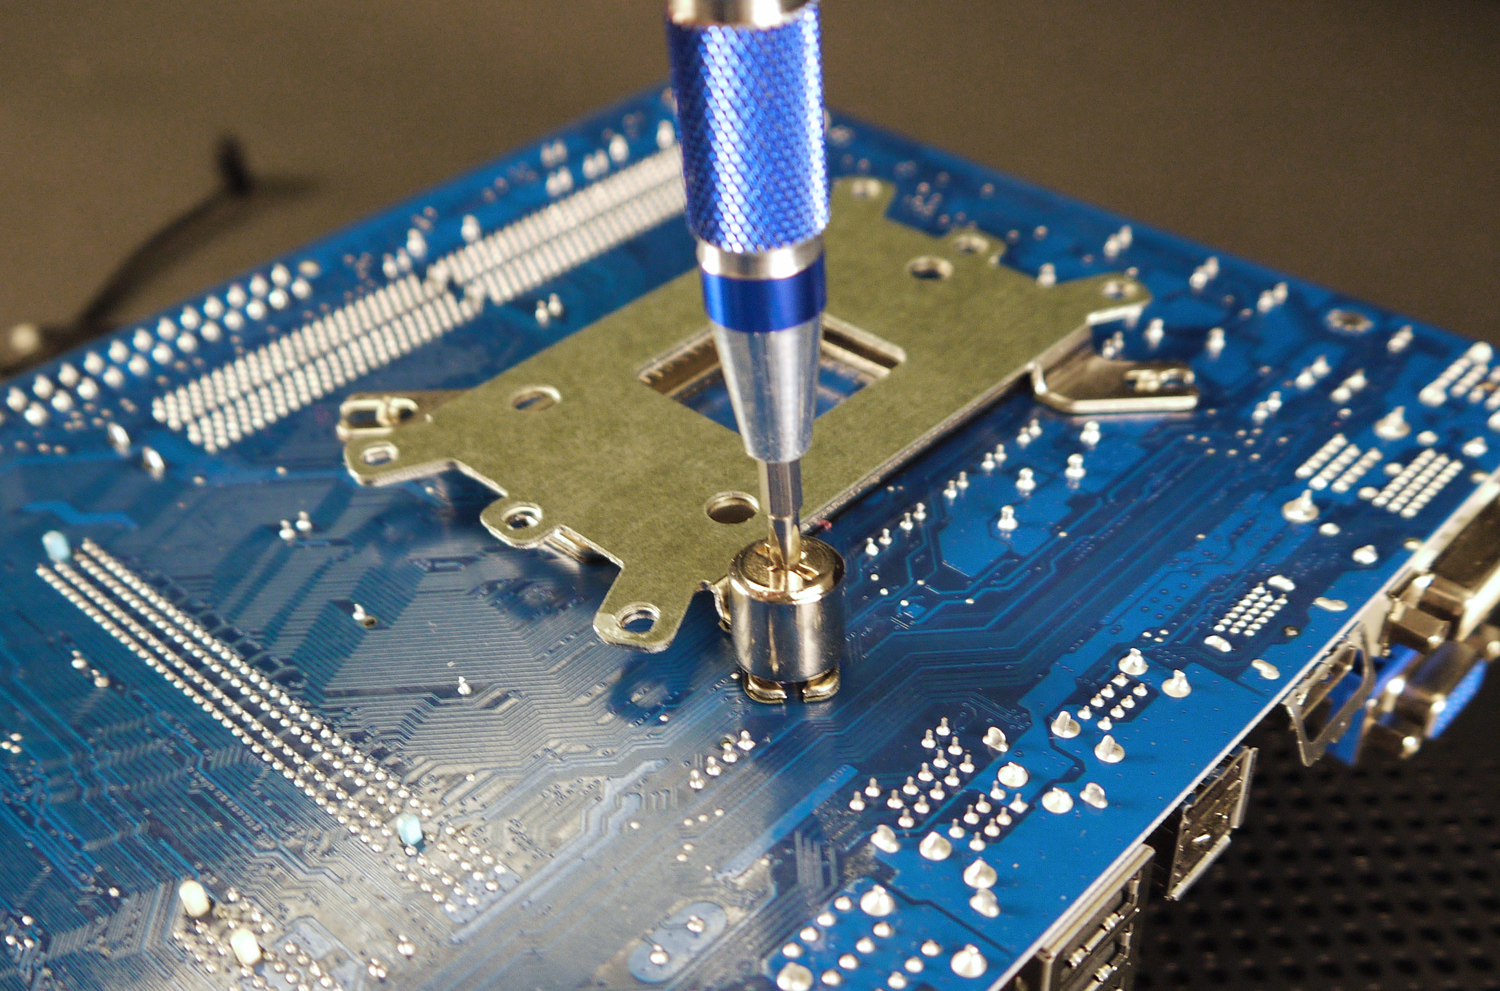
Use the hex-head tool bundled with the cooler to gradually tighten each washer in a clockwise motion with your Phillips screwdriver. You’ll eventually hear a small metallic click as you tighten the washers. This means they’re as tight as they will go – the washer will still move, but they won’t become any tighter.
That’s the hard part. All you have to do now is turn the motherboard over again so that it lays flat and attach the cooler’s fan to the motherboard. You will find this connector between the processor socket and the PCIe slot.
Step 5: Install the power supply
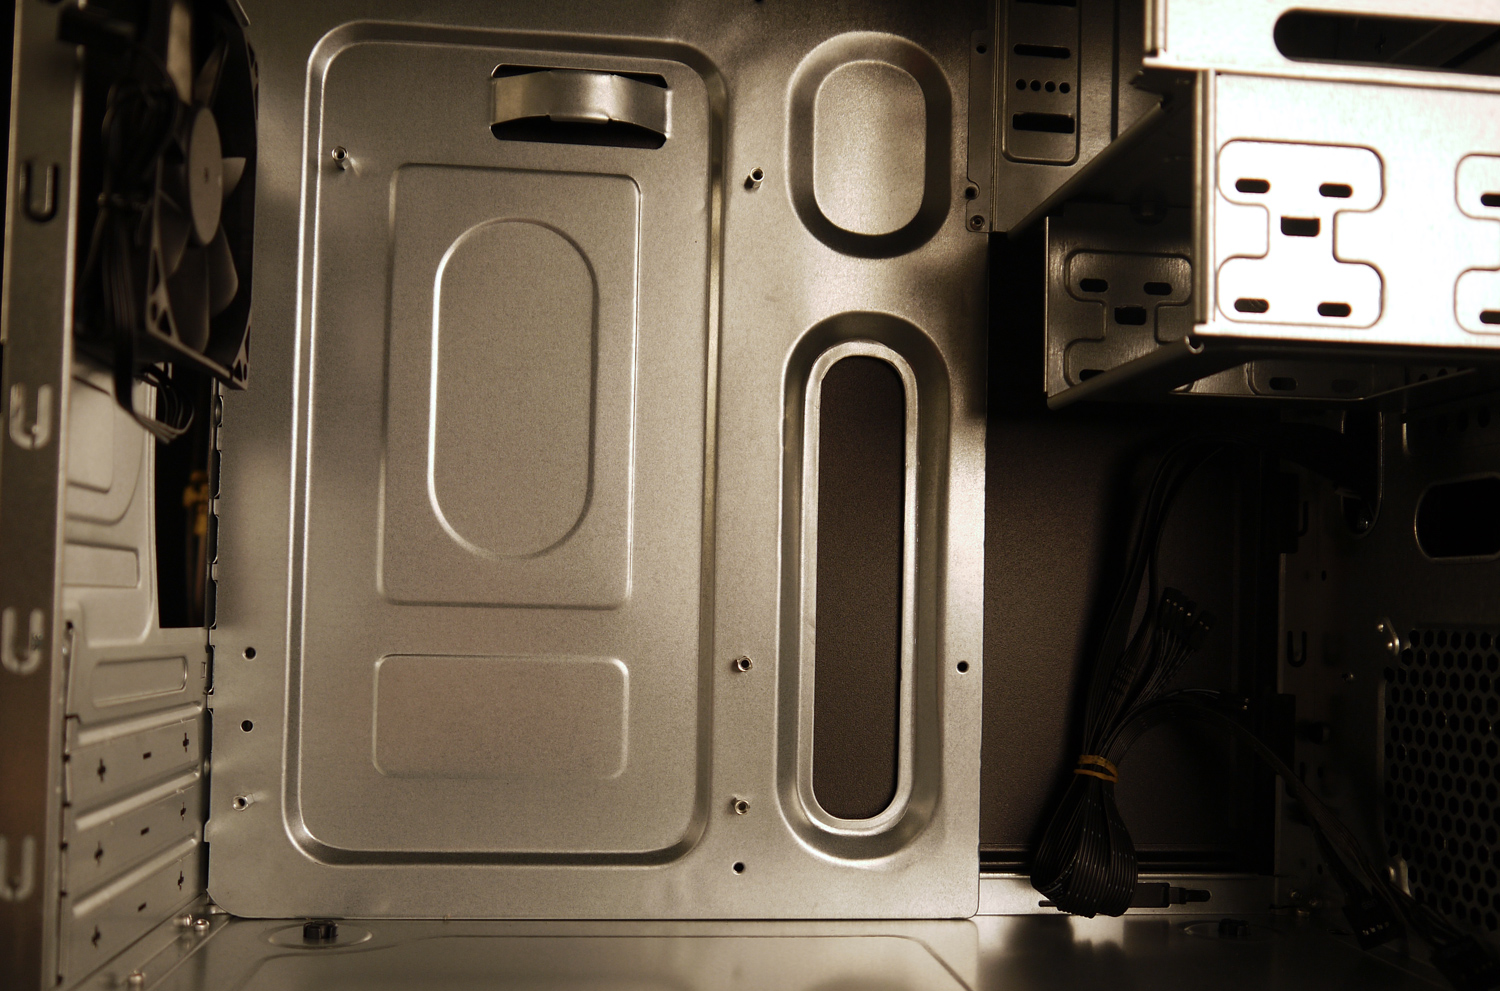
Now put the case’s side panel and motherboard aside for a moment and grab the case again. At the rear of the case, along the top, you’ll see a large cut-out surrounded by four screw holes. This is where the power supply goes.

Install is simple. Just align the screw holes in the power supply with the ones in the back of the case. Because the pattern of screws is not perfectly rectangular, it is, once again, impossible to install the power supply in the wrong direction.
Step 6: Install the hard drive
You’ll need to remove the right side case panel to install the hard drive. This is done in the same way you removed the previous panel. Remove the two screws holding the panel in place, then slide it gently back to detach it.
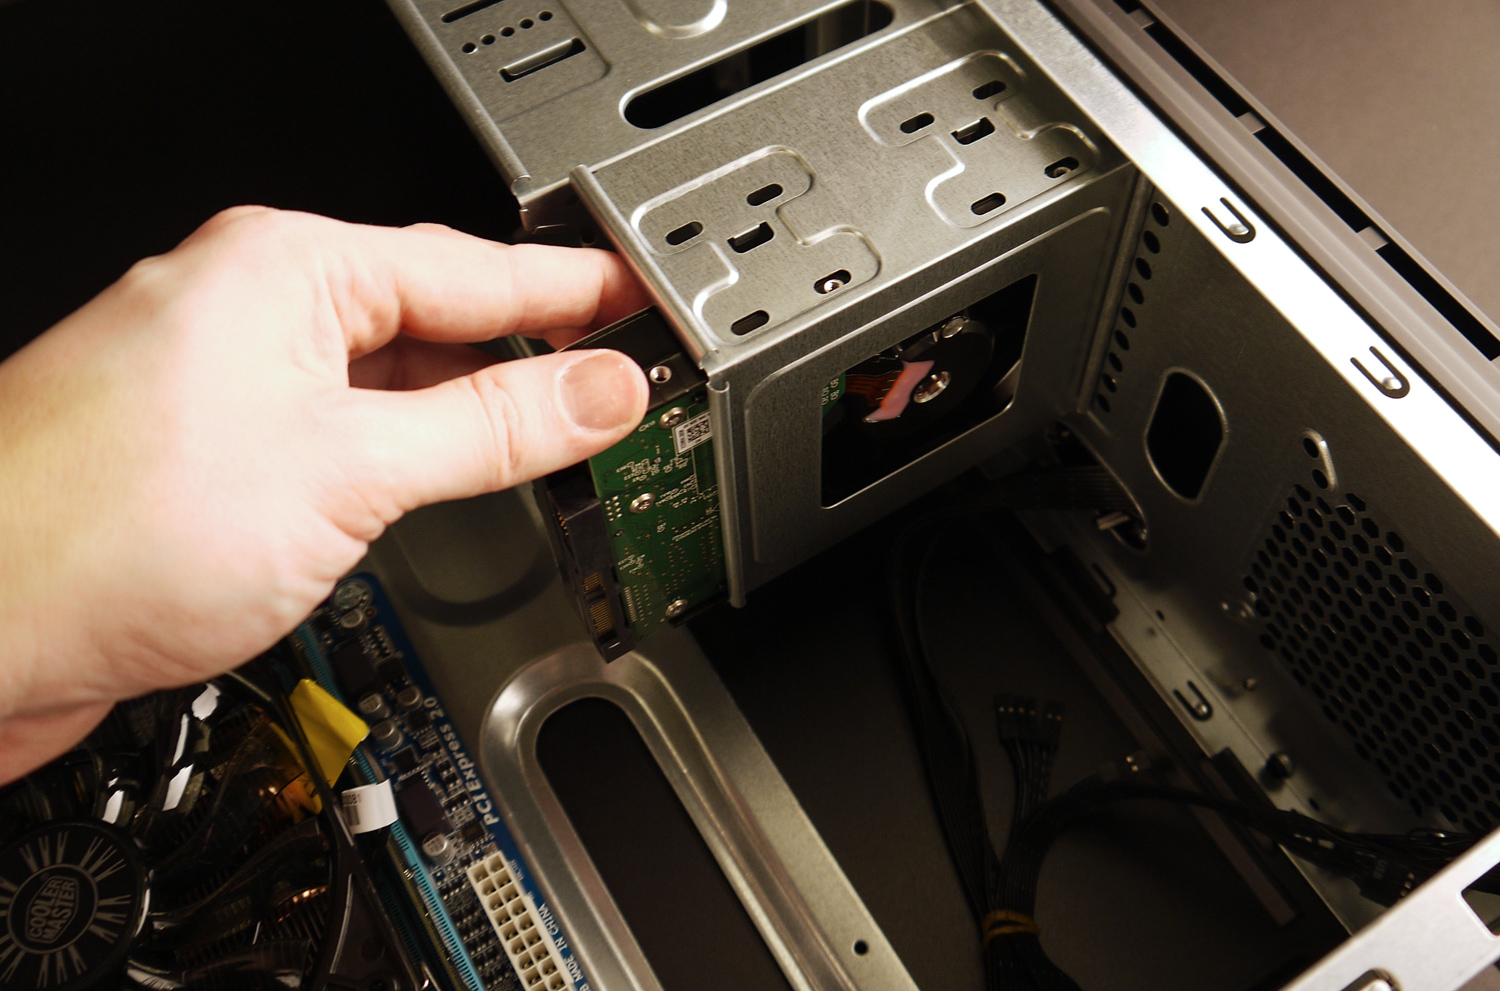
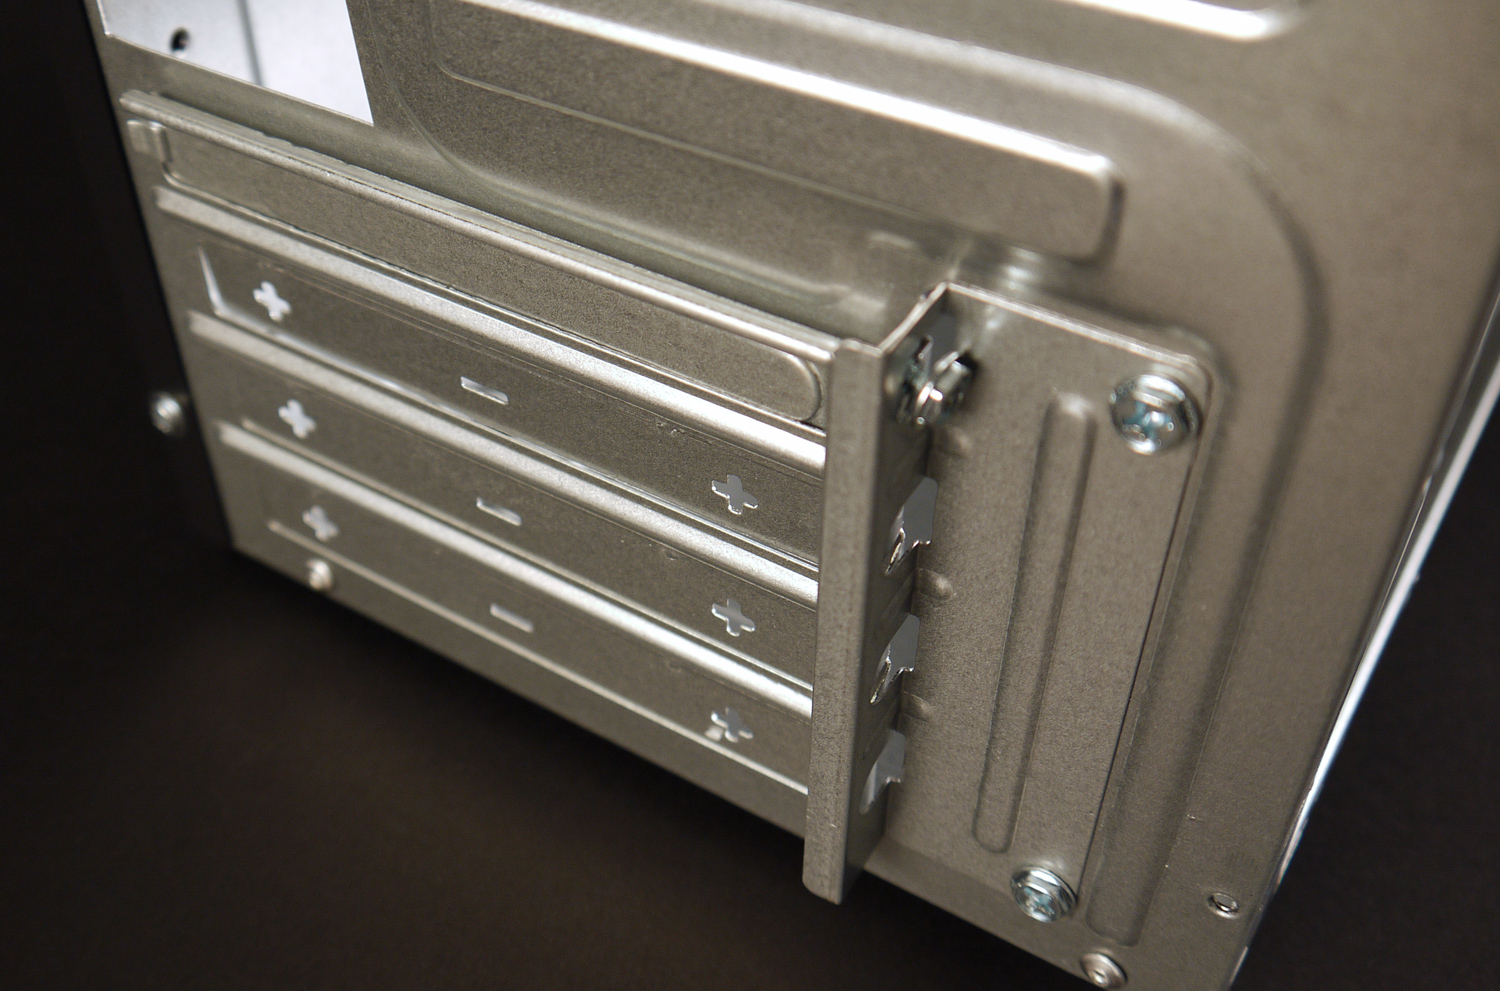
Place the hard drive in the hard drive bay, which is located at the front of the case below the larger optical drive bays. Insert the hard drive so that its label is facing upwards and the power and data connectors are facing the rear of the case. Then, align the screw holes on each side of the hard drive with those in the bay.
Use two screws on the left and right sides to secure the hard drive. Tighten these as much as possible. A loose screw can cause annoying vibrations when the hard drive is active.
Step 7: Install the motherboard

Start with the port panel. This is the small piece of thin metal with cut-outs for the motherboard’s ports. It should be aligned so the three audio-out ports are at the bottom of the case. Installation is just a matter of snapping it in. However, because the case in this build is inexpensive, you may need to firmly hold the metal surrounding the port panel while snapping it into place.
You must attach the stand-offs before installing the motherboard. Stand-offs are small screws with a large six-sided head that have another screw hole drilled in the top. These stand-offs keep the motherboard from directly touching the case, which could short out the motherboard.
There’s already one stand-off attached to the case. Use this as your starting point. Place the motherboard in the case so that the hole in the upper left-hand corner of the motherboard aligns with this existing stand-off. Through the other holes in the motherboard, you will be able to see where the additional stand-offs need to be attached.

Remove the motherboard, attach the stand-offs, then place the motherboard back in the case and align the holes along the edges of the motherboard with the stand-offs. Also, align the ports with the cut-outs in the port panel. Use the screws provided with the case to attach the motherboard to the stand-offs.
Step 8: Make motherboard connections
There are several components and ports that should now be connected to the motherboard.
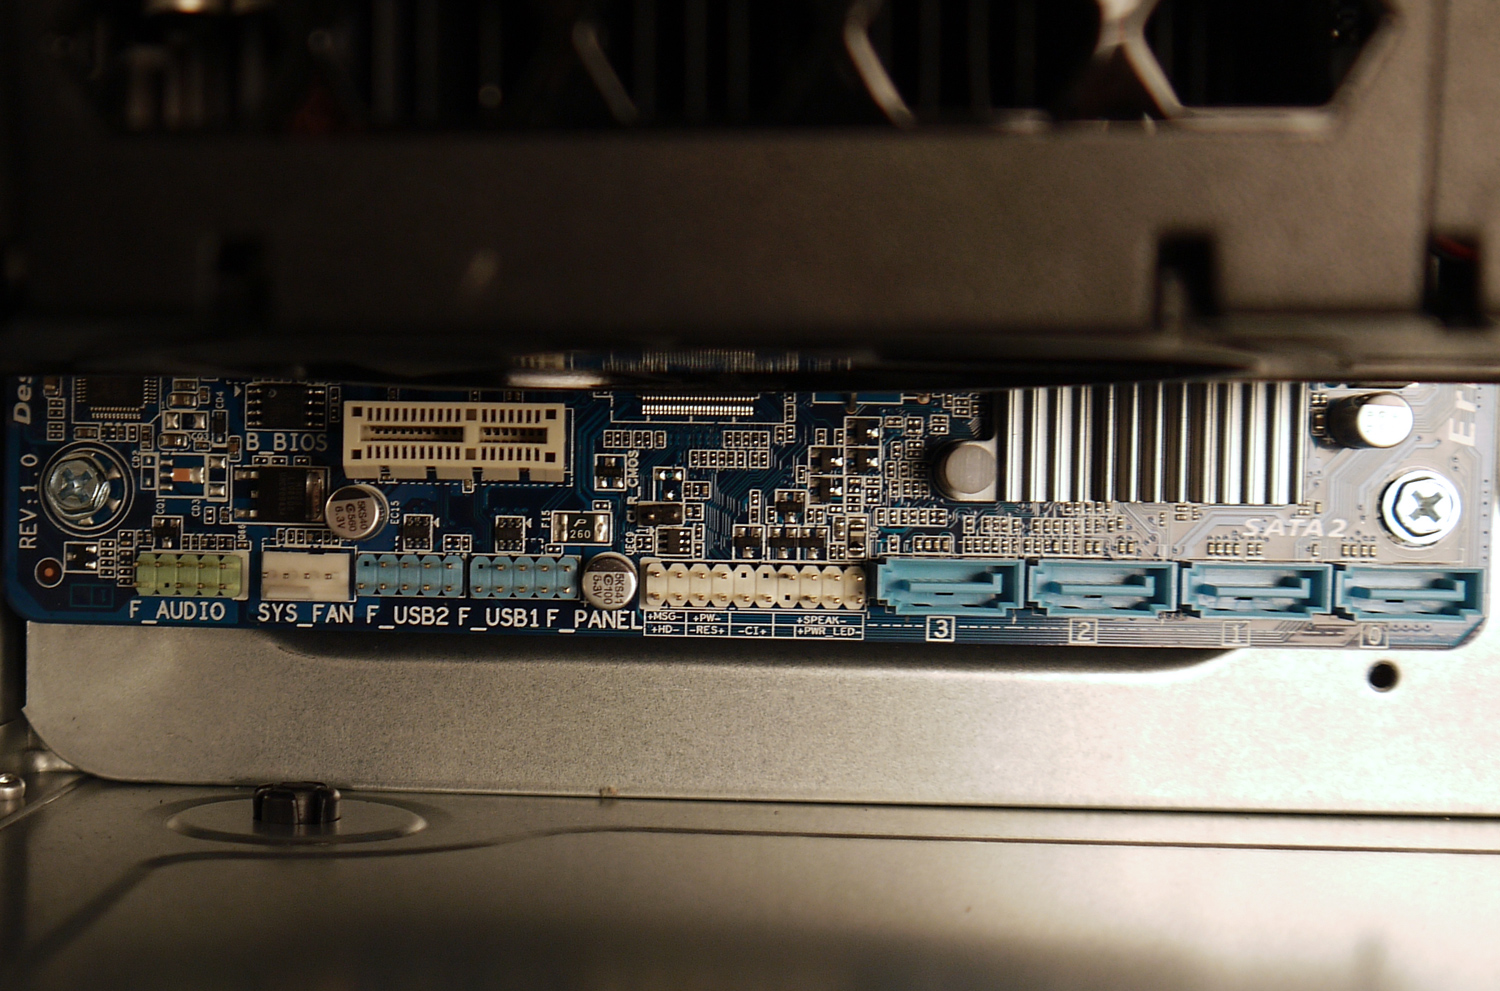
Let’s start with the fan. The case has one fan, mounted at the rear, which must be powered by a three-pin or four-pin connector. You will find this connector at the bottom of the motherboard labeled as SYS_FAN.
Next, locate the USB and HD_Audio cable at the front of the case. These will make the front-facing USB and audio ports functional. Plug the USB cable into F_USB1 and plug the HD_Audio cable into F_AUDIO. Both cables can only be connected in one orientation because of dead pins in their layout.
Now, run the SATA cable, which was bundled in the motherboard’s box, from SATA2 0 to the SATA data connection on your hard drive. Again, the cable can only connect in one orientation.
Last up are the front panel switches and lights. Grab the motherboard’s manual and turn to page 17, which is where you’ll find a diagram of the F_PANEL connectors. When you examine the cables in the case you will see that each has an arrow pointing to one particular pin. This is the positive or “+” pin. With that in mind, install the power, reset, and LED light connectors according to the diagram and labeling on the motherboard.

Step 9: Install the video card
Before installing the video card on the motherboard, you must free up space on the case’s rear panel. To do this, remove the screws holding the expansion slot bracket in place, then remove the third screw that holds the top expansion slot panel is place. You’ll also need to remove the expansion slot panel below it, but this one is not held by a screw – instead, it’s a metal cut-out that can be pushed away with your finger.
With the back panel free, install the video card by lining it up with the PCIe slot and pressingly gently until it snaps into place. The rear of the video card, which contains the video-out ports, should align with the expansion slot panels you just removed from the case.
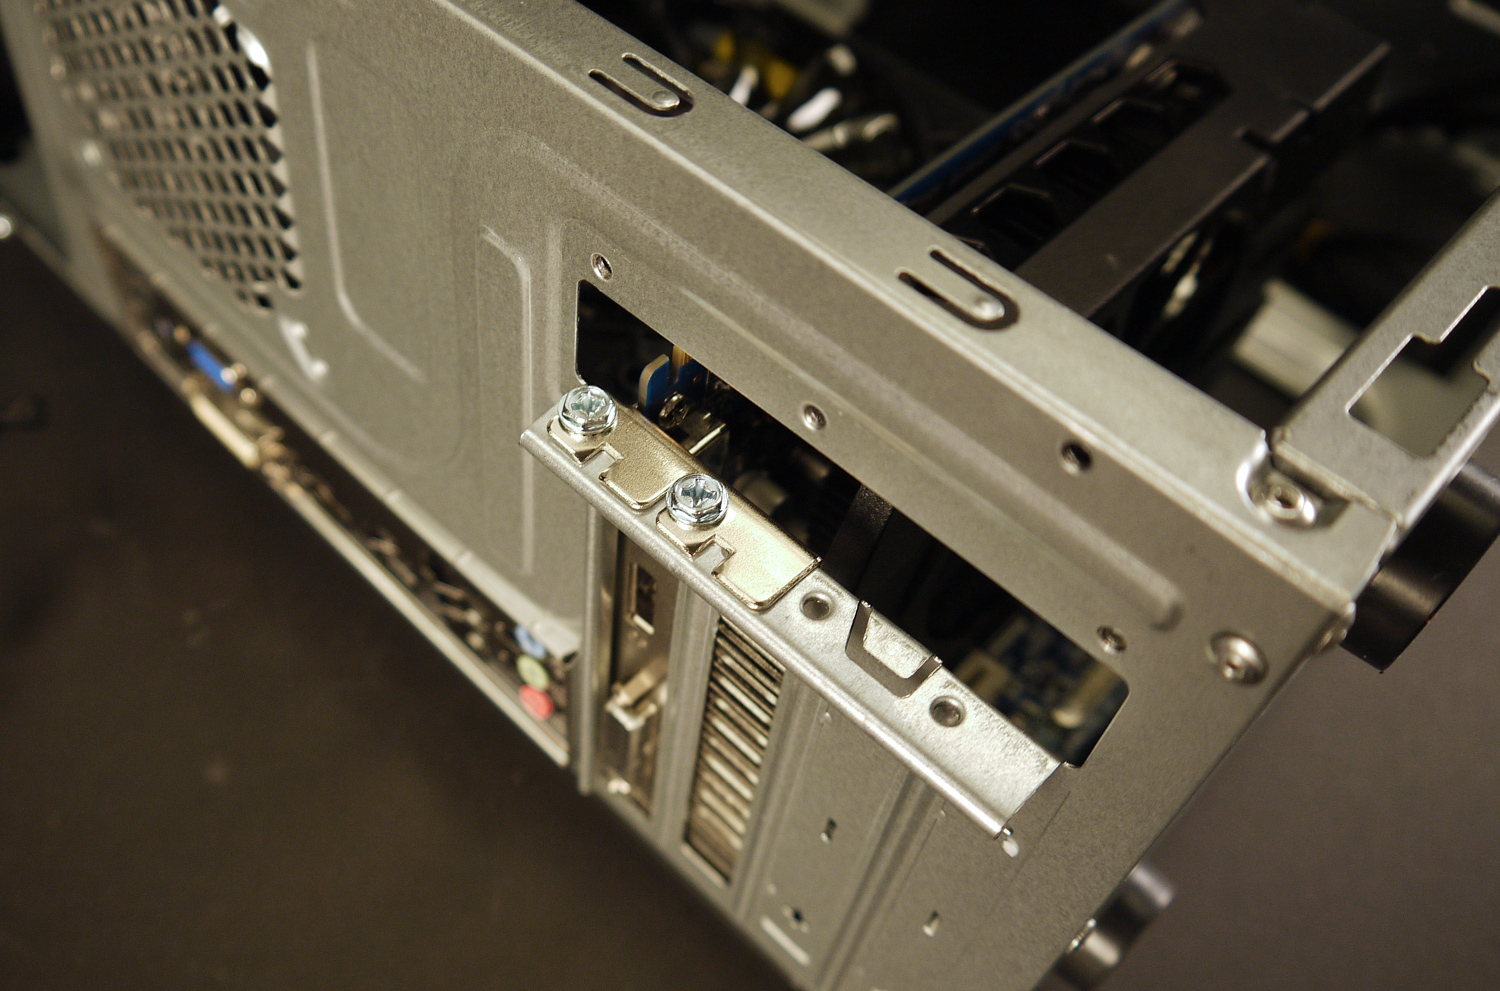
Secure the video card by attaching it to the rear of the case with screws and then re-installing the expansion slot bracket you removed at the beginning of this step.
Step 10: Connect the power supply
With all the hardware installed, there’s just one task to finish. You must connect the power supply to the components in the PC.
Start with the motherboard. There are two power connections: a square four-pin connector below the upper-left corner of the motherboard connectors, and a long, rectangular 20-pin connector beside the RAM. Both connectors are cut so they can be installed in only one orientation, and the 20-pin connector is clear and simple. Just plug it in – done!
The four-pin connector is in a tight spot, however, so installing it can be awkward. If you find you can’t install it, use a pair of tweezers or enlist the help of someone with smaller hands then yourself. As a final alternative, you can remove the power supply from its mount, make the connection, and then re-install the supply.
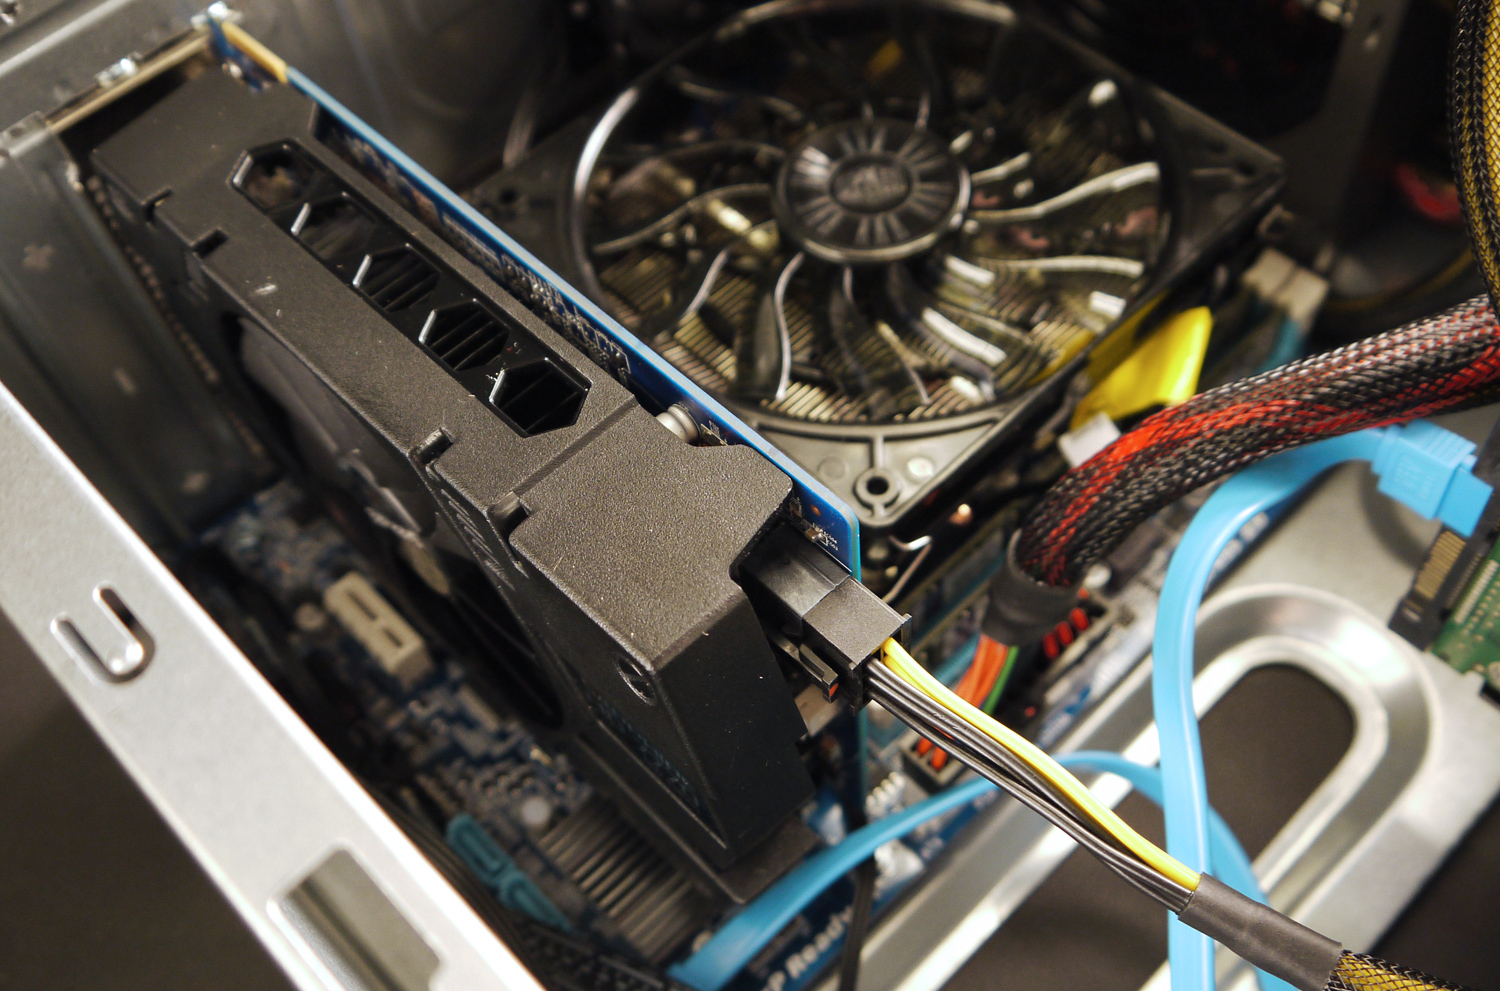
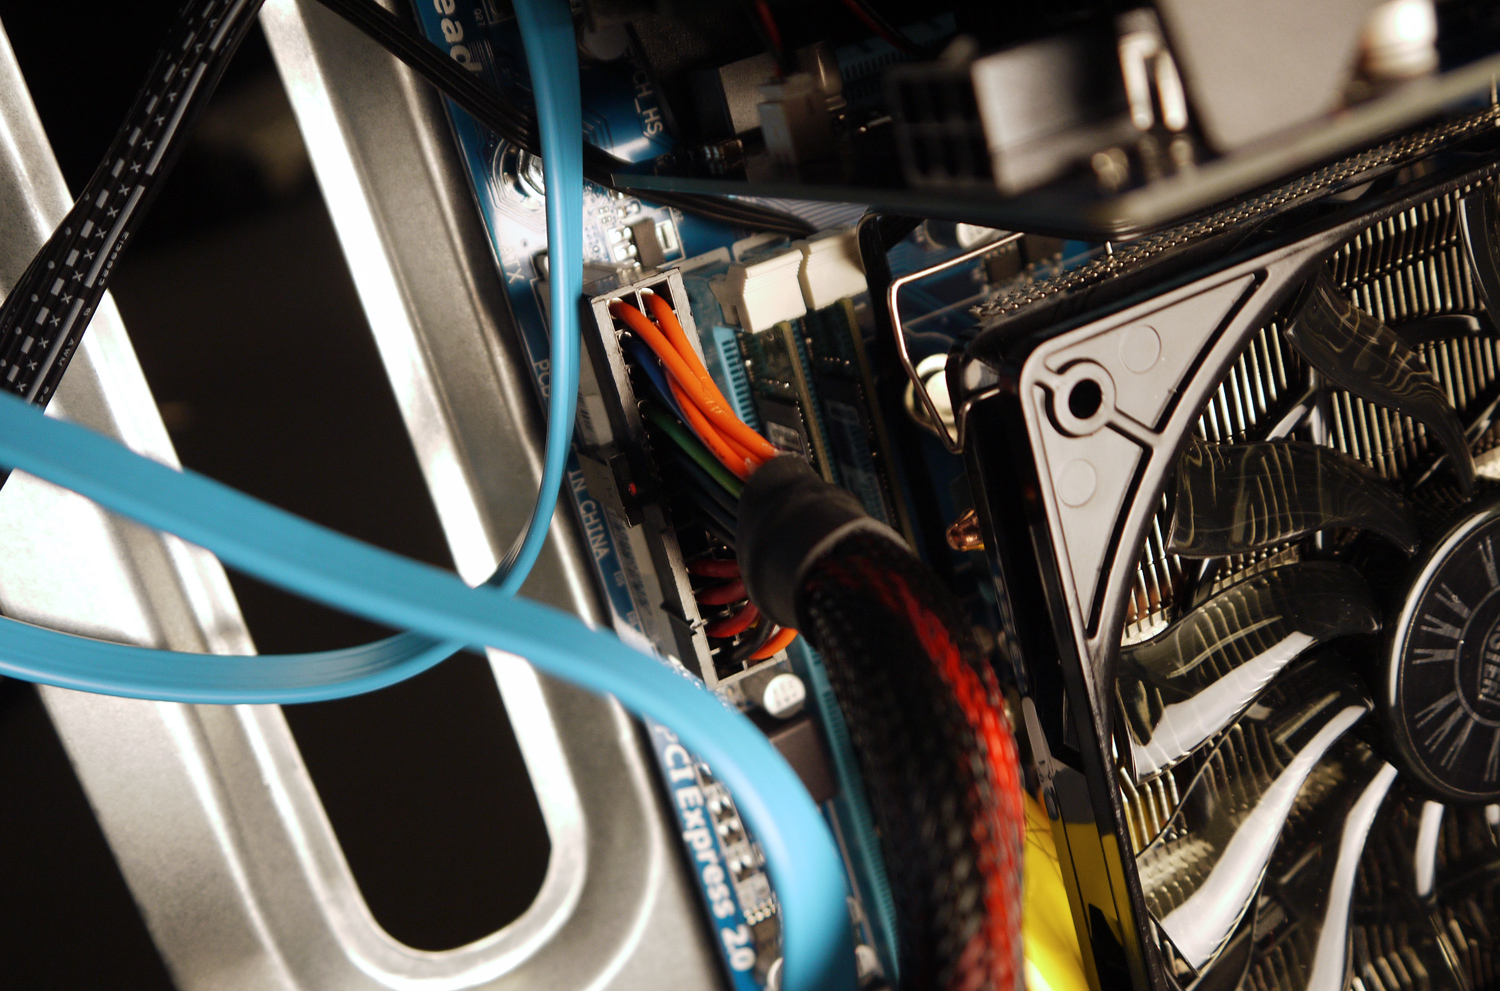
You’ll need to plug the six-pin PCIe connector into the video card and one of the long, thin SATA connectors into the hard drive. Again, both can only be installed in one orientation. Once you’ve made these connections, stuff the mess of leftover cords into the optical drive bay. This will keep them from interfering with the case’s airflow.
Turn it on
Congratulations! Your Steam Box is built and ready for its maiden voyage. Before you re-install the case panels, though, you should make sure it boots. Plug it into a power outlet, turn the power supply on, and then press the power button on the front of the case. You should see the case lights turn on and hear the fans activate.
Having problems? If so, here’s a checklist of potential issues:
- Firmly attach all power connectors.
- Check the front panel connections (particularly the power button) to ensure they’re properly installed.
- Make sure that all required motherboard stand-offs were installed.
- Verify that the video card and RAM are properly seated.
Turn your Steam Box back off and re-install the case panels. You can attach it to a monitor and other peripherals. It’s time to install Ubuntu.
Installing Ubuntu

For our build we’re using Ubuntu 12.10. This version of Linux is popular, easy to install, and readily supports most hardware.
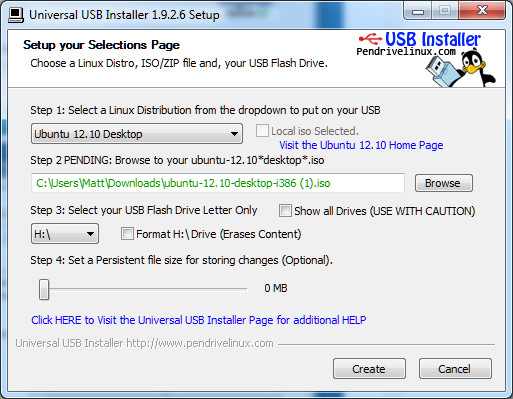
Because there is no optical drive in this build, you will need to install Ubuntu from USB. To do this, download the latest version of Ubuntu Desktop and also download the Universal USB Installer tool. After both downloads have finished, install Universal USB Installer and open it.
Select Ubuntu 12.10 as your distribution, find the Ubuntu .iso file on your PC, and then select a USB flash drive currently connected to your computer. Make sure it’s empty, as this process will delete all contents on the USB drive. Then click Create.
Once the process has finished, remove the flash drive from your PC and connect it to the Steam Box. Turn the Steam Box on and wait. The drive will automatically be detected and Ubuntu’s installer will load. Follow the installation wizard’s steps.
After the Ubuntu installer has finished, there’s just one more step. Open Firefox on your Steam Box and search Google for “AMD Radeon Linux Drivers.” Look for the page containing AMD’s Proprietary Catalyst drivers for Linux x86 and download the latest beta driver from that site.
When the driver has finished downloading, find the file, right-click it, and open its properties. Navigate to the Permissions tab in the following menu. Near the bottom of this tab, you’ll see a checkbox next to “Allow executing file as program.” Check that box and click close.
Now you can start the driver installation by double-clicking on the driver program. Just follow the steps of the wizard and then reboot the Steam Box.
And that’s it. You can now run Steam in Big Picture mode on this PC and enjoy any of the titles that are currently compatible with Linux on Steam.
What about Windows?

Valve seems to be committed to Linux and its promotion as a gaming platform, yet there’s no denying that the current library is a bit thin. Only a fraction of the many great games Steam sells are currently compatible with Linux, and – by extension – the Steam Box.
You may decide you want to run Windows instead. An OEM version of Windows 8 will set you back $100 online – a fair chunk of additional cash, which is money you don’t need to spend.
Microsoft’s stance towards registration of Windows 7 is forgiving. The product key never has to be entered. Ever. Not putting in a product key will eventually prompt Windows to warn you that your software may be counterfeit, which is annoying, and the PC’s desktop wallpaper will be disabled. But that’s about it. You’ll even continue to receive Windows updates.
None of these problems are troublesome for a Steam Box. You’re not even going to be using the Windows desktop, so running an un-activated version of Windows is not a bad choice.
Recommended peripherals
Now that you have your Steam Box ready, you can connect it to your HDTV or a monitor and go wild. Both video and audio can be handled through the video card’s HDMI port, so the computer plays well with receivers.
The only remaining issue is control. Keyboard and mouse doesn’t really work on the couch, so you’ll need a gamepad. You might also want a wireless keyboard. Here are a few recommendations.
Microsoft Xbox 360 Controller for Windows
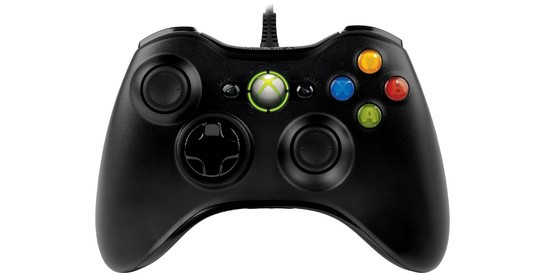
When the 360 was released, Microsoft made a small yet important decision. Drivers for the 360’s controller were bundled into Windows. Ever since then it has been widely regarded as the best gamepad for PCs both because of its excellent design and the out-of-the-box support games provide it. Almost every game that has been released for Xbox 360 and ported to the PC will work flawlessly.
Linux has drivers for this gamepad, too. You can find the relevant information on the Ubuntu website.
Logitech F710
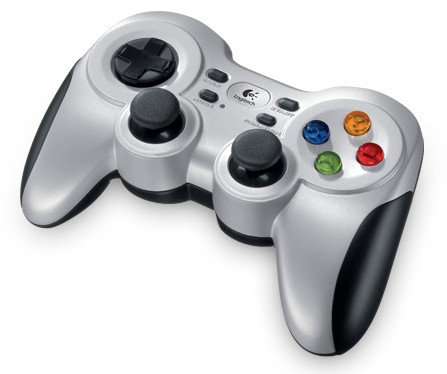
While we prefer the 360 controller, not everyone will like it. The only decent alternative on the market, in our opinion, is the Logitech F710. This wireless USB gamepad is set up similar to the PlayStation 3’s controller but has a chunkier, more rounded design. Linux is not officially supported, but Ubuntu’s default gamepad drivers are compatible.
VisionTek CandyBoard

Your Steam Box theoretically doesn’t need to leave Big Picture mode once you’ve activated it, but most users will need to occasionally update drivers or software. Also, the Steam Box is a fully capable PC – so why not use it for home theater content, too?
That’s where the CandyBoard comes in. This small, wireless keyboard also features a touchpad in the center, making it the only peripheral you’ll ever need for media use. The keyboard works with both Windows and Linux.
Don’t want to build it? Win it!
While we’ve tried to make this build as simple as possible, there’s no doubt it can be complex. Putting together a computer is never an easy task. A system as simple and inexpensive as this is a good choice for cutting your teeth, but if you’re still feeling timid, don’t fret. There’s still a chance of owning it.
We’re giving away the Steam Box we built to a lucky Digital Trends reader. Enter here!